

Autocomplete Attribute
The autocomplete property indicates whether autocomplete should be turned on or disabled for a form or input field.
With autocomplete, the web browser may anticipate the value. Based on previously entered values in HTML input attributes, the browser should provide alternatives to the user when they begin to text in a field.
The autocomplete property is supported by form> and the input> types listed below:
- Text
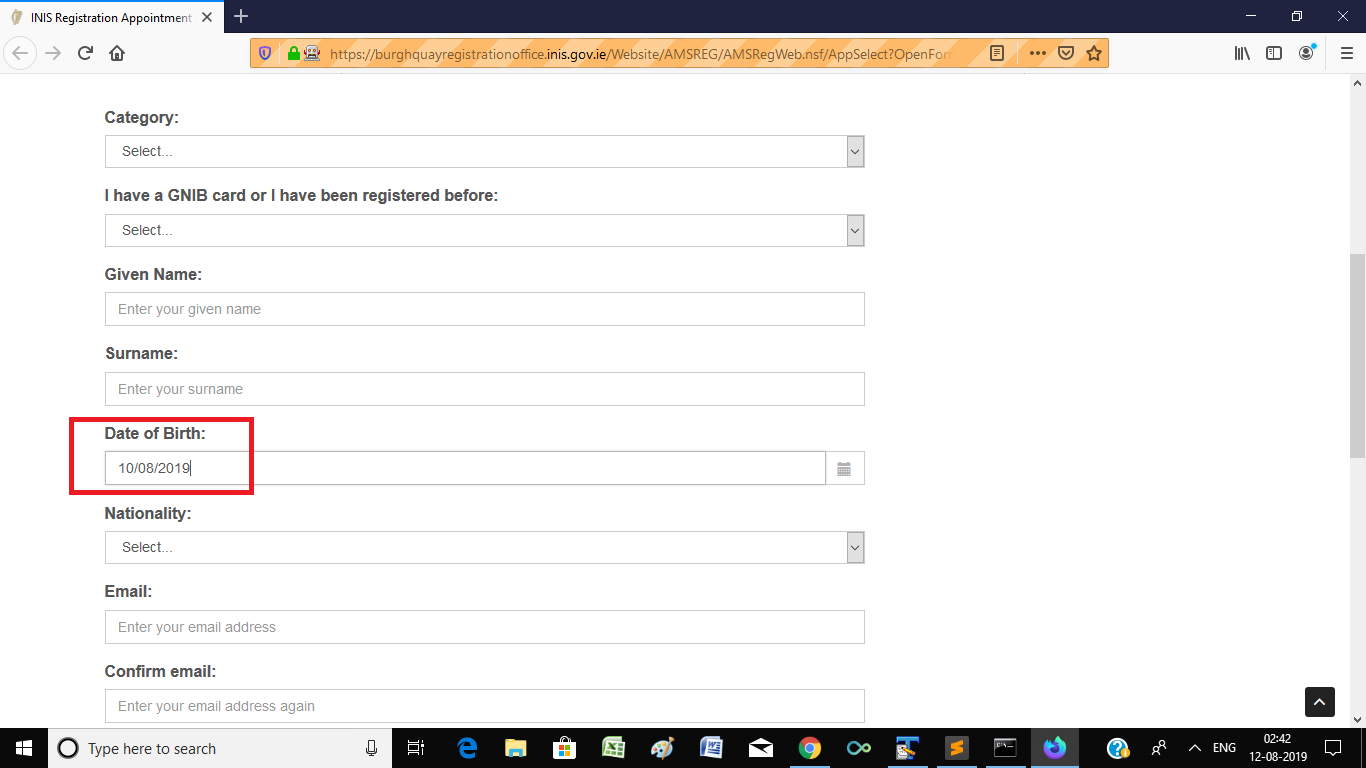
- Date pickers
- Search
- Url
- Phone
- Colour
- range
- Password
An HTML input with autocomplete enabled for one input field and disabled for the others:
Example
Execute
<!DOCTYPE html>
<html>
<body>
<form action=»/action_page.php» autocomplete=»on»>
<label for=»fname»>Owner first name:</label>
<input type=»text» id=»fname» name=»fname»><br>
</form></body></html>
Piece of advice: In certain browsers, you may have to enable the autocomplete feature (see under “Preferences” in the browser’s menu).
Текстовые поля
Последнее обновление: 21.05.2016
Однострочное текстовое поле создается с помощью элемента input, когда его атрибут имеет значение :
<input type="text" name="login" />
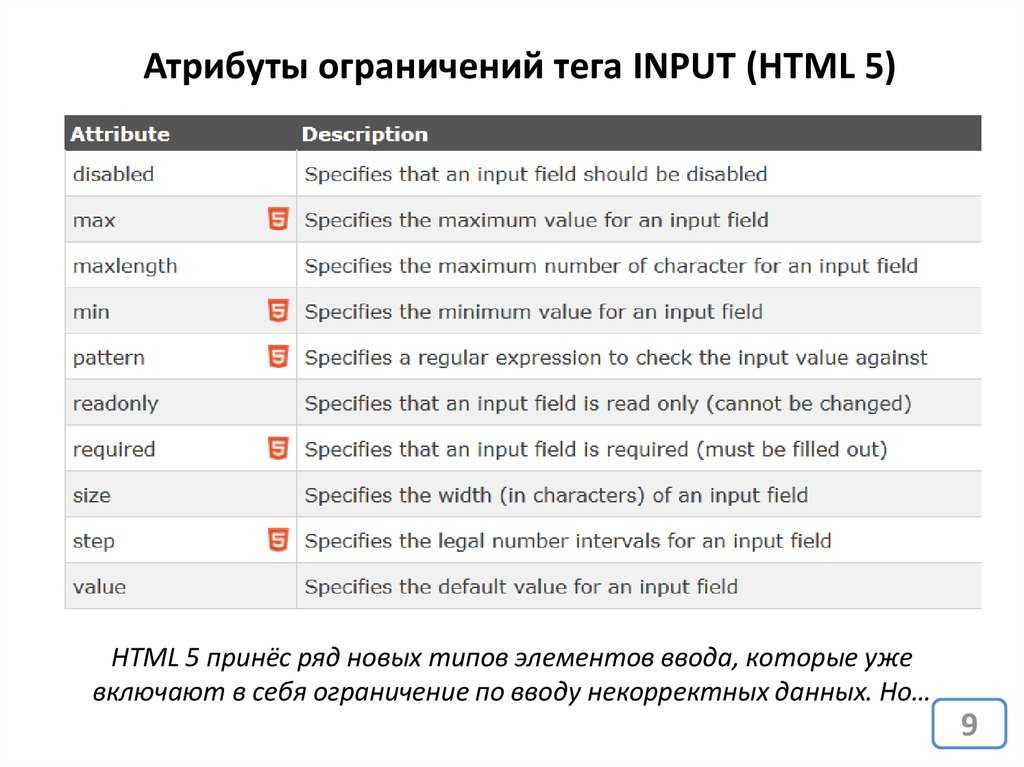
С помощью ряда дополнительных атрибутов можно настроить текстовое поле:
-
dir: устанавливает направление текста
-
list: устанавливает список подсказок для ввода в поле
-
maxlength: максимально допустимое количество символов в текстовом поле
-
pattern: определяет шаблон, которому должен соответствовать вводимый текст
-
placeholder: устанавливает текст, который по умолчанию отображается в текстовом поле
-
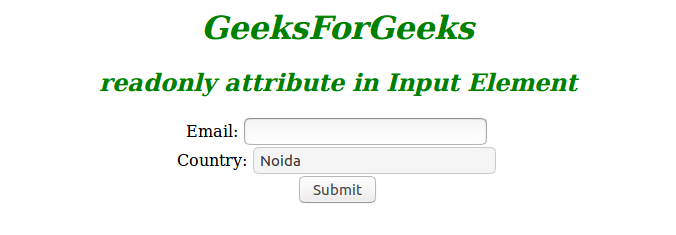
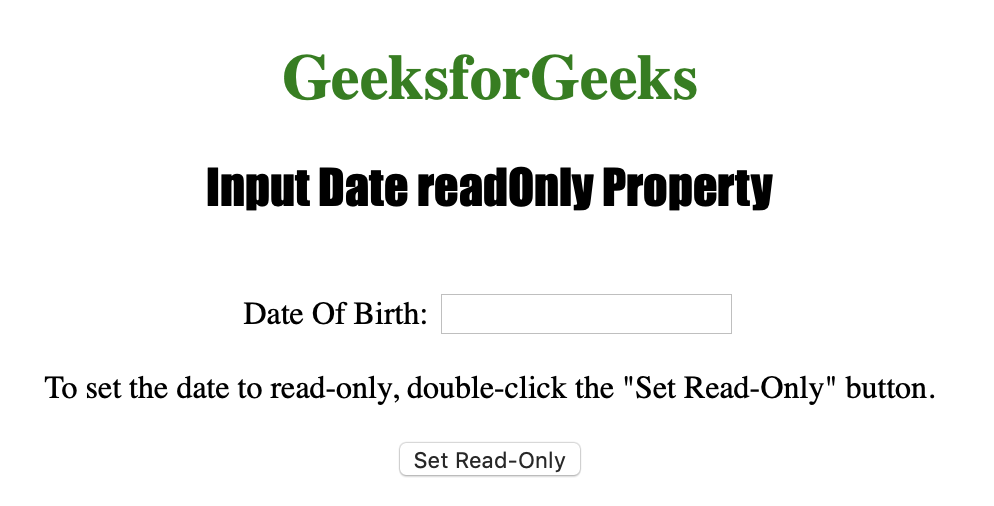
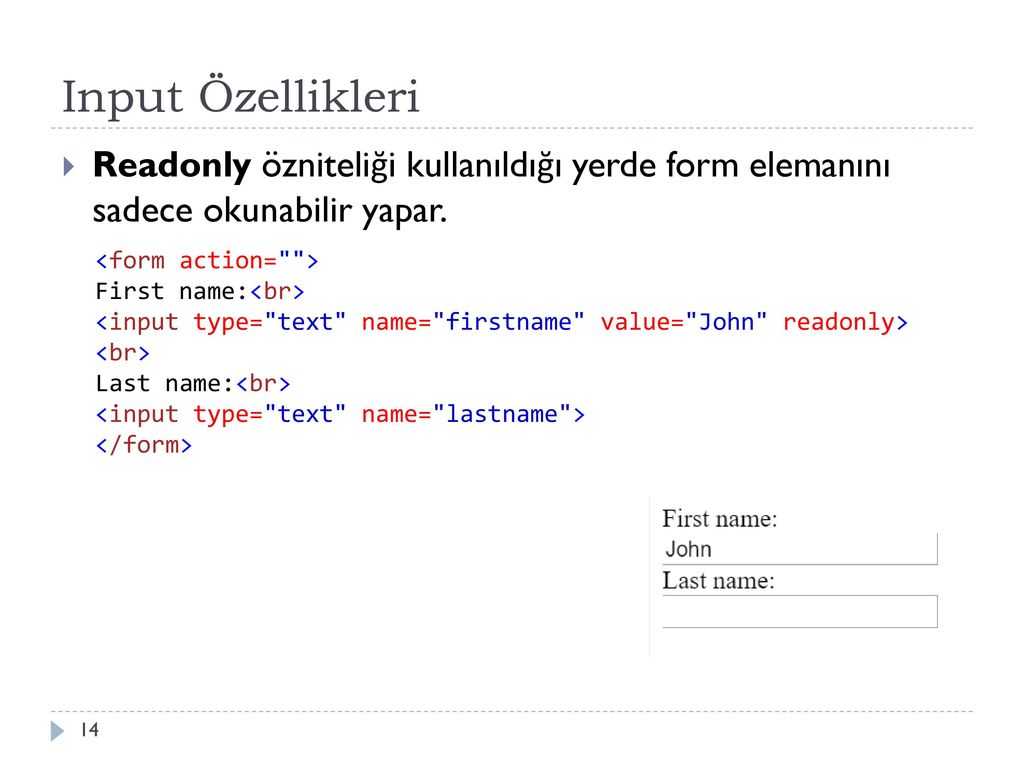
readonly: делает текстовом поле доступным только для чтения
-
required: указывает, что текстовое поле обязательно должно иметь значение
-
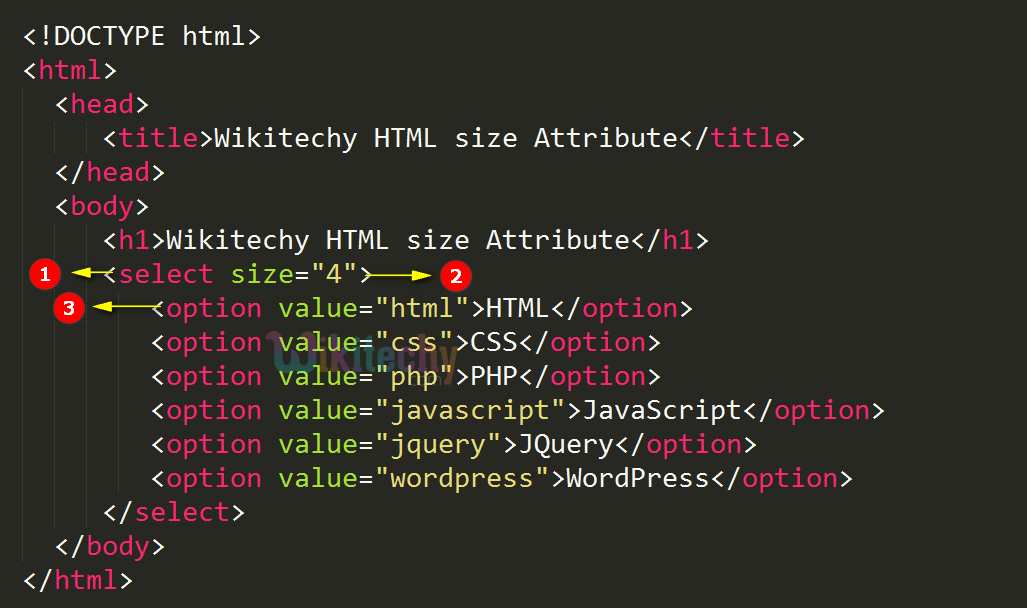
size: устанавливает ширину текстового поля в видимых символах
-
value: устанавливает значение по умолчанию в текстовом поле
Применим некоторые атрибуты:
<!DOCTYPE html>
<html>
	<head>
		<meta charset="utf-8">
		<title>Текстовые поля в HTML5</title>
	</head>
	<body>
		<form>
			<p><input type="text" name="userName" placeholder="Введите имя" size="18" /></p>
			<p><input type="text" name="userPhone" placeholder="Введите номер телефона" size="18" maxlength="11" /></p>
			<p>
				<button type="submit">Отправить</button>
				<button type="reset">Отмена</button>
			</p>
		</form>
	</body>
</html>
В этом примере во втором текстовом поле сразу устанавливаются атрибуты и . При этом size — то есть количество
символов, которые помещаются в видимое пространство поля больше, чем допустимое количество символов. Однако все равно ввести символов больше, чем
maxlength, мы не сможем.
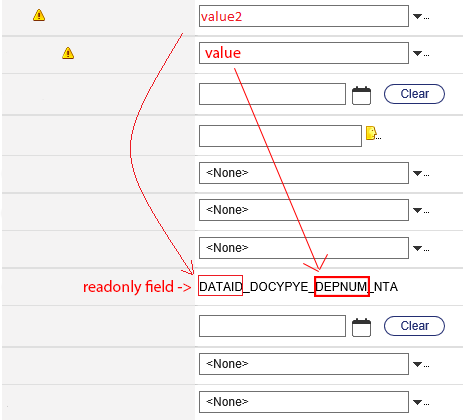
В данном случае также важно различать атрибуты и , хотя оба устанавливают видимый текст в поле. Однако устанавливает своего рода подсказку или приглашение к вводу, поэтому он обычно отмечается серым цветом
В то время как
значение представляет введенный в поле текст по умолчанию:
<p><input type="text" name="userName" value="Том" /></p>
<p><input type="text" name="userPhone" placeholder="Номер телефона" /></p>
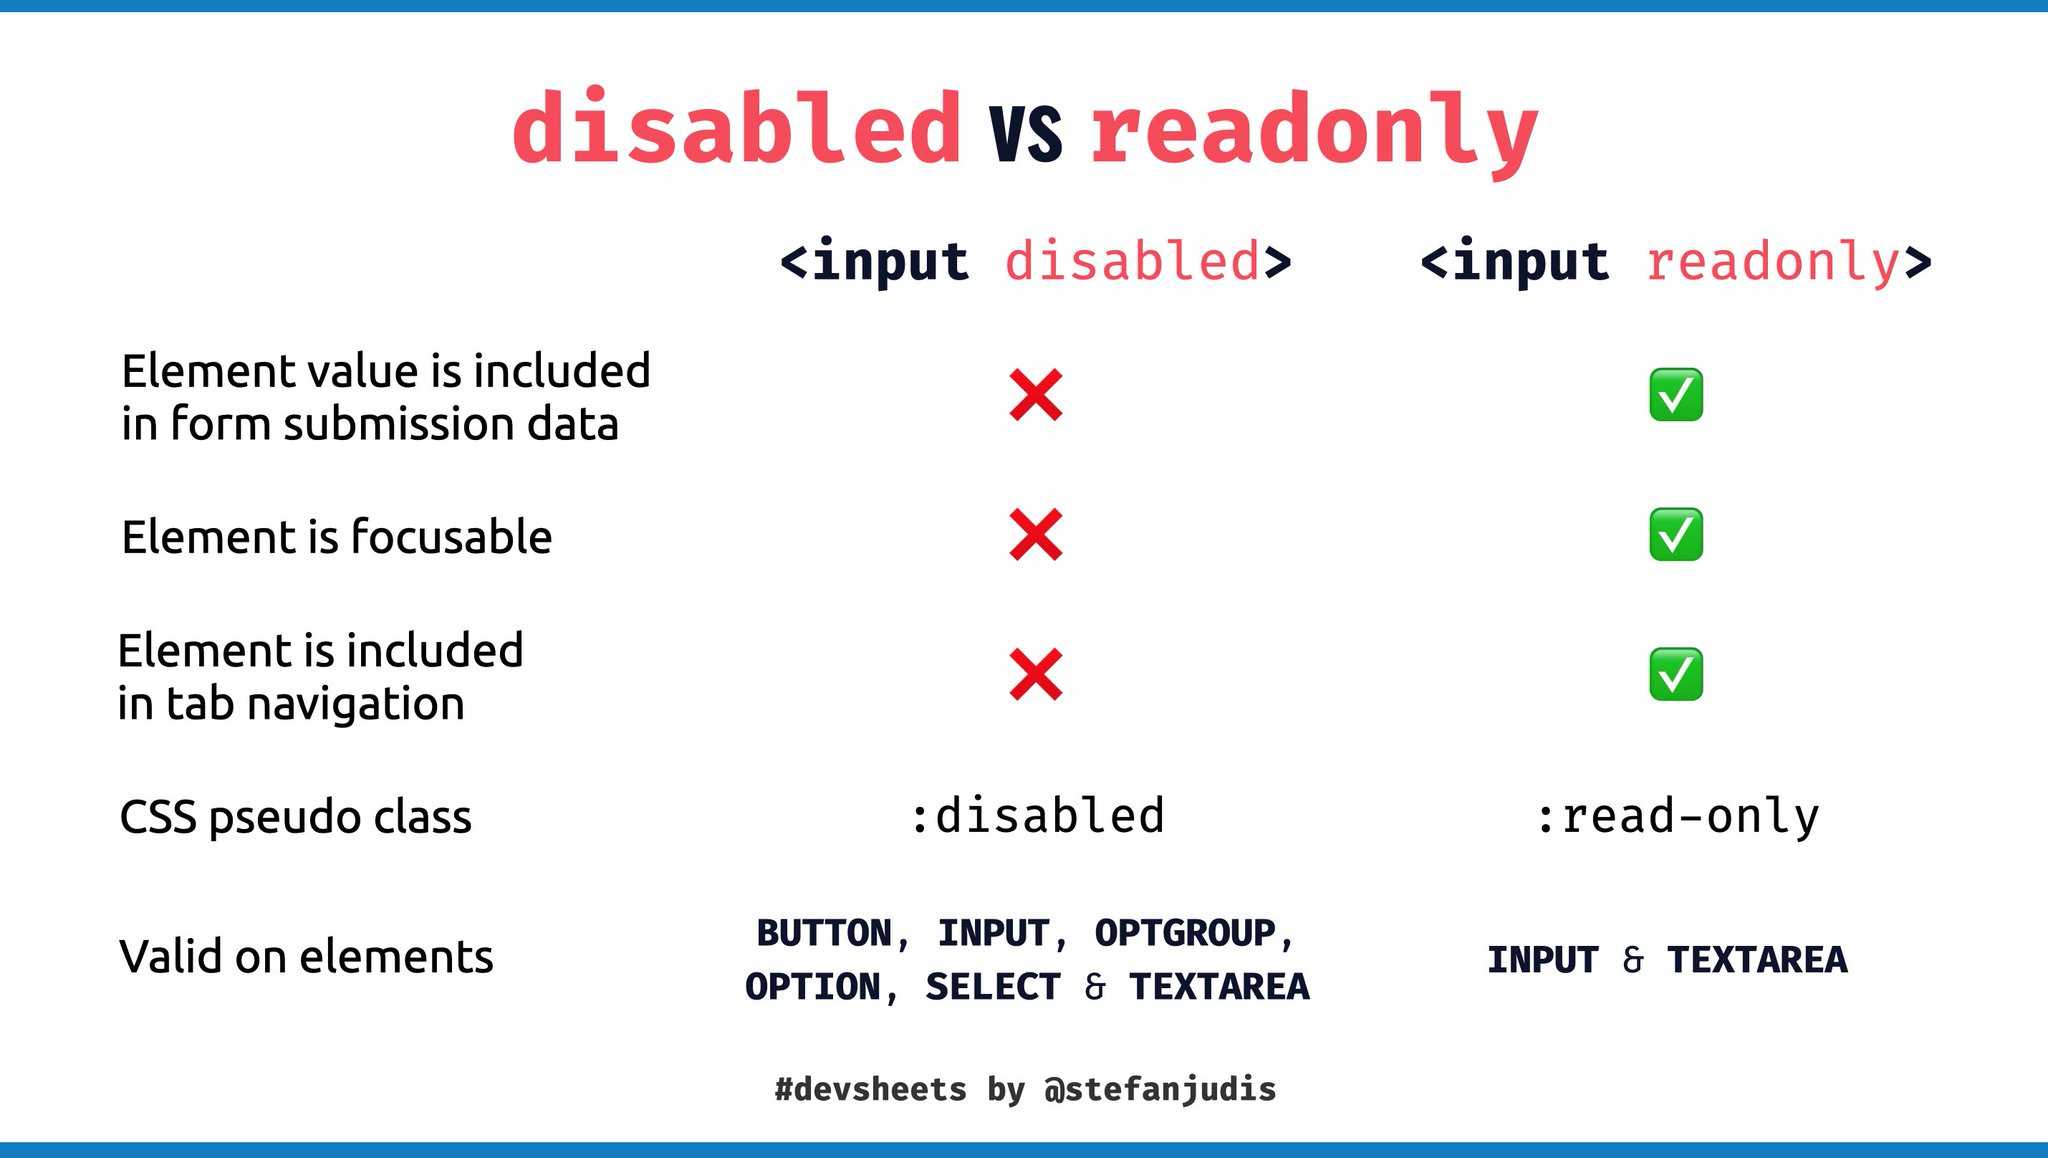
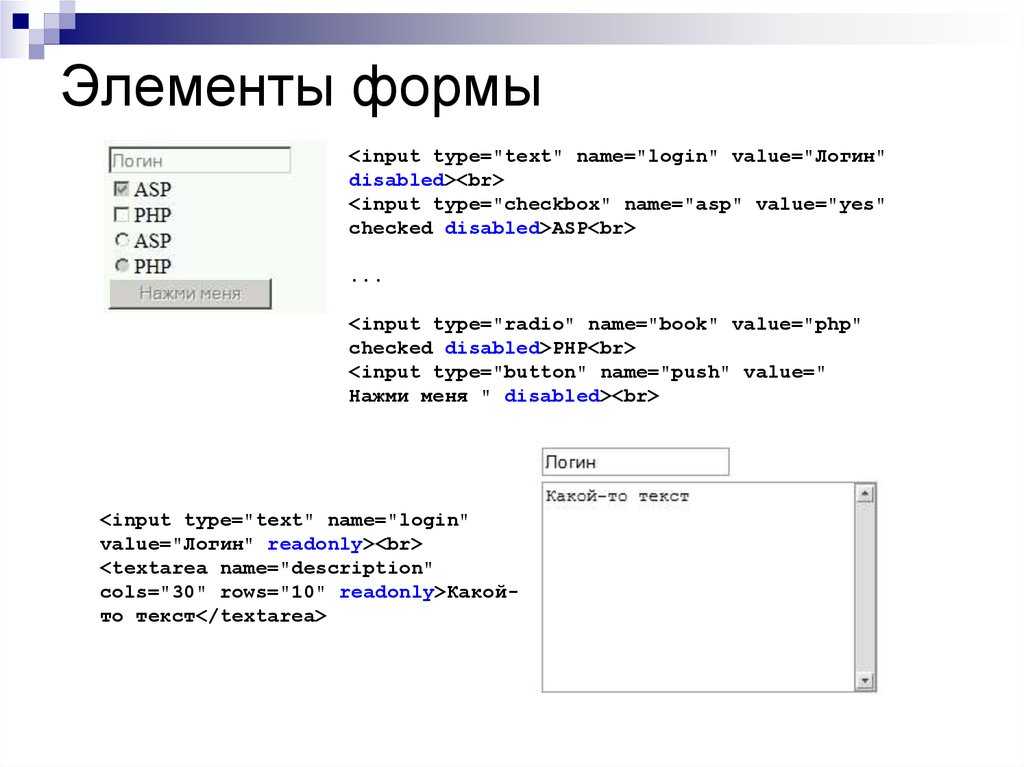
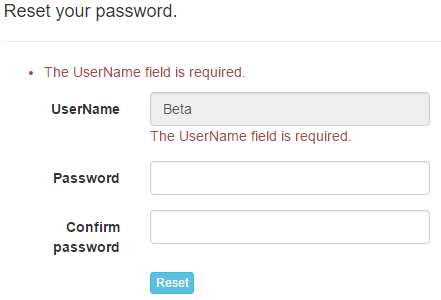
Атрибуты и делают текстовое поле недоступным, однако сопровождаются разным визуальным эффектом. В случае с
disabled текстовое поле затеняется:
<p><input type="text" name="userName" value="Том" readonly /></p>
<p><input type="text" name="userPhone" value="+12345678901" disabled /></p>
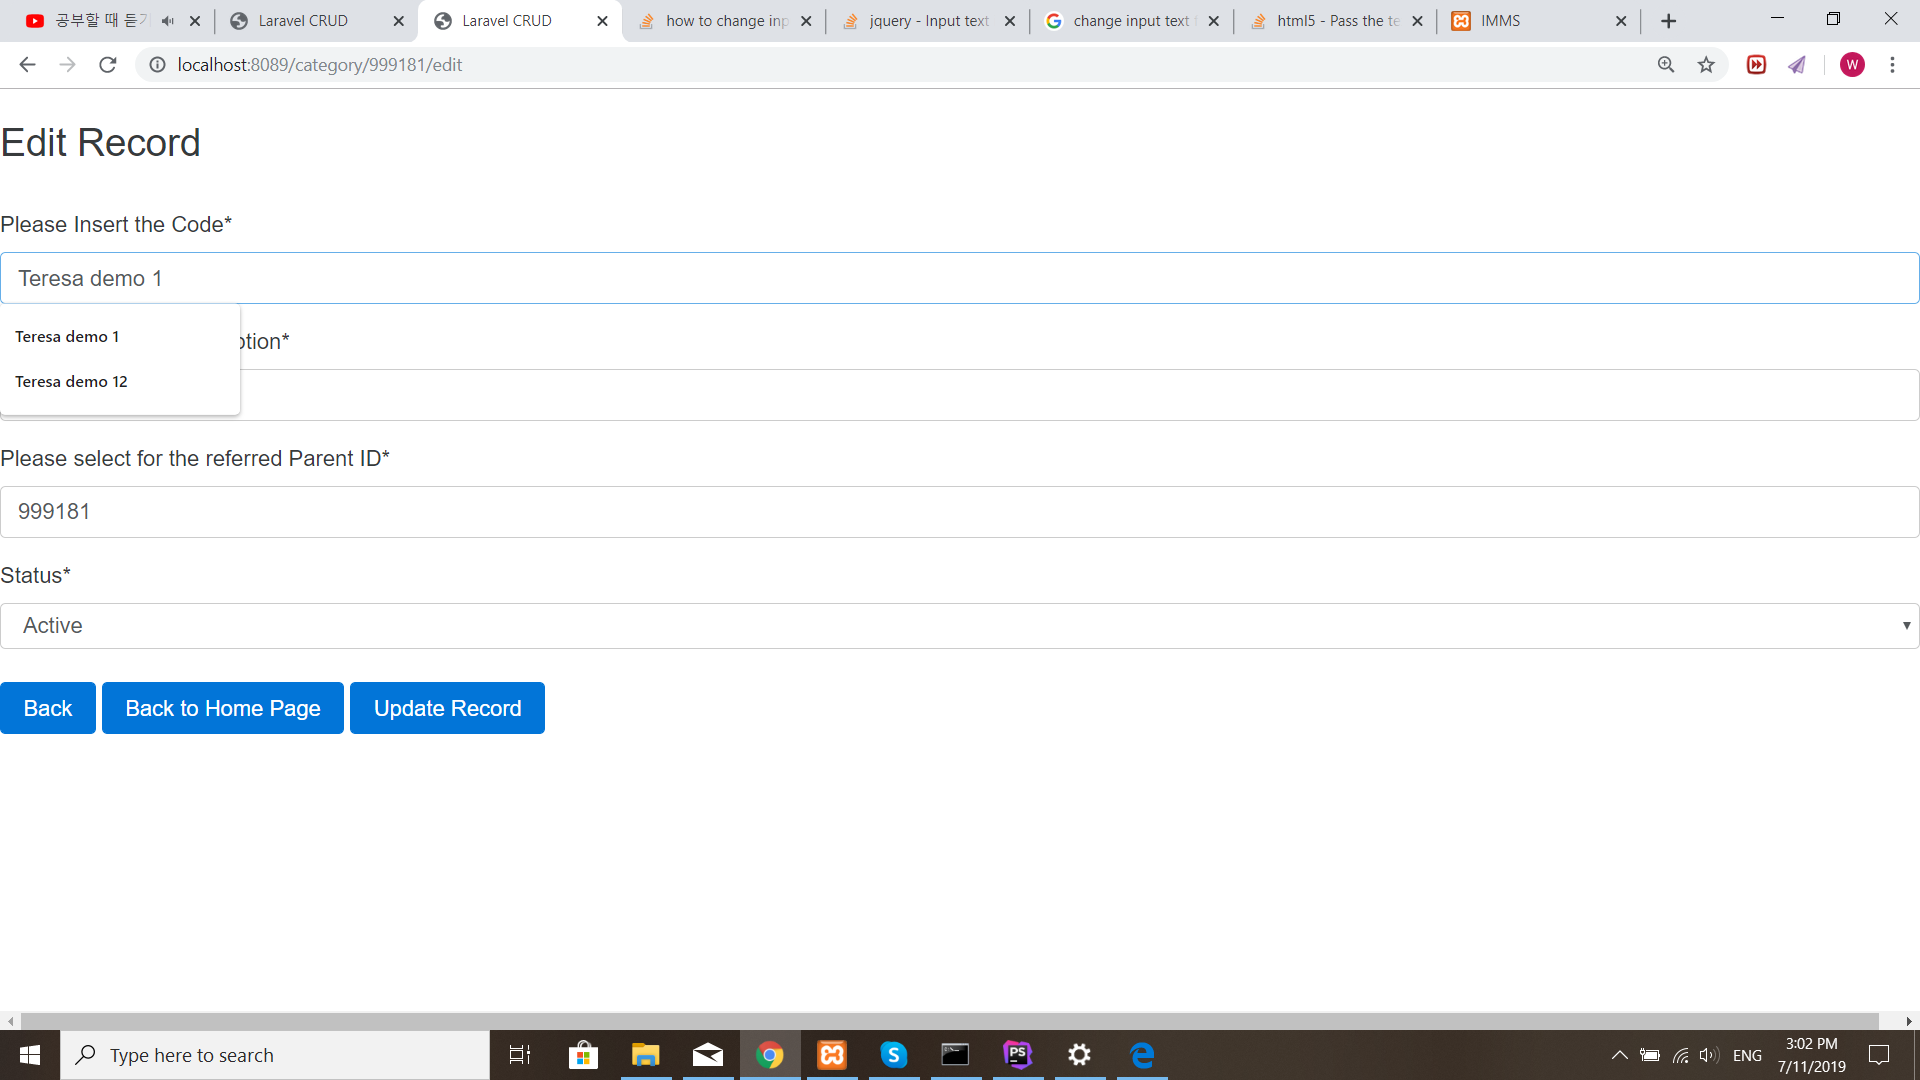
Среди атрибутов текстового поля также следует отметить такой атрибут как list. Он содержит ссылку на элемент datalist,
который определяет набор значений, появляющихся в виде подсказки при вводе в текстовое поле. Например:
<!DOCTYPE html>
<html>
	<head>
		<meta charset="utf-8">
		<title>Текстовые поля в HTML5</title>
	</head>
	<body>
		<form>
			<p><input list="phonesList" type="text" name="model" placeholder="Введите модель" /></p>
			<p>
				<button type="submit">Отправить</button>
			</p>
		</form>
		<datalist id="phonesList">
			<option value="iPhone 6S" label="54000"/>
			<option value="Lumia 950">35000</option>
			<option value="Nexus 5X"/>
		</datalist>
	</body>
</html>
Атрибут текстового поля указывает на id элемента datalist. Сам элемент datalist с помощью вложенных элементов
определяет элементы списка. И при вводе в текстовое поле этот список отображается в виде подсказки.
Направление текста
Атрибут dir задает направление ввода текста. Он может принимать два значения: ltr (слева направо) и
rtl (справа налево):
<input type="text" name="username" dir="rtl" />
Поле поиска
Для создания полей поиска предназначен элемент input с атрибутом . Формально он представляет собой простое текстовое поле:
<!DOCTYPE html>
<html>
	<head>
		<meta charset="utf-8">
		<title>Поиск в HTML5</title>
	</head>
	<body>
	<form>
		<input type="search" name="term" />
		<input type="submit" value="Поиск" />
	</form>
	</body>
</html>
Поле ввода пароля
Для ввода пароля используется элемент input с атрибутом . Его отличительной чертой является то, что вводимые символы маскируются точками:
<form>
	<p><input type="text" name="login" /></p>
	<p><input type="password" name="password" /></p>
	<input type="submit" value="Авторизация" />
</form>
НазадВперед
HTML Attributes Advanctages
HTML input attributes offer a number of advantages when creating web forms or other user input scenarios:
- Improved user experience: HTML input attributes can help guide users by providing helpful hints or required fields. This can make the user experience more intuitive and improve the chances of users successfully submitting the form.
- Flexibility: The range of input types and attributes available with HTML input elements makes it possible to create a variety of custom form controls to suit different needs.
- Accessibility: Certain attributes, such as the “required” attribute, can make web forms more accessible for users with disabilities by providing clear guidance on how to complete the form.
- Simplified validation: HTML input attributes can be used to validate form data before it is submitted, which can help reduce errors and prevent incomplete or inaccurate data from being entered.
- Improved security: HTML input attributes can be used to prevent malicious attacks, such as SQL injection or cross-site scripting, by validating data before it is submitted.
If this article helped you to fulfill your educational desire in anyway, do share this meaningful with your friends as well.
We value your feedback.
+1
+1
+1
+1
+1
+1
+1


Properties can make read-only attributes
What if we wanted to make it so the of our objects can be changed but the and can’t be changed?
We want to make the and the attributes read-only.
It turns out the attribute is already read-only:
We can’t assign to because properties are read-only by default.
We could try to make our attribute into a property, by adding this to our class definition:
We’re using the decorator to create a property named and this property returns the attribute when accessed.
This property doesn’t quite work though:
It doesn’t work because in our initializer method we assigned to :
But is a property that doesn’t have a setter, so it’s read-only (all properties are read-only by default).
Our property is accessing data that’s stored in the same places as our property.
That’s not possible!
There’s nothing to distinguish our property name from an attribute of the same name, so we have a name collision.
We need our property name to be different from the attribute where we actually store our data.
We don’t want to rename our property, so let’s rename our attribute.
Multiple Attribute
There is an input multiple attribute that signifies that a user is permitted to enter more than one value into an input field.
Multiple values can be entered in a file upload field:
Example
Execute
<!DOCTYPE html>
<html>
<body>
</body></html>
Multiple attribute can be defined to only type that would be selected here is an example:
Example: 
Execute
<!DOCTYPE html>
<html>
<head>
</head>
<body>
<form>
<label for=»picture»>Choose your picture:</label>
<input type=»file» id=»picture» name=»picture» accept=»image/png, image/jpeg»>
<input type=»submit» value=»submit»>
</form>
</body>
</html>
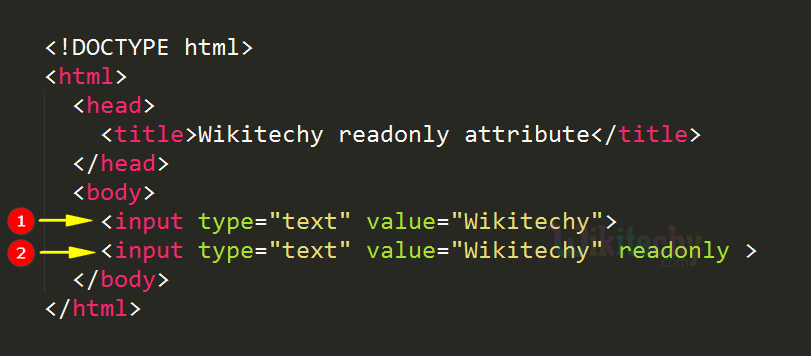
Why readonly?
There are several reasons why a Web page author might wish to
make a form field readonly:
- The form should contain some data which is submitted along
with the form but is not be changed by the user. The data
might e.g. originate from previous input from the user,
processed by a server side script which has then generated
a new form with some prefilled fields. - The author might be using a element
just to create a «scrollable subwindow» of text, i.e. for
data display, without actually using a form at all.
Note that this isn’t such a great idea, and using
inline frames might
do the job better (though you’d still need some fallback
for browsers not supporting ). - An input field might be used just as «output area» for
code
(see e.g. my ).
The reason is that for displaying results of
JavaScript calculations, using a form field (however illogical)
is the way which works most universally across
JavaScript implementations. - The author might wish to make some fields in a form
take different state according to data entered in the form.
For example, some field F might need to be fixed unless
a particular selection is made in another field, in which
case F would need to be changed
(via )
to a normal,
user-changeable input field.
The methods used to make a field readonly, especially the
workaround methods, need to be selected according to the purpose.
Min and Max Attributes
HTML input attributes input Min and Max indicate the minimum and maximum values for input fields.
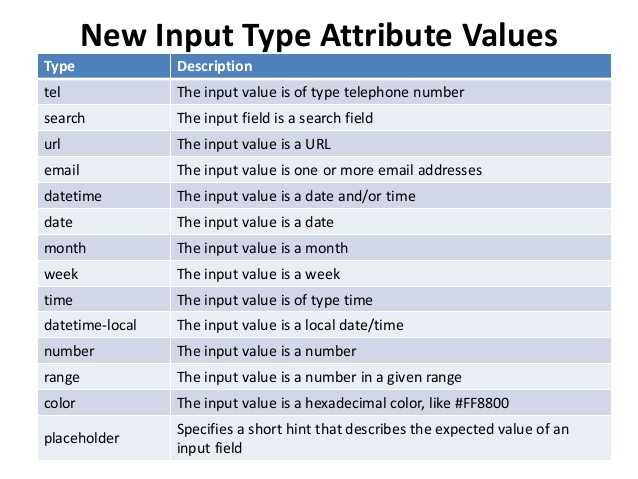
Input types for the min and max attributes consist of number, range, date, datetime-local, month, time, and week.
You can create a range of legal values by using the max and min attributes in conjunction with each other.
You can set a maximum date, a minimum date, and a range of legal values in order to achieve this:
Example
Execute
<!DOCTYPE html>
<html>
<body>
</body></html>
Here is another example of the max and min attribute on the text field:
Example: 
Execute
<!DOCTYPE html>
<html>
<body>
<form>
<div>
<label for=»choose»>Which book you prefer a Ulysses or a lolita?</label>
<input type=»text» id=»choose» name=»fav» required minlength=»7″ maxlength=»7″>
</div>
<div>
<button>Submit</button>
</div>
</form>
</body>
</html>
Autofocus Attribute
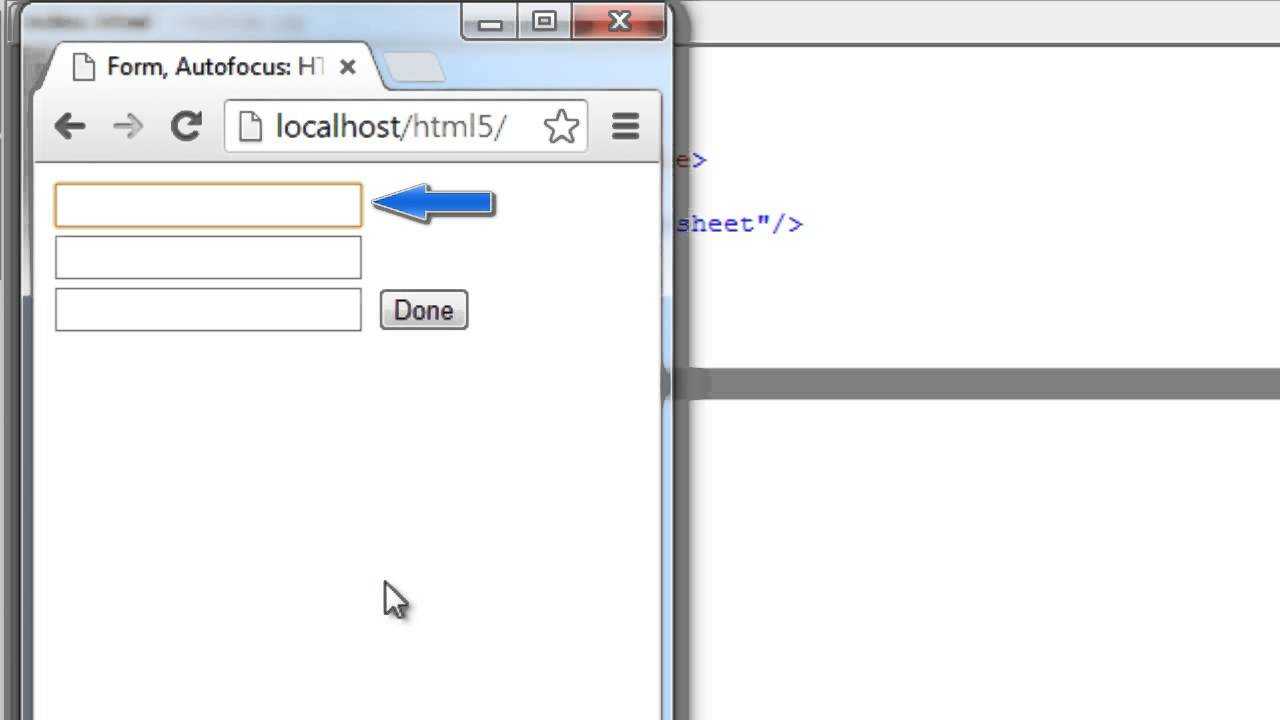
When the page loads, the input autofocus attribute ensures that the input field proactively gains focus.
Once the page loads, the “Owner first name:” input field will automatically gain focus:
Example
Execute
<!DOCTYPE html>
<html>
<body>
<form>
<label for=»fname»>Owner first name:</label><br>
<input type=»text» id=»fname» name=»fname» autofocus><br>
<label for=»lname»>Last name:</label><br>
<input type=»text» id=»lname» name=»lname»>
</form>
</body>
</html>
Here is a complete example of the autofocus attribute in a form:
Example: 
Execute
<!DOCTYPE html>
<html>
<body>
<h2>Total Marks</h2>
<form action=»» accept-charset=»utf-8″>
<label for=»id»>ID:</label>
<input type=»text» name=»id»><br>
<label for=»course»>Course:</label>
<input type=»text» name=»course» autofocus><br>
<label for=»grade»>Grade:</label>
<input type=»text» name=»grade»><br>
<label for=»marks»>Marks:</label>
<input type=»number» name=»marks»><br><br>
<input type=»submit»>
</form>
</body>
</html>
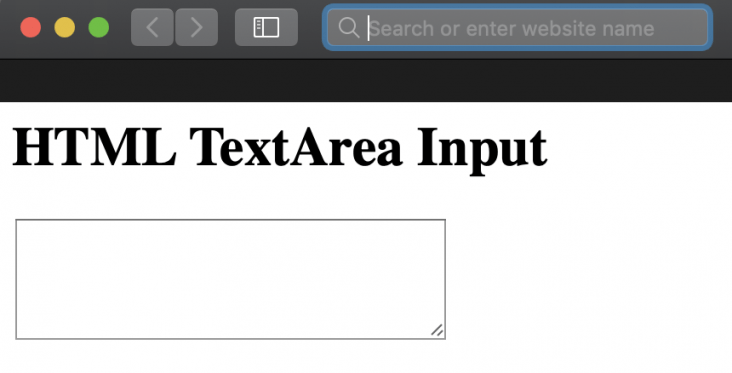
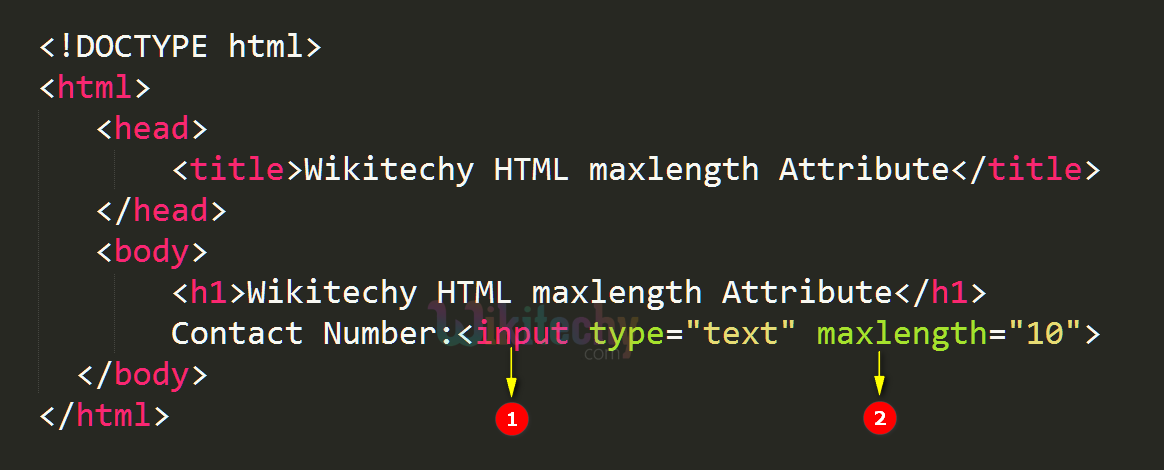
HTML TextArea maxlength
Do You know? You can set the limit of TextArea by using the HTML TextArea maxlength attribute.
See below example code line. By adding maxlength attribute with the value it 10, then only 10 characters the user can enter.
Disabled
Is it possible to do HTML Textarea disabled? Yes by using a Disabled attribute in a tag like – <textarea disabled>.
See Below for example code line. After this, a TextArea is not editable. A User can edit or enter any value.


TextArea resize
At the left-bottom TextArea resize optionally available. Where users can easily increase the size of it.
You can do the HTML textarea size property fixed by using CSS code in element- style=”resize:none”
Output: See GIF with and without resize option TextArea box.
Attributes | Important
Below is Addtional HTML textarea attributes, which you can use in TextArea Input Tag.
| Attribute | Value | Description |
|---|---|---|
| autofocus | autofocus | Specifies that a text area should automatically get focus when the page loads |
| cols | number | Specifies the visible width of a text area |
| dirname | textareaname.dir | Specifies that the text direction of the textarea will be submitted |
| disabled | disabled | Specifies that a text area should be disabled |
| form | form_id | Specifies one or more forms the text area belongs to |
| maxlength | number | Specifies the maximum number of characters allowed in the text area |
| name | text | Specifies a name for a text area |
| placeholder | text | Specifies a short hint that describes the expected value of a text area |
| readonly | readonly | Specifies that a text area should be read-only |
| required | required | Specifies that a text area is required/must be filled out |
| rows | number | Specifies the visible number of lines in a text area |
| wrap | hardsoft | Specifies how the text in a text area is to be wrapped when submitted in a form |
HTML Textarea Width and Height | How to
To set an HTML TextArea Height and Width you can use cols and rows attributes with CSS code or else only use CSS.
See the below example of it. Using inline CSS style.
Output:
So you now understand the why HTML TextArea Required in Web App. If you have any doubt and suggestion. Then comment on it.
Using an underscore prefix for internal attributes
We need an attribute that has a different name than .
When you have an attribute that represents internal data that shouldn’t be accessed directly (by code outside of your class) it’s common in Python to prefix a single underscore () before that attribute name.
PEP 8 as well: «Use one leading underscore only for non-public methods and instance variables.»
So we’ll rename the attribute that stores our length to :
So, we’ll say:
And our property will access now to get the length:
Here’s the full class:
Now when we make a object, we’ll see that there is a :
But we can’t assign to it because it’s a property:
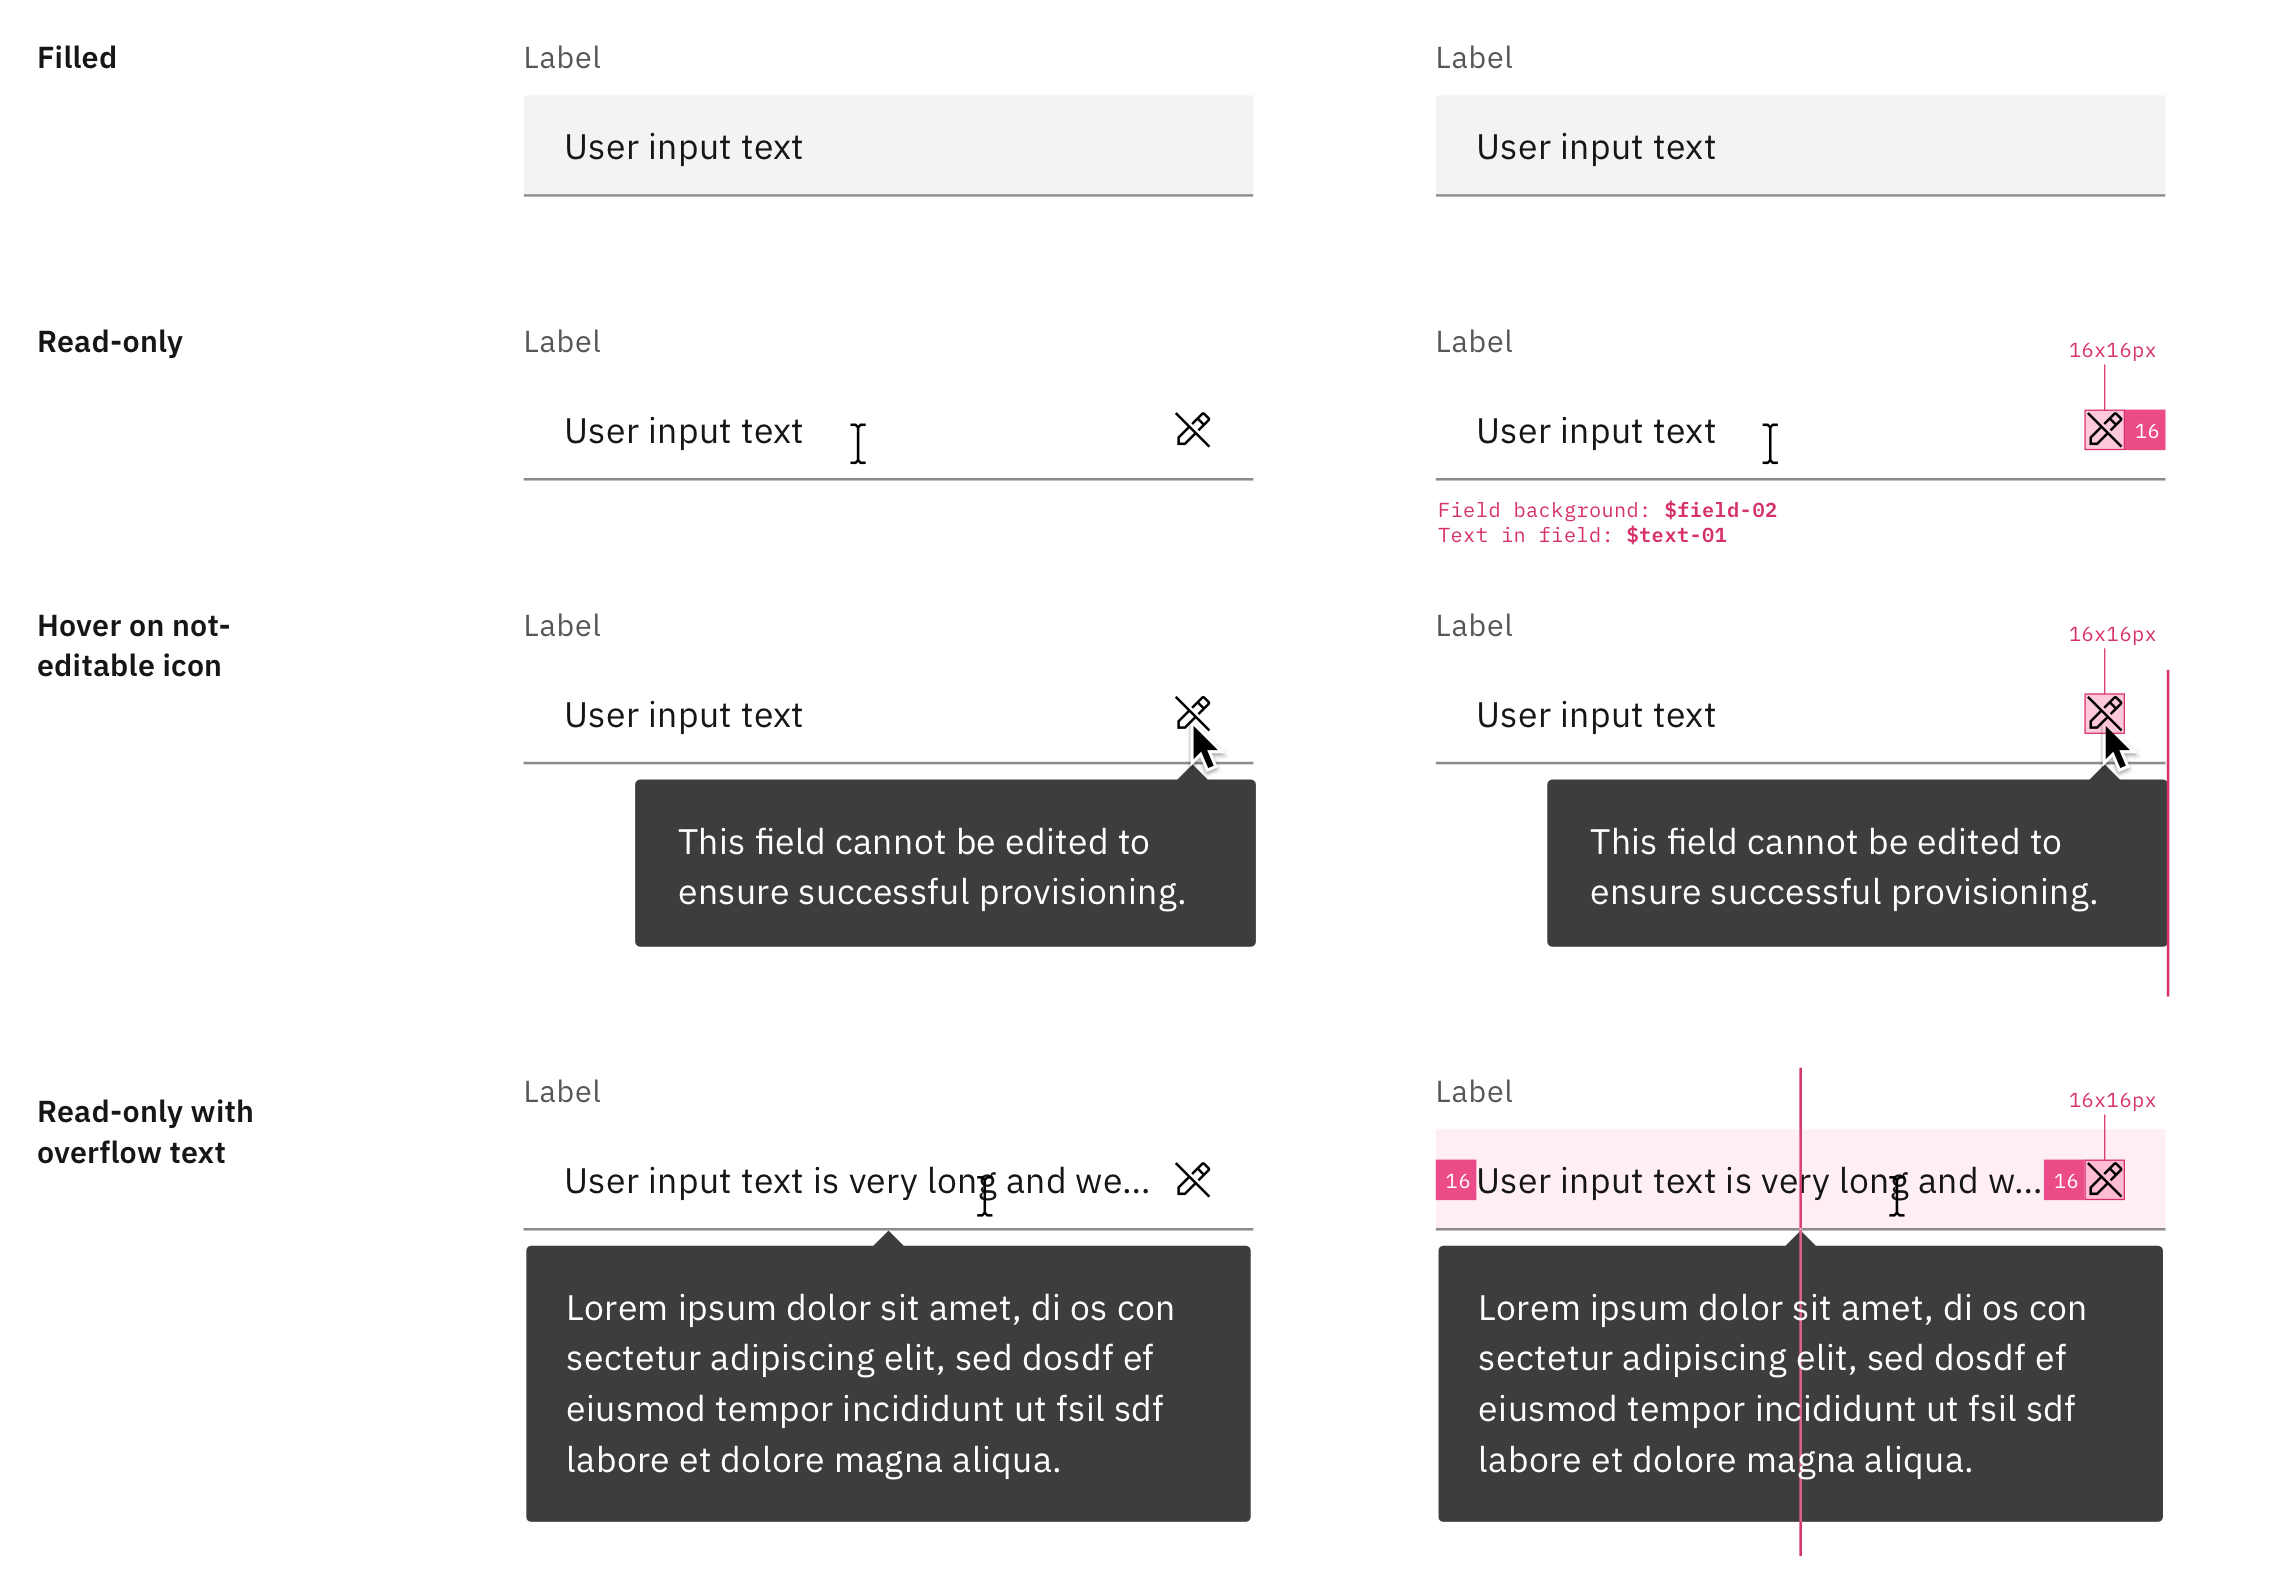
How to make it look readonly?
The visual appearance of
readonly fields on IE (and Netscape 6)
is the same as for normal fields, whereas
disabled fields look different. This isn’t quite natural.
You may wish to suggest a change using
style sheets,
e.g. using a different background color.
Be careful: a readonly field should not resemble the default
appearance of a disabled field!
The following example
contains various fields, one of which is
a readonly field with the attribute
suggesting a light grey background color and not quite black
text color as well as an italics version of the font in use:
If you have several readonly fields on a page, you probably wish
to put the stylistic suggestions into a element
or an external style sheet instead of including a copy of them
into each field. Then you would invent a suitable class name
(it could be for example) and use
in the elements which have the attribute.
Unfortunately it is currently not possible to specify in a style
sheet that some rules are to be applied to all elements which have
a certain value for a certain attribute. (Such possibilities exist
in CSS2, but they are not supported yet by browsers.)
Note that
the possibilities of affecting form
field appearance are relatively limited. The CSS methods for it
work to some extent on IE 4+ but not on many other browsers.
In our example, Netscape 4.0 shows the readonly field with CSS
so that the text is in italics but the appearance is otherwise
that of a normal input field, i.e. the color and background suggestions
are ignored.
Depending on your
readonly, you might wish to suppress the border around the field, so that
it does not really look like a field at all. This is technically simple
(using in a style sheet) but works on some
browsers only. For a simple example (for JavaScript-enabled browsers),
see
.
This document is part of my
material on HTML forms.
Date of last update: 2002-07-25.
Jukka KorpelaPattern Attribute:
A regular expression is required when the input pattern attribute is included in HTML input attributes, so that the input field’s value is validated based on it.
Input types supported by the pattern attribute include:
- Text
- Date
- Search
- Url
- Tel
- Password
You can help the user by describing the pattern through the global title attribute.
Please take a look at our JavaScript tutorial for more information about regular expressions.
A text area that can consist of only three letters with no numbers or special characters (for example, a capital letter):
Execute
<!DOCTYPE html>
<html>
<body>
</body></html>
Generalized Solution
Surprisingly, applying the similar technique to instance attribute appears much trickier than with class attributes.
The major problem here is working with several instances of the class. Implementation of a property, read-only or not, require modification of the instance class. It can be easily done in the method of the metaclass, but it would work only on one instantiation of this class. On the attempt of creating of the second instance, a constructor assigning to the same attribute will fail, because the modified class already made to provide read-only functionality for this attribute. Therefore, we come to the situation when we need to create a separate class for each instance.
The real trick is to inject a hook in the class constructor, which is done via the call to in the body of the method of the metaclass.
When this call creates an , we need another instance of the class created dynamically. This new instance, , is created from the dynamically-created class without a constructor. Now, using two instances and two classes, new and old ones, we can manipulate instance attributes to distribute them between — for read-write instance attributes and — for read-only properties replacing instance attributes:
Python
class DefinitionSet:
    attributeContainerName = "."

class Readonly(type):

    class Attribute(object):
        def __init__(self, value):
            self.value = value

    @classmethod
    def Base(cls):
        return Readonly(str(), (), {})

    def __new__(metaclass, className, bases, classDictionary):
        def getAttrFromClass(attr):
            return lambda cls: getattr(type(cls), DefinitionSet.attributeContainerName)
        class NewMetaclass(metaclass):
            setattr(metaclass, DefinitionSet.attributeContainerName, {})
            def __call__(cls, *args, **kwargs):
                instance = type.__call__(cls, *args, **kwargs)
                newClass = metaclass(cls.__name__, cls.__bases__, {})
                newInstance = type.__call__(newClass)
                setattr(newClass, DefinitionSet.attributeContainerName, {})
                names = dir(instance)
                for name in names:
                    if hasattr(cls, name):
                        continue
                    value = getattr(instance, name)
                    if isinstance(value, metaclass.Attribute):
                        if hasattr(newInstance, name):
                            delattr(newInstance, name)
                        getattr(
                            newClass,
                            DefinitionSet.attributeContainerName) = value.value
                        aProperty = property(getAttrFromClass(name))
                        setattr(newClass, name, aProperty)
                    else:
                        setattr(newInstance, name, getattr(instance, name))
                return newInstance
        clone = dict(classDictionary)
        for name, value in clone.items():
            if not isinstance(value, metaclass.Attribute):
                continue;
            getattr(NewMetaclass, DefinitionSet.attributeContainerName) = value.value
            aProperty = property(getAttrFromClass(name))
            setattr(NewMetaclass, name, aProperty)
            classDictionary = aProperty
            classDictionary.pop(name, None)
        return type.__new__(NewMetaclass, className, bases, classDictionary)
Note that is reused between different classes, the class of the instance used for implementation of instance read-only properties and for metaclass, used for implementation of class read-only properties. However, the mechanism of the substitution is different.

Another trick is “hiding” the dictionary instance stored in the class and given the attribute name . With such name, this attribute cannot appear as a result of “usual” operation dot-notation syntax, ; it can only be operated via the methods . This seems to be really important, because it helps to avoid all possible collision with user attributes based on dot notation, even if the user uses attribute names with any number of underscores. This way, the implementation does not rely on any kind of naming conventions, so typical for Python developers.
A word of warning: it can’t be absolutely readonly
In addition to limitations listed below, there is a more
fundamental restriction. Even if all browsers supported the
HTML way of declaring a field as readonly, a user could still
create his private copy of the author’s form, edit it,
making the field a normal input field, and using that form to submit
data. (The author .) Or the user might write a form
of his own from scratch, based on information or assumptions about
what the form handler expects to get.
It is true that the server-side form handler could be written
so that it checks the field
in the HTTP transaction. Specifically, it could check that the
field matches the address of the document
containing the form to be used. This approach is not without
problems though. It could limit usability (e.g. by preventing the
fair use of local copies of that document), and it wouldn’t protect
against browsers or other programs which have been written to
send faked fields.
Thus, do not rely on readonly fields actually
remaining readonly. In particular, when such fields will be used
in server-side form handlers, normal data presence and integrity
tests should be performed.
Solution for Class Attributes: Usage
First, let’s see how it can be used:
Python
class Foo(ReadonlyBase):
    bar = 100
    test = Readonly.Attribute(13)

print("Foo.bar: " + str(Foo.bar))
Foo.bar += 1
print("Modified Foo.bar: " + str(Foo.bar))
print("Foo.test: " + str(Foo.test))
try:
    Foo.test = Foo.test + 1
except Exception:
    print ("Cannot set attribute Foo.test")
Here, the attribute is just marked with the assignment using ; the desired constant value of any type is moved to an actual argument of the call. The object is the inner class of the class ; the whole line is the call to its constructor and assignment.
Here is the idea: the entire trick is performed by the metaclass: if the attribute is assigned to a object, instantiation of the class object removes this attributes and creates matching read-only property exposed by another metaclass. It may sounds tricky, but… it is really pretty tricky.
In fact, base class does not have to be used. It is shown in this code sample due to different syntax of Python 2 and Python 3. The class could directly setup its metaclass, without any base classes. The only problem is the different syntax. Let’s consider this unpleasant Python problem and its work-around.
Unification of Python 2 and 3 in the Demo
The usage sample shown above lacks the definition of the class . Without this class, the class could be created directly from the class used as its metaclass, using the following syntax:
Python
class Foo(object, metaclass = Readonly):
Python
class Foo(object):
    __metaclass__ = Readonly
Alternatively, the base class could have been created in the same way. Instead, the file “demo.py” uses creation of an equivalent class object using metaprogramming approach:
Python
ReadonlyBase = Readonly(str(), (), {})
This piece of code is compatible with both lines of Python versions. To understand how it works, it’s enough to know that a metaclass is just a class derived (directly or indirectly) from the class . The call to its constructor creates an object which is a class: it has all the properties of a class and can be used as a class, and possibly, depending on the second parameter (), as a metaclass.
At this point, the usage is explained. Now, it’s time to show how the metaclass turns the class attributes marked by the assignment into read-only properties.
Атрибуты
-
accept-charset – указывает кодировку символов передаваемых данных,
например, «utf-8». Если атрибут не указан, то указывается кодировка, установленная для страницы. -
action – в качестве значения принимает полный или относительный путь к серверной
программе-обработчику, которой будут передаваться данные формы после отправки на сервер. -
autocomplete – позволяет отключать автозаполнение полей формы, которое
происходит при повторном вводе одинаковых данных. Принимает два значения «on» (по умолчанию) и
«off». При этом, если автозаполнение отключено в настройках самого браузера, то данный атрибут
игнорируется. Кроме того, значение атрибута может быть переопределено таким же атрибутом autocomplete,
но у конкретных элементов формы, например, в случае необходимости не сохранять важные данные вроде паролей, номеров банковских карт и т.д. -
enctype – устанавливает способ кодирования отправляемых данных. Может
принимать значения:-
«application/x-www-form-urlencoded» – применяется по умолчанию и подходит для
большинства случаев, поэтому сам атрибут enctype обычно не указывается; - «multipart/form-data» – следует использовать при отправке файлов;
-
«text/plain» – кодирует данные в виде простого текста, только заменяя пробелы знаком
+; требуется редко, например, может быть полезен при отправке данных формы по электронной почте.
-
«application/x-www-form-urlencoded» – применяется по умолчанию и подходит для
-
name – определяет уникальное имя формы, которое в основном используется для
доступа к ней через скрипты. -
novalidate – данный логический атрибут отменяет встроенную проверку данных вводимых пользователем в
поля формы на ошибки. Значений не принимает и по умолчанию выключен. -
method – принимает значения «GET»
или «POST», которые определяют метод отправки данных формы на сервер. По умолчанию применяется
«GET». -
target – сообщает имя целевого окна или фрейма, в котором будет открыт результат отправки данных формы.
В качестве значений может принимать:- _self – документ будет открываться в текущем окне или фрейме (используется по умолчанию);
- _blank – документ будет открываться в новом окне или фрейме;
-
_parent – документ будет открываться в родительском фрейме, а в случае отсутствия такового,
в текущем окне; -
_top – документ будет открываться в главном (текущем) окне, в котором находится данный фрейм,
содержащий ссылку, а в случае отсутствия фреймов в окне, данное значение сработает, как _self; -
name – имя фрейма, в котором будет открываться документ; если указать несуществующее имя окна
или фрейма, то браузер откроет документ в новом окне.
-
Также для элемента доступны универсальные атрибуты и
соответствующие атрибуты-события.
Main differences to previous proposals
Immutability
This RFC aligns with Immutability (2018, Stale).
This RFC does not align with the semantics of the recent Write once properties (2020, Declined), which is targeting a different problem.
Property Accessors Syntax
This RFC does not try to solve as wide use case as the different iterations of Property Accessors Syntax does.
However:
— Accessors overcomplicates readonly, and does not offer solutions to immutability
— There seems to be a higher need in the community for readonly and immutable semantics
— Everything Accessors offers beyond disconnected read and write visibility for properties, can easily be done with plain methods. The same is not true for readonly and immutable semantics as shown in the introduction.