

Введение в обработку событий
Последнее обновление: 1.11.2015
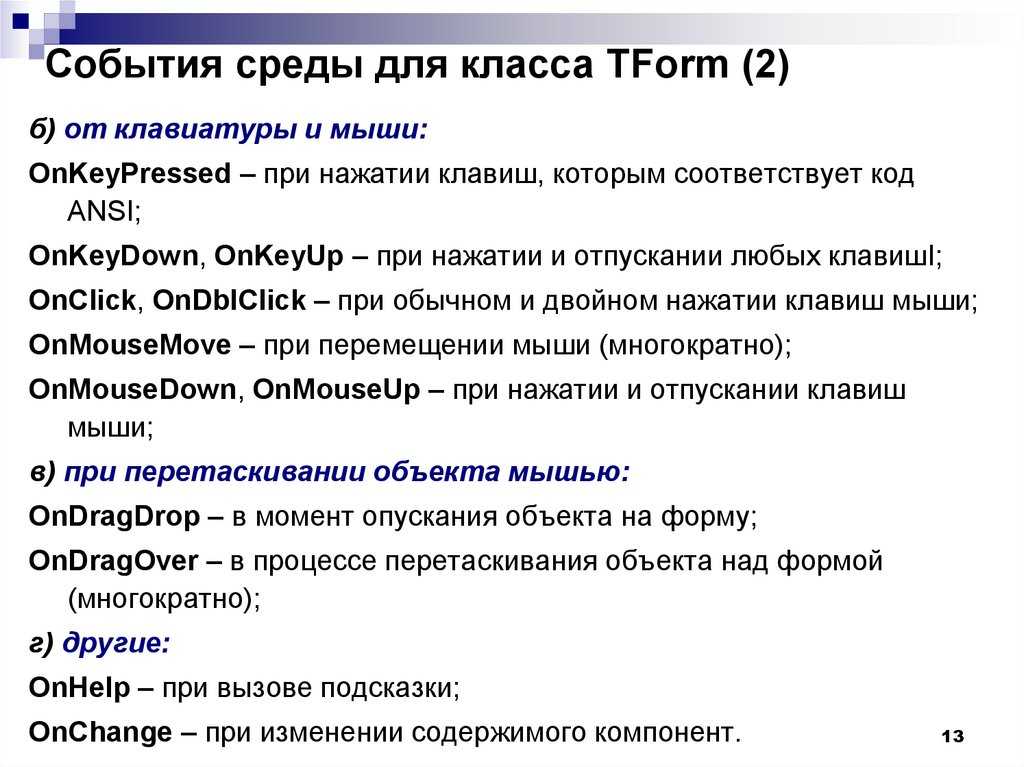
Для взаимодействия с пользователем в JavaScript определен механизм событий. Например, когда пользователь нажимает кнопку, то возникает
событие нажатия кнопки. В коде JavaScript мы можем определить возникновение события и как-то его обработать.
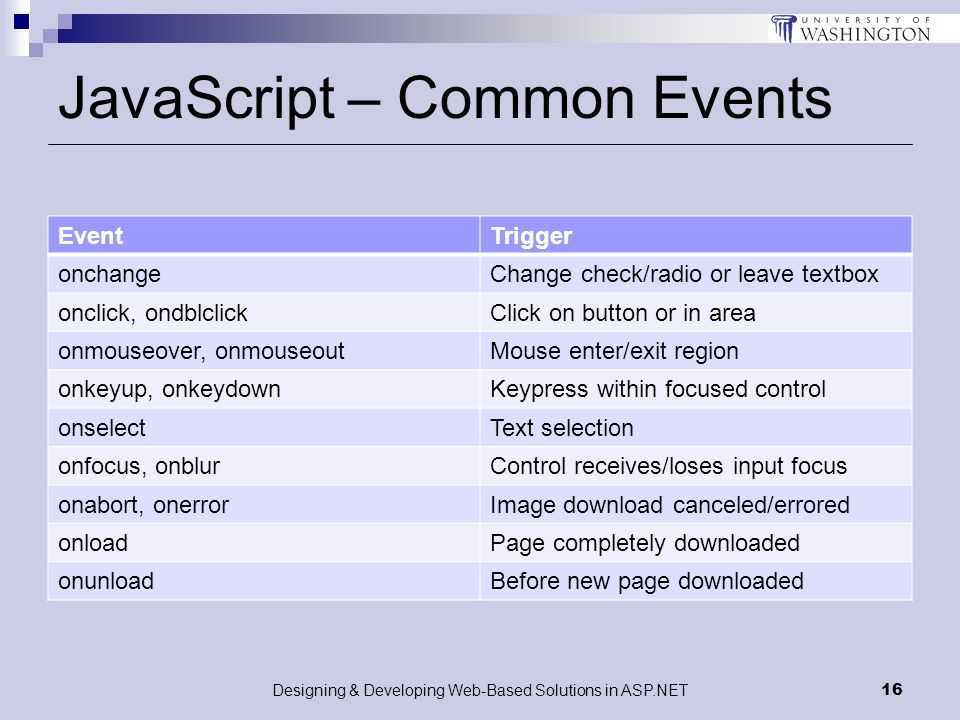
В JavaScript есть следующие типы событий:
-
События мыши (перемещение курсора, нажатие мыши и т.д.)
-
События клавиатуры (нажатие или отпускание клавиши клавиатуры)
-
События жизненного цикла элементов (например, событие загрузки веб-станицы)
-
События элементов форм (нажатие кнопки на форме, выбор элемента в выпадающем списке и т.д.)
-
События, возникающие при изменении элементов DOM
-
События, возникающие при касании на сенсорных экранах
-
События, возникающие при возникновении ошибок
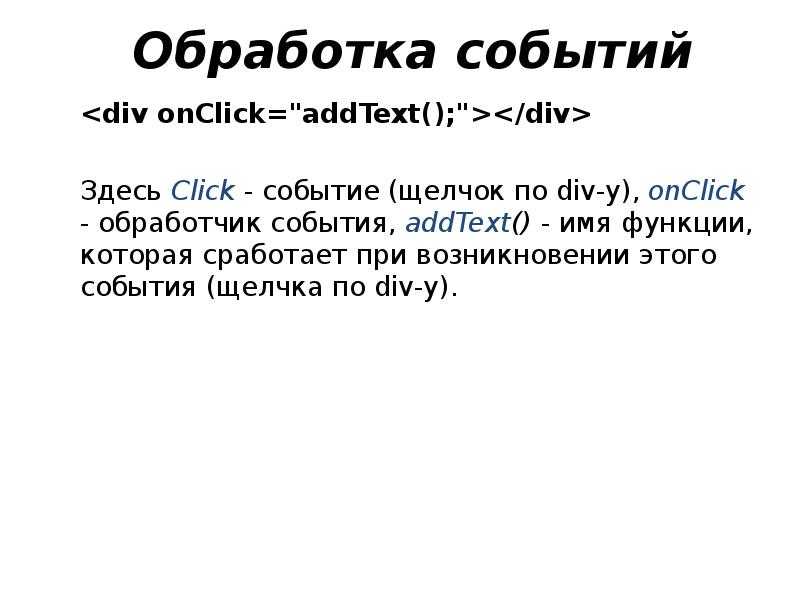
Рассмотрим простейшую обработку событий. Например, на веб-странице у нас есть следующий элемент div:
<div id="rect" onclick="alert('Нажато')" style="width:50px;height:50px;background-color:blue;"></div>
Здесь определен обычный блок div, который имеет атрибут onclick, который задает обработчик события нажатия на блок div.
То есть, чтобы обработать какое-либо событие, нам надо определить для него обработчик. Обработчик представляет собой код на языке JavaScript. В данном случае обработчик выглядит довольно просто:
alert('Нажато')
И при нажатии на кнопку будет выскакивать сообщение:
Также можно было бы вынести все действия по обработке события в отдельную функцию:
<!DOCTYPE html>
<html>
<head>
	<meta charset="utf-8" />
</head>
<body>
<div id="rect" onclick="displayMessage()" style="width:50px;height:50px;background-color:blue;"></div>
<script>
function displayMessage(){

	alert('Нажато');
}
</script>
</body>
</html>
Теперь обработчиком события будет выступать функция .
Передача параметров в обработчик события
В обработчик можно передавать параметры. Например, мы можем передать текущий объект, на котором возникает событие:
<a href="page1.html" onclick="return handler(this)">Станица 1</a>
<script>
function handler(obj){

	alert(obj.href);
	return false;
}
</script>
Ключевое слово указывает на текущий объект ссылки, на которую производится нажатие. И в коде обработчика мы можем
получить этот объект и обратиться к его свойствам, например, к свойству href.
Кроме того, надо отметить, что здесь обработчик возвращает результат. Хотя в первом примере с блоком div от обработчика не требовалось возвращения результата.
Дело в том, что для некоторых обработчиков можно подтвердить или остановить обработку события. Например, нажатие на ссылку должно привести к переадресации.
Но возвращая из обработчика , мы можем остановить стандартный путь обработки события, и переадресации не будет.
Если же возвращать значение , то событие обрабатывается в стандартном порядке.
Если же мы вовсе уберем возвращении результата, то событие будет обрабатываться, как будто возвращается значение true:
<a href="page1.html" onclick="handler(this)">Станица 1</a>
<script>
function handler(obj){

	alert(obj.href);
}
</script>
Кроме непосредственно элемента-источника события в обработчик мы можем передавать объект .
Этот объект не определяется разработчиком, это просто аргумент функции обработчика, который хранит всю информацию о событии. Например:
<!DOCTYPE html>
<html>
<head>
	<meta charset="utf-8" />
	<style>
	#rect{
		width:50px;
		height:50px;
		background-color:blue;
	}
	</style>
</head>
<body>
<div id="rect" onclick="handler(event)"></div>
<script>
function handler(e){

	alert(e.type); // получаем тип события
}
</script>
</body>
</html>
В данном случае с помощью свойства объекта event получаем тип события (в данном случае тип ).
НазадВперед
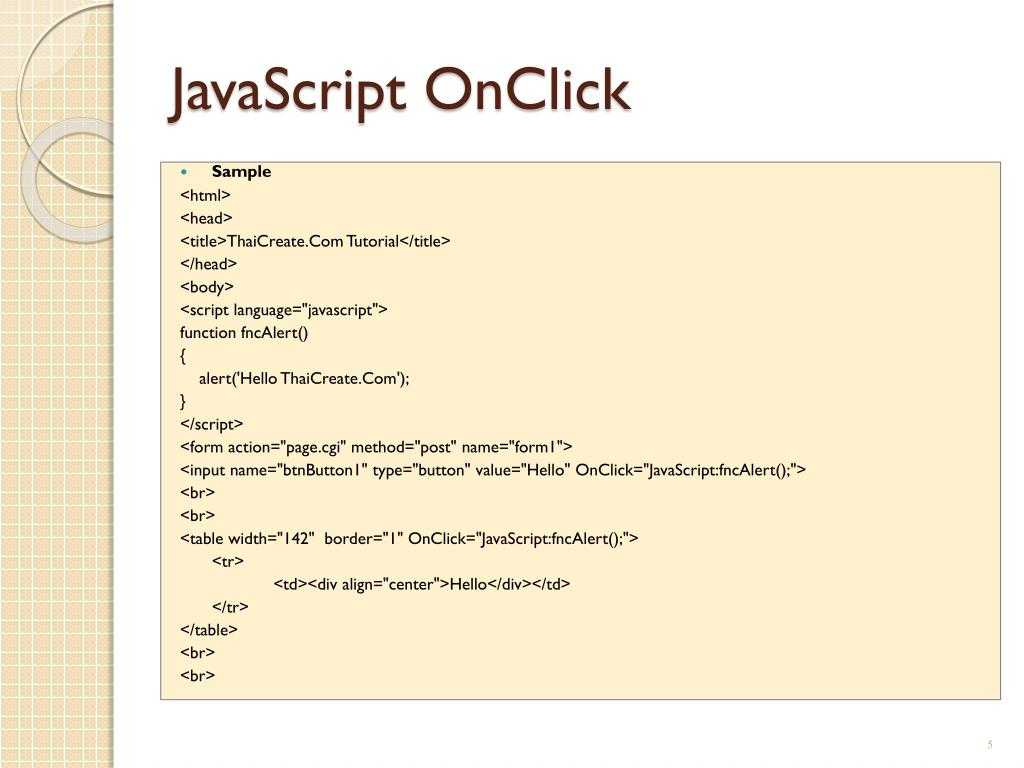
Как вызвать функцию JavaScript с помощью атрибутов событий HTML
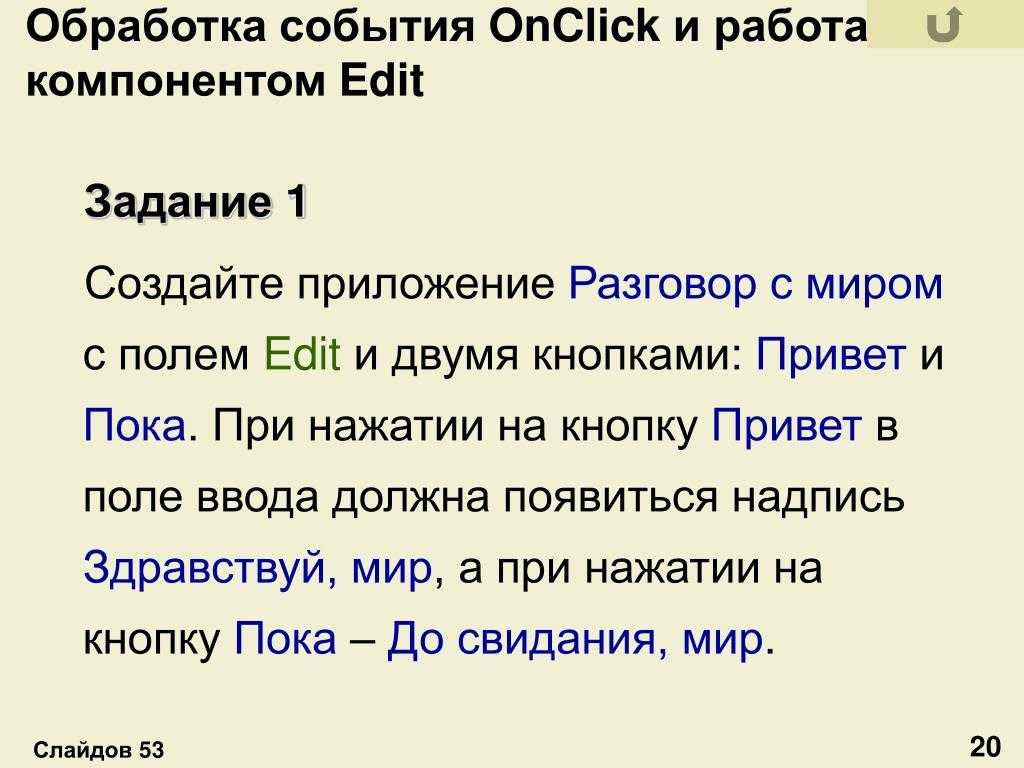
Давайте разработаем веб-страницу, которая будет принимать имена своих пользователей.
Как только пользователь нажмет кнопку “Отправить”, на веб-сайте появится поздравительное сообщение для пользователя.
Мы будем использовать атрибут события HTML “onclick”,
чтобы вызвать функцию, когда пользователь нажимает кнопку.
Эта функция встретит пользователя предупреждающим сообщением.
Вам нужно будет создать файл HTML и JavaScript, чтобы опробовать этот пример.
Давайте создадим для исходного кода HTML и для исходного кода JavaScript.
Мы также будем использовать эти исходные коды для последующих примеров с минимальными изменениями.
Исходный код HTML
Ты можешь написать или скопировать приведенный ниже исходный код в свой .
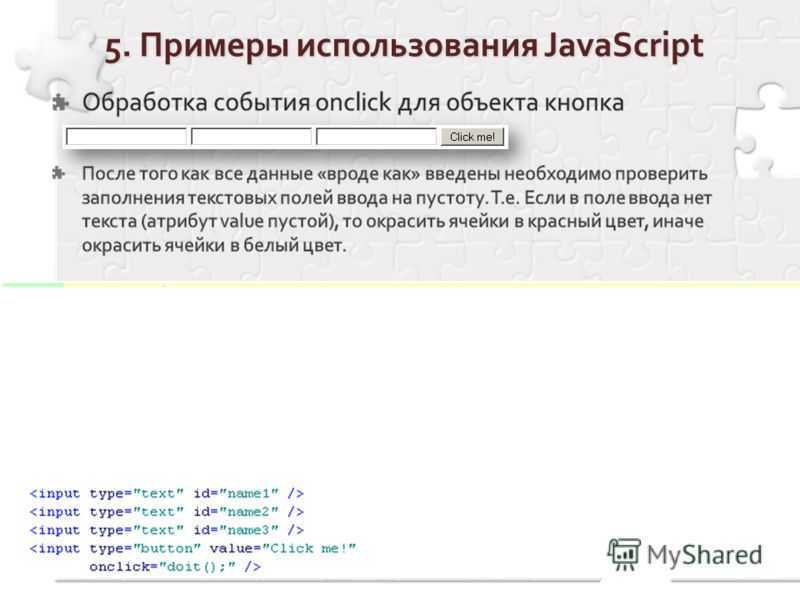
Этот исходный код HTML показывает текстовое поле и кнопку отправки.
Пользователи могут ввести имя в текстовое поле.
В приведенном выше примере используется атрибут события “onclick” в разметке для кнопки “Отправить”. Браузер вызывает функцию “showAlert()”, если пользователь нажимает кнопку “Отправить”.
Исходный код JavaScript
Давайте напишем приведенный ниже исходный код в файл —
Эта функция выполняет поиск текстового поля HTML с идентификатором “Полное имя”. Он извлекает вводимые пользователем данные и использует их для отображения сообщения.
Ожидаемые результаты
В действии веб-страница просит конечных пользователей ввести полное имя пользователя. Если вы введете “Джон Коллинз”, система покажет сообщение “Привет, Джон Коллинз!”.
Implementation of the method click()
1. When a function argument is given
In this type of implementation, a function is taken as an input and is executed whenever the method of click()is called.
- The writing of the code is between the script tag and within the HTML body of the code.
- The calling of the function is done as an h1 style attribute.
- An argument is declared with the function and is taken as a function separately.
- The method toggle is applied over the object using this operator with 1000ms delay.
- An example of the implementation method with a given function argument is shown below.
The output of the code will be “Clicking me will toggle the text!”
Learn Software Development Courses online from the World’s top Universities. Earn Executive PG Programs, Advanced Certificate Programs, or Masters Programs to fast-track your career.
2. When no argument is given
The javascript onclick method fires an event of onclick. An element is already assigned to the method. Therefore an element can call the event onclick of another element separately. This can be achieved through the following steps:
- An object has to be declared first with an attribute of a particular style that is clickable. An onclick action has to be declared for the object.
- A block of script is to be created in the code’s body where the attribution of the method click() is done to a format of different style, p.
- The h1 onclick method which is already defined is to be called within the function call.
- The same onclick method is then called upon for an attribute.
- An example of a code showing the implementation of a click() method without a given argument is shown below.
The output of the code is “Clicking me will call an alert!”.
- Rendering an HTML button and adding text to the page on clicking of the button. Click() method is most commonly attached to a button, however, it can be attached to any other elements in a web page.
-
- A basic button is rendered with an id of “btn-primary” which is inside a <div> with an id of “main.
- Through the code, new content is to be displayed with a class of “new content” in the <p> tag after the clicking of the button.
- The jQuery is enclosed within the <script> tags.
-
- The method click()is attached to the button’s id and an argument is taken as a call back function which is an anonymous function.
- The string “Button clicked” is returned by the callback function.
-
- The code will start with the button inside the <div> “main”.
- Once when the button is clicked, the callback function will be called by the event handler as click() method is attached to the button selector.
- The string “Button clicked” will be displayed.
- The above code will render the content only once, however for displaying the string every time the code is clicked, append() is used instead of HTML().
-
- It will produce the string three times as the new content inside the <p> tag.
- The callback function is called each time the button is clicked.
Как вызвать функцию JavaScript с помощью обработчиков событий в HTML
Мы разработаем веб-страницу, которая будет принимать имена своих пользователей. Как только пользователь нажмет кнопку “Отправить”, на веб-сайте появится поздравительное сообщение для пользователя.
Здесь мы будем использовать свойство обработчика событий JavaScript “onclick” для вызова функции JavaScript, когда пользователь нажимает кнопку “Отправить”.
Исходный код HTML
Ты можешь написать или скопировать исходный код HTML ниже в свой HTML-документ, . Этот исходный код HTML показывает текстовое поле и кнопку отправки. Пользователи могут ввести имя в текстовое поле.
Исходный код JavaScript
Ты можешь написать или скопировать приведенный ниже исходный код в свой файл JavaScript,
В этом примере обработчик событий onclick вызывает функцию showAlert(). Этот вызов функции происходит, когда вы нажимаете кнопку отправки HTML.
Ожидаемые результаты
Если вы введете имя “Джон” и нажмете кнопку “Отправить”, система покажет сообщение — “Привет, Джон!”.
Общая информация
Кнопка — один из самых распространенных элементов управления в программировании. Наследуется от TextView и является базовым классом для класса СompoundButton. От класса CompoundButton в свою очередь наследуются такие элементы как CheckBox, ToggleButton и RadioButton. В Android для кнопки используется класс android.widget.Button. На кнопке располагается текст и на кнопку нужно нажать, чтобы получить результат. Альтернативой ей может служить компонент ImageButton (android.widget.ImageButton), у которого вместо текста используется изображение.
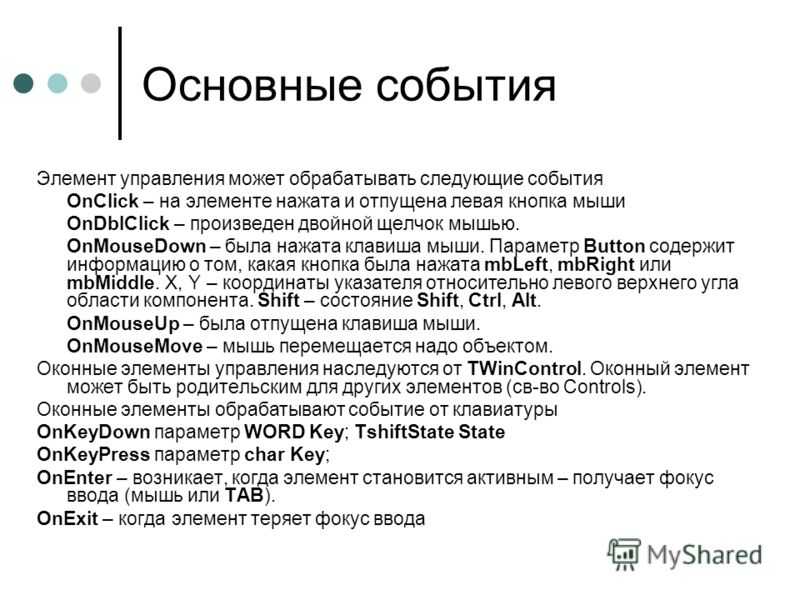

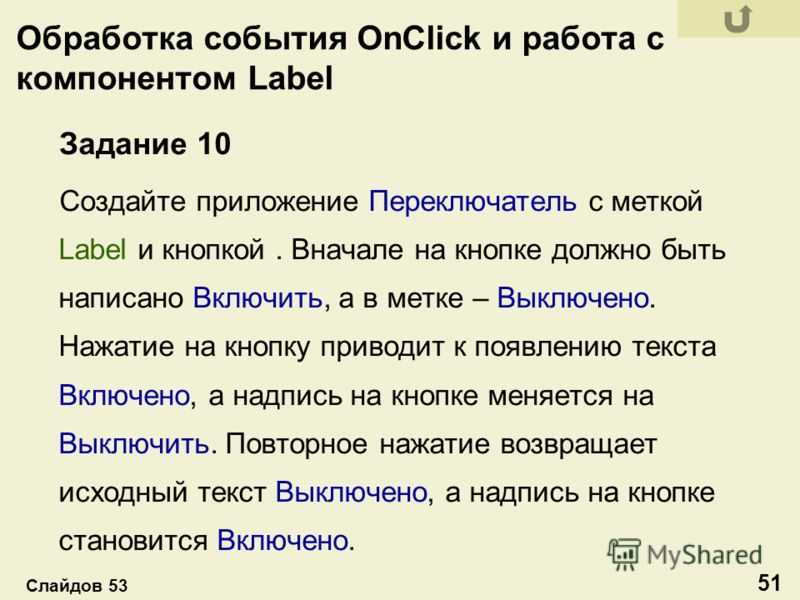
В студии кнопка представлена компонентом Button в разделе Widgets. Управлять размером шрифта, цветом текста и другими свойствами можно через атрибут textAppearance, который задействует системные стили. Выпадающий список данного свойства содержит огромный перечень вариантов. Также вы можете вручную задать конкретные индивидуальные настройки через отдельные свойства.
Если вы растягиваете кнопку по всей ширине экрана (android:layout_width=»match_parent»), то дополнительно рекомендую использовать атрибут android:layout_margin (или родственные ему layout_marginRight и layout_marginLeft) для создания отступов от краев экрана (веб-мастера знакомы с этими терминами).
Так как кнопка является наследником TextView, то использует многие знакомые атрибуты: textColor, textSize и др.
The onclick event is a DOM event that occurs when a user clicks on an element.
The Document Object Model (DOM) is created by the browser when a web page is loaded. This is a data structure representing the page as a series of nodes and objects. Representing the page in a DOM makes it easier for programs to interact with and manipulate the page.
DOM events are signals that are sent when specific events occur on the page. There are many types of DOM events, and they allow JavaScript to intervene and execute custom code in response to events as they occur. An event can be added in the HTML page or directly through JavaScript.
The onclick event occurs when a user clicks on an element with an assigned onclick event .
Пример: Onclick в JavaScript
object
Чтобы это понять, нам понадобится кнопка… button
<button id=»onclick_v_javascript»>Это второй способ реализации Onclick в JavaScript</button>
buttonidquerySelector-adocument.querySelector(«#onclick_v_javascript»).onclick = function(){alert(«Это второй способ реализации Onclick в JavaScript»);};
Соберем все вместе:
<button id=»onclick_v_javascript»>Это второй способ реализации Onclick в JavaScript</button>
<script>document.querySelector(«#onclick_v_javascript»).onclick = function(){alert(«Это второй способ реализации Onclick в JavaScript и вывод через alert»);}; </script>
Результат:
Это второй способ реализации Onclick в JavaScript
Пример кодирования для вызова функции JavaScript с использованием слушателей событий
Мы разработаем веб-страницу, которая будет принимать имена своих пользователей. Как только пользователь нажмет кнопку “Отправить”, на веб-сайте появится поздравительное сообщение для пользователя.
Здесь мы будем использовать слушатель событий JavaScript для вызова функции JavaScript, когда пользователь нажимает кнопку “Отправить”.
Исходный код HTML
Ты можешь написать или скопировать исходный код HTML ниже в свой HTML-документ, . Этот исходный код HTML показывает текстовое поле и кнопку отправки. Пользователи могут ввести имя в текстовое поле.
Исходный код JavaScript
Внешний файл JavaScript, должен иметь исходный код ниже —
Когда пользователь нажимает кнопку “Отправить”, браузер выполняет два вызова функций. Это функции “showAlert()` и “Showwelcomemessage()”.
Ожидаемые результаты
Если вы введете Джона в качестве ввода и нажмете кнопку “Отправить”, система должна отобразить два сообщения друг за другом:
- Привет, Джон!
- Добро пожаловать, Джон!
What are synthetic events in React?
React implements a synthetic events system that brings consistency and high performance to React apps and interfaces. It achieves consistency by normalizing events so that they have the same properties across different browsers and platforms.
A synthetic event is a cross-browser wrapper around the browser’s native event. It has the same interface as the browser’s native event, including and , except the events work identically across all browsers.
It achieves high performance by automatically using event delegation. In actuality, React doesn’t attach event handlers to the nodes themselves. Instead, a single event listener is attached to the root of the document. When an event is fired, React maps it to the appropriate component element.
Possible mistakes
If you’re starting to work with events – please note some subtleties.
We can set an existing function as a handler:
But be careful: the function should be assigned as , not .
If we add parentheses, then becomes a function call. So the last line actually takes the result of the function execution, that is (as the function returns nothing), and assigns it to . That doesn’t work.
…On the other hand, in the markup we do need the parentheses:
The difference is easy to explain. When the browser reads the attribute, it creates a handler function with body from the attribute content.
So the markup generates this property:
Don’t use for handlers.
Such a call won’t work:
DOM-property case matters.
Assign a handler to , not , because DOM properties are case-sensitive.
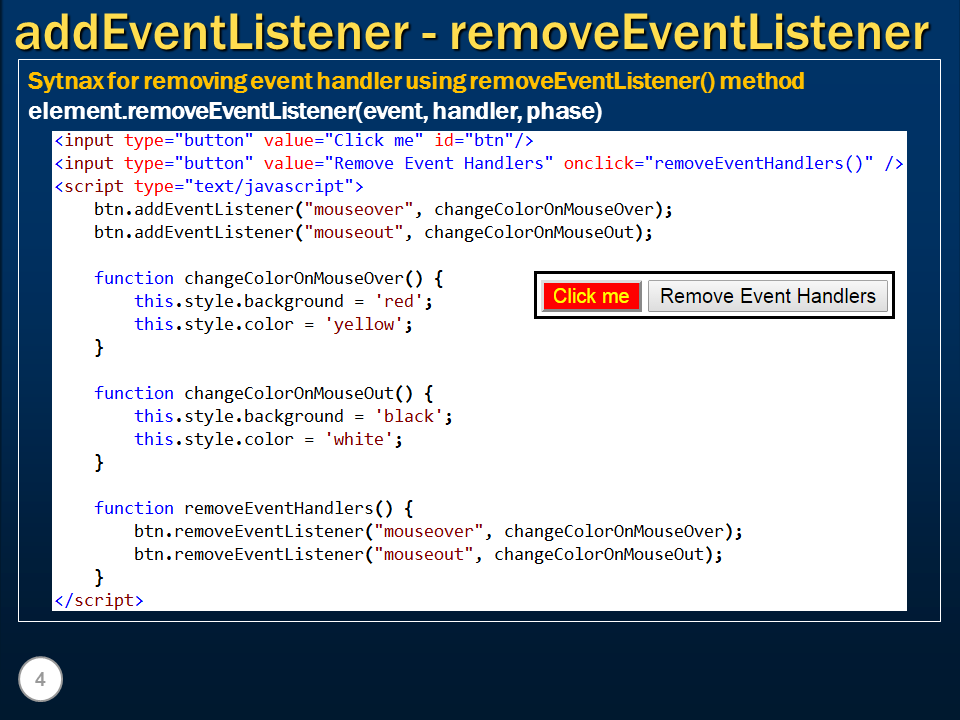
Несколько обработчиков одного и того же события
В javascript можно назначать НЕСКОЛЬКО обработчиков одного и того же события. Для этого используются методы:
addEventListener — добавление обработчика
removeEventListener — удаление обработчика
Пример: Щелкнув по кнопке вызвать диалоговое окно со словом Ура!. Выполнить задание, используя метод addEventListener.
Решение:
- html код:
<input type="button" value="кнопка" id="MyElem"> |
скрипт:
<script>
function message() {
	alert('Ура!');
}
let input = document.getElementById("MyElem");
input.addEventListener("click", message);
</script>
|
Пример: В предыдущем задании удалить добавленный обработчик с кнопки, используя метод removeEventListener.
Решение:
<script>
function message() {
	alert('Ура!');
}
let input = document.getElementById("MyElem");
input.addEventListener("click", message);
input.removeEventListener("click", message);
</script>
|
Всплытие и погружение события
obj.onevent = function(e) {/*...*/}
// где e - объект события
// e.target - элемент, на котором произошло событие
|
Резюме
- Вы можете обрабатывать события, передавая функцию в качестве пропса элементу, такому как .
- Обработчики событий должны передаваться, а не вызываться. , а не .
- Вы можете определить функцию обработчика событий отдельно или встроенную (инлайн).
- Обработчики событий определяются внутри компонента, поэтому они могут получить доступ к пропсам.
- Вы можете объявить обработчик событий в родительском элементе и передать его в качестве пропса дочернему элементу.
- Вы можете определить свои собственные пропсы обработчика событий с именами, специфичными для приложения.
- События распространяются вверх. Вызовите для первого аргумента, чтобы это предотвратить.
- События могут иметь нежелательное поведение браузера по умолчанию. Вызовите , чтобы это предотвратить.
- Явный вызов пропса обработчика событий из дочернего обработчика является хорошей альтернативой распространению события.
Window
Window Object
addeventlistener()
alert()
atob()
blur()
btoa()
clearInterval()
clearTimeout()
close()
closed
confirm()
console
defaultStatus
document
focus()
frameElement
frames
history
getComputedStyle()
innerHeight
innerWidth
length
localStorage
location
matchMedia()
moveBy()
moveTo()
name
navigator
open()
opener
outerHeight
outerWidth
pageXOffset
pageYOffset
parent
print()
prompt()
removeEventlistener()
resizeBy()
resizeTo()
screen
screenLeft
screenTop
screenX
screenY
scrollBy()
scrollTo()
scrollX
scrollY
sessionStorage
self
setInterval()
setTimeout()
status
stop()
top
Window Console
assert()
clear()
count()
error()
group()
groupCollapsed()
groupEnd()
info()
log()
table()
time()
timeEnd()
trace()
warn()
Window History
back()
forward()
go()
length
Window Location
assign()
hash
host
hostname
href
origin
pathname
port
protocol
reload()
replace()
search
Window Navigator
appCodeName
appName
appVersion
cookieEnabled
geolocation
javaEnabled()
language
onLine
platform
product
taintEnabled()
userAgent
Window Screen
availHeight
availWidth
colorDepth
height
pixelDepth
width
Вешаем onclick на элемент из javascript-кода
Рассмотим еще один способ, на мой взгляд, самый практичный и надежный. Хорош он тем, что событие можно повесить на множество элементов. Для этого требуется выбрать при помощи javascript-селекторов элементы, к которым требуется применить событие onclick.
Код в действии:
Нажмите на ссылку:
Выбору элементов по селекторам можно посвятить отдельную тему, могу сказать только то, что согласно новой спецификации HTML5, их выбор стал прост и в javascript. Если Вы знакомы с jquery или CSS, то выбрать нужные элементы для Вас не составит труда. Например, так просто можно выбрать все элементы с классом «link» и повесить на них нужное действие:
//выбираем нужные элементы
var a = document.querySelectorAll('.link');

//перебираем все найденные элементы и вешаем на них события
[].forEach.call( a, function(el) {
    //вешаем событие
    el.onclick = function(e) {
        //производим действия
    }
});
How to use an onClick event?
First, you must select the element to which you want to add the onClick event. For our button example, we would use the <button> element.
Next, add an attribute to your element. This attribute is called onClick. This attribute’s value is the code you want to run when the element is clicked.
Here’s what our code would look like with the onClick event added:
<button onClick=»alert(‘Hello, world!’)»>Click me!</button>
When a user clicks on this button, they will see an alert popup that says, «Hello, world!» You can change the message to anything you want.
You’re not limited to just displaying a message, either. You can also use the onClick event to run other javascript code. For example, you could redirect the user to another page using the following code:
<button onClick=»window.location = ‘http://www.example.com'»>Click me!</button>
This button would redirect the user to www.example.com when clicked.
As you can see, the onClick event is a powerful way to add interactivity to your website. There are endless possibilities for what you can do with it!
Adding an onclick event to an HTML document
The following code defines a function, greet(), that prints ‘Hey there clicker!’ to the console:
JavaScript
function greet() {
    console.log('Hey there clicker!');
}
We can set an HTML Button to invoke this function when the button is clicked
The example below shows how an onclick event is assigned directly in the HTML document:
HTML
<button onclick="greet()">Click me</button>
The above code displays a button on the user’s screen with the text ‘Click me’. When clicked, function greet() will be invoked and ‘Hey there clicker!’ will be printed to the console.
The example above uses a function declaration. The same result can be achieved with a :
JavaScript
const greeting = function greet() {
    console.log('Hey there clicker!');
}
The code above uses a function expression to store the handler function in a variable – const greeting.
To invoke the handler, we use the name of the variable – and not that of the function – when defining the onclick event handler. The function could also have been when defined.
HTML
<button onclick="greeting()">Click me</button>
The above example assigns the variable const greeting as the onclick handler for the ‘Click me’ button.
Learn more about JavaScript functions by following this link.
Note: To invoke a function expression, the parentheses must appear after the variable’s name!
JavaScript onClick Event Example
Now that we’ve gone over the basics of the onClick event, let’s look at an example.
In this example, we’re going to create a button that, when clicked, will change the color of the text on the page. To do this, we’ll need to use two things:
-
The onClick event
-
The javascript function document.getElementById()
The onClick event will be used to run a function when the button is clicked. The document.getElementById() function will be used to get an element on the page so that we can change its style.
Here’s what our code will look like:
See the Pen Untitled by HubSpot (@hubspot) on CodePen.
Let’s break this down piece by piece.
First, we have our button:
<button onClick=»changeColor()»>Click me!</button>
This button has the onClick event added to it. The value of the onClick event is the changeColor() function. This means that when the button is clicked, the changeColor() function will run when the button is clicked.
Next, we have our javascript code:
<script> function changeColor() { document.getElementById(‘myText’).style.color = ‘red’; } </script>
This is the code that will run when our button is clicked. First, we create a function called changeColor(). This function doesn’t take any arguments.
Inside our changeColor() function, we use the document.getElementById() function to get an element on the page. In this case, we’re getting the element with the id of «myText».
Once we have our element, we can change its style. In this example, we’re changing the color property to red. This will make the text red.
Finally, we have our element:
<p id=»myText»>This is some text.</p>
This is a simple paragraph element. The only thing different about this element is that it has an id attribute. The document will use this id attribute.getElementById() function to find the element on the page.
And that’s it! When you run this code, you should see a button and some text on the page. When you click the button, the text should turn red.
Suggested Blogs
Blogs
1725
12 Interesting Computer Science Project Ideas & Topics For Beginners
Summary:
In this article, you will learn 12 Interesting Computer Science Project Ideas & Topics For Beginners (2023).
Face detection
Online auct
Read More
by Pavan Vadapalli
29 Aug 2023
Blogs
121814
Best Jobs in IT without Programming
Summary
In this article, you will learn about the best jobs in IT without programming. Take a glimpse.
IT Project Manager
IT Support Specialist
User
Read More
by Sriram
28 Aug 2023
Blogs
5369
AWS Lambda Tutorial for Beginners: Complete Tutorial
With the development of cloud technology, AWS Lambda has become the most widely used serverless architecture. One of the examples of cloud service pro
Read More
by Sriram
28 Aug 2023
Blogs
955
How To Become a UI/UX Designer? A Detailed Step-by-Step Guide in 2023
A UI/UX Designer’s job involves creating visually appealing interfaces for digital products. These products include mobile apps, software, and website
Read More
by Pavan Vadapalli
10 Aug 2023
Blogs
922
Career in Mobile Web Development: How to Become a Mobile Web Developer?
Why a career in Mobile Web Development?
With the increasing use of smartphones and mobile devices, the demand for mobile-friendly websites and applic
Read More
by Pavan Vadapalli
10 Aug 2023
Blogs
1012
Top 10 AI Tools for Programmers in 2023
A survey conducted by GitHub staff revealed 92% of US-based developers have advocated using AI for software development, and 70% expect to make the co
Read More
by Pavan Vadapalli
02 Aug 2023
Blogs
2201
Top Interesting Final Year Computer Science Project Ideas & Topics
Computer science is a multidisciplinary domain with varied interest areas. Choosing an apt project topic is vital to ensure a learner’s success as it
Read More
by Pavan Vadapalli
09 Jul 2023
Blogs
5025
Top Interesting Final Year Computer Science Project Ideas & Topics
Computer science is a multidisciplinary domain with varied interest areas. Choosing an apt project topic is vital to ensure a learner’s success as it
Read More
by Pavan Vadapalli
09 Jul 2023
Blogs
5925
Top 20 System Administrator Skills To Master in 2023
Introduction
System administrators are crucial in ensuring the smooth operation of computer systems and networks in today’s technology-driven world.
Read More
by Keerthi Shivakumar
30 Jun 2023
Load More
Применяем jQuery
Если в проекте используется библиотека jQuery, то можно ещё упростить код. Рассмотрим два самых распространенных способа:
$(function(){
    $(".link").click(function() {
        //действия
    });
});
И ещё один вариант, который идентичен предыдущему.
$(function(){
    $(".link").on("click", function(){
        //действия
    });
});
С обработчиком «on()» лучше ознакомиться отдельно, так как он несет в себе много полезного функционала. Например, возможность указать через пробел несколько событий к которым будет применяться действие, делегировать события на дочерние элементы, а так же он полезен если необходимо повесить событие на динамически добавляемые элементы, которых изначально нет на странице.


Как добавить событие onclick в HTML-код
Шаг 1: Выберите элемент для добавления события onclick
Первой вещью, которую нужно сделать, это выбрать элемент, на который вы хотите добавить событие onclick. Это может быть любой HTML-элемент, такой как <button>, <a>, <img> или <div>.
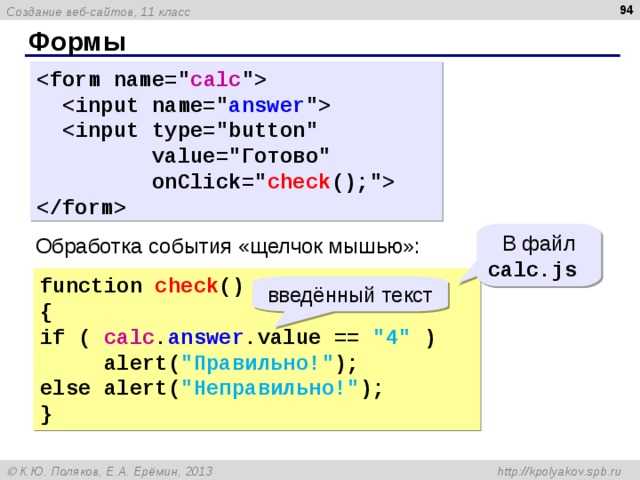
Шаг 2: Определите функцию для обработки события onclick
После выбора элемента, следующим шагом будет определить функцию, которая должна быть выполнена, когда происходит событие onclick. Эта функция может быть определена в параметрах элемента через атрибут onclick или в отдельном скрипте на странице.
Шаг 3: Привяжите функцию к элементу
Наконец, необходимо связать функцию с выбранным элементом, чтобы она была выполнена при клике на элемент. Это можно сделать, добавив атрибут onclick к элементу и указав имя функции внутри кавычек, как показано в следующем примере:
Где myFunction() — это имя функции, которую вы определили для обработки события onclick.
Также можно связать функцию с элементом с помощью JavaScript, используя метод addEventListener. Этот метод должен быть выполнен после загрузки страницы и позволяет добавить обработчик события к элементу, как показано в следующем примере:
Где myButton — это id выбранного элемента, а myFunction — это функция, которую вы определили для обработки события onclick.
- Следуя этим шагам, вы можете легко добавить событие onclick в любой HTML-элемент на вашей странице.
- Обязательно убедитесь, что имя функции, которую вы определяете для обработки события onclick, существует и объявлено в вашем JavaScript-коде.
- Также убедитесь, что код JavaScript подключен к вашей HTML-странице.