

The value Attribute
The input value attribute indicates an underlying value for an input field:
ExampleInput fields with initial (default) values:
<!DOCTYPE html>
<html>
<body>

<h1>The input value attribute</h1>

<p>The value attribute specifies an initial value for an input field:</p>

<form action="/action_page.php">
  <label for="fname">First name:</label><br>
  <input type="text" id="fname" name="fname" value="Salman"><br>
  <label for="lname">Last name:</label><br>
  <input type="text" id="lname" name="lname" value="Khan"><br><br>
  <input type="submit" value="Submit">
</form>

</body>
</html>
The autocomplete Attribute
The input autocomplete attribute indicates whether a form or an input field ought to have autocomplete on or off.
Autocomplete allows the browser to predict the value. At the point when a user begins to type in a field, the browser should show alternatives to fill in the field, based on earlier typed values.
ExampleAn HTML form with autocomplete on, and off for one input field:
<form action="/action_page.php" autocomplete="on">
  <label for="fname">First name:</label>
  <input type="text" id="fname" name="fname"><br><br>
  <label for="lname">Last name:</label>
  <input type="text" id="lname" name="lname"><br><br>
  <label for="email">Email:</label>
  <input type="email" id="email" name="email" autocomplete="off"><br><br>
  <input type="submit" value="Submit">
</form>
Tip: In some browsers you may need to activate an autocomplete function for this to work (Look under “Preferences” in the browser’s menu).
HTML Form and Input Elements
| Tag | Description |
| <form> | Defines an HTML form for user input |
| <input> | Defines an input control |
Thanks for reading! We hope you found this tutorial helpful and we would love to hear your feedback in the Comments section below. And show us what you’ve learned by sharing your projects with us.
Number Field
The number field can take text input and validate that the input is a valid number.
The browser may assist the user by showing a numeric keyboard, e.g. on a mobile phone.
You specify that an input field is a number field using the
attribute, like this:
<input type="number" name="numberField"/>
Here is a live example. Try typing in a number,
press enter, and see what they browser says.
Number Field Attributes
Number fields have three attributes extra they can use which affect what numbers that can
be chosen. These attributes are:
- min
- max
- step
The attribute sets the minimum number accepted by the field. The
similarly sets the maximum accepted number. The
attribute sets the number of steps the number i the number field should increase
when clicking the arrow up and down in the field. Here is a code example:
<input type="number" name="numberField"
    min="10" max="20" step="2" />
Here is a live example. Try clicking the arrows and see what happens.
Related Resources
- How to Create Button with Line Breaks
- How to Add an HTML Button that Acts Like a Link
- How to Create Mailto Forms
- Input Types for HTML Forms
- How To Change the Color of an HTML5 Input Placeholder Using CSS
- How to Change Default Text Selection Color Using CSS
- How to Disable Text Selection, Copy, Cut, Paste and Right-click on a Web Page
- How to Disable the Browser Autocomplete and Autofill on HTML Form and Input Fields
- How to Remove and Style the Border Around Text Input Boxes in Google Chrome
- How to Style Buttons with CSS
- How to Create Search Boxes
- How to Disable Zoom on a Mobile Web Page With HTML and CSS
- How to Style a Checkbox with CSS
- How to Create Range Slider With HTML5 and jQuery
- How to Create Contact Form With CSS
- How to Create a Responsive Login Form in Navbar with CSS
- How to Create a Fullscreen Image Slider with Pure CSS
- How to Align a Checkbox and Its Label Consistently Cross-Browsers
- How to Know which Radio Button is Selected using jQuery
- How to Make the Content of Input Start from the Right
- How to Change the Input and Button Images with CSS
- How to Auto-Hide a Placeholder Text on Focus with CSS and jQuery
- How to Align the Placeholder Text of an Input Field in HTML
- How to Control the Width of the <label> Tag
- How to Match an Empty Input Box with CSS
- How to Get the Value of Selected Option in a Select Box
- How to Get the Value of Text Input Field Using JavaScript
- How to Create Checkbox with a Clickable Label
- How to Check a Radio Button with jQuery
- What is the Difference Between the «id» and «name» Attributes
- How to Use the «required» Attribute with the Radio Input Field
- How to Apply CSS Style to the Element Name
- How to Make the Text Input Non-Editable
- How to Add an Onclick Effect with HTML and CSS
- How to Remove Focus Around Buttons on Click
- How to Change Selected Value of a Drop-Down List Using jQuery
- How to Reset File Input with jQuery
- How to Allow Only Positive Numbers in the Input Number Type
- How to Create a Glowing Border Around an Input Field
- How to Check and Uncheck Checkbox with JavaScript and jQuery
- How to Use the HTML <fieldset> Tag
- How to Set Default HTML Form Focus Without Javascript
- How to Hide the HTML5 Number Input’s Arrow Buttons
- What is aria-label and How to Use It
- How to Allow the File Input Type to Accept Only Image Files
- How to Select All Text in HTML Text Input When Clicked Using JavaScript
- How to Uncheck a Radio Button
- How to Get the Value of a Textarea using jQuery
- How to Align Labels Next to Inputs
- How to Assign a Checked Initial Value to the Radio Button
- How to Style Input and Submit Buttons
- Is It Possible to Nest an HTML <button> Element Inside an <a> Element in HTML5
- Why and How the Bootstrap sr-only Class is Used
- How to Set a Minlength Validation in HTML5
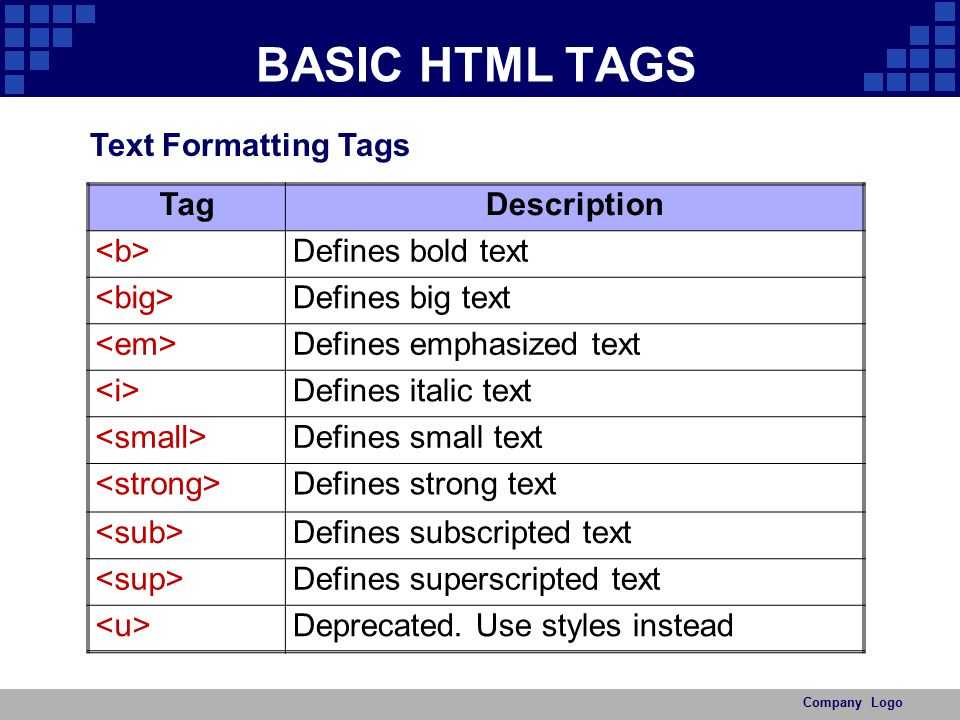
How to style tag?
Common properties to alter the visual weight/emphasis/size of text in <input> tag:
- CSS font-style property sets the style of the font. normal | italic | oblique | initial | inherit.
- CSS font-family property specifies a prioritized list of one or more font family names and/or generic family names for the selected element.
- CSS font-size property sets the size of the font.
- CSS font-weight property defines whether the font should be bold or thick.
- CSS text-transform property controls text case and capitalization.
- CSS text-decoration property specifies the decoration added to text, and is a shorthand property for text-decoration-line, text-decoration-color, text-decoration-style.
Coloring text in <input> tag:
- CSS color property describes the color of the text content and text decorations.
- CSS background-color property sets the background color of an element.
Text layout styles for <input> tag:
- CSS text-indent property specifies the indentation of the first line in a text block.
- CSS text-overflow property specifies how overflowed content that is not displayed should be signalled to the user.
- CSS white-space property specifies how white-space inside an element is handled.
- CSS word-break property specifies where the lines should be broken.
Other properties worth looking at for <input> tag:
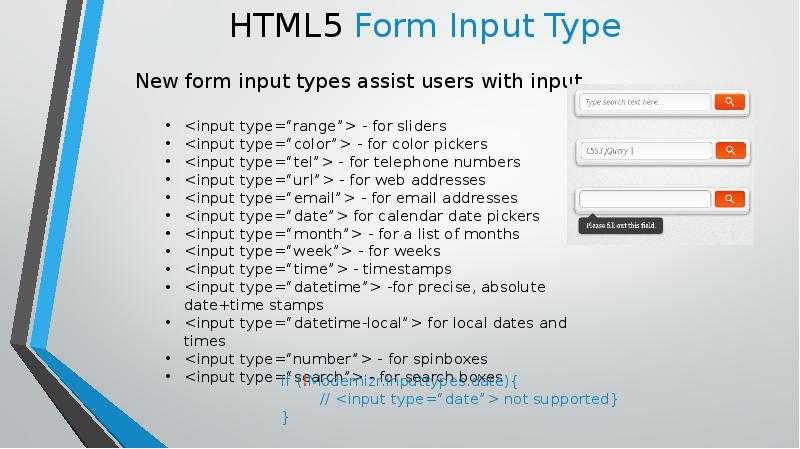
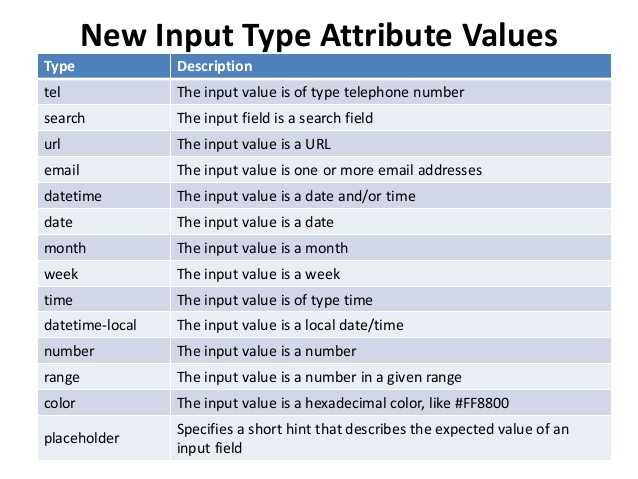
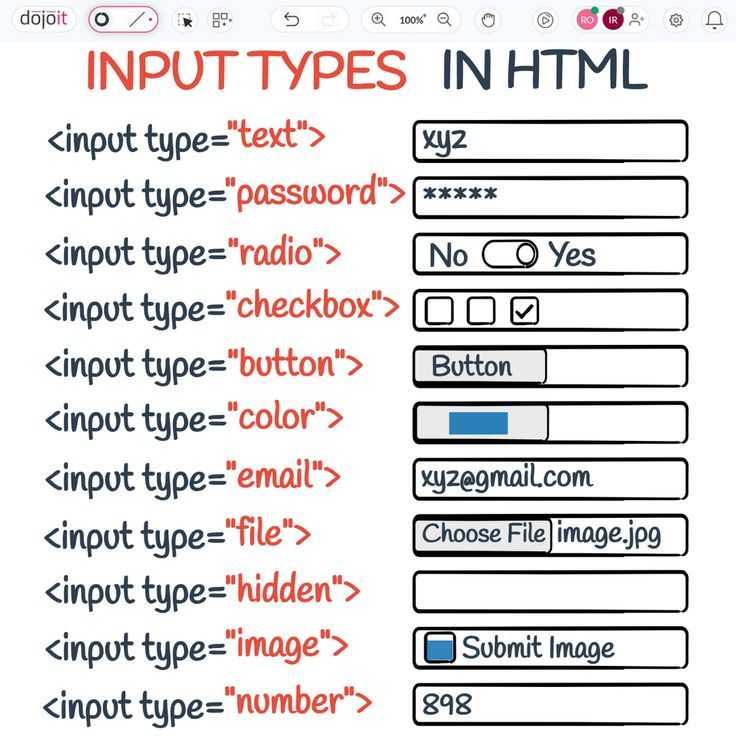
Values of the type attribute
| Value | Description |
|---|---|
| button | Defines the active button. |
| checkbox | Check the boxes (the user can select more than one of the options). |
| color | Specifies a color palette (user can select color values in hexadecimal). |
| date | Defines the input field for calendar date. |
| datetime | Defines the input field for date and time. |
| datetime-local | Defines the input field for date and time without a time zone. |
| Defines the input field for e-mail. | |
| file | Sets the control with the Browse button, clicking on which you can select and load the file. |
| hidden | Defines a hidden input field. It is not visible to the user. |
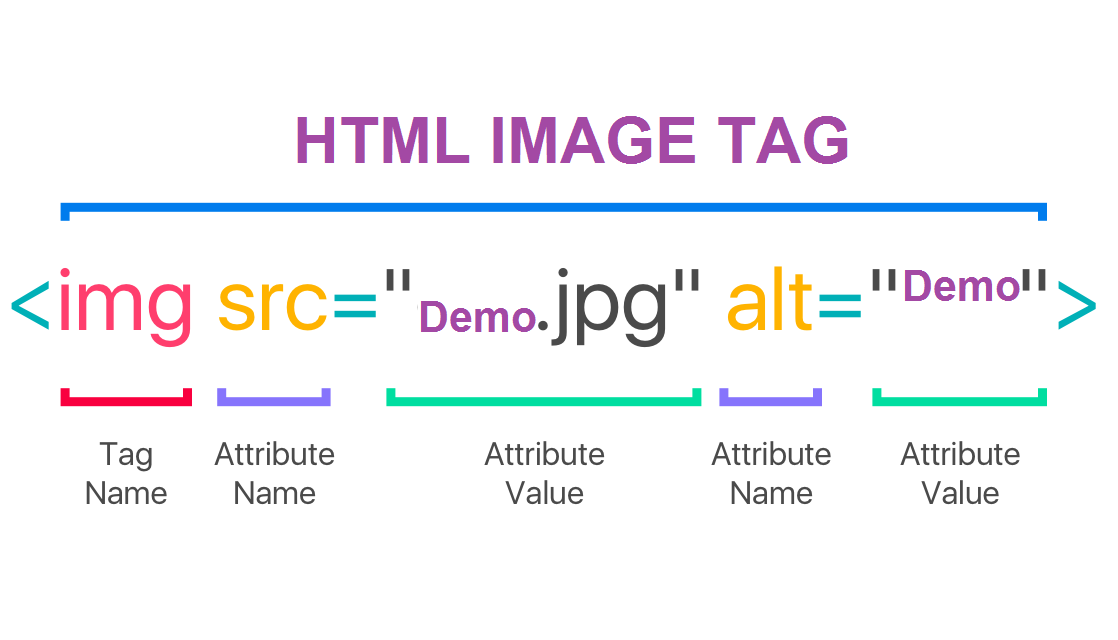
| image | Indicates that an image is used instead of a button to send data to the server. The path to the image is indicated by the src attribute. The alt attribute can also be used to specify alternative text, the height and width attributes to specify the height and width of the image. |
| month | Defines the field of selecting a month, after which the data will be displayed as year-month (for example: 2018-07). |
| number | Defines the input field for numbers. |
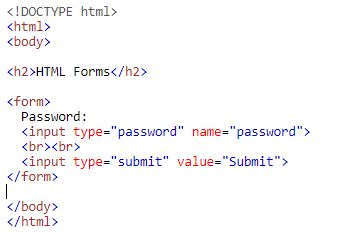
| password | Defines a field for entering a password (the entered characters are displayed as asterisks, dots or other characters). |
| radio | Creates radio button (when choosing one radio button all others will be disabled). |
| range | Creates a slider to select numbers in the specified range. The default range is from 0 to 100. The range of numbers is specified by the min and max attributes. |
| reset | Defines a button for resetting information. |
| search | Creates a text field for search. |
| submit | Creates a button of submitting the form data (“submit” button). |
| text | Creates a single line text field. |
| time | Specifies a numeric field for entering time in a 24-hour format (for example, 13:45). |
| url | Creates an input field for URL. |
| week | Creates a field for selecting the week, after which the data will be displayed as year-week (for example: 2018-W25). |
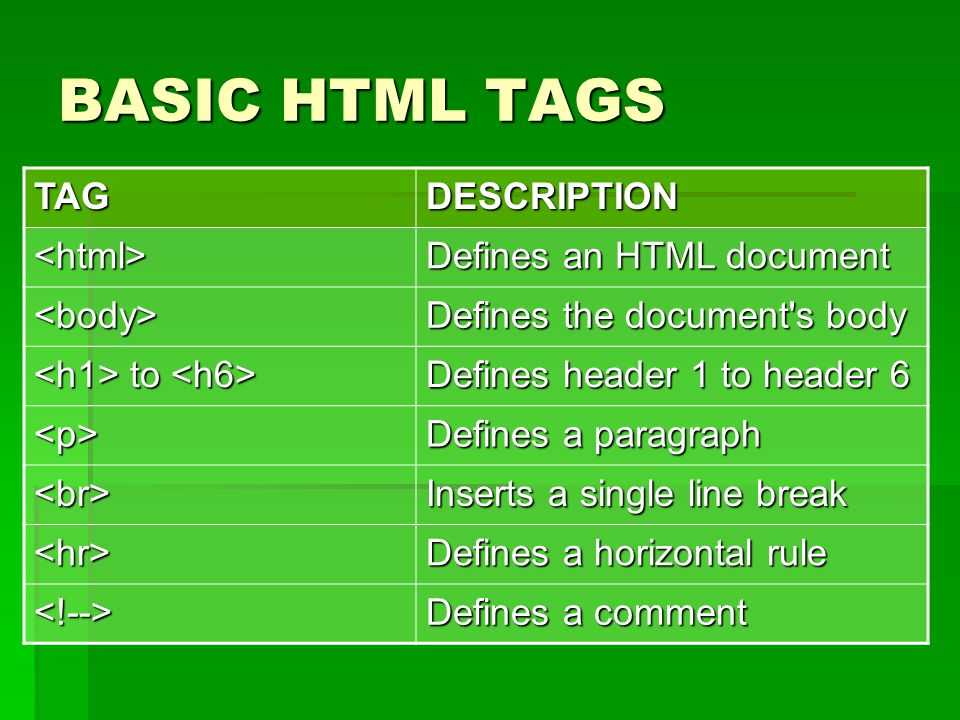
HTML Теги
<!—…—><!DOCTYPE><a><abbr><acronym><address><applet><area><article><aside><audio><b><base><basefont><bdi><bdo><big><blockquote><body><br><button><canvas><caption><center><cite><code><col><colgroup><data><datalist><dd><del><details><dfn><dialog><dir><div><dl><dt><em><embed><fieldset><figcaption><figure><font><footer><form><frame><frameset><h1> — <h6><head><header><hr><html><i><iframe><img><input><ins><kbd><label><legend><li><link><main><map><mark><meta><meter><nav><noframes><noscript><object><ol><optgroup><option><output><p><param><picture><pre><progress><q><rp><rt><ruby><s><samp><script><section><select><small><source><span><strike><strong><style><sub><summary><sup><svg><table><tbody><td><template><textarea><tfoot><th><thead><time><title><tr><track><tt><u><ul><var><video>
HTML Справочник
HTML Теги по алфавитуHTML Теги по категорииHTML ПоддержкаHTML АтрибутыHTML ГлобальныеHTML СобытияHTML Названия цветаHTML ХолстHTML Аудио/ВидеоHTML ДекларацииHTML Набор кодировокHTML URL кодHTML Коды языкаHTML Коды странHTTP СообщенияHTTP методыКовертер PX в EMКлавишные комбинации
HTML Теги
<!—…—>
<!DOCTYPE>
<a>
<abbr>
<acronym>
<address>
<applet>
<area>
<article>
<aside>
<audio>
<b>
<base>
<basefont>
<bdi>
<bdo>
<big>
<blockquote>
<body>
<br>
<button>
<canvas>
<caption>
<center>
<cite>
<code>
<col>
<colgroup>
<data>
<datalist>
<dd>
<del>
<details>
<dfn>
<dialog>
<dir>
<div>
<dl>
<dt>
<em>
<embed>
<fieldset>
<figcaption>
<figure>
<font>
<footer>
<form>
<frame>
<frameset>
<h1> — <h6>
<head>
<header>
<hr>
<html>
<i>
<iframe>
<img>
<input>
<ins>
<kbd>
<label>
<legend>
<li>
<link>
<main>
<map>
<mark>
<meta>
<meter>
<nav>
<noframes>
<noscript>
<object>
<ol>
<optgroup>
<option>
<output>
<p>
<param>
<picture>
<pre>
<progress>
<q>
<rp>
<rt>
<ruby>
<s>
<samp>
<script>
<section>
<select>
<small>
<source>
<span>
<strike>
<strong>
<style>
<sub>
<summary>
<sup>
<svg>
<table>
<tbody>
<td>
<template>
<textarea>
<tfoot>
<th>
<thead>
<time>
<title>
<tr>
<track>
<tt>
<u>
<ul>
<var>
<video>
<wbr>

The min and max Attributes
The input min and max attributes determine the minimum and maximum values for an input field.
The min and max attributes work with the accompanying input types: number, range, date, datetime-local, month, time and week.
Tip: Use the maximum and min attributes together to create a range of legal values.
ExampleSet a max date, a min date, and a range of legal values:
<form>
  <label for="datemax">Enter a date before 1980-01-01:</label>
  <input type="date" id="datemax" name="datemax" max="1979-12-31"><br><br>

  <label for="datemin">Enter a date after 2000-01-01:</label>
  <input type="date" id="datemin" name="datemin" min="2000-01-02"><br><br>

  <label for="quantity">Quantity (between 1 and 5):</label>
  <input type="number" id="quantity" name="quantity" min="1" max="5">
</form>
New Attributes
A set of new form field attributes have been added in HTML5 too. Each of them are covered in
the sections below.
autofocus
The attribute enables you to specify which field should be given
focus automatically when the page is loaded. You should have only one such field on any given
page. For instance, a search field, or one of the fields in a login box.
The attribute can be used with any type of form field. Here is an example:
<input type="text" name="comboBoxField" autofocus>
placeholder
The attribute provides a way to specify a value to show in
a form field before the user types anything into the field. Once the user starts typing,
the place holder value disappears.
The attribute can be used with any form field that takes
text input. Here is an example:
<input type="text" name="textField" placeholder="Type in here">
And live:
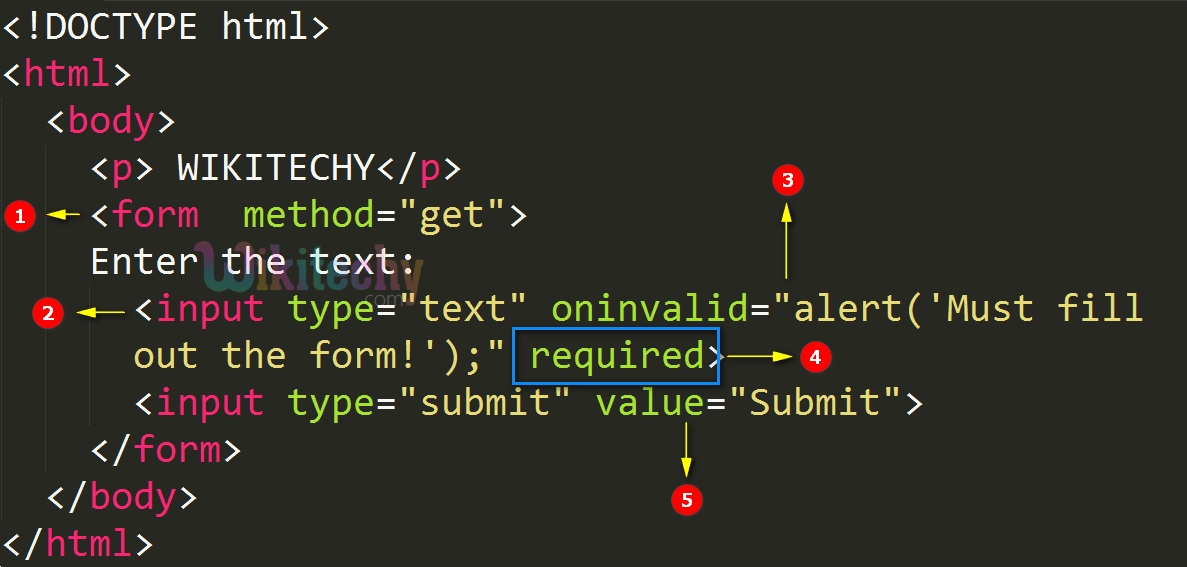
required
The attribute specifies that a given attribute is required.
The means, that the form cannot be submitted until a value has been entered into
the given field. Here is an example:
<input type="text" name="textField" required>
Notice that you don’t have to provide a value for the attribute. Its presence is enough.
pattern
The attributes enables you to specify a regular expression pattern that
a text type into a given input field must match. I will not explain regular expressions here.
Here is an example:
<input type="text" name="textField" pattern="">
This example sets a pattern that matches one character between A and Z, and number between
0 and 9.
The regular expression syntax used is the same as for JavaScript, but with an implicit
at the beginning, and a at the end. These two characters match
the beginning and end of the input, but now you don’t need to add them every time.
autocomplete
The attribute can be used to signal to the browser that it is
okay to auto complete the given input field. This is most likely not an attribute you
will use a lot.
min + max
The and attributes restrict the input allowed for an
input field. You can use these attributes to e.g. set the minimum and maximum number
allowed for a field, or the minimum and maximum date allowed
in a field.

You do not need to have both a and a attribute.
You can also just one of them — either the or
attribute.
step
The attribute is used to set how much e.g.
or fields increment with each click on the arrow buttons, or
movement of the slider.
The attribute can also be used with date fields with the
value , to specify that the time can be set with very fine
granularity (e.g. milliseconds).
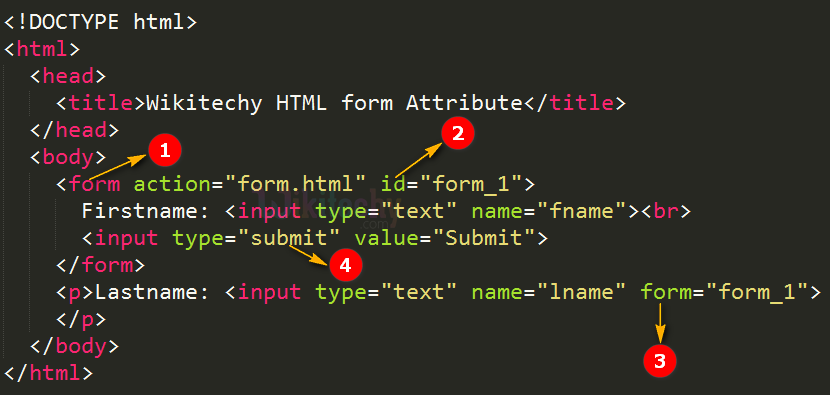
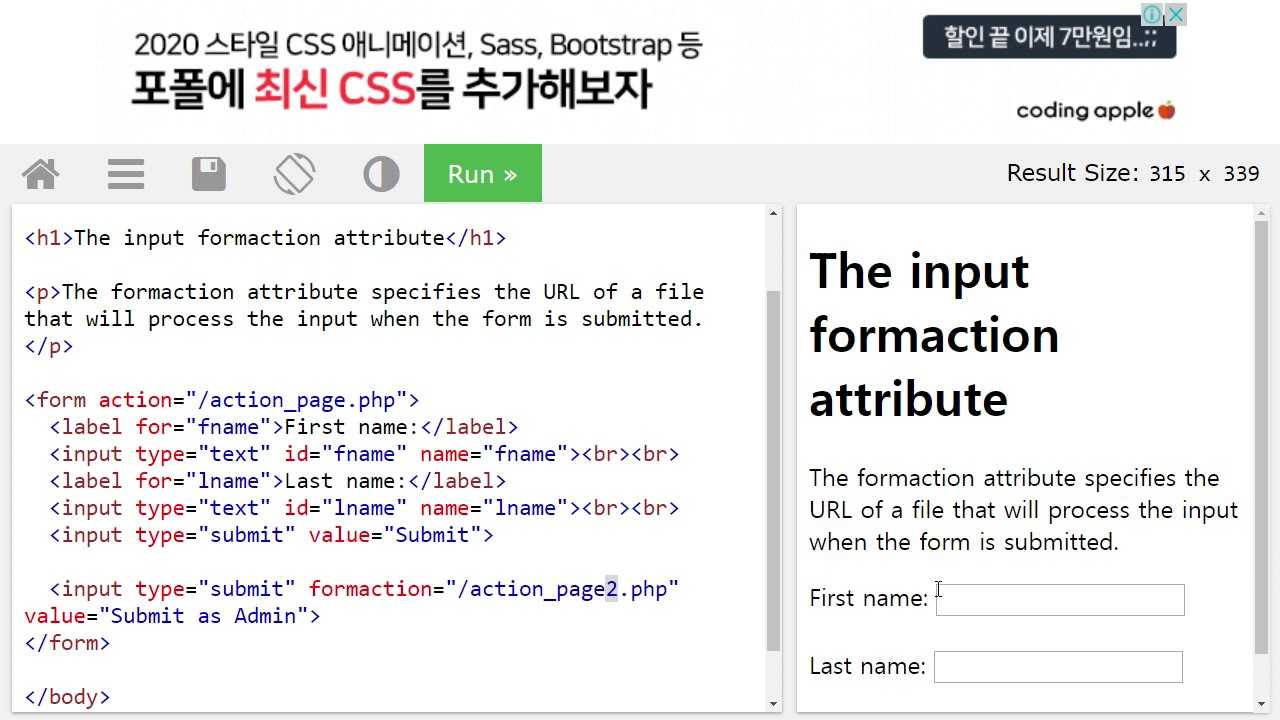
form
The attribute is used to associate form fields with a
element they are not nested inside. Here is an example:
<form id="theForm">
    <input type="text" >
</form>

<input type="range" form="theForm">
Notice the last field. It is placed outside the element.
The attribute of the field is pointing to the
of the element. That way the browser knows that this input field belongs to
that form, even if the input field is not nested inside the element.
The maxlength Attribute
The input maxlength attribute determines the maximum number of characters allowed in an info field.
Note: When a maxlength is set, the input field won’t acknowledge more than the predetermined number of characters. Nonetheless, this attributes doesn’t provide any feedback. Along these lines, assuming you need to alarm the user, you should write JavaScript code.
ExampleSet a maximum length for an input field:
<form>
  <label for="fname">First name:</label><br>
  <input type="text" id="fname" name="fname" size="50"><br>
  <label for="pin">PIN:</label><br>
  <input type="text" id="pin" name="pin" maxlength="4" size="4">
</form>
Range Fields
The range fields are used like number fields, but instead of having an arrow up and down to select the value,
you have a slider.
You specify that an input field is a range field using the
attribute, like this:
<input type="range" name="rangeField"/>
Here is a live example. Try moving the slider, and click the button to see the value of the range field.
As you can see, the value of the range field spans from 0 to 100.
Range Field Attributes
Range fields have three attributes extra they can use which affect what numbers that can
be chosen by the slider. These attributes are:
- min
- max
- step
The attribute sets the minimum number you can select. The
similarly sets the maximum number of the range. The
attribute sets the increment of the value in the range field when the slider is moved.
Here is a code example:
<input type="range" name="rangeField"
    min="100" max="200" step="2"/>
Here is a live example. Try moving the slider, and click the button to see the value of the range field.
As you can see, the values of the range field now vary between 100 and 200, in increments of 2.
The height and width Attributes
The input height and width attributes indicate the height and width of an <input type=”image”> element.
Tip: Always determine both the height and width attributes for pictures. In the event that height and width are set, the space needed for the picture is saved when the page is loaded. Without these attributes, the browser doesn’t know the the size of the picture, and can’t save the appropriate space to it. The effect will be that the page layout will change during loading (while the pictures load).

ExampleDefine an image as the submit button, with height and width attributes:
<form>
  <label for="fname">First name:</label>
  <input type="text" id="fname" name="fname"><br><br>
  <label for="lname">Last name:</label>
  <input type="text" id="lname" name="lname"><br><br>
  <input type="image" src="img_submit.gif" alt="Submit" width="48" height="48">
</form>
The step Attribute
The input step attribute determines the legal number intervals for an input field.
Example: if step=”3″, legal numbers could be – 3, 0, 3, 6, and so on
Tip: This attribute can be used along with the maximum and min attributes to create a range of legal values.
The step attribute works with the accompanying input types: number, range, date, datetime-local, month, time and week.
ExampleAn input field with a specified legal number intervals:
<form>
  <label for="points">Points:</label>
  <input type="number" id="points" name="points" step="3">
</form>
Note: Input limitations are not foolproof, and JavaScript provides numerous approaches to add illegal input. To securely confine input, it should likewise be checked by the receiver (the server)!