
Вот и все!
CSS-анимации – это отличный способ внедрить привлекательные элементы на веб-страницу и улучшить пользовательский опыт. В этом уроке по CSS-анимации на примерах рассмотрены составные части анимации в CSS. Это все, что необходимо для создания анимированных сайтов и веб-приложений, совместимых с браузерами. Чтобы провести тестирование CSS-анимации и веб-приложений на совместимость с браузерами, вы можете попробовать LambdaTest – облако кросс-браузерного тестирования, которое предлагает 3000+ браузеров и комбинаций ОС для тестирования ваших веб-сайтов и веб-приложений на совместимость с браузерами.

При работе с CSS-анимацией возможности безграничны. Но больше идей рождает более привлекательный дизайн, и мы приветствуем все эти предложения от наших читателей. Прокомментируйте ниже ваши проекты CSS-анимации и помогите сообществу разработчиков усовершенствовать свои навыки работы с анимацией.
Счастливой анимации!
Animations
Animations Keyframes
To set multiple points at which an element should undergo a transition, use the rule. The rule includes the animation name, any animation breakpoints, and the properties intended to be animated.
Vendor Prefixing the Keyframe Rule
The rule must be vendor prefixed, just like all of the other and properties. The vendor prefixes for the rule look like the following:
The animation above is named , stated directly after the opening rule. The different keyframe breakpoints are set using percentages, starting at and working to with an intermediate breakpoint at . The keywords and could be used in place of and if wished. Additional breakpoints, besides , may also be stated. The element properties to be animated are listed inside each of the breakpoints, and in the example above.
It is important to note, as with transitions only individual properties may be animated. Consider how you might move an element from top to bottom for example. Trying to animate from to will not work, because animations can only apply a transition within a single property, not from one property to another. In this case, the element will need to be animated from to .
Animations Keyframes Demo
Hover over the ball below to see the animation in action.
See the Pen Animations Keyframes by Shay Howe (@shayhowe) on CodePen.
Animation Name
Once the keyframes for an animation have been declared they need to be assigned to an element. To do so, the property is used with the animation name, identified from the rule, as the property value. The declaration is applied to the element in which the animation is to be applied to.
Using the property alone isn’t enough though. You also need to declare an property and value so that the browser knows how long an animation should take to complete.
Animation Duration, Timing Function, & Delay
Once you have declared the property on an element, animations behave similarly to transitions. They include a duration, timing function, and delay if desired. To start, animations need a duration declared using the property. As with transitions, the duration may be set in seconds or milliseconds.
A timing function and delay can be declared using the and properties respectively. The values for these properties mimic and behave just as they do with transitions.
The animation below should cause the to bounce once while moving to the left, however only when hovering over the .
HTML
CSS
Шаги анимации
Кроме функций замедления, элемент можно анимировать используя шаги, т.е. ступенчато. (Примером может послужить секундная стрелка часов, которая сначала двигается, а затем осуществляется задержка на 1 секунду, потом снова двигается и снова задержка и т.д.) Шаги задаются с помощью функции steps(). Ниже показан пример:
Теперь анимация увеличения кнопки будет проходить рывками. Задержка между рывками в данном случае будет 667ms (2000/3). Второй параметр функции steps указывает, будет ли рывок выполняться сразу или после задержки:
| Функция | График | Описание |
|---|---|---|
| steps(3) | Пауза возникает при запуске анимации. (Эта функция соответствует steps(3, end), т.к. значение end используется по умолчанию.) | |
| steps(3, end) | Пауза возникает при запуске анимации. | |
| steps(3, start) | Анимация запускается сразу, пауза появляется в конце. |
CSS-переходы и их события
Как вы уже знаете для создания простой анимации в CSS можно использовать переходы. Суть здесь заключается в том, что с помощью них мы можем указать браузеру то, что значение какого-то CSS-свойства нужно изменить не сразу, а плавно в течении некоторого количества времени. После этого, для того чтобы переход начался, нам нужно будет всего лишь изменить значение этого CSS-свойства, и браузер сам выполнит эту анимацию.
Очень часто на сайтах и в веб-приложениях запуск CSS-перехода выполняется при наступлении каких-то определенных событий. Например, при клике на элемент или при наведении на него курсора.
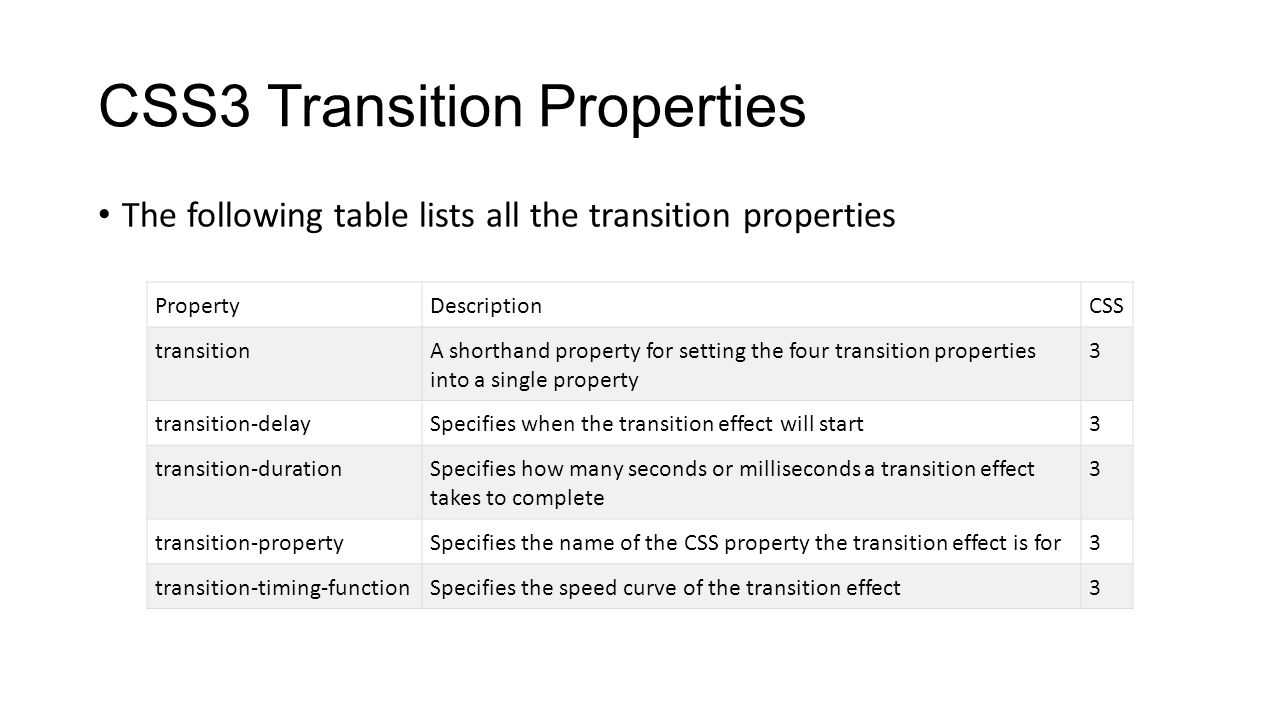
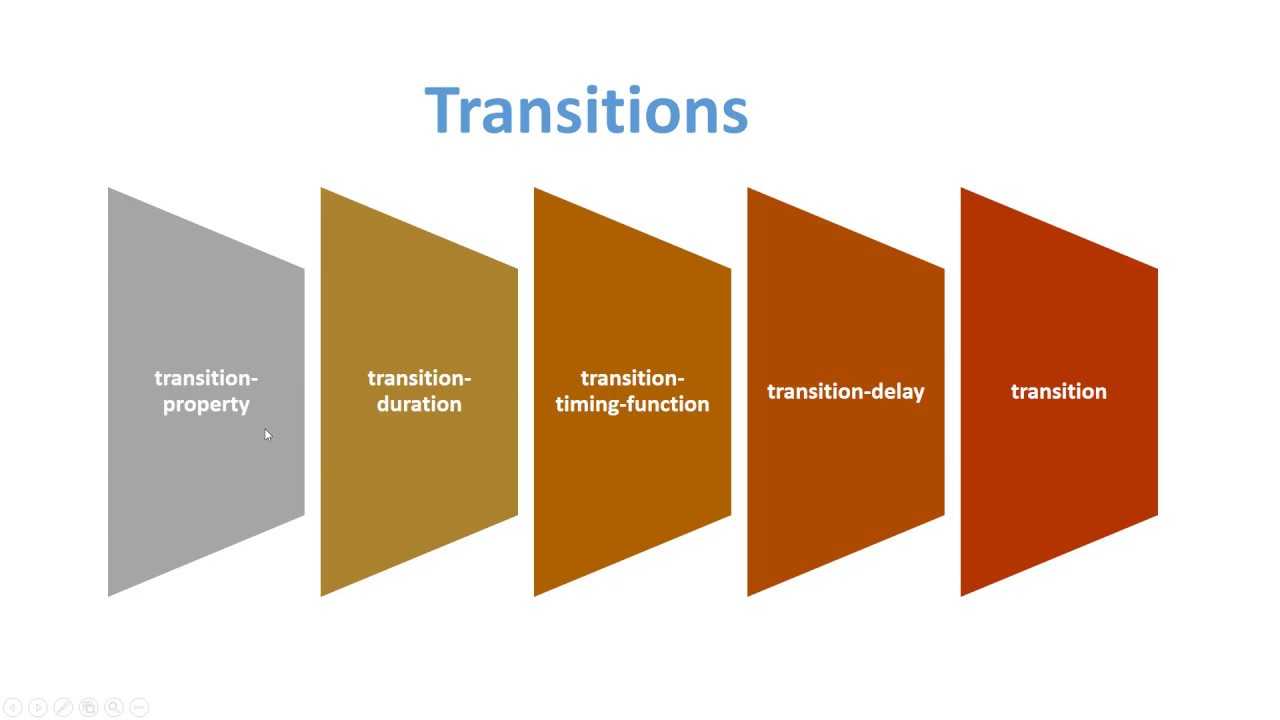
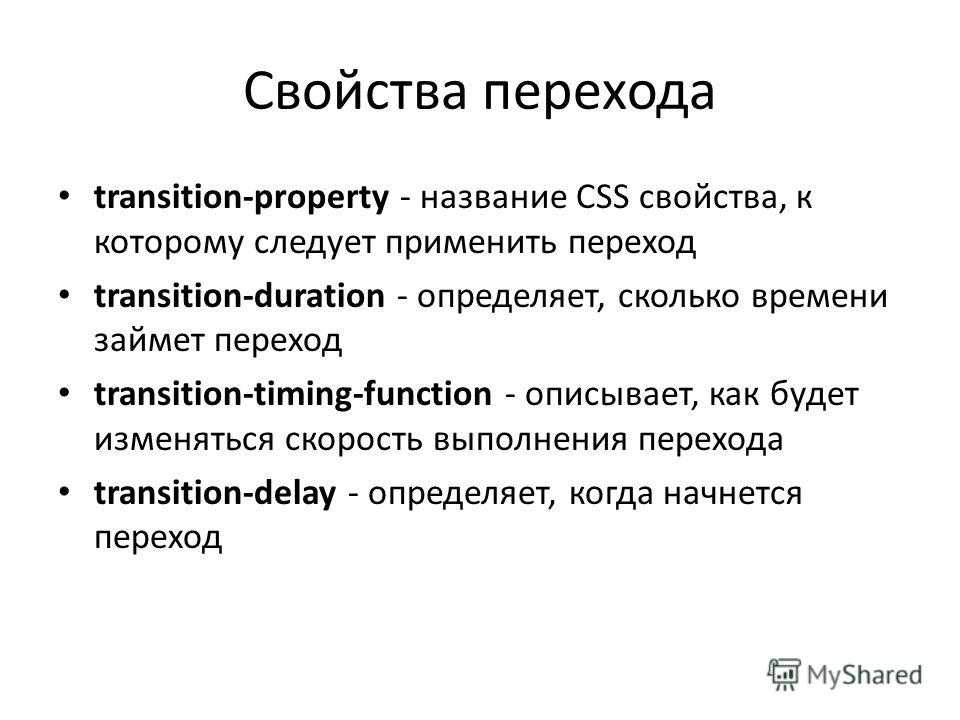
Для задания CSS-перехода используются следующие свойства:
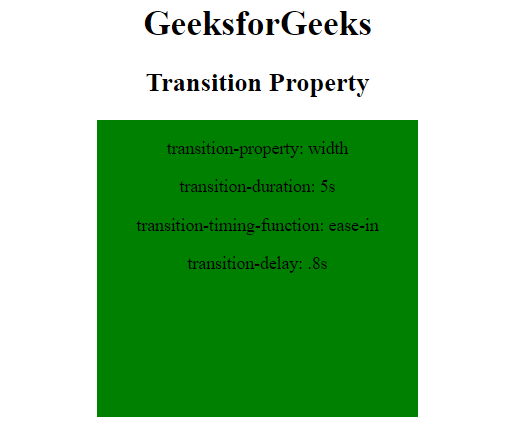
- – для указания CSS-свойства, которое нужно анимировать;
- – длительность перехода;
- – задает как должна изменяться скорость во время CSS-перехода;
- – время задержки перед началом перехода.
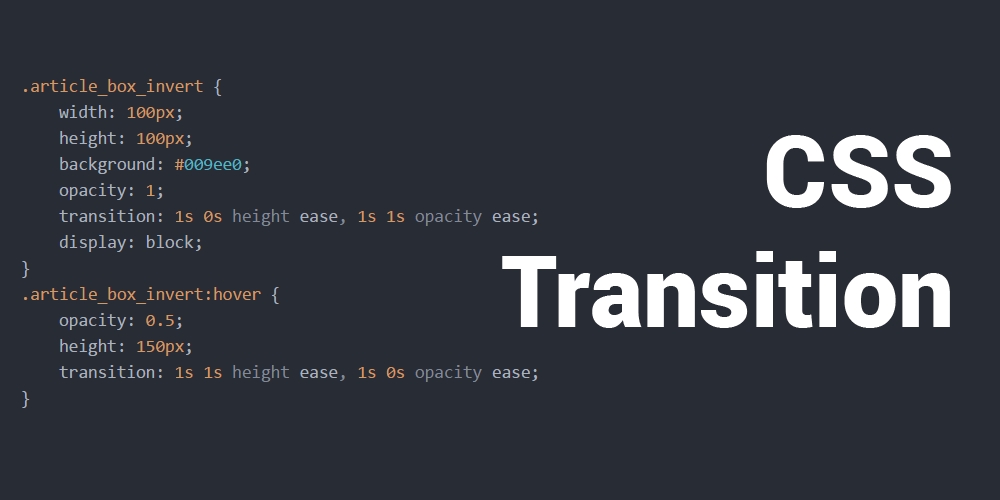
Например, мы хотим, чтобы изменения цвета фона () происходило плавно в течение 1 секунды. При этом нам нужно, чтобы этот процесс начинался не сразу, а через 0,1 секунды после создания CSS-перехода. Кроме этого, необходимо чтобы переход начинался и заканчивался медленно, или другими словами, чтобы анимация выполнялась посредством функции :
HTML
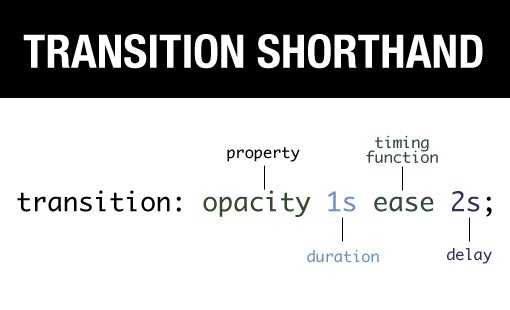
В CSS также можно записать все эти свойства кратко, используя :
CSS
При CSS-переходах могут возникать следующие события в DOM:
- – при создании CSS-перехода, то есть до того, как он реально начался;
- – когда CSS-переход фактически начался;
- – при завершении выполнения перехода;
- – при отмене CSS-перехода.
Событие возникает при создании CSS-перехода, то есть перед . В то время возникает, когда CSS-переход уже начался, то есть сразу после окончания .
Событие возникает после завершения CSS-перехода. Если CSS-переход удаляется до завершения, то событие сгенерировано не будет. Например, если мы во время перехода удалили свойство или установили для элемента свойство со значением .
При удалении анимации до её завершения генерируется другое событие, а именно .
Добавление обработчиков к этим событиям осуществляется как обычно:
JavaScript
Здесь мы добавили обработчик события с помощью метода .
Но прежде всего, являются ли ваши CSS-анимации отзывчивыми?
В этом учебнике по CSS-анимации мы узнаем, как создавать анимации и включать их в веб-сайты и веб-страницы. Однако, когда мы создаем анимацию, мы хотим, чтобы она была совместима с множеством размеров экранов, таких как смартфоны, планшеты, настольные компьютеры, ноутбуки и т. д. Чтобы создать отзывчивый веб-дизайн с анимацией, мы должны провести тест на отзывчивость с помощью инструмента проверки отзывчивости.
Частое тестирование отзывчивости с помощью ручных методов может быть громоздким и дорогостоящим. Поэтому следует инвестировать в надежные и бесплатные инструменты проверки отзывчивости, такие как LT Browser, чтобы сэкономить время и быстро протестировать веб-дизайн. С помощью LT Browser вы можете выполнять отладку мобильных представлений в 50+ предварительно созданных видовых экранах устройств, создавать пользовательские разрешения устройств, моделировать сеть, выполнять горячую перезагрузку, генерировать отчеты о производительности на основе Google Lighthouse и многое другое.
Давайте проверим отзывчивость свойства animation-direction в LT Browser на мобильных и планшетных видовых экранах.
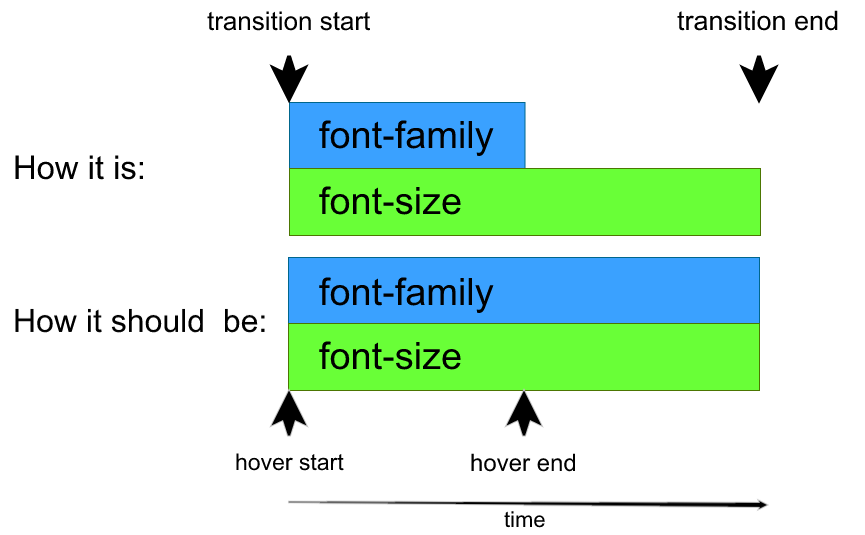
Transitioning From And To auto
The CSS property value translates to “Dear browser, please calculate some reasonable value for this.” Paragraphs () and any block-level elements will be as wide as their parent if they have . There are times when you’ll change from to a specific width — and want to transition that change. The specification neither enforces nor denies the use of values for transitionable properties.
Firefox, IE and Opera cannot transition from or to values. IE makes a little exception for , but that’s it. WebKit, on the other hand, is capable of transitioning from and to pretty much any CSS property that accepts the value. WebKit doesn’t like too much; for that property, it will only trigger a event, without generating or showing any intermediate values or states during the transition.
For the other properties, such as and , WebKit’s behavior is not quite what you’d expect. If translated to a calculated width of and you transitioned that to , then your transition would not shrink from 300 to 100 pixels. Instead, it would grow from 0 to 100 pixels.
For a full compatibility table, have a look at “CSS Animatable Properties.”
Morphing the toggle button icon
Now it’s time to see some CSS transitions in action. Let’s get into coding mode! The goal will be to morph the icon on a toggle button from its hamburger shape into an X shape.
Here’s what the result will look like:
See the Pen
Hamburger menu hover by Rob (@robjoeol)
on CodePen.
The HTML includes a simple button and a span element. The icon is made of the span, together with two pseudo-elements before and after the span, which appropriately styled look like a hamburger icon. Here’s the relevant HTML code:
<button class="hamburger__toggle">
  <span class="hamburger__icon"></span>
</button>
Now the CSS. Here are the default styles to render the hamburger icon (just the relevant rules):
/* give the span element and related pseudo-elements the appearance of white lines */
.hamburger__icon,
.hamburger__icon::before,
.hamburger__icon::after {
  position: absolute;
  width: 30px;
  height: 2px;
  border-radius: 4px;
  background-color: white;
}

/* center the span element in the middle of its containing button */
.hamburger__icon {
  top: calc(50% - 2px);
  left: calc(50% - 15px);
}

/* position the two pseudo-elements to the very left*/
.hamburger__icon::before,
.hamburger__icon::after {
  content: "";
  left: 0;
}
/* this is the top dash of the hamburger */
.hamburger__icon::before {
  bottom: 8px;
}
/* this is the bottom dash of the hamburger */
.hamburger__icon::after {
  top: 8px;
}
The snippet above creates the three lines typical of the hamburger icon appearance.
Next, it’s time for the hover styles. When users hover over the button, the span and the pseudo-elements will be rotated (using the CSS function) and their background color, position, height, and width will change to take up the shape of a typical close icon.
Here’s the code:
/* HOVER STYLES ON THE BUTTON */

/* rotate middle dash of hamburger */
.hamburger__toggle:hover .hamburger__icon {
  height: 5px;
  width: 54px;
  left: 5px;
  top: calc(50% - 2px);
  transform: rotate(-45deg);
  background-color: red;
}

/* rotate bottom dash of hamburger counter clockwise */
.hamburger__toggle:hover .hamburger__icon::after {
  width: 54px;
  height: 5px;
  top: -1px;
  transform: rotate(-270deg);
  background-color: red;
}

/* hide the top dash by scaling it to 0 */
.hamburger__toggle:hover .hamburger__icon::before {
  transform: scale(0);
}
If you hover on the button now, you’ll see the hamburger icon immediately morph into a close icon. Adding CSS transitions will achieve the gradual morphing effect we’re after.
Conclusion
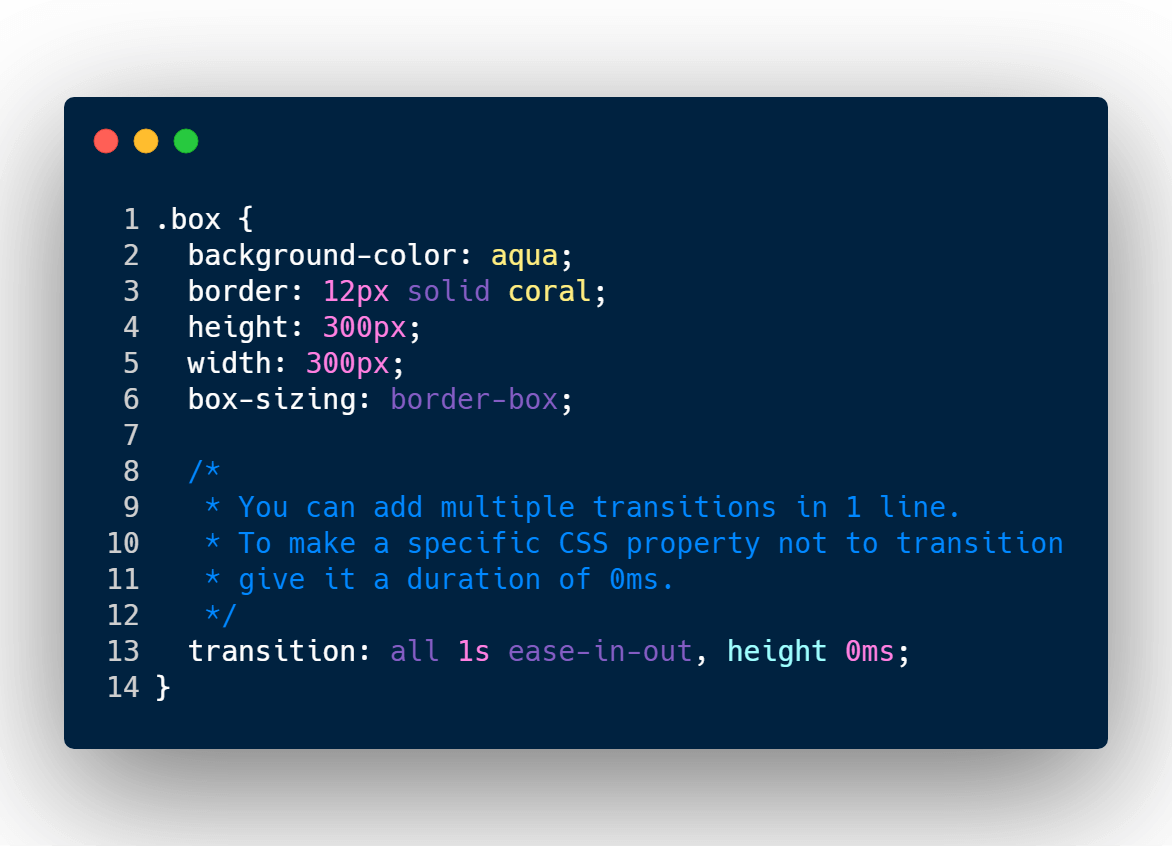
- Be very careful when using . You will get events for properties that you didn’t expect to ever transition.
- Be careful when using shorthand properties, because the number of triggered events varies between browsers.
- Opera and IE don’t trigger events when a negative delay cancels out the duration.
- WebKit has real issues with the priority of properties such as . Avoid this for now.
- IE doesn’t support implicit transitions — for example, triggered for when changes.
- Firefox and Opera cannot parse .
- Opera mixes up the priority of properties.
- Transitions on pseudo-elements do not trigger events.
- IE 10 has a weird bug when transitioning pseudo-elements.
- The specification leaves a lot of room for improvement.
Related Content
If you’re interested in transitions and animations — and how to use them wisely — have a look at these fantastic resources:
- “Dynamic Visual Effects With CSS3 Transitions,” Mike Sierra, Web Platform Docs
- “All You Need to Know About CSS Transitions,” Alex MacCaw
- Meaningful Transitions
- “Transitional Interfaces,” Pasquale D’Silva
- Animatable (showcase of transitions), Lea Verou
- “CSS Animatable Properties,” Oli Studholme
Thanks go to Oli Studholme and Lea Verou for taking the time to review this article, and Peter Linss for walking me through the CSS Working Group’s testing infrastructure. Front page image credit: “Transitional Interfaces,” Pasquale D’Silva
(al)
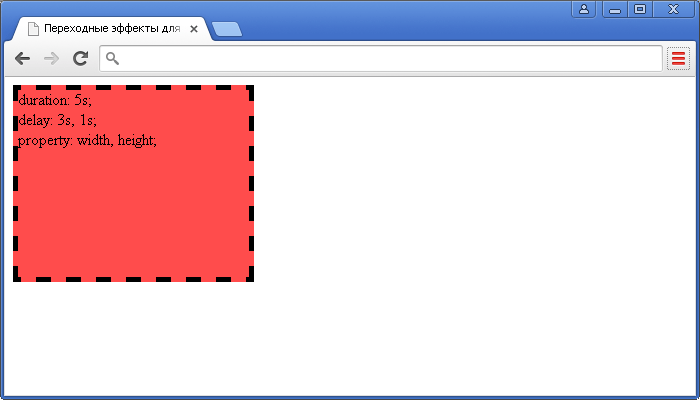
Example Code
Working Example within an HTML Document
<!DOCTYPE html>
<title>Example</title>
<style>
.resize {
background-color: yellowgreen;
color: olivedrab;
width: 40%;
height: 20px;
padding: 10px;
font-size: 1em;
font-family: sans-serif;
transition-property: width, height, font-size, font-weight, background-color;
transition-duration: 0.5s, 1s, 2s, 0.3s, 3s;
transition-timing-function: cubic-bezier(0.25, 0.1, 0.25, 1.4);
transition-delay: 0s;
}
.resize:hover {
width: 70%;
height: 150px;
font-size: 2.3em;
font-weight: bold;
background-color: beige;
}
</style>
<div class=»resize»>
Hover over me…
</div>
Dynamically change transition-duration
There is also a very interesting trick, we can use some pseudo-classes of the element to dynamically change the of the element.
for example:
Enter fullscreen modeExit fullscreen mode
When the mouse hovers an element, change the duration of the transition animation of the element from 3s to 0.5s, so that when the element is hovered, the duration of the transition animation is 0.5s, but the duration of the transition reset But it is 3s:
Using this little trick, we try to create some interesting effects.
Signature Panel Implemented in Pure CSS
Using the above-mentioned tricks, we can implement a pure CSS signature panel.
First of all, in a container with a height and width of 500px, a 100×100 HTML grid layout is implemented, using flex and grid. For convenience, I use the Pug template engine.
Enter fullscreen modeExit fullscreen mode
For convenience, I added a to each grid, in fact, the background and grid are white:
In order to achieve the signature effect, we add a hover event to each grid , and change the background color of the current grid when hovering. At the same time, the most important thing is to set a very large in the normal state, and set a very small in the hover time, the pseudo code is as follows:
Enter fullscreen modeExit fullscreen mode
Take a look at the effect:
This is achieved. When the mouse hovers up, the background color is quickly changed because of , and when the hover effect leaves, takes effect again, and the black color will be a very, very slow. The speed is ineffective, so slow that you can’t feel it changing.
Of course, if we want to realize the signature, there is still something missing. We need to realize that the background color change of the element will not start immediately when the mouse hovers over the drawing board. Only when the mouse is pressed (maintaining the state) will it start. Follow the mouse track to change the color. When the mouse stops clicking, it stops drawing.
There is a clever way to achieve this. We superimpose a layer of div on the canvas. The level is higher than the canvas. When the mouse hovers over the canvas, it is actually hovering over this mask layer. Press to trigger the event, add a event to the element, and remove the mask layer.
The pseudo code is as follows:
Enter fullscreen modeExit fullscreen mode
Enter fullscreen modeExit fullscreen mode
In this way, a complete signature board, or drawing board, is realized:
The complete code implementation, and adding the function using CSS, you can click here: CodePen Demo — Pure CSS signature
Like this, an effect from my friend alphardex uses the above techniques to superimpose blending modes and filters to achieve:
How about it? Is it a very interesting CSS trick? I hope you will enjoy this wonderful technique achieved by CSS transition.
Performance
Most CSS properties can be animated, because most of them are numeric values. For instance, , , are all numbers. When you animate them, the browser gradually changes these numbers frame by frame, creating a smooth effect.
However, not all animations will look as smooth as you’d like, because different CSS properties cost differently to change.
In more technical details, when there’s a style change, the browser goes through 3 steps to render the new look:
- Layout: re-compute the geometry and position of each element, then
- Paint: re-compute how everything should look like at their places, including background, colors,
- Composite: render the final results into pixels on screen, apply CSS transforms if they exist.
During a CSS animation, this process repeats every frame. However, CSS properties that never affect geometry or position, such as , may skip the Layout step. If a changes, the browser doesn’t calculate any new geometry, it goes to Paint → Composite. And there are few properties that directly go to Composite. You can find a longer list of CSS properties and which stages they trigger at https://csstriggers.com.
The calculations may take time, especially on pages with many elements and a complex layout. And the delays are actually visible on most devices, leading to “jittery”, less fluid animations.
Animations of properties that skip the Layout step are faster. It’s even better if Paint is skipped too.
The property is a great choice, because:
- CSS transforms affect the target element box as a whole (rotate, flip, stretch, shift it).
- CSS transforms never affect neighbour elements.
…So browsers apply “on top” of existing Layout and Paint calculations, in the Composite stage.
In other words, the browser calculates the Layout (sizes, positions), paints it with colors, backgrounds, etc at the Paint stage, and then applies to element boxes that need it.
Changes (animations) of the property never trigger Layout and Paint steps. More than that, the browser leverages the graphics accelerator (a special chip on the CPU or graphics card) for CSS transforms, thus making them very efficient.
Luckily, the property is very powerful. By using on an element, you could rotate and flip it, stretch and shrink it, move it around, and . So instead of properties we can use , use for increasing element size, etc.
The property also never triggers Layout (also skips Paint in Mozilla Gecko). We can use it for show/hide or fade-in/fade-out effects.
Paring with can usually solve most of our needs, providing fluid, good-looking animations.
For example, here clicking on the element adds the class with and , thus making it move to the right and disappear:
Here’s a more complex example, with :
CSS Справочники
CSS СправочникCSS ПоддержкаCSS СелекторыCSS ФункцииCSS ЗвукCSS Веб шрифтыCSS АнимацииCSS ДлиныCSS Конвертер px-emCSS Названия цветаCSS Значения цветаCSS по умолчаниюCSS Символы
CSS Свойства
align-content
align-items
align-self
all
animation
animation-delay
animation-direction
animation-duration
animation-fill-mode
animation-iteration-count
animation-name
animation-play-state
animation-timing-function
backface-visibility
background
background-attachment
background-blend-mode
background-clip
background-color
background-image
background-origin
background-position
background-repeat
background-size
border
border-bottom
border-bottom-color
border-bottom-left-radius
border-bottom-right-radius
border-bottom-style
border-bottom-width
border-collapse
border-color
border-image
border-image-outset
border-image-repeat
border-image-slice
border-image-source
border-image-width
border-left
border-left-color
border-left-style
border-left-width
border-radius
border-right
border-right-color
border-right-style
border-right-width
border-spacing
border-style
border-top
border-top-color
border-top-left-radius
border-top-right-radius
border-top-style
border-top-width
border-width
bottom
box-decoration-break
box-shadow
box-sizing
caption-side
caret-color
@charset
clear
clip
color
column-count
column-fill
column-gap
column-rule
column-rule-color
column-rule-style
column-rule-width
column-span
column-width
columns
content
counter-increment
counter-reset
cursor
direction
display
empty-cells
filter
flex
flex-basis
flex-direction
flex-flow
flex-grow
flex-shrink
flex-wrap
float
font
@font-face
font-family
font-kerning
font-size
font-size-adjust
font-stretch
font-style
font-variant
font-weight
grid
grid-area
grid-auto-columns
grid-auto-flow
grid-auto-rows
grid-column
grid-column-end
grid-column-gap
grid-column-start
grid-gap
grid-row
grid-row-end
grid-row-gap
grid-row-start
grid-template
grid-template-areas
grid-template-columns
grid-template-rows
hanging-punctuation
height
hyphens
@import
isolation
justify-content
@keyframes
left
letter-spacing
line-height
list-style
list-style-image
list-style-position
list-style-type
margin
margin-bottom
margin-left
margin-right
margin-top
max-height
max-width
@media
min-height
min-width
mix-blend-mode
object-fit
object-position
opacity
order
outline
outline-color
outline-offset
outline-style
outline-width
overflow
overflow-x
overflow-y
padding
padding-bottom
padding-left
padding-right
padding-top
page-break-after
page-break-before
page-break-inside
perspective
perspective-origin
pointer-events
position
quotes
resize
right
tab-size
table-layout
text-align
text-align-last
text-decoration
text-decoration-color
text-decoration-line
text-decoration-style
text-indent
text-justify
text-overflow
text-shadow
text-transform
top
transform
transform-origin
transform-style
transition
transition-delay
transition-duration
transition-property
transition-timing-function
unicode-bidi
user-select
vertical-align
visibility
white-space
width
word-break
word-spacing
word-wrap
writing-mode
z-index
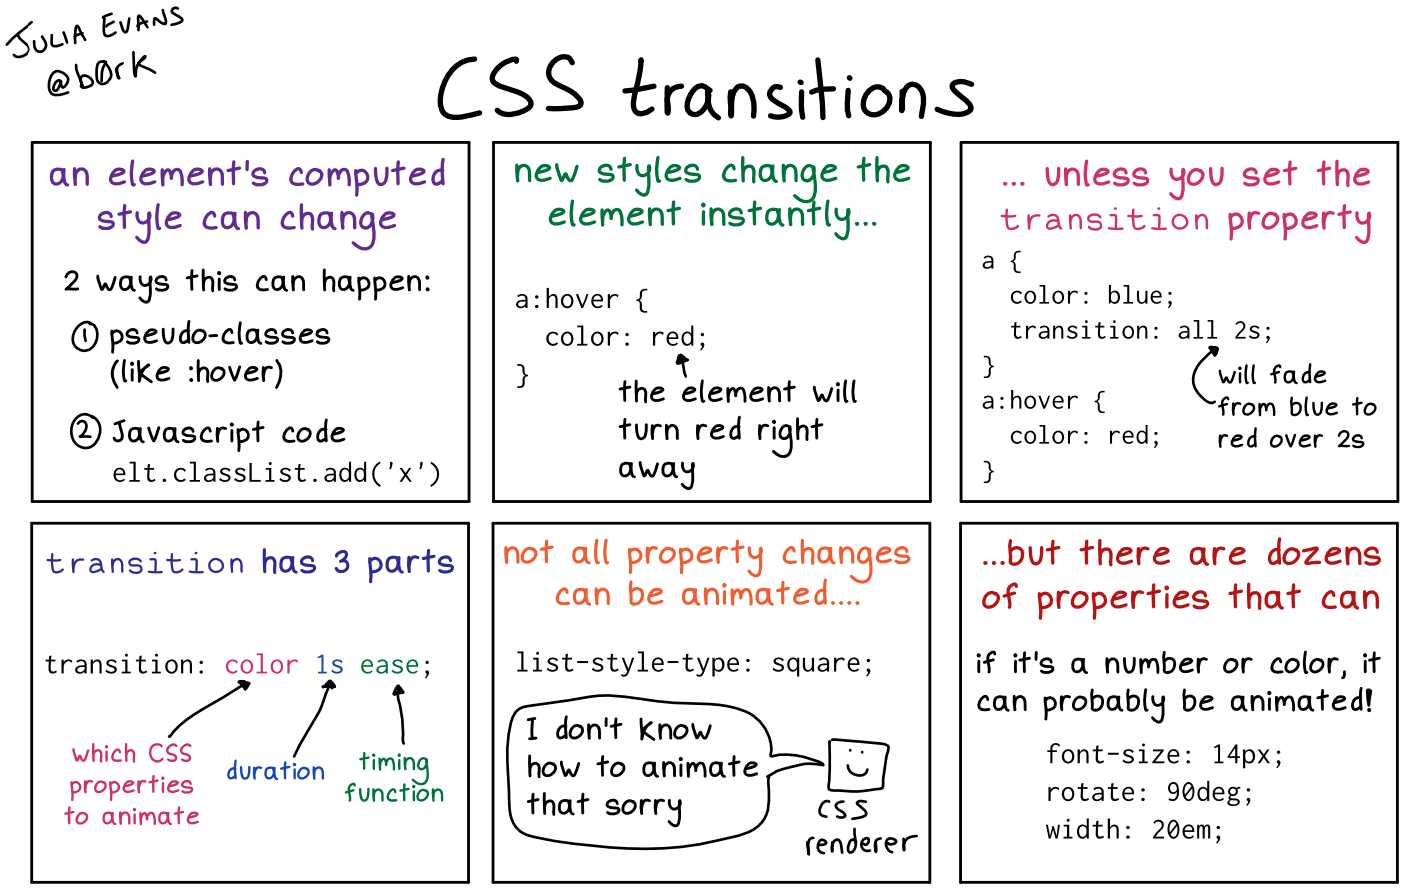
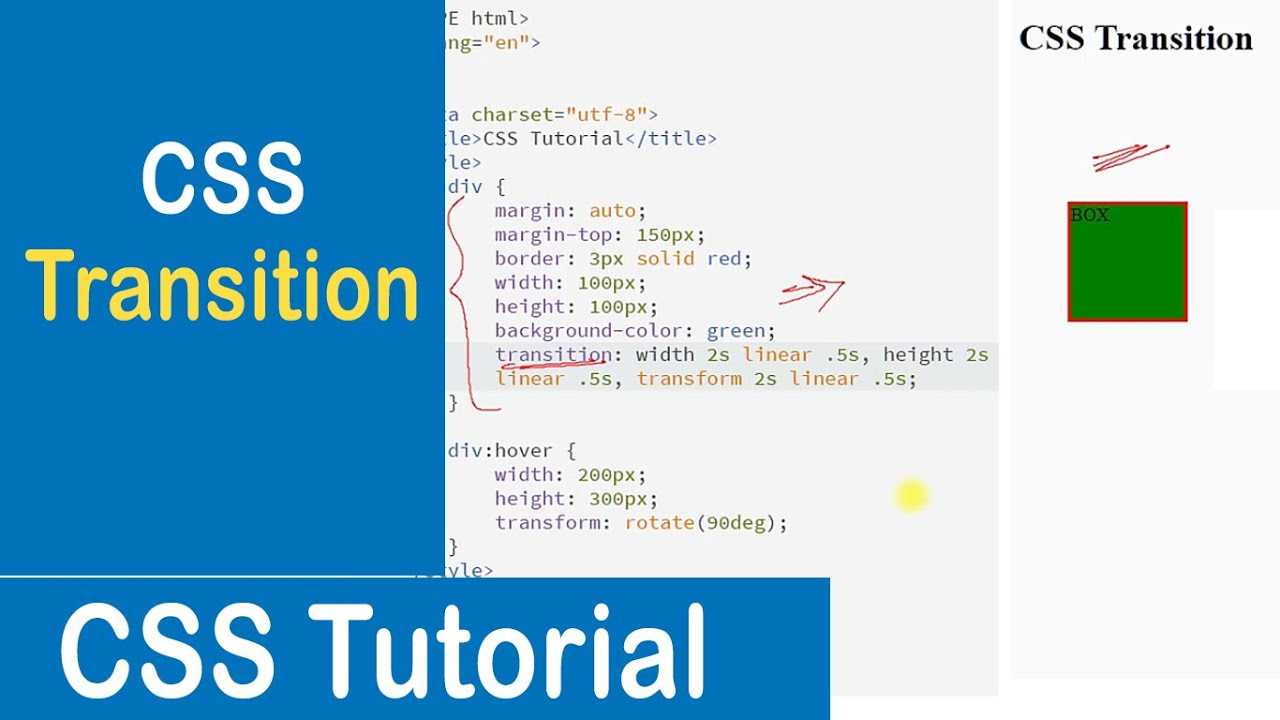
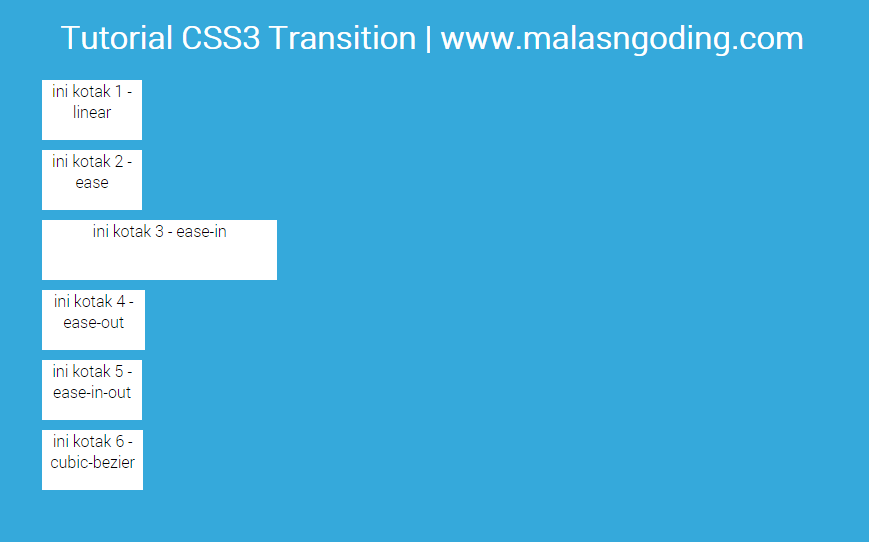
CSS transitions
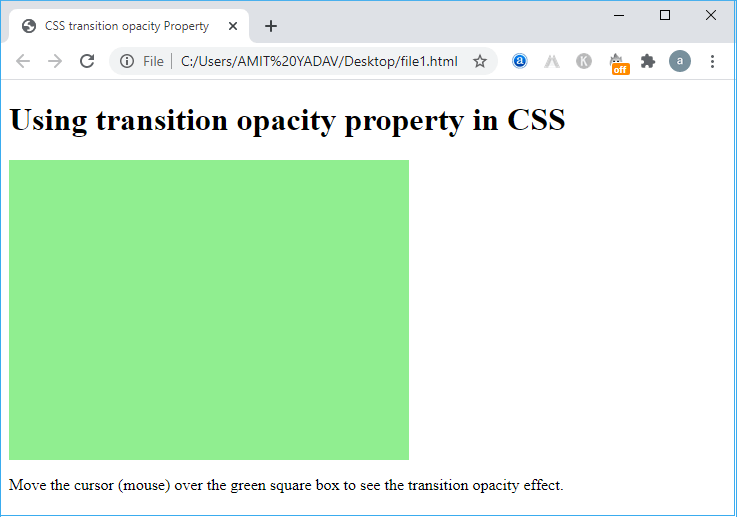
CSS transitions позволяют сделать изменения CSS-свойств плавно и в течение некоторого времени. Таким образом, вы получаете возможность контролировать процесс перехода элемента от одного состояния к другому. Начнем с простейшего примера и продолжим дальше.
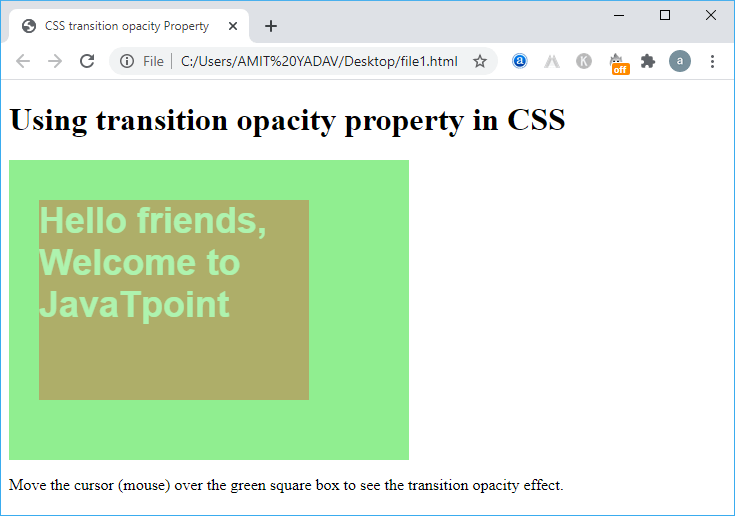
При наведении курсора на квадрат плавно изменяется цвет фона.
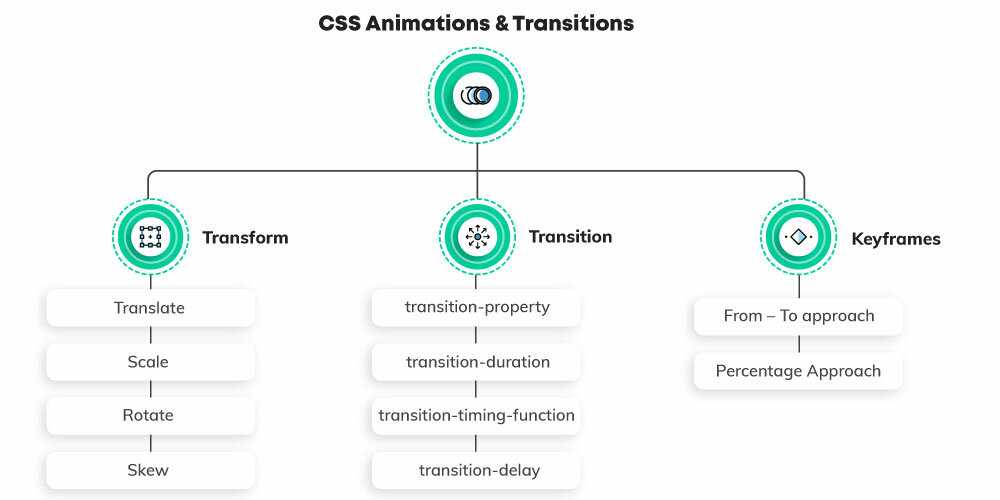
Теперь подробнее рассмотрим, как управлять переходами в CSS. У нас на вооружении есть всего 5 свойств, которые позволяют контролировать transition-анимацию:
- transition-property;
- transition-duration;
- transition-timing-function;
- transition-delay;
- transition;
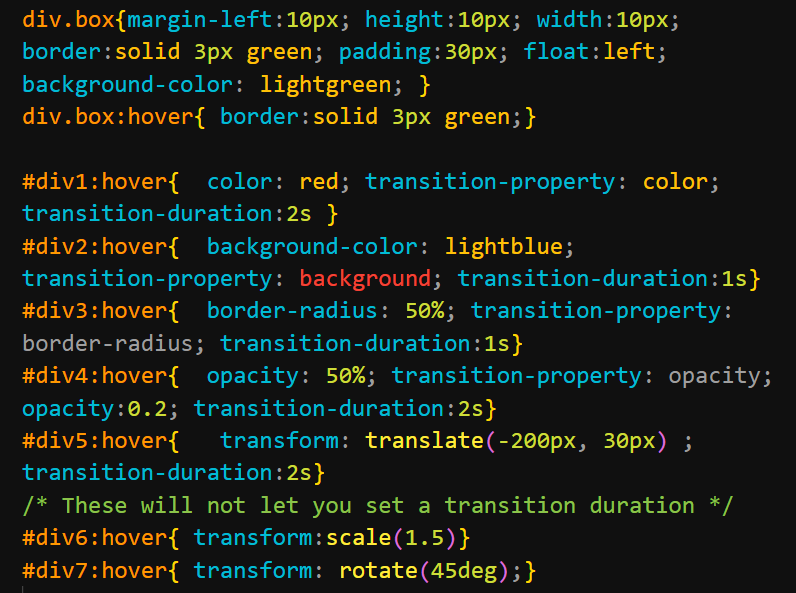
transition-property — указывает список свойств, которые будут анимироваться; свойства, которые здесь не указаны, будут изменяться обычным образом. Можно анимировать все свойства для конкретного элемента, указав значение all. Если вы не указали ни одного свойства, то по умолчанию используется значение all.
Пример:
transition-property: width;
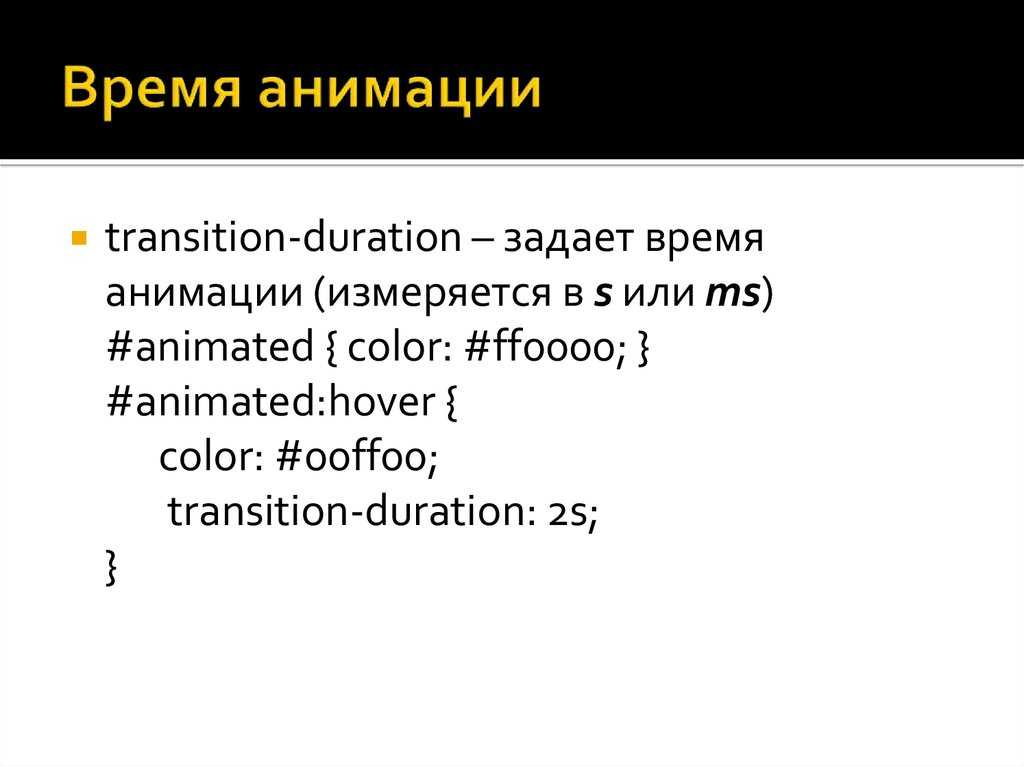
transition-duration — задаёт значение продолжительности анимации, время можно указывать в секундах или миллисекундах.
Пример:
transition-duration: 1s;
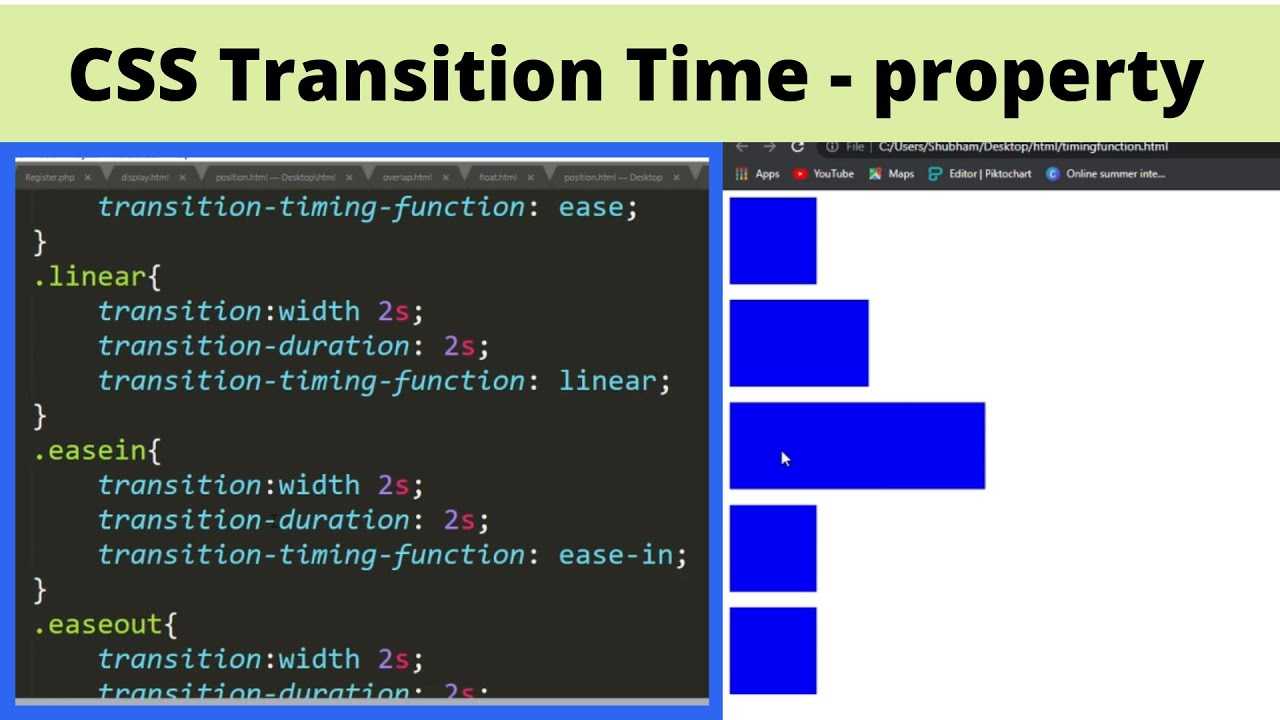
transition-timing-function — временная функция, указывает точки ускорения и замедления за определенный период времени для контроля изменения скорости анимации. Проще говоря, с помощью этого свойства можно указать поведение для анимации. Например, мы можем ускорить анимацию в начале и замедлить в конце, либо наоборот. Для того, чтобы задать процесс анимации используются кривые Безье. Вообще, transition-timing-function позволяет сделать очень много разных поведений для анимаций, это
целая тема для статьи, поэтому здесь мы не будем углубляться.
Пример:
transition-timing-function: cubic-bezier(0, 0, 1, 1);
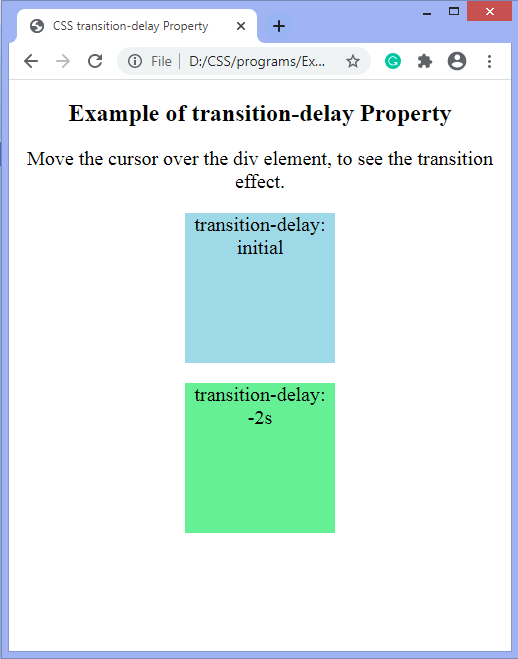
transition-delay — задаёт задержку времени до начала анимации, можно указывать в секундах или миллисекундах.
Пример:
transition-delay: 500ms;
transition — это общее свойство, которое позволяет перечислить первые четыре свойства в порядке: property, duration, timing-function, delay.
Пример:
transition: background-color 1s cubic-bezier(0, 0, 1, 1) 500ms;
У нас получилась вот такая простая анимация: при наведении мышкой на квадрат изменяется ширина; продолжительность анимации одна секунда; анимация воспроизводится по линейной функции; задержка перед началом анимации 500 миллисекунд.
С помощью CSS transitions можно анимировать почти все свойства и создавать много интересных, красивых, функциональных и даже сложных анимаций, которые будут дополнять и улучшать ваш проект. Например, я сделал вот такой Material-FAB на чистом CSS, используя transitions:
Wrapping It All Up
Wasn’t all of this somewhat moderately fun? The thing that makes
transitions so great is how simple they are to use. They don’t require
you to really change your
existing behavior in order to use them. All the time, you set CSS
properties that get modified at runtime either by code or user
interaction. A transition simply plugs into
this commonplace occurrence and allows you to animate the property
changes. No wonder the aliens were amazed!
Anyway, what you’ve seen here is just the surface of everything you can do with
transitions. The following articles will help you dig deeper:
- The CSS Transitions Cheatsheet
- CSS3: Animations vs. Transitions
-
The transitionEnd Event
-
Looping a CSS Transition
-
Animating Movement Smoothly using CSS
-
Animating Many Elements Using Transitions
Just a final word before we wrap up. If you have a question and/or want to be part of a friendly, collaborative community of over 220k other developers like yourself, post on the forums for a quick response!
#Tween
type: «tween»
Set to to use a duration-based animation. If any non-orchestration values are set without a property, this is used as the default animation.

Copy<motion.path
animate={{ pathLength: 1 }}
transition={{ duration: 2, type: «tween» }}
/>
duration: number
The duration of the tween animation. Set to by default, 0r if animating a series of keyframes.
Copyconst variants = {
visible: {
opacity: 1,
transition: { duration: 2 }
}
}
ease: Easing | Easing[]
The easing function to use. Set as one of the below.
- The name of an existing easing function.
- An array of four numbers to define a cubic bezier curve.
- An easing function, that accepts and returns a value .
If the animating value is set as an array of multiple values for a keyframes animation, can be set as an array of easing functions to set different easings between each of those values.
Copy<motion.div
animate={{ opacity: 0 }}
transition={{ ease: }}
/>
These strings are the built-in named easing functions in Framer.
- , ,
- , ,
- , ,
from: number | string
The value to animate from. By default, this is the current state of the animating value.
Copy<motion.div
animate={{ rotate: 180 }}
transition={{ from: 90, duration: 2 }}
/>
times: number[]
When animating keyframes, can be used to determine where in the animation each keyframe is reached. Each value in is a value between and , representing .
There must be the same number of as there are keyframes. Defaults to an array of evenly-spread durations.
Copy<motion.div
animate={{ scale: }}
transition={{ times: }}
/>