
HTML Теги
<!—…—><!DOCTYPE><a><abbr><acronym><address><applet><area><article><aside><audio><b><base><basefont><bdi><bdo><big><blockquote><body><br><button><canvas><caption><center><cite><code><col><colgroup><data><datalist><dd><del><details><dfn><dialog><dir><div><dl><dt><em><embed><fieldset><figcaption><figure><font><footer><form><frame><frameset><h1> — <h6><head><header><hr><html><i><iframe><img><input><ins><kbd><label><legend><li><link><main><map><mark><meta><meter><nav><noframes><noscript><object><ol><optgroup><option><output><p><param><picture><pre><progress><q><rp><rt><ruby><s><samp><script><section><select><small><source><span><strike><strong><style><sub><summary><sup><svg><table><tbody><td><template><textarea><tfoot><th><thead><time><title><tr><track><tt><u><ul><var><video>
Attributes
| Attribute | Value | Description |
|---|---|---|
| align | leftrighttopbottommiddle |
Defines the alignment of the image in reference to surrounding elements. |
| alt | text | Defines the alternate text for the image. |
| border | pixels |
Defines the width of the border around the image.Not supported in HTML5. |
| crossorigin | ||
| Defines, whether the CORS (a technology, that allows a web page to access resources from another domain) is used when loading the image. Images, uploaded via CORS, can be used in the <canvas> element without limiting the functionality of the latter. | ||
| anonymous | CORS requests from this element will not pass credentials. | |
| use-credentials | CORS requests from this element will pass credentials. New attribute in HTML5. |
|
| height | pixels | Defines the height of the image. |
| hspace | pixels | Defines spaces at the left and right sides of the image.Not supported in HTML5. |
| ismap | ismap | Specifies that the contents of the tag is a server-side image map. |
| longdesc | URL | Specifies the URL address with a detailed description of the image (For a short description of the image, use the alt attribute. Not supported in HTML5. |
| src | URL | Defines the source of the image. |
| usemap | #mapname | Specifies a link to the <map> element, which contains the coordinates for the client map image. |
| vspace | pixels |
Defines spaces at the top and bottom of the image.Not supported in HTML5. |
| width | pixels | Defines the width of the image. |
The <img> tag supports the Global Attributes and the Event Attributes.
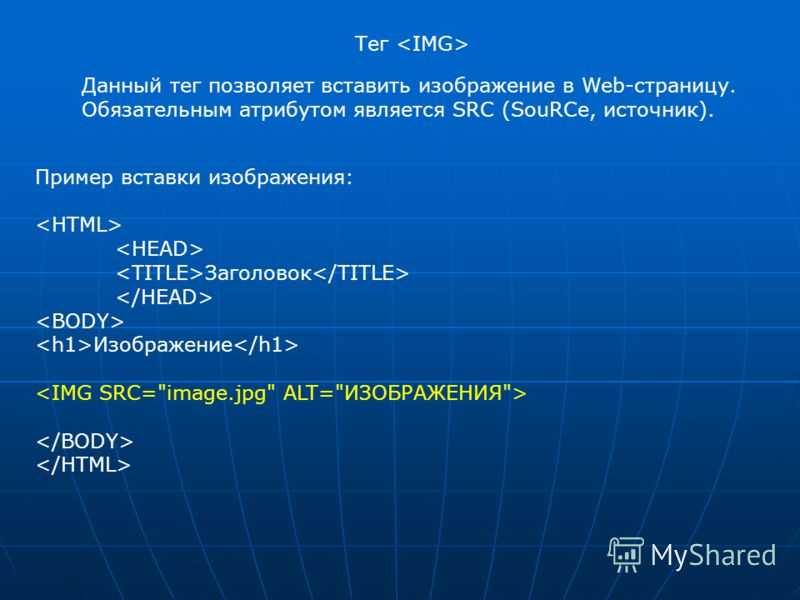
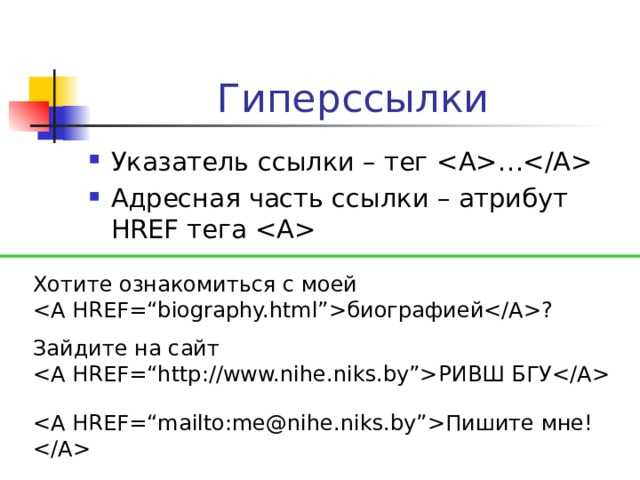
Синтаксис тега
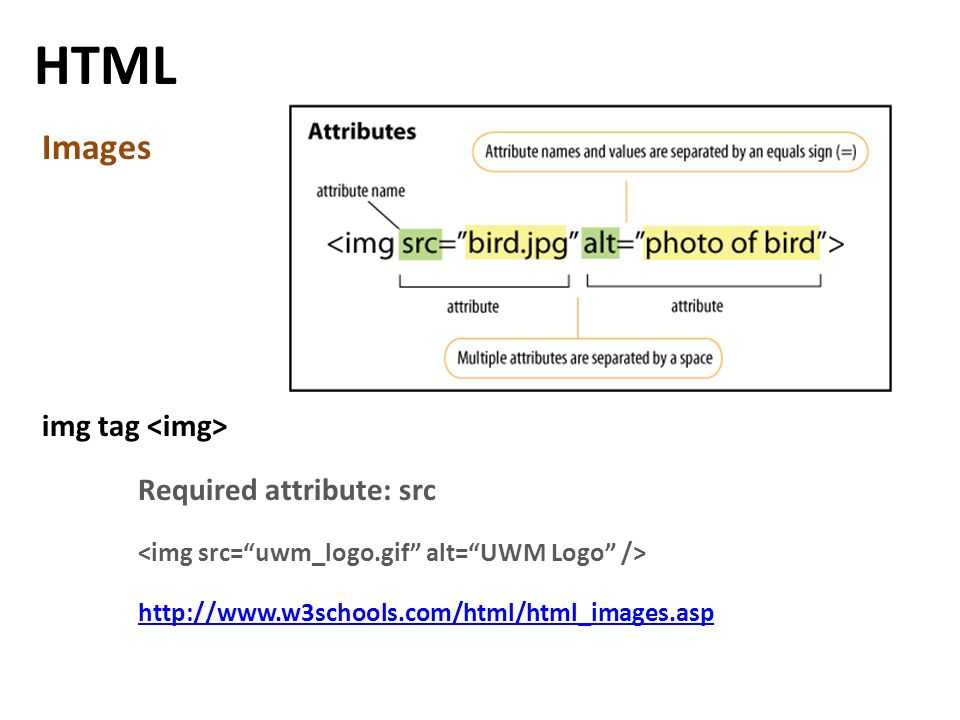
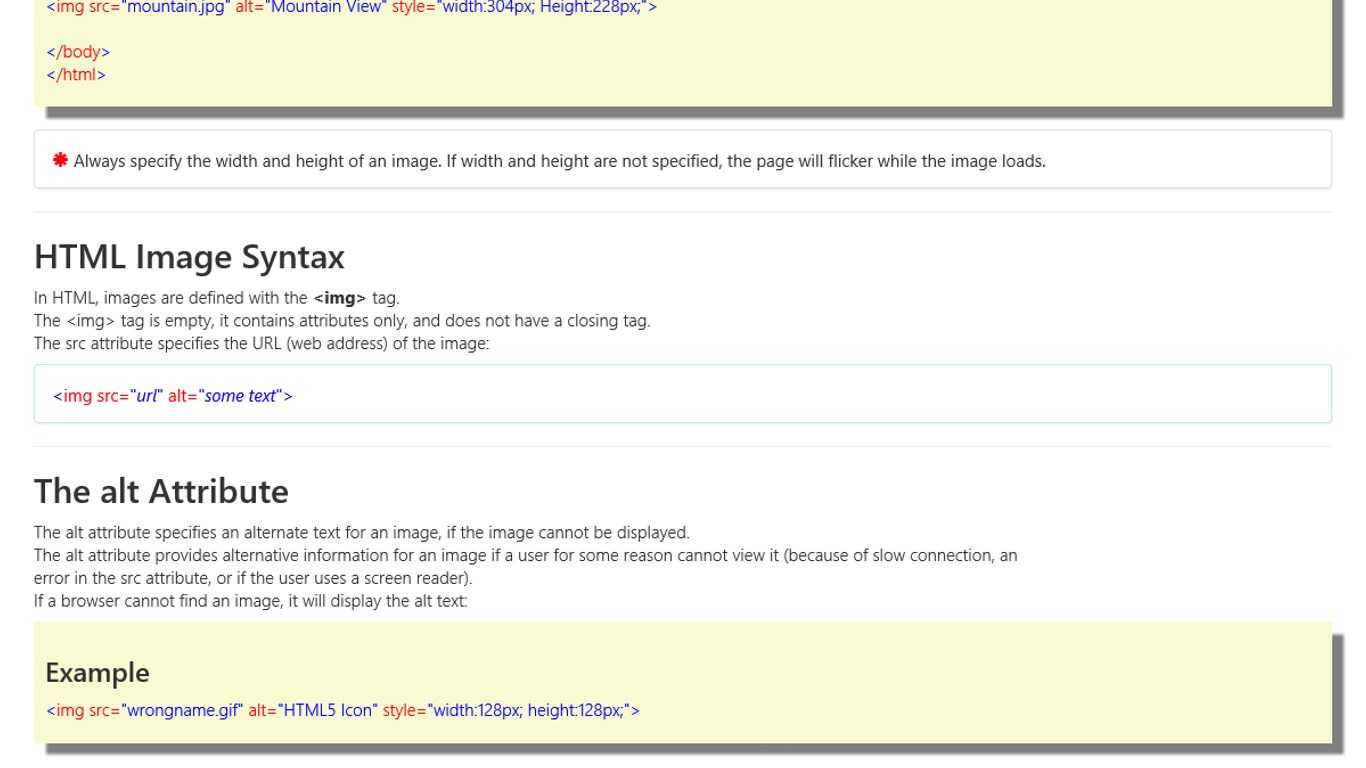
Обратите внимание, что данный тег является одиночным и не требует закрывающего тега . Атрибут src является обязательным
С помощью него указывается адрес выводимого изображения. Можно указать абсолютный или относительный URL. Если адрес не указать или же написать с ошибкой, то картинка выведена не будет
Атрибут src является обязательным. С помощью него указывается адрес выводимого изображения. Можно указать абсолютный или относительный URL. Если адрес не указать или же написать с ошибкой, то картинка выведена не будет.
Атрибут alt=»описание» — не является обязательным, но лучше сразу себя приучить к тому, чтобы прописывать его каждому изображению, поскольку это нужно как для пользователей, так и для поисковых систем.
Остальные атрибуты являются необязательными, их мы рассмотрим чуть ниже. Сначала приведем простенький пример вывода картинки на html.
HTML References
HTML by AlphabetHTML by CategoryHTML Browser SupportHTML AttributesHTML Global AttributesHTML EventsHTML ColorsHTML CanvasHTML Audio/VideoHTML Character SetsHTML DoctypesHTML URL EncodeHTML Language CodesHTML Country CodesHTTP MessagesHTTP MethodsPX to EM ConverterKeyboard Shortcuts
HTML Tags
<!—>
<!DOCTYPE>
<a>
<abbr>
<acronym>
<address>
<applet>
<area>
<article>
<aside>
<audio>
<b>
<base>
<basefont>
<bdi>
<bdo>
<big>
<blockquote>
<body>
<br>
<button>
<canvas>
<caption>
<center>
<cite>
<code>
<col>
<colgroup>
<data>
<datalist>
<dd>
<del>
<details>
<dfn>
<dialog>
<dir>
<div>
<dl>
<dt>
<em>
<embed>
<fieldset>
<figcaption>
<figure>
<font>
<footer>
<form>
<frame>
<frameset>
<h1> — <h6>
<head>
<header>
<hr>
<html>
<i>
<iframe>
<img>
<input>
<ins>
<kbd>
<label>
<legend>
<li>
<link>
<main>
<map>
<mark>
<meta>
<meter>
<nav>
<noframes>
<noscript>
<object>
<ol>
<optgroup>
<option>
<output>
<p>
<param>
<picture>
<pre>
<progress>
<q>
<rp>
<rt>
<ruby>
<s>
<samp>
<script>
<section>
<select>
<small>
<source>
<span>
<strike>
<strong>
<style>
<sub>
<summary>
<sup>
<svg>
<table>
<tbody>
<td>
<template>
<textarea>
<tfoot>
<th>
<thead>
<time>
<title>
<tr>
<track>
<tt>
<u>
<ul>
<var>
<video>
<wbr>
Examples
An audio player:
<audio src=»horse.ogg» controls>
Your browser does not support the audio element.
</audio>
An embedded flash animation:
<embed src=»helloworld.swf»>
An <iframe> in its simplest use:
<iframe src=»/default.asp»></iframe>
An image is marked up as follows:
<img src=»smiley.gif» alt=»Smiley face»>
Input Example
An HTML form with an image that represents the submit button:
<form action=»/action_page.php»>
First name: <input type=»text» name=»fname»><br>
<input type=»image» src=»submit.gif» alt=»Submit»>
</form>
Point to an external JavaScript file:
<script src=»myscripts.js»></script>
Source Example
An audio player with two source files. The browser should choose which file (if any) it has support for:
<audio controls>
<source src=»horse.ogg» type=»audio/ogg»>
<source src=»horse.mp3″ type=»audio/mpeg»>
Your browser does not support the audio element.
</audio>
Track Example
A video with two subtitle tracks:
<video width=»320″ height=»240″ controls>
<source src=»forrest_gump.mp4″ type=»video/mp4″>
<source src=»forrest_gump.ogg» type=»video/ogg»>
<track src=»subtitles_en.vtt» kind=»subtitles» srclang=»en» label=»English»>
<track src=»subtitles_no.vtt» kind=»subtitles» srclang=»no» label=»Norwegian»>
</video>
Tag Modern Approaches
There are various ways you can use the tag that are a bit more up to date and modern. Let’s look at some of them now.
Lazy Load Images
Lazy loading is a newish «load what is needed» concept. With lazy loading, the image is loaded only when the user scrolls to its viewport.
This is in contrast to eager loading, which loads every image immediately after the page is rendered by the browser.
To apply lazy loading, add the loading attribute to the tag and set the value to “lazy”.
Images are often quite high quality and large these days, but this can negatively impact user experience and SEO – hence the introduction of lazy loading.
Use the and Tags
Often, you might need to specify to the user the caption of an image. A lot of developers do this by placing a tag right after the .
This might not be wrong, but it defies best practices and does not associate the caption with the image, so search engines won’t understand what it is.
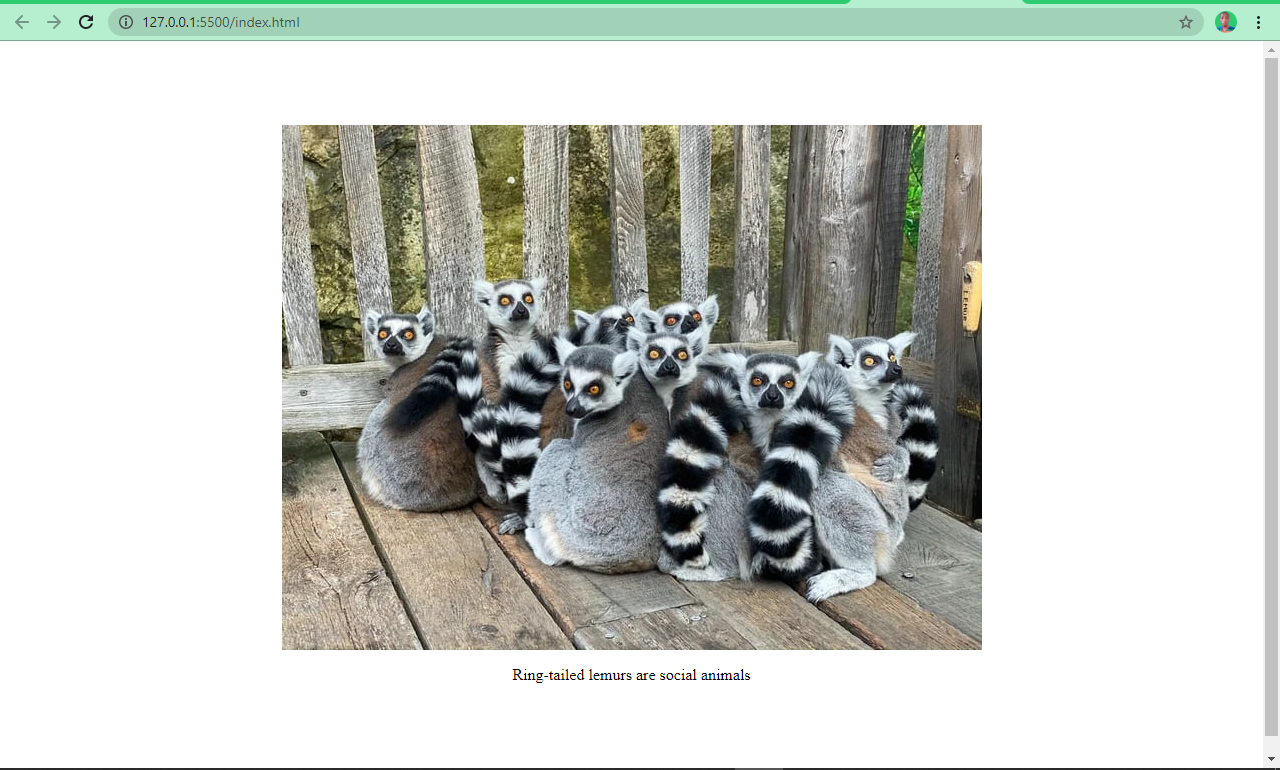
Its is clear that there is no association between the image and the caption in the above example.
HTML5 introduced the and elements to help with this. You wrap the tag inside a element, and you specify a caption within the element.

This helps search engines associate the caption with the image, leading to better performance and SEO.
The snippets of code below and the screenshots show you an image with and without the and elements:
You can see now that the image and the caption are beautifully associated.
Use the .webP Image Format
.webP is an image format created by Google. According to the creator, it’s an image format lower in size than its counterparts — JPG, JPEG, PNG, but with the same quality.
This format has been getting more and more widely accepted and is considered the nextgen image format for the web.
HTML Атрибуты
acceptaccept-charsetaccesskeyactionaltasyncautocompleteautofocusautoplaycharsetcheckedciteclasscolscolspancontentcontenteditablecontextmenucontrolscoordsdatadata-dirdraggabledropzoneformformactionheadersheighthiddenhighhrefhreflanghttp-equividitemiditempropitemrefitemscopeitemtypeismapkeytypekindlabellanglistlooplowmanifestmaxmaxlengthmediamethodminminlengthmultiplemutednamenovalidateonabortonafterprintonbeforeprintonbeforeunloadonbluroncanplayoncanplaythroughonchangeonclickoncopyoncutondblclickondragondragendondragenterondragleaveondragoverondragstartondropondurationchangeonemptiedonerroronfocusonhashchangeoninputoninvalidonkeydownonkeypressonkeyuponloadonloadeddataonloadedmetadataonloadstartonmousedownonmousemoveonmouseoutonmouseoveronmouseuponmousewheelonofflineononlineonpagehideonpageshowonpasteonpauseonplayonplayingonprogressonratechangeonresetonresizeonscrollonsearchonseekedonseekingonselectonshowonstalledonsubmitonsuspendontimeupdateontoggleonunloadonvolumechangeonwaitingonwheelopenoptimumpatternplaceholderposterpreloadreadonlyrelrequiredreversedrowsrowspansandboxscopescopedselectedshapesizesizesspanspellchecksrcsrcdocscrlangsrcsetstartstepstyletabindextargettitletranslatetypeusemapvaluewidth
Supported Image Formats
Image file formats are standardized means to organize and store digital images. An image file format may store data in an uncompressed format, a compressed format (which may be lossless or lossy), or a vector format. (Wikipedia).
Each user agent supports different image formats. Here is the list of common image formats:
| Abbreviation | File format | MIME type | File extension(s) | Browser compatibility |
|---|---|---|---|---|
| APNG | Animated Portable Network Graphics | image/apng | .apng | Chrome, Edge, Firefox, Opera, Safari |
| BMP | Bitmap file | image/bmp | .bmp | Chrome, Edge, Firefox, Opera, Safari |
| GIF | Graphics Interchange Format | image/gif | .gif | Chrome, Edge, Firefox, Opera, Safari |
| ICO | Microsoft Icon | image/x-icon | .ico, .cur | Chrome, Edge, Firefox, Opera, Safari |
| JPEG | Joint Photographic Expert Group image | image/jpeg | .jpg, .jpeg, .jfif, .pjpeg, .pjp | Chrome, Edge, Firefox, Opera, Safari |
| PNG | Portable Network Graphics | image/png | .png | Chrome, Edge, Firefox, Opera, Safari |
| SVG | Scalable Vector Graphics | image/svg+xml | .svg | Chrome, Edge, Firefox, Opera, Safari |
| TIFF | Tagged Image File Format | image/tiff | .tif, .tiff | None built-in; add-ons required |
| WebP | Web Picture format | image/webp | .webp | Chrome, Edge, Firefox, Opera |
Примеры использования:
Атрибут src (Элемент <audio>)
В примере определяется файл в формате OGG. Данный код будет успешно работать в браузерах Firefox, Chrome и Opera. Чтобы аудиофайл воспроизводился в браузерах Internet Explorer и Safari, он должен быть в формате MP3:
Атрибут src (Элемент <source>)
Чтобы код работал во всех браузерах, используйте тег <source> внутри тега <audio>. Элемент <source> позволяет ссылаться на несколько аудиофайлов. В этом случае браузер будет использовать первый подходящий аудиофайл:
Атрибут src (Элемент <embed>)
Браузер анализирует расширение файла и решает по нему, какой плагин или внешняя программа требуется для отображения файла:
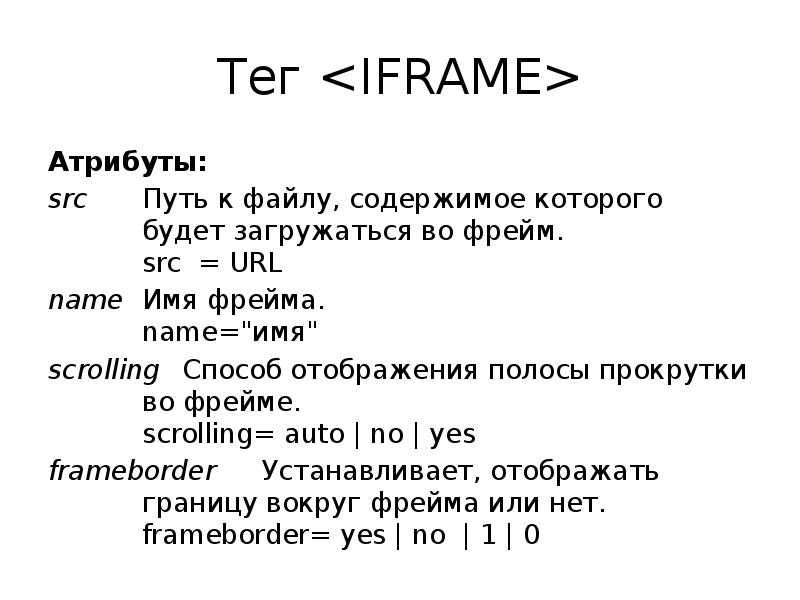
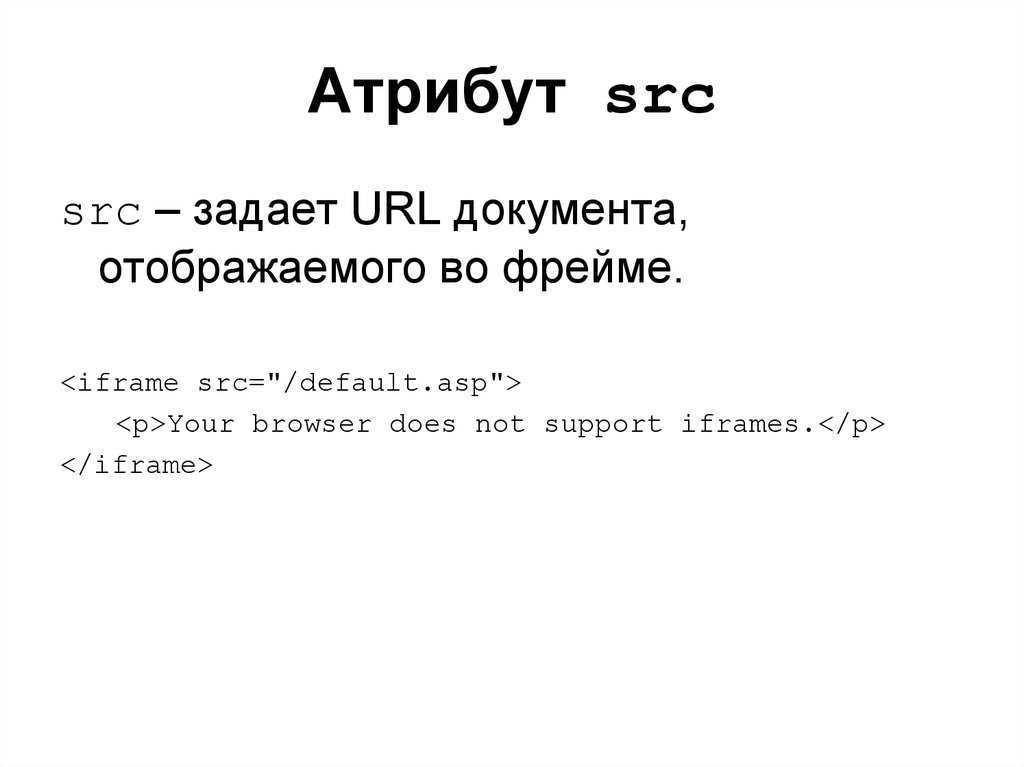
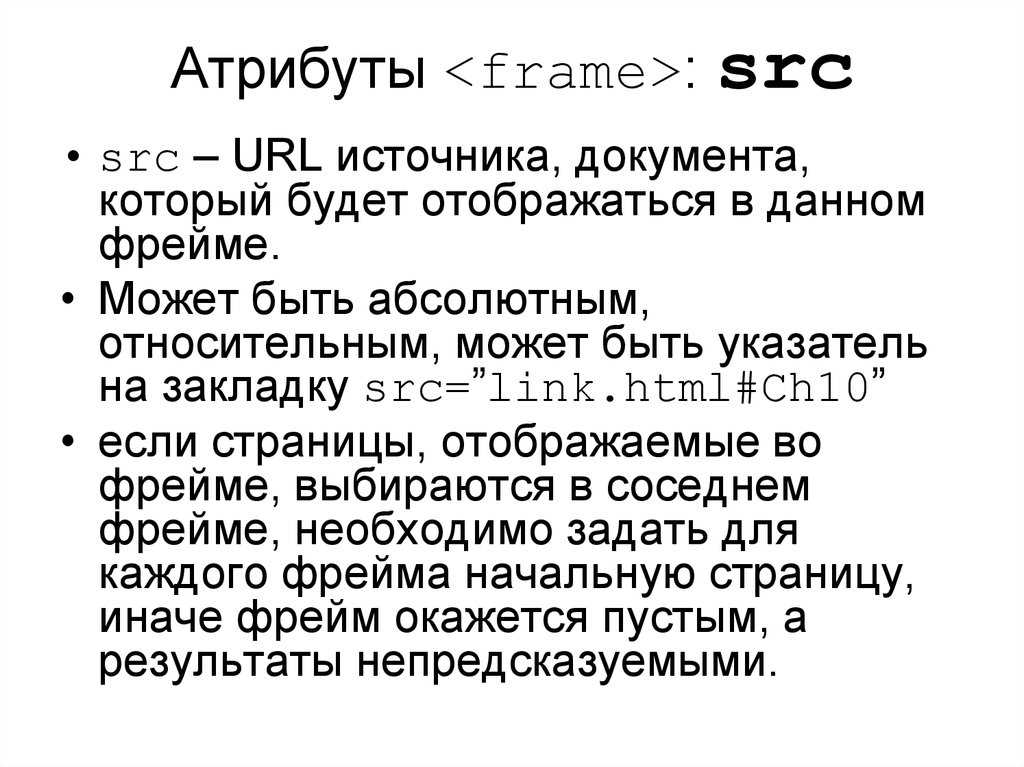
Атрибут src (Элемент <iframe>)
Атрибут src указывает адрес файла, который будет загружаться во фрейм. Это может быть HTML-документ, изображение или серверная программа. Допустимо использовать не только путь к файлу, но также имя функции JavaScript, которое возвращает значение.
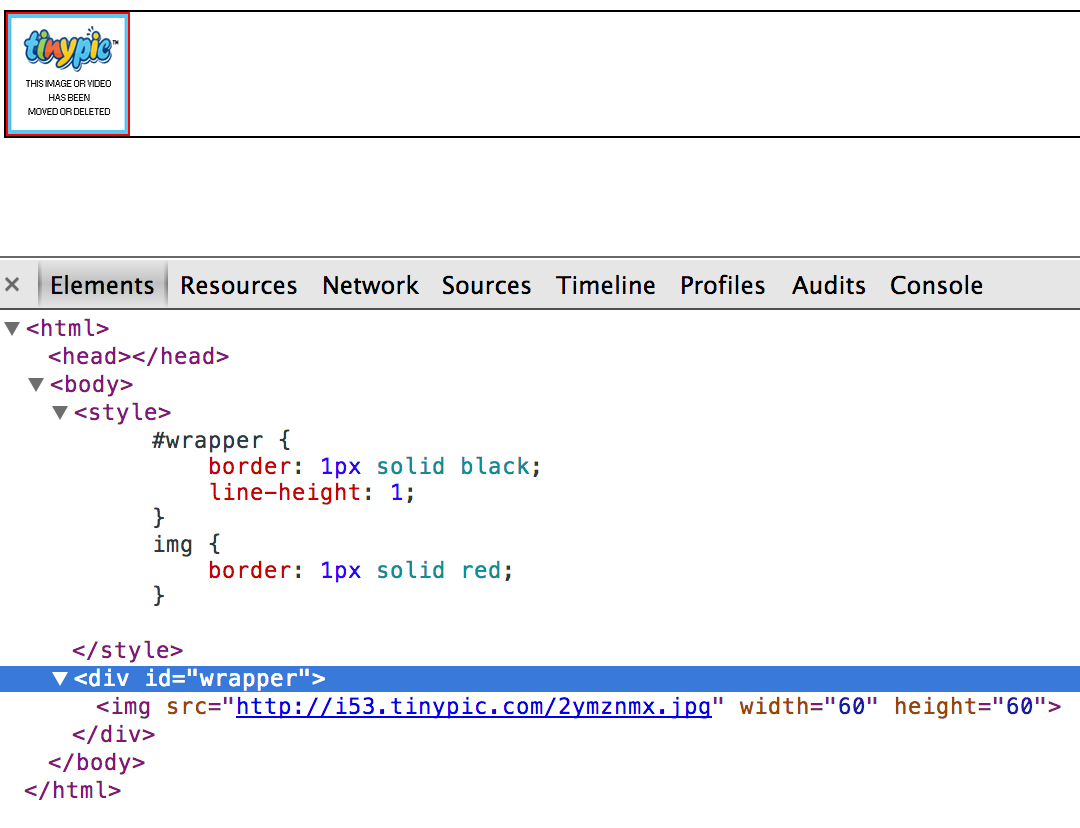
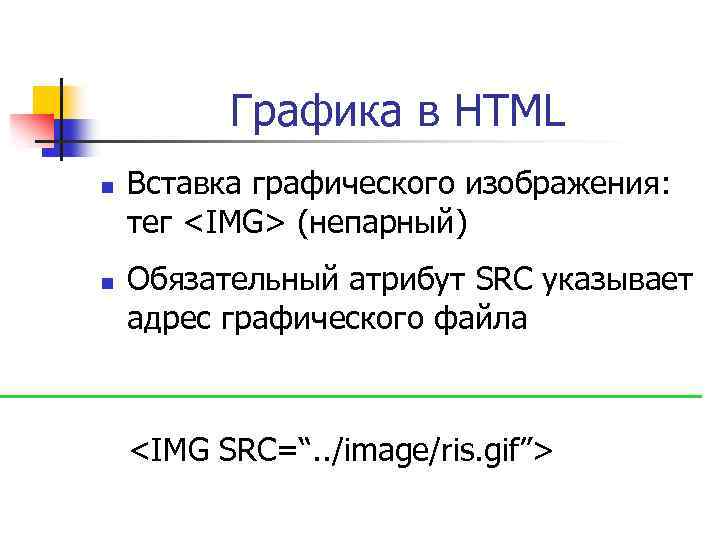
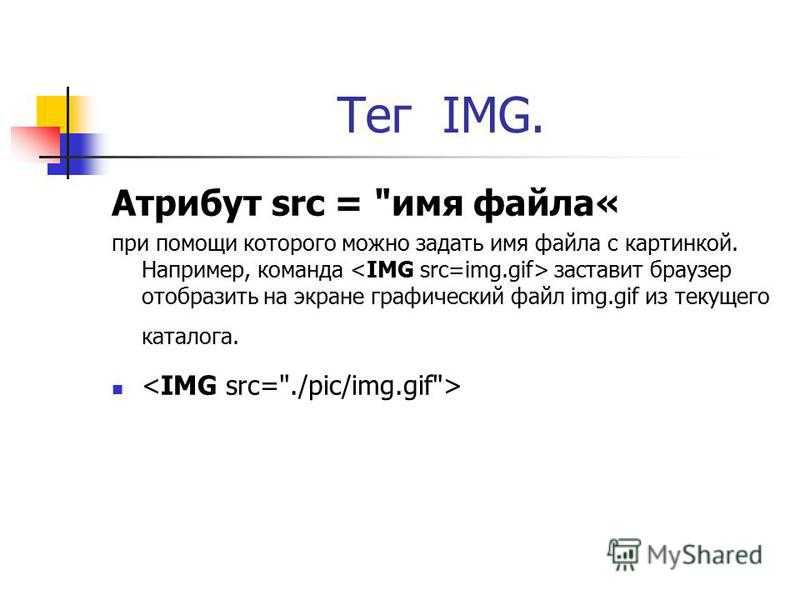
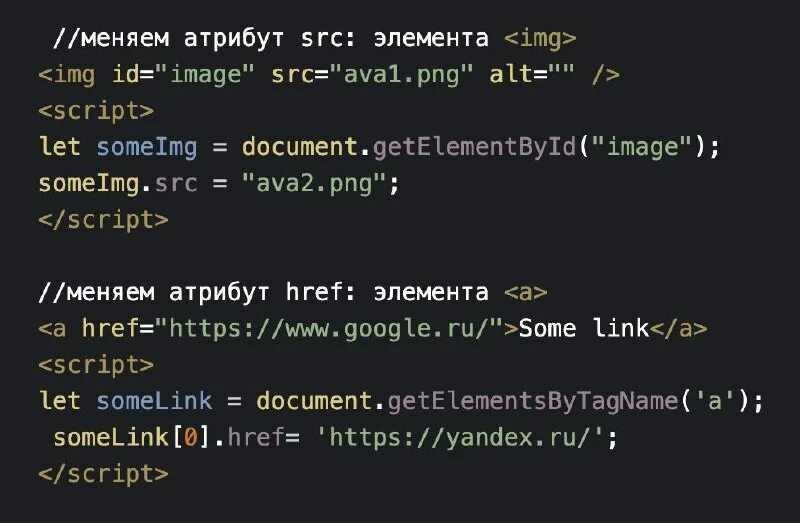
Атрибут src (Элемент <img>)
Атрибут src определяет местонахождение (URL) изображения.
Во время загрузки страницы браузер также загружает изображения и вставляет их в код страницы. Если по указанному URL изображение не будет найдено, то браузер вставит на его место иконку «битой» или недостоверной ссылки.
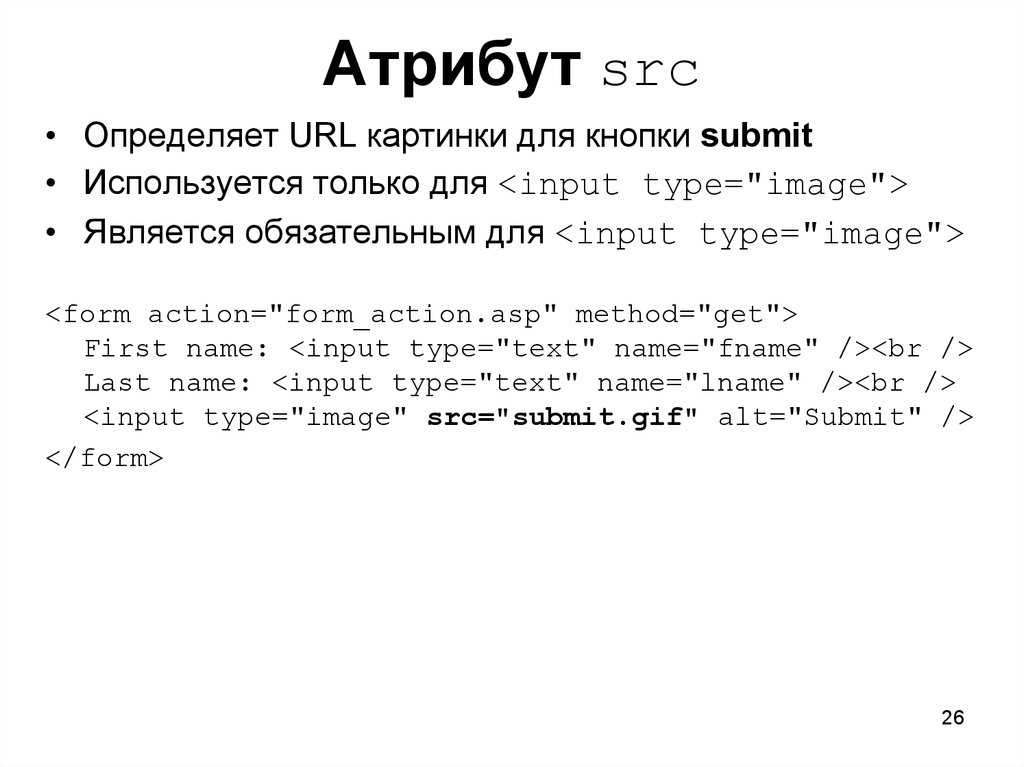
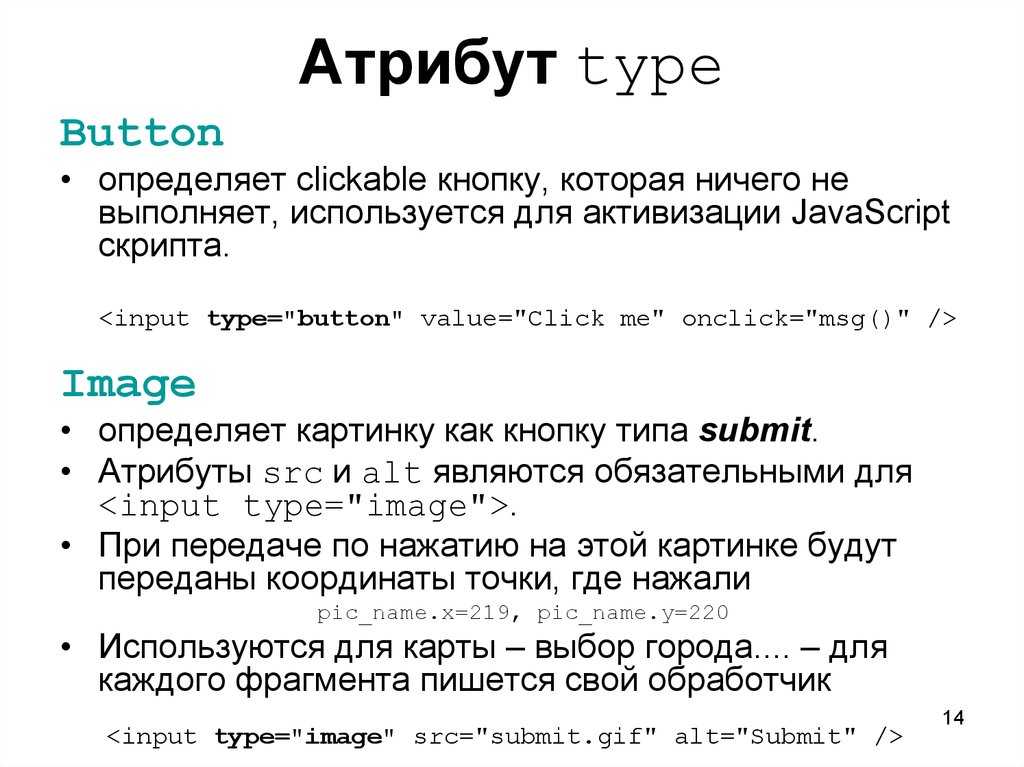
Атрибут src (Элемент <input>)
Атрибут src определяет местонахождение (URL) изображения для элемента ввода.
Атрибут src является обязательным для <input type=»image»> и может использоваться только с <input type=»image»>.
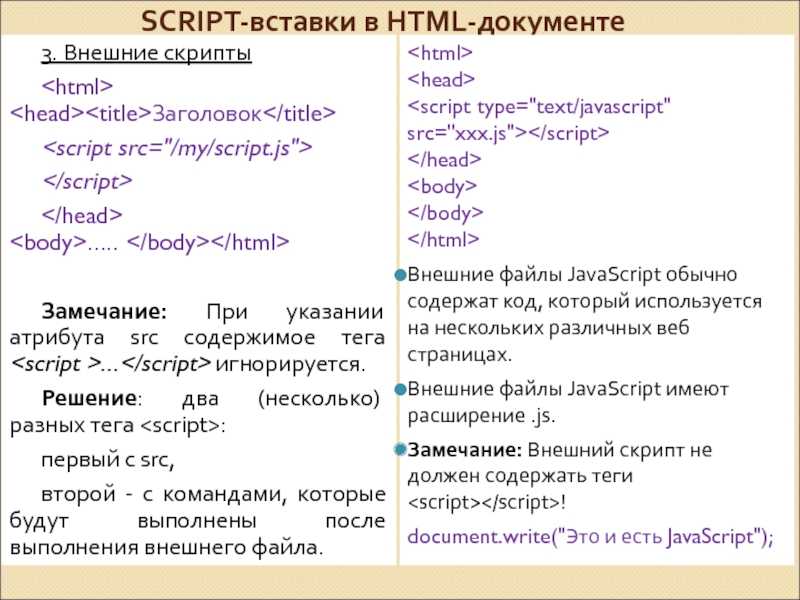
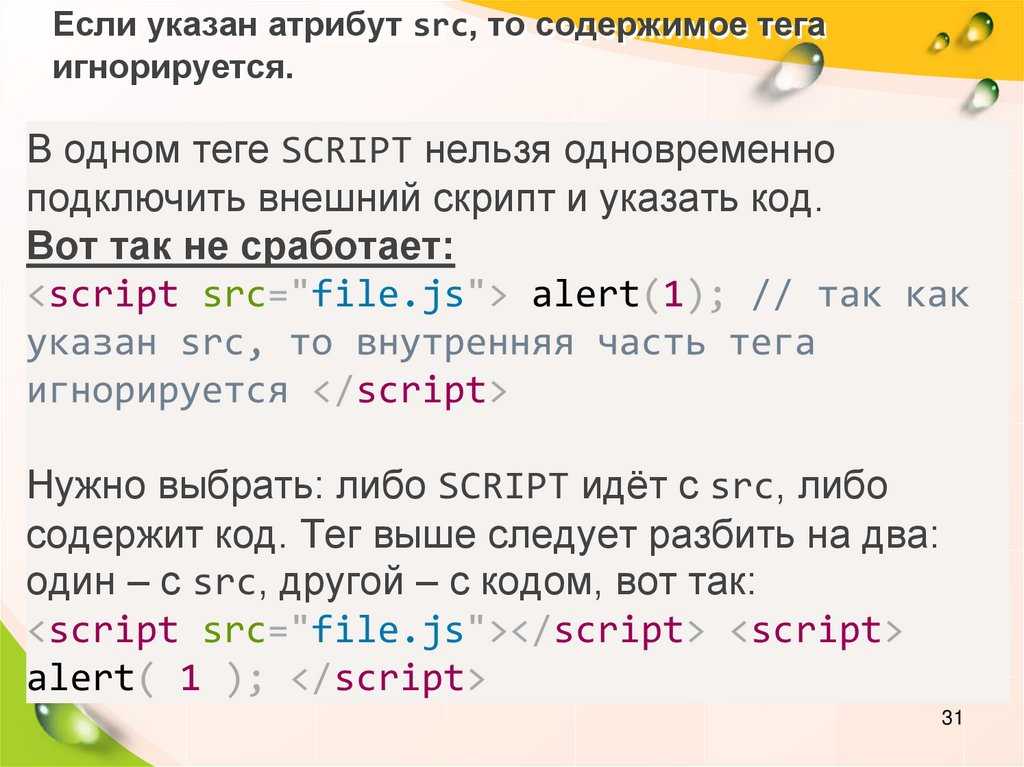
Атрибут src (Элемент <script>)
Атрибут src определяет местонахождение (URL) внешнего файла скрипта.
Файлы со скриптами обычно имеют расширение .js и могут размещаться в любом доступном месте.
Преимуществ использования внешних файлов со скриптом несколько. Внешний файл после первого обращения сохраняется в кэше браузера и при последующих вызовах загружается быстрее. Кроме того, вызываемые функции удобно править в одном месте и код проще контролировать. Это особенно актуально, когда несколько веб-страниц используют одни и те же скрипты.
Атрибут src (Элемент <track>)
Атрибут src является обязательным для элемента <track>. Он определяет местонахождение (URL) текстовой дорожки для медиафайла.
Поддержка браузерами
Атрибут src имеет следующую поддержку браузерами для каждого элемента:
- Настольные
- Мобильные
| Элемент | ||||||
| <audio> | 9+ | 3+ | 10.5+ | Да+ | 3.1+ | 3.5+ |
| <embed> | 3+ | 1+ | 3.5+ | 1+ | 1+ | 1+ |
| <iframe> | 4+ | 1+ | 4+ | 1+ | 1+ | 1+ |
| <img> | 1+ | 1+ | 1+ | 1+ | 1+ | 1+ |
| <input> | 2+ | 1+ | 1+ | 1+ | 1+ | 1+ |
| <script> | 3+ | 1+ | 3.5+ | 1+ | 1+ | 1+ |
| <source> | 9+ | 8+ | 10.5+ | Да | 4+ | 3.5+ |
| <track> | 10+ | 18+ | 10.5+ | Да | 4+ | 31+ |
| <video> | 9+ | 4+ | 11.5+ | Да+ | 4+ | 3.5+ |
| Элемент | ||||
| <audio> | 2.3+ | 3.5+ | 11+ | 3.2+ |
| <embed> | 1+ | 1+ | 6+ | 1+ |
| <iframe> | 1+ | 1+ | 6+ | 1+ |
| <img> | 1+ | 1+ | 4+ | 1+ |
| <input> | 1+ | 1+ | 6+ | 1+ |
| <script> | 1+ | 1+ | 6+ | 1+ |
| <source> | 2+ | 3.5+ | 11+ | 4+ |
| <track> | 2+ | 3.5+ | 11+ | 4+ |
| <video> | 2.1+ | 3.5+ | 12+ | 3.2+ |
Примеры
Аудиоплеер:
<audio src=»horse.ogg» controls>
Ваш браузер не поддерживает элемент аudio.
</audio>
Встроенная флэш-анимация:
<embed src=»helloworld.swf»>
<iframe> в самом простом варианте использования:
<iframe src=»/default.php»></iframe>
Изображение помечается следующим образом:
<img src=»smiley.gif» alt=»Улыбка»>
Пример Input
форма HTML с изображением, представляющим кнопку отправки:
<form action=»/action_page.php»>
Имя: <input type=»text» name=»fname»><br>
<input type=»image» src=»submit.gif» alt=»Отправить»>
</form>
Укажить на внешний файл JavaScript:
<script src=»myscripts.js»></script>
Пример Source
Аудиоплеер с двумя исходными файлами. Браузер должен выбрать, какой файл (если таковой имеется) поддерживает:
<audio controls>
<source src=»horse.ogg» type=»audio/ogg»>
<source src=»horse.mp3″ type=»audio/mpeg»>
Ваш браузер не поддерживает тег audio.
</audio>
Пример Track
Видео с двумя дорожками субтитров:
<video width=»320″ height=»240″ controls>
<source src=»forrest_gump.mp4″ type=»video/mp4″>
<source src=»forrest_gump.ogg» type=»video/ogg»>
<track src=»subtitles_en.vtt» kind=»subtitles» srclang=»en» label=»Английский»>
<track src=»subtitles_no.vtt» kind=»subtitles» srclang=»no» label=»Норвежский»>
</video>
Related Resources
- HTML Images
- CSS background-image Property
- CSS border-image Property
- CSS image-rendering Property
- How to Add an Animated Text Over an Image on Hover With CSS3
- How to Create an Image Slider or Slideshow
- How to Change the Color of PNG Image With CSS
- How to Add Advanced Hover Effects to an Image with Pure CSS
- How to Create a Drop Shadow for PNG Images
- How to Create Polaroid Image With CSS
- How to Center an Image Between the Containers
- How to Add Image in the Title Bar
- Lazy load images with JavaScript
- How to Add Border to Image in CSS
- How to Add a Frame Around an Image
- How to Make Images Responsive with CSS
- How to Give a Text or Image a Transparent Background Using CSS
- How to Scale Images and Background Images on Hover
- How to Resize Images Proportionally for Responsive Web Design With CSS
- How to Convert an Image into a Grayscale Image With CSS
- How to Disable Zoom on a Mobile Web Page With HTML and CSS
- How to Maintain the Aspect Ratio with CSS
- How to Auto-Resize the Image to fit an HTML Container
- How to Create Thumbnail Images
- How to Vertically Align a Text Next to the Image
- How to Position One Image on Top of Another in HTML/CSS
- How to Crop and Center Images Automatically in CSS
- How to Set the Equivalent of «src» Attribute of an <img> Tag in CSS
- How to Get the Children of the $(this) Selector
- How to Make the Div Height to Auto-Adjust to the Background Size
- When to Use HTML <img> Tag and CSS background-image Property
- How to Change the Image Source Using jQuery
- How to Make JavaScript Execute After Page Load
- How to Display Base64 Images in HTML
- How to Set an Equivalent of the «cover» Value of the background-size Property for an <img> Tag
- How to Center the Content in Grid
- How to Center an Image with the CSS text-align Property
- Is It Possible to Nest an HTML <button> Element Inside an <a> Element in HTML5
- How to Prevent the Appearance of Lines Around a Circle Created with clip-path
The new loading attribute
There is a new HTML attribute that allows deferring image and iframe loading until they are close to being shown. The WHATWG has a pull request for this feature, and it is already a part of Chromium (as of v76).
Supported values for the attribute include:
- «lazy» which defers the load until the image or iframe reaches a distance threshold from the viewport.
- «eager» which loads the resource immediately.
- «auto» which is the default behavior, loads the resource.
You can use the lazy value to take advantage of browser-native lazy loading:
Lazy loading is a set of techniques in web and application development that defers the loading of resources on a page to a later point in time when those resources are needed instead of loading them upfront. These techniques help improve performance and utilization of the device’s resources reducing associated costs.


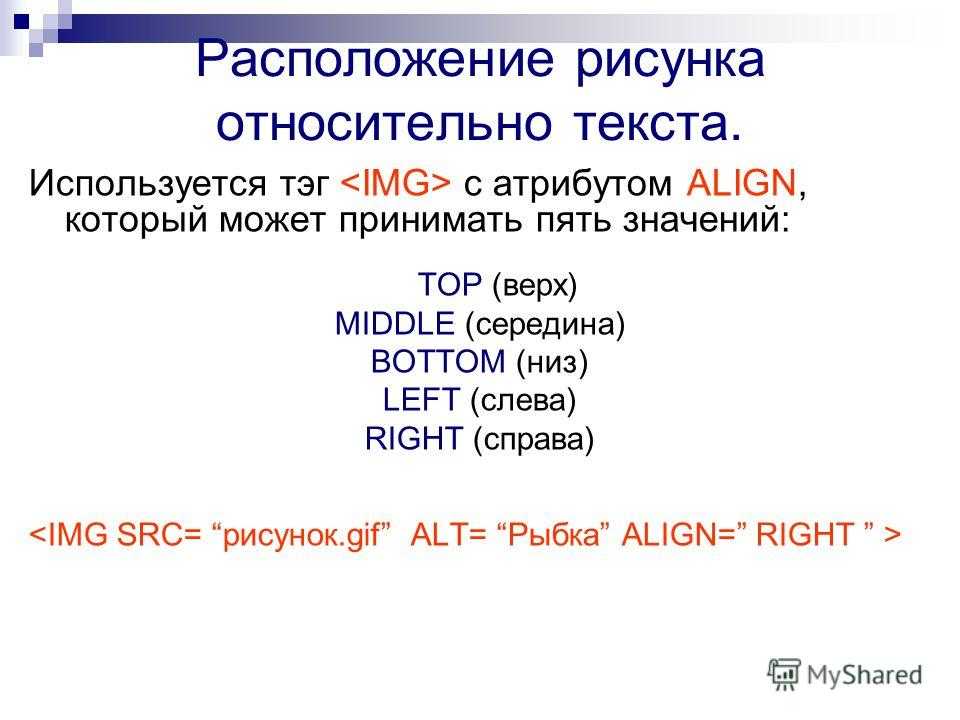
Атрибуты и свойства тега
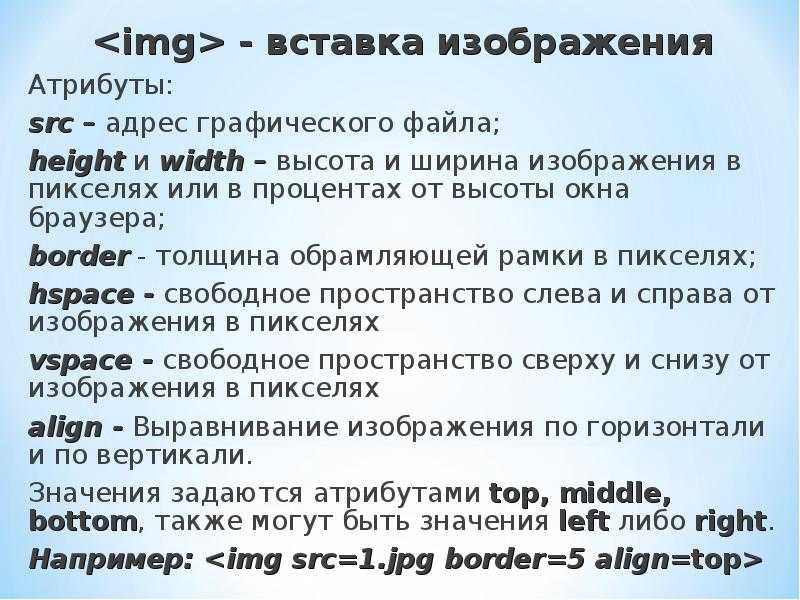
1. Свойство align=»параметр» — определяет выравнивание рисунка. Это значение так же влияет на то, как текст будет обтекать рисунок. Может принимать следующее параметры:
- left — выравнивание по левому краю
- middle — выравнивание середины изображения по базовой линии текущей строки
- bottom — выравнивание нижней границы изображения по окружающему тексту
- top — верхняя граница изображения выравнивается по самому высокому элементу текущей строки
- right — выравнивание по правому краю
Пример 3.1. Выравнивание изображения в html по правому краю
Преобразуется на странице в следующее:
2. Свойство alt=»текст» — подсказка/описание картинки. Выполняет сразу две важные функции:
- Выдает подсказку при наведении
- Если в браузере отключены изображения, то выводится этот текст
Этот атрибут также очень важен при ранжировании изображений в Яндекс Картинках и Google Картинках. Его следует прописывать к каждому изображению, поскольку это является одним из факторов в алгоритмах поисковых системах.
3. Свойство border=»ЧИСЛО» — задает толщину рамки обтекающей изображение. Измеряется в пикселях. Более подробно читайте в отдельной статье: свойство CSS border
Пример 3.2. Вывод картинки в html с рамкой (границей)
Преобразуется на странице в следующее:
4. Свойство bordercolor=»цвет» — задает цвет рамки, которая обтекает изображение. Имеет смысл, только если атрибут border больше 0.
Пример 3.3. Вывод картинки в html с цветной рамкой
Результат можно видеть чуть выше.
Примечание
Атрибуты border и bordercolor можно задать в стилях CSS к img:
5. Свойство height=»ЧИСЛО» — задает высоту изображения: либо в пикселях, либо в процентах %. Например, если изображение имеет размер 400х200, а мы укажем высоту 150 пикселей, то оно сжимается до 300х150 (на 25% меньше), т.е. пропорционально.
6. Свойство width=»ЧИСЛО» — задает ширину изображения: либо в пикселях, либо в процентах %. Например, если изображение имеет размер 1000х800, а ширина указывается 1200 пикселей, то оно автоматически расширяется на 20% до 1200х960.
7. Свойство hspace=»ЧИСЛО» — задает горизонтальный отступ изображения в пикселях от других объектов html.
8. Свойство vspace=»ЧИСЛО» — задает вертикальный отступ изображения в пикселях от других объектов html.
Примечание
Вместо hspace и vspace советую применять старый и проверенный margin (более подробно про него можете прочитать в уроке про описание стилей html). Кратко напомню:
- margin-top: X px; (X — отступ сверху)
- margin-bottom: Y px; (Y — отступ внизу)
- margin-left: L px; (L — отступ слева)
- margin-right: R px; (R — отступ справа)
Задают отступы от объектов в пикселях. Допускаются отрицательные значения. По умолчанию либо наследуется значение предка, либо имеет значение 0.
Например. Отступ слева составляет 50 пикселей, а сверху 10 пикселей.
Преобразуется на странице в следующее:
В данном примере — отступ сверху составил 10 пикселей, слева 50 пикселей.
9. Свойство class=»имя_класса» — можно присвоить класс изображению, чтобы задать стиль всем изображениям этого класса.
HTML Справочник
HTML Теги по алфавитуHTML Теги по категорииHTML ПоддержкаHTML АтрибутыHTML ГлобальныеHTML СобытияHTML Названия цветаHTML ХолстHTML Аудио/ВидеоHTML ДекларацииHTML Набор кодировокHTML URL кодHTML Коды языкаHTML Коды странHTTP СообщенияHTTP методыКовертер PX в EMКлавишные комбинации
HTML Теги
<!—…—>
<!DOCTYPE>
<a>
<abbr>
<acronym>
<address>
<applet>
<area>
<article>
<aside>
<audio>
<b>
<base>
<basefont>
<bdi>
<bdo>
<big>
<blockquote>
<body>
<br>
<button>
<canvas>
<caption>
<center>
<cite>
<code>
<col>
<colgroup>
<data>
<datalist>
<dd>
<del>
<details>
<dfn>
<dialog>
<dir>
<div>
<dl>
<dt>
<em>
<embed>
<fieldset>
<figcaption>
<figure>
<font>
<footer>
<form>
<frame>
<frameset>
<h1> — <h6>
<head>
<header>
<hr>
<html>
<i>
<iframe>
<img>
<input>
<ins>
<kbd>
<label>
<legend>
<li>
<link>
<main>
<map>
<mark>
<meta>
<meter>
<nav>
<noframes>
<noscript>
<object>
<ol>
<optgroup>
<option>
<output>
<p>
<param>
<picture>
<pre>
<progress>
<q>
<rp>
<rt>
<ruby>
<s>
<samp>
<script>
<section>
<select>
<small>
<source>
<span>
<strike>
<strong>
<style>
<sub>
<summary>
<sup>
<svg>
<table>
<tbody>
<td>
<template>
<textarea>
<tfoot>
<th>
<thead>
<time>
<title>
<tr>
<track>
<tt>
<u>
<ul>
<var>
<video>
<wbr>
HTML Tags
<!—><!DOCTYPE><a><abbr><acronym><address><applet><area><article><aside><audio><b><base><basefont><bdi><bdo><big><blockquote><body><br><button><canvas><caption><center><cite><code><col><colgroup><data><datalist><dd><del><details><dfn><dialog><dir><div><dl><dt><em><embed><fieldset><figcaption><figure><font><footer><form><frame><frameset><h1> — <h6><head><header><hr><html><i><iframe><img><input><ins><kbd><label><legend><li><link><main><map><mark><meta><meter><nav><noframes><noscript><object><ol><optgroup><option><output><p><param><picture><pre><progress><q><rp><rt><ruby><s><samp><script><section><select><small><source><span><strike><strong><style><sub><summary><sup><svg><table><tbody><td><template><textarea><tfoot><th><thead><time><title><tr><track><tt><u><ul><var><video>
HTML Tag Best Practices
Do not resize an image with the width and height attributes.
This is a bad practice because it can make the image appear distorted and can affect the quality.
Instead, you can optimize the image to your desired dimensions with photo editing software such as Photoshop.
In the code snippet below, I specify a width and height for the image – a bad practice:
The image looks like this:
Without using the width and height attributes, the image looks like this:
Looks better? Yes!
Name Your Images Appropriately
Naming images appropriately can help search engines understand what the image is about. For example, name an image instead of . The latter is not enough for search engine optimization (SEO).
Reduce Image File Size
The image’s file size is crucial when it comes to page speed. A smaller image size (that preserves the image’s quality) reduces load time while larger images take forever to load.
There are several tools and various software that can help you do this. Some examples are imageOptim, jStrip, and PNGGauntet. And if you’re concerned about SEO, you’ll want to look into these – as page speed is an important ranking factor.


Host Images with a CDN
Imagine if a website is hosted in the United States but a user in Africa wants to accessed it. Assets such as images and icons would have to travel from The States to Africa, which in turn slows download time.
Using a CDN (Content Delivery Network) will allow the website’s images to be cached across several locations around the world. The CDN can then serve them from locations closest to the user, improving load time and providing a better user experience.
Cloudflare is a popular CDN that a lot of developers use to host their images.
Use Descriptive Alternative Text
Using descriptive alternative text helps search engines understand what the image is about. But it doesn’t end there – the alt text must also be relevant to the image.
For example, use this:
Insead of this:
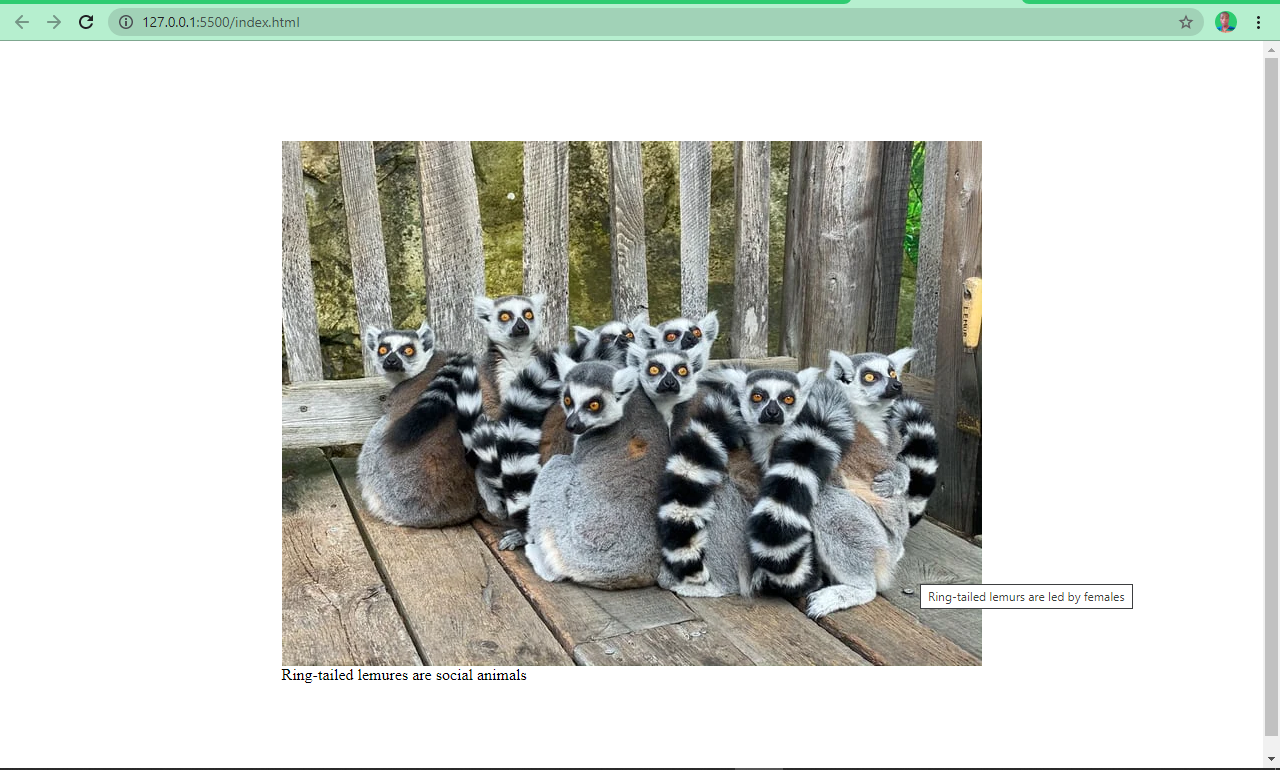
Use the Attribute to Show Tooltips
Just like the attribute, you can use the attribute to show additional information about the image. Browsers display this as a tooltip when the user hovers over the image.
HTML Tag Attributes
The Attribute
The attribute signifies the image source. Without it, the tag itself wouldn’t be functional in the real world.
It indicates to the browser where to find the image. So it takes a relative path if the image is hosted locally, or an absolute URL if the image is hosted online.
The Attribute
The alt attribute specifies an alternative text for the image. This could be the text that shows during a network failure, for example. Or it could display something when the image source is wrongly specified, so users know what the image is about.
In the code snippet below, the image source is wrongly specified, showing you the role that the attribute plays:
This is the CSS that centers the image horizontally and vertically:
And it looks like this:
The alt attribute is very important for 2 other reasons:
- SEO: it indicates to web crawlers what the image is about
- Accessibility: it helps screen readers know what the image is about so they can report that to visually impaired people. In addition, it lets users with low bandwidth know what the image is about.
The and Attributes
You can use these attributes to specify a certain width and height for your images. With these attributes, you can resize the image down or up.
Ideally, though, you shouldn’t resize an image with these attributes. We’ll touch on this more under best practices.
Using «data:image/[type];base64,[base64-string]» for src attribute
The format can be used as the value of the attribute of an tag to display an image directly from the HTML code, without having to load it from an external file.
Here’s an example of how to use this format to display an image in an tag:
In this example, specifies the MIME type of the image, and represents the base64-encoded image data.
Note that using base64-encoded images can increase the size of the HTML file, and can slow down the loading of the page. It’s generally recommended to use this format for small images or icons, and to use external files for larger images.