
Difference between cellspacing and cellpadding
There is a major difference between cellspacing and cellpadding. As i stated above cellpadding is spacing inside the columns or cells while the cellspacing is spacing outside the columns or cells. Let’s see a demonstration.
Difference between cellpadding and cellspacing
- Cellpadding and cellspacing both are related to cells height and width in cellpadding space between 1 cell and cellspacing means space between 2 cells. Or borders of table.
- Think of a cell as a box. Cellspacing is the space between boxes. Cellpadding is the space between the content inside the box and its borders.
- Cell Spacing is used to set space between different table cells. CellPadding is used the space between the edges of the cell and the content of the cell.
- Cellpadding space between Content of cell and Cell Wall while Cellspacing is space between two cells .
I am sure now you have clear understanding about cellpadding and cellspacing. Let’s now try to understand other attributes we use in tables like rowspan, colspan, valign, cellpadding and cellspacing.
HTML Tags
<!—><!DOCTYPE><a><abbr><acronym><address><applet><area><article><aside><audio><b><base><basefont><bdi><bdo><big><blockquote><body><br><button><canvas><caption><center><cite><code><col><colgroup><data><datalist><dd><del><details><dfn><dialog><dir><div><dl><dt><em><embed><fieldset><figcaption><figure><font><footer><form><frame><frameset><h1> — <h6><head><header><hr><html><i><iframe><img><input><ins><kbd><label><legend><li><link><main><map><mark><meta><meter><nav><noframes><noscript><object><ol><optgroup><option><output><p><param><picture><pre><progress><q><rp><rt><ruby><s><samp><script><section><select><small><source><span><strike><strong><style><sub><summary><sup><svg><table><tbody><td><template><textarea><tfoot><th><thead><time><title><tr><track><tt><u><ul><var><video>
What is cellspacing in HTML tables
Cellpspacing is another important attribute for table tag in HTML. As cellpadding provides space inside the cells. Oppositely cellspacing provides space outside the cells. For example if in a single row you have two cells and you have given 5px cellspacing to table. Both cells will have spacing top, right, bottom and left 5px which will make 10px spacing between two cells as both have 5px spacing on left and right. Spacing is always good to make something more readable and attention seeker.
The general format to specify cellspacing
When you start a table the cellspacing attribute is also defined in table’s tag similar to cellpadding.
<table border=”1px” cellspacing=”5px” cellpadding=”5px”> In this example we are defining cellspacing and cellpadding while giving 1px border to identify the spacing. Let’s take a look to complete example below.
In example above we have two rows in first row we have two headings and in second row we have two table data cells. So cellspacing will produce spacing between cells from top, left, right and bottom while cellpadding will produce spacing inside the cells.
Colspan and Rowspan Attributes
You will use colspan attribute if you want to merge two or more columns into a single column. Similar way you will use rowspan if you want to merge two or more rows.
Example
<!DOCTYPE html>
<html>

   <head>
      <title>HTML Table Colspan/Rowspan</title>
   </head>

   <body>
      <table border = "1">
         <tr>
            <th>Column 1</th>
            <th>Column 2</th>
            <th>Column 3</th>
         </tr>
         <tr>
            <td rowspan = "2">Row 1 Cell 1</td>
            <td>Row 1 Cell 2</td>
            <td>Row 1 Cell 3</td>
         </tr>
         <tr>
            <td>Row 2 Cell 2</td>
            <td>Row 2 Cell 3</td>
         </tr>
         <tr>
            <td colspan = "3">Row 3 Cell 1</td>
         </tr>
      </table>
   </body>

</html>
This will produce the following result −
Цвет border
Для границ есть атрибуты bordercolor , bordercolorlight , bordercolordark . Например:
<table border="2" bordercolor="blue" bordercolorlight="#00CCFF" bordercolordark="#000099">
Эти атрибуты, которые позволяют создавать красивые эффекты, корректно отображаются только в Internet Explorer, в то время как в других браузерах (Mozilla, Opera) они будут отображаться частично, если не некорректно.
На самом деле правильный способ назначить цвет границы — использовать CSS.
Тем не менее, существуют решения, используемые разработчиками начиная с HTML 3, которые позволяют отображать цветные линии вокруг таблиц. Техника обычно заключается в том, чтобы фоновый цвет показывался в пространстве между ячейками. Давайте посмотрим на пример:
<table width="450" bgcolor="#00CCFF" cellpadding="10" cellspacing="1">
<tr bgcolor="FFFFFF">
<td width="50%"><b>текст</b></td>
<td width="50%"> </td>
</tr>
</table>
который дает:
| текст |
Свойства и параметры html таблиц: отступ, ширина, цвет фона, граница (рамка)
тега tablewidth — ширина таблицы. может быть в пикселях или % от ширины экрана.bgcolor — цвет фона ячеек таблицыbackground — заливает фон таблицы рисункомborder — рамка и границы в таблице. Толщина указывается в пикселяхcellpadding — отступ в пикселях между содержимым ячейки и её внутренней границей
<table border="1" width="300"> <!-- Задаём границу в 1 пиксель и ширину в 300 пикселей -->
без крайне редко применяемых тегов caption и thborder (граница)width (ширина таблицы, строки или ячейки)bgcolor (цвет ячейки)
<html>
   <head>
   <title>Таблица html</title>
   </head>
<body>
<table border="1" width="300"> <!-- Задаём границу в 1 пиксель и ширину в 300 пикселей -->
   <tr bgcolor="Gainsboro">  <!-- Задаём цвет ячеек для всей первой строки -->
        <td>
            Стобец 1
        </td>
        <td>
            Стобец 2
        </td>
   </tr>
   <tr>
        <td>
            Текст в первой ячейке первого столбца
        </td>
        <td>
            Текст во второй ячейке второго столбца
        </td>
   </tr>
</table>
</body>
</html>
frame — атрибут, обозначающий рамку вокруг таблицы. Есть следующие значения:
void — рамки нет,
above — только верхняя рамка,
below — только нижняя рамка,
hsides — только верхняя и нижняя рамки,
vsides — только левая и правая рамки,
lhs — только левая рамка,
rhs — только правая рамка,
box — все четыре части рамки.rules — атрибут, обозначающий границы внутри таблицы, между ячейками. Есть следующие значения:
none — между ячейками нет границ,
groups — границы только между группами строк и группами столбцов (будут рассмотрены чуть позже),
rows — границы только между строками,
cols — границы только между стобцами,
all — отображать все границы.
<html>
   <head>
   <title>Таблица html</title>
   </head>
<body>
<table border="1" width="300" frame="void" rules="rows"> <!-- Задаём границу в 1 пиксель и ширину в 300 пикселей. Внешней рамки нет. Есть граница между строками -->
   <tr bgcolor="Gainsboro">  <!-- Задаём цвет ячеек для всей первой строки -->
        <td>
            Стобец 1
        </td>
        <td>
            Стобец 2
        </td>
   </tr>
   <tr>
        <td>
            Текст в первой ячейке первого столбца
        </td>
        <td>
            Текст во второй ячейке второго столбца
        </td>
   </tr>
</table>
</body>
</html>
| Поскольку атрибутом border теперь редко пользуются, то и я Вам рекомендую не привыкать к нему и следующие примеры будут без указания границ. |
выравнивание в таблицеalign — выравнивание таблицы. Её можно расположить слева (left), справа (right), по центру (center)cellspacing — расстояние между ячейками таблицы. Указывается в пикселях (по умолчанию 0 пикселей)cellpadding — отступ в пикселях между содержимым ячейки и её внутренней границей (по умолчанию 0 пикселей)
<html>
   <head>
   <title>Таблица html</title>
   </head>
<body>
<table width="400" align="center" cellspacing="5" cellpadding="10">
<!-- Задаём ширину 400 пикселей. Таблицу выравниваем по центру. Расстояние между ячейками 5 пикселей. Отступ между содержимым ячейки и её границей 10 пикселей -->
   <tr bgcolor="Gainsboro">  <!-- Задаём цвет ячеек для всей первой строки -->
        <td>
            Стобец 1
        </td>
        <td>
            Стобец 2
        </td>
   </tr>
   <tr>
        <td>
            Текст в первой ячейке первого столбца
        </td>
        <td>
            Текст во второй ячейке второго столбца
        </td>
   </tr>
</table>
</body>
</html>
Внимание! Если не указывать ширину таблицы или ячейки, не задавать отступы и выравнивания, то ширина таблицы будет строиться по содержимому — границы будут примыкать к словам, а ширина будет выбираться автоматически.
Расположение заголовка таблицы
Давайте рассмотрим еще одно простое свойство для стилизации таблиц — caption-side, которое устанавливает расположение заголовка таблицы (над или под таблицей). По умолчанию свойство caption-side имеет значение top, которое помещает заголовок над таблицей. Для того, чтобы поместить заголовок под таблицу необходим использовать свойство со значение bottom.
Давайте рассмотрим пример использования этого свойства:
<!DOCTYPE html>
<html>
<head>
<title>Пример использования свойства caption-side</title>
<style>
td, th {
border: 1px solid blue; /* задаем сплошную границу размером 1 пиксель синего цвета */
}
.topCaption {
caption-side: top; /* заголовок таблицы находится над ней */
}
.bottomCaption {
caption-side: bottom; /* заголовок таблицы находится под ней */
}
</style>
</head>
	<body>
		<table class = "topCaption">
			<caption>Заголовок над таблицей</caption>
			<tr>
				<th>Наименование</th><th>Цена</th>
			</tr>
			<tr>
				<td>Рыба</td><td>350 рублей</td>
			</tr>
			<tr>
				<td>Мясо</td><td>250 рублей</td>
			</tr>
		</table>
		<br>
		<table class = "bottomCaption">
			<caption>Заголовок под таблицей</caption>
			<tr>
				<th>Наименование</th><th>Цена</th>
			</tr>
			<tr>
				<td>Рыба</td><td>350 рублей</td>
			</tr>
			<tr>
				<td>Мясо</td><td>250 рублей</td>
			</tr>
		</table>
	</body>
</html>
В данном примере мы создали два класса, которые управляют расположением заголовка таблицы. Первый класс (.topCaption) помещает заголовок таблицы над ней, мы применили его к первой таблице, а второй класс (.bottomCaption) помещает заголовок таблицы под ней, мы применили его ко второй таблице. Класс .topCaption имеет значение свойства caption-side по умолчанию и создан для демонстрации.
Результат нашего примера:
Рис. 148 Пример использования свойства caption-side.
Table Heading
Table heading can be defined using <th> tag. This tag will be put to replace <td> tag, which is used to represent actual data cell. Normally you will put your top row as table heading as shown below, otherwise you can use <th> element in any row. Headings, which are defined in <th> tag are centered and bold by default.
Example
<!DOCTYPE html>
<html>

   <head>
      <title>HTML Table Header</title>
   </head>

   <body>
      <table border = "1">
         <tr>
            <th>Name</th>
            <th>Salary</th>
         </tr>
         <tr>
            <td>Ramesh Raman</td>
            <td>5000</td>
         </tr>

         <tr>
            <td>Shabbir Hussein</td>
            <td>7000</td>
         </tr>
      </table>
   </body>

</html>
This will produce the following result −
Table Header, Body, and Footer
Tables can be divided into three portions − a header, a body, and a foot. The head and foot are rather similar to headers and footers in a word-processed document that remain the same for every page, while the body is the main content holder of the table.
The three elements for separating the head, body, and foot of a table are −
-
<thead> − to create a separate table header.
-
<tbody> − to indicate the main body of the table.
-
<tfoot> − to create a separate table footer.
A table may contain several <tbody> elements to indicate different pages or groups of data. But it is notable that <thead> and <tfoot> tags should appear before <tbody>
Example
<!DOCTYPE html>
<html>

   <head>
      <title>HTML Table</title>
   </head>

   <body>
      <table border = "1" width = "100%">
         <thead>
            <tr>
               <td colspan = "4">This is the head of the table</td>
            </tr>
         </thead>

         <tfoot>
            <tr>
               <td colspan = "4">This is the foot of the table</td>
            </tr>
         </tfoot>

         <tbody>
            <tr>
               <td>Cell 1</td>
               <td>Cell 2</td>
               <td>Cell 3</td>
               <td>Cell 4</td>
            </tr>
         </tbody>

      </table>
   </body>

</html>
This will produce the following result −
Using CSS padding for Cell padding
Now lets look into cell padding. As I’ve already mentioned above attribute of table tag is not supported by HTML5, we have to look for other alternatives to function the same.
Luckily, we have property in CSS which works just fine.
I am not going to add some extra HTML for this section. Since the structure is same to that of section 3. Though just for the difference I will be changing some texts beyond the table element which doesn’t effect our table representation.
So yeah, Lets just add CSS for this section.
In the above CSS I’ve added border to table and padding to table head and data. Let’s see how that changes our table:
 Css padding in table
Okay, It’s should obvious as of now, if you followed along, that each cell has been padded to 20px in all sides. There is no any stringent rule on the value of in padding.
So lets see how differentiates the table designs for each value.
Border-collapse
In CSS, helps to set the border of tables separately or collapsed as a single border. All along this tutorial, we haven’t touched property. So due to the default value, you can see separate borders for each row.
In this above CSS padding example, lets modify border-collapse value to see how it effects our table cells.
Here, we’ve set the value of to . Now lets see how this changes the table compared to previous display.
 Css padding with Border-collapae
More Complex Rendering Models
Scrollable Regions
The HTML table model allows you to group rows and columns. For large
tables, you might want to make regions of the table into scrolling
regions with their own scroll bars. The model is designed to make it
easy to keep the table head and foot fixed while scrolling the body
rows. This could be controlled by a scroll property that indicates
intended viewing area for the scrollable region. This property could be
used for the TBODY element, but may also be worth supporting for
individual cells, rows or columns. For TBODY, the viewable area could be
specified as a single length value denoting the height of the viewable
area. The width is given by the table width. For cells, one might want
to give both a width and a height as an indication of the minimum size
for each dimension when assigning row heights and column widths.
Borders around groups of cells
One possibility is for the author to drag select a group of cells and
to set internal and external border properties for the group. This could
be handled by setting the properties directly on each of the cells.
Indeed, this is how most current word processing software works today.
Another approach is to ask the author to create a class name for the
group which is used to set the class attribute value for each of the
cells. This is analogous to creating a new paragraph style for Word.
One can then associate different border properties for the
internal and external border of the group. For instance
«border-inner-style: dotted» and «border-style: solid». This would
produce a solid line for the cell borders on the outside of the group
and dotted lines for borders within the group. This works even for
non-contiguous groups of cells. For isolated cells only the external
border style matters. The internal style is only used when two cells in
the group share a common border. This approach makes the most sense
when the cell margins are set to «none» so that adjacent borders are
coincident.
Borders around Rows, Columns, Row or Column Groups
It would be easy enough to extend CSS to allow the border, margin and
padding properties to be used with the TR, THEAD, TBODY, TFOOT, COL and
COLGROUP elements. This introduces the same problem as differing cell
margins. For instance, you could define a thick border around a
particular column. The other columns would then need to be adjusted to
ensure that the cells in each row stay in alignment.
Column borders would fit between the inter-column rule and the cell
borders. Column group borders would likewise fit between inter-column
rule and the coloumn border. A similar situation applies to borders
around rows and row groups. Precedence rules similar to those for
cells would be needed to deal with overlapping borders when this
arises.
Support for these additional borders seems like a relatively
straightforward extension, once practical experience has been gained
with the simpler model outlined in the current proposal.
Cellspacing with border-spacing CSS
Since cellpadding and cellspacing attribute on HTML has been deprecated on HTML5. We need another alternative for padding and spacing of cells.
So, In this section we will be using border-spacing to CSS property which allows of cellspacing on table.
Okay, Lets add the following HTML. It is exactly same to the HTML code of above sections just without any attributes in tag.
Now lets add border-spacing property on our CSS.
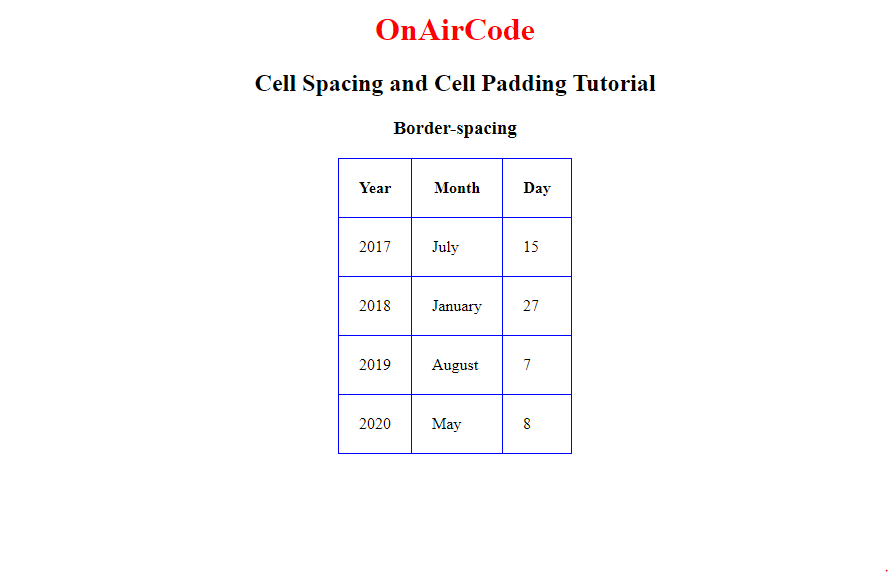
In the above CSS, I’ve set border-spacing to 25px which sets the cellspacing to 25px. So, with this property the result design should be same to that of section 1.
table spacing with border-spacing
Border-spacing
Okay, Since the special feature of this section is . Lets look into this property with more details. First of all, property is only applicable to tables or inline-tables unlike CSS ,which ,though, we will use it as a cell padding in following section, can be applied to any elements.
Also requires that property be set to which is its default value. This means that if you change border-collapse property setting it to other than then property won’t work.
In our CSS, we haven’t used property coz it’s default property is already .
Now lets look into values of the property. It can have three different types of values.
- Length Length
- initial
- inherit
Length Length: allows us to set values in px, cm etc with first length denoting the space between horizontally adjacent cells and second length denoting the space between vertically adjacent cells.
However In tutorial we have only used one length as: this sets the distance to between all adjacent cells be it vertical or horizontal.
Note: initial is used to set to default value and inherit is used to inherit value from its parent
How to adjust spacing separately for the top, right, left, and bottom of each cell?
You can use the CSS property to adjust the spacing of each cell in an HTML table separately. The property takes up to four values, which correspond to the top, right, bottom, and left sides of the element, respectively.
Here’s an example of how to adjust the spacing of each cell separately in an HTML table:
Try it Yourself »
In this example, the first cell in the first row has a padding of 10 pixels for the top, 20 pixels for the right, 30 pixels for the bottom, and 40 pixels for the left. The second cell in the first row has a padding of 20 pixels for the top and bottom, and 30 pixels for the right and left. The first cell in the second row has a padding of 0 pixels for the top and right, and 10 pixels for the bottom. The second cell in the second row has a padding of 0 pixels for the top and bottom, and 20 pixels for the right and left.
Content: Cellpadding Vs Cellspacing
Comparison Chart
| Basis for comparison | Cellpadding | Cellspacing |
|---|---|---|
| Basic | Controls the white space between the border of a cell and its content. | Sets the space between the solitary cells. |
| Meant for | Single cell | More than one cell |
| HTML format |
Definition of Cellpadding
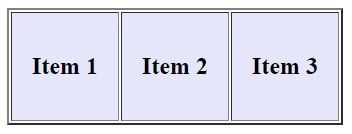
The attribute which sets the space in a cell between the content and peripheral boundary is named as cellpadding. In other words, the distance between the content that a cell surrounds and the cell boundary is managed by cellpadding attribute. The unit of this distance can be implied in pixels or percentage in HTML. The cellpadding attribute value can also be of 0 value, according to the need of the users. It is used to separate the text from each other which ameliorates the appearance.
Older versions of HTML support cellpadding command but later version HTML5 does not permit the use of cellpadding, so as the substitute CSS is used to provide the same formatting when required.
Definition of Cellspacing
Cellspacing is different than cellpadding. It controls the distance between single cells in a table. By using this attribute, designers could easily alter the space between the edges of the different adjacent cells. It improves the clarity of the table. The increase in the quantity of cellspacing apparently increases the cell border, which will be shown in the example.
Cellspacing is mainly used in web designing. Different languages have quite a different syntax for the cellspacing such as in CSS it is employed using “border-spacing” property while in HTML “cellspacing” is used.
Key Differences Between Cellpadding and Cellspacing
- Cellpadding describes the whitespaces in a cell along the text and the cell edge. On the other hand, cellspacing signifies the whitespace between the different cells. Both are absolutely different.
- Cellpadding involves the space within a cell while cellspacing involves the width between the cells (i.e. more than one cell).
Example of Cellpadding
<!DOCTYPE html>
<html>
<head>
<style>
td { background:lavender;}
</style>
<title>
Webpage table
</title>
</head>
<body>
<table border="2" cellpadding="20">
<tr>
<td>
<h2>Item 1</h2>
</td>
<td>
<h2>Item 2</h2>
</td>
<td>
<h2>Item 3</h2>
</td>
</tr>
</table>
</body>
</html>
OUTPUT:

Example of Cellspacing
<!DOCTYPE html>
<html>
<head>
<style>
td { background:lavender;}
</style>
<title>
Webpage table
</title>
</head>
<body>
<table border="2" cellspacing="10" >
<tr>
<td>
<h2>Item 1</h2>
</td>
<td>
<h2>Item 2</h2>
</td>
<td>
<h2>Item 3</h2>
</td>
</tr>
</table>
</body>
</html>
OUTPUT:
Conclusion
Cellpadding and cellspacing are two of the attributes which assist the controlling of the style and layout of the tables in web pages. Cellpadding creates whitespaces within a cell between the text and the cell border while cellspacing can be used to manage the space between the cells in a table.
Properties associated with the TABLE element
Many of the properties allow you to give from one to four values.
The order is top, right, bottom, left. If there is only one value, it
applies to all sides, if there are two or three, the missing values are
taken from the opposite side.
What does it mean if there are only two or three values? The above
isn’t sufficiently clear. <left> ]] would make
more sense to me.
Border-Style
This sets the style of the border. You can supply one to four
values to set the border style independently for each of the four
sides. The possible values are:
- INSET
-
A 3D inset, with a light color to the right and bottom; and a
dark color to the left and top. - OUTSET
-
A 3D outset, with a dark color to the right and bottom; and a
light color to the left and top. - GROOVE
-
A 3D groove, with the left and right sides drawn with a light colored
line to the immediate left of a dark colored line. The top and bottom
sides are drawn with a dark colored line immediately above a light
colored line. - RIDGE
-
A 3D ridge, with the left and right sides drawn with a dark colored
line to the immediate left of a light colored line. The top and bottom
sides are drawn with a light colored line immediately above a dark
colored line. - DOTTED
-
A simple dotted line.
- DASHED
-
A simple dashed (i.e. broken) line.
- SOLID
-
A continous line.
- DOUBLE
- A double line made up from an outer thicker solid line
next to a thinner inner solid line.
Border-Width
This property sets the width of the border. You can give from one to
four values to set the widths of each of the four sides independently.
The value is given in the standard CSS notation for lengths, e.g.
border-width: 4px for a four pixel wide line. You can also
use a keyword for the width, e.g. thin, medium and
thick.
Certain border styles have a minimum width, e.g. groove must
be 2 pixels wide or more, while double must be 3 pixels wide or
more. If the border-width property is set to less than the minimum value
for the specified border-style, then then the minimum value is used
instead.
Border-Color
This sets the color for the border. You can give from one to four
values to set the colors of each of the four sides independently.
Color values are given using the standard CSS notation for colors,
e.g. border-color: #0000C0 for a dark blue border.
What about a syntax like «border-color: rgb(0, 0, 192)» allowing you
to specify colors as decimal values which are much easier for users to
get hold of than the hexadecimal equivalents.
For border styles involving a 3D effect, how can you give a pair of
color values corresponding to the light and dark colors needed for these
effects? I would suggest a paired notation, e.g. «light/dark» where the
words light and dark are replaced by the corresponding color values.
Border
This allows you to give values for width, style and color in one go:
e.g. «border: thin solid black«. It is formally defined as:
border: <border-width> ]
Padding
This is used to set the table padding. One to four length values
can be given using the standard CSS notation to set the padding for
each of the four sides independently, e.g. padding: 4px.
CellMargin
This sets the value for cell margins. Like padding, you can supply
one to four length values, e.g. cellmargin: 4px. This property
is only needed if we want to avoid the search process for dealing
different cell margins for cells in a given row or column.
CellPadding
This is used to set the default cell padding for the table. One to
four length values can be given using the standard CSS notation to set
the padding for each of the four sides independently, e.g. padding:
4px.
HTML td: nowrap
Благодаря атрибуту nowrap вы можете сделать так, чтобы содержимое ячейки не было перенесено , если только мы явно не наложим на него значение <br> (что означает «break », то есть «break»):
<table width="100" border="1">
<tr>
<td nowrap>
Этот текст не будет перенесен на новую строчку<br>
в этот будет с новой строчки
</td>
</tr>
</table>
Обратите внимание, что когда ячейка не заполнена каким-либо элементом, не все браузеры будут отображать края одинаково. Поэтому всегда желательно заполнять ячейки чем-либо, даже символом «а» (это обозначение для обозначения «неразрывного пробела» , то есть «пробела, который не переносится») или а . как и все сущности, это специальный символ и принимает размер тега, внутри которого они содержатся
Поэтому всегда желательно заполнять ячейки чем-либо, даже символом «а» (это обозначение для обозначения «неразрывного пробела» , то есть «пробела, который не переносится») или а . как и все сущности, это специальный символ и принимает размер тега, внутри которого они содержатся.