
Иерархия window.frames
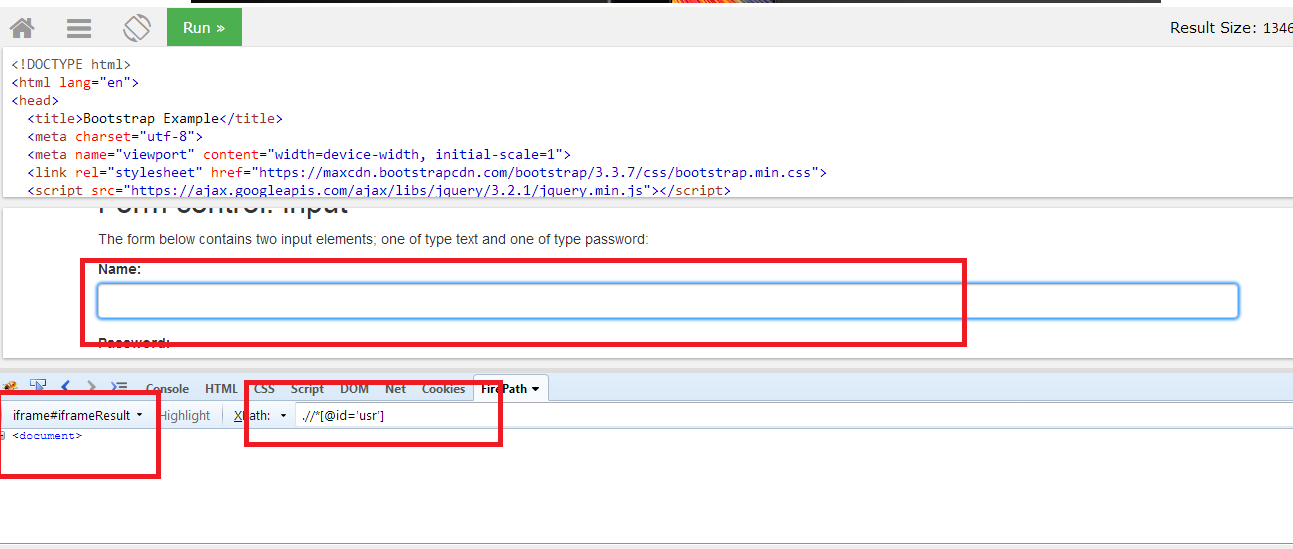
Альтернативный способ доступа к окну ифрейма – это получить его из коллекции .
Есть два способа доступа:
- – доступ по номеру.
- – доступ по ифрейма.
Обратим внимание: в коллекции хранится именно окно (), а не DOM-элемент. Демонстрация всех способов доступа к окну:
Демонстрация всех способов доступа к окну:
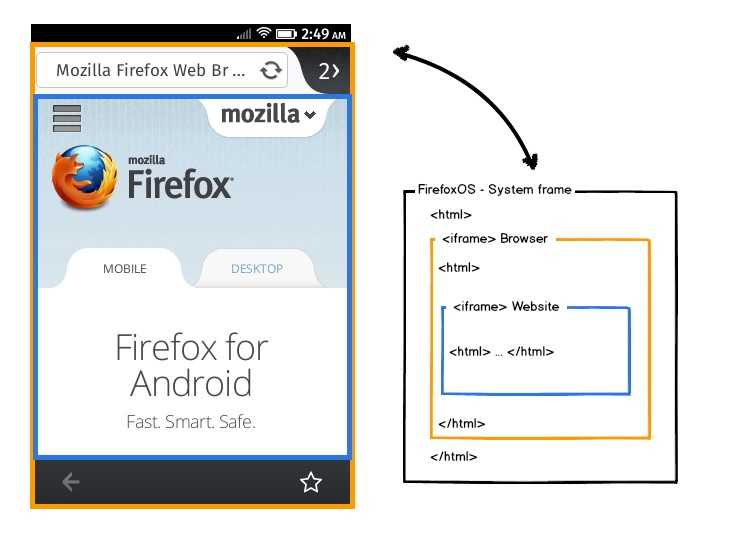
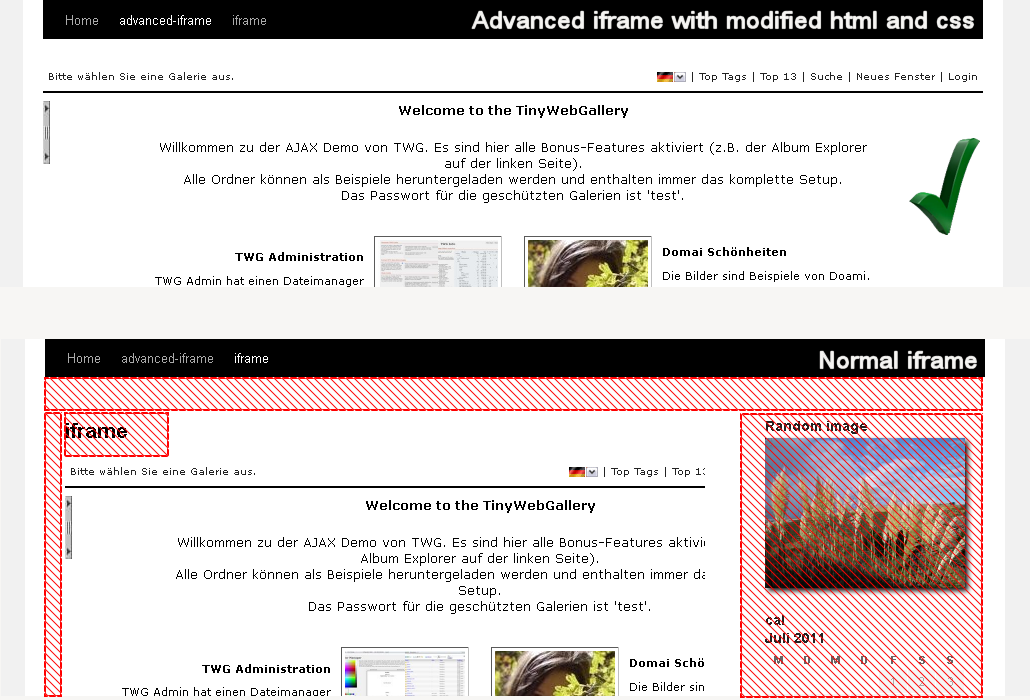
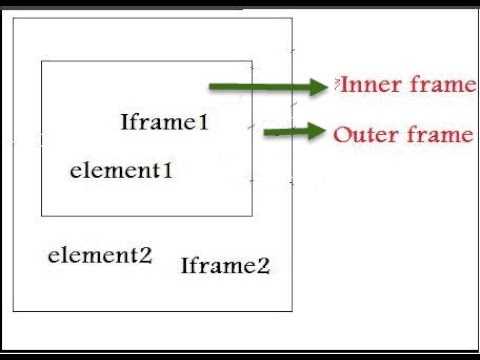
Внутри ифрейма могут быть свои вложенные ифреймы. Всё это вместе образует иерархию.
Ссылки для навигации по ней:
-
– коллекция «детей» (вложенных ифреймов)
-
– содержит ссылку на родительское окно, позволяет обратиться к нему из ифрейма.
Всегда верно:
-
– содержит ссылку на самое верхнее окно (вершину иерархии).
Всегда верно (в предположении, что вложенные фреймы существуют):
Свойство позволяет легко проверить, во фрейме ли находится текущий документ:
Исчерпывающий путеводитель по тегу iframe +27
- 16.02.20 08:33
•
BlackStar1991
•
#488516
•
Хабрахабр
•
Перевод
•
•
11300
Разработка веб-сайтов, HTML
Рекомендация: подборка платных и бесплатных курсов создания сайтов — https://katalog-kursov.ru/
Элемент iframe (сокращение от встроенного фрейма), вероятно, является одним из старейших тегов HTML и был представлен ещё в далеком 1997 году в HTML 4.01 Microsoft Internet Explorer.
Хотя все современные браузеры поддерживают данный тег, многие разработчики пишут бесконечные статьи, не советуя им пользоваться. Я считаю, что плохая репутация, которая сформировалась, около данного тега не должна мешать вам использовать его. У данного тега есть много хороших примеров применения. Кроме того, iframe не так сложно защитить, поэтому вам не придется беспокоиться о заражении компьютера вашего пользователя.
Чтобы помочь вам сформировать собственное мнение и отточить свои навыки разработчика, мы расскажем обо всем, что вам нужно знать об этом противоречивом теге.
Мы рассмотрим большинство функций, которые предоставляет элемент iframe, и поговорим о том, как их использовать, а также о том, как iframe может быть полезен для преодоления некоторых сложных ситуаций. Наконец, мы поговорим о том, как вы можете защитить свой iframe, чтобы избежать потенциальных уязвимостей.
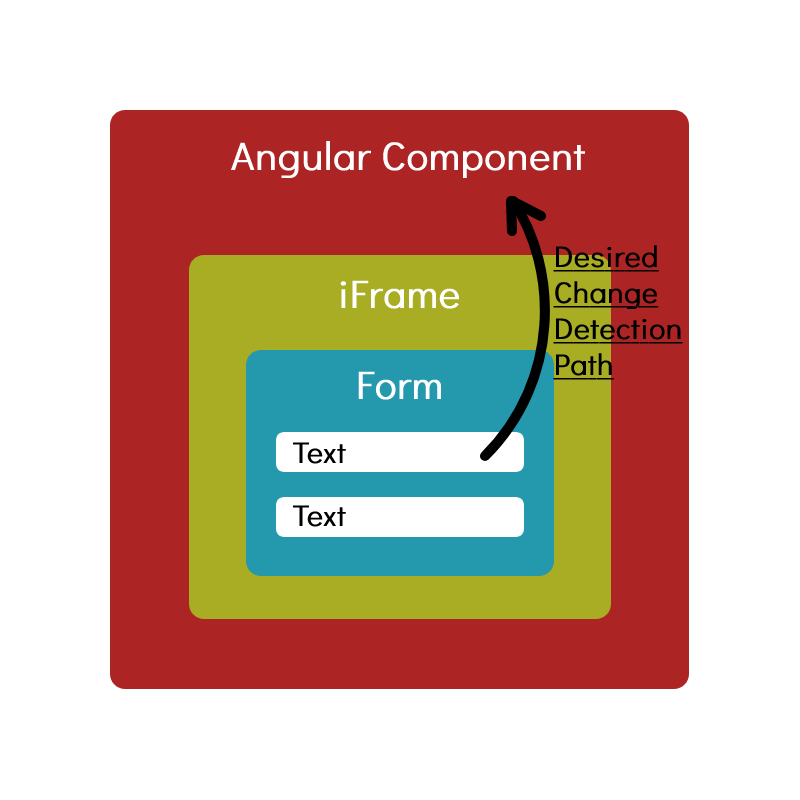
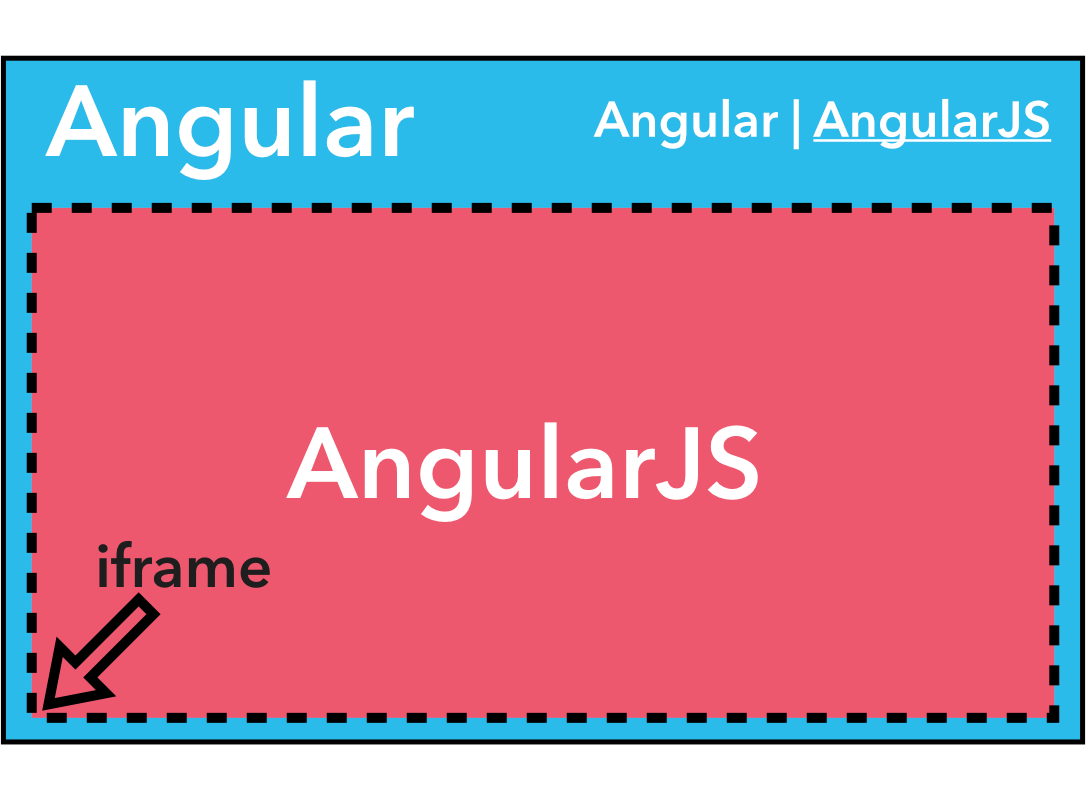
React portal
According to the React documentation, portals allow us to render children into a DOM node that exists outside of the parent component’s DOM hierarchy. Basically, portals let us render children wherever we want to.
You can create a portal with the following command:
ReactDOM.createPortal(child, container)
In this case, the child is a React element, fragment, or string, and the container is the DOM location or node to which the portal should be rendered.
With a React portal, we can choose where to place a DOM node in the DOM hierarchy. To do so, we’ll first establish a reference to an existing and mounted DOM node. In this case, it would be in the of a given . Then, we’ll create a portal with it. The portal’s contents are also considered children of the parent’s virtual DOM.
Let’s say we have the following file called :
import React from 'react'

function MyComponent() {
    return (
        <div>
            <p style={{color: 'red'}}>Testing to see if my component renders!</p>
        </div>
    )
}

export default MyComponent;
Now, let’s create a file called and write the following code:
import React, { useState } from 'react'
import { createPortal } from 'react-dom'

const CustomIframe = ({
  children,
  ...props
}) => {
  const  = useState(null)

  const mountNode =
    contentRef?.contentWindow?.document?.body

  return (
    <iframe {...props} ref={setContentRef}>
      {mountNode && createPortal(children, mountNode)}
    </iframe>
  )
}

export default CustomIframe;
We created a with the Hook, therefore, once the state is updated, the component will re-render. We also got access to the iframe document body, then created a portal to render the children passed to in its body instead:
import './App.css';
import CustomIframe from './CustomIframe';
import MyComponent from './MyComponent';
function App() {


  return (
    <CustomIframe title='A custom made iframe'>
        <MyComponent />
      </CustomIframe>
  );
}

export default App;
You can pass any React app or component as a child of , and it will work just fine!
The React app or component will become encapsulated, meaning you can develop and maintain it independently.
You can also achieve the same encapsulation as above using a library called . To install it, run the following command:
npm install --save react-frame-component
Encapsulate your component as follows:
import Frame from 'react-frame-component';

function App() {

  return (
    <div className='App'>
        <p>Iframes in React</p>
        <Frame >
           <MyComponent />
        </Frame>
    </div>
  );
}

export default App;
Style scoped attribute
What is it?
- The spec:
- Support: Chrome 19, via flag
(source,
see also)
This is a method for limiting the effect of styling to the element it is
defined within. It is used like so:
(GitHub Gist)
In today’s (hoverboard-free) world, all the text in the example before would be
rendered in red. In the future, the “scoped” attribute on the tag will
limit the effect of the tag to its siblings.
Why is it relevant?
Some applications may programmatically append elements to the
publisher’s page. In these cases, there is a danger that the new rules
unintentionally affect publisher content. By utilizing the attribute,
applications can prevent this unfortunate side-effect.
Recommendation
This functionality isn’t backwards compatible, so you’ll break pages on “old”
(by tomorrow’s standards) browsers. To use in production, a JavaScript
polyfill is completely necessary.
I would normally endorse using the feature anyway (in order to reap the
benefits in supporting browsers). Unfortunately, in order to properly “opt in”
to this behavior, your code will need to do more than just declare the attribute. Similar content in disparate locations will require duplicate style
elements. It seems somewhat unreasonable to implement such a large change for
the limited reward (avoiding an unlikely side-effect in some future browsers).
All in all, I’d say, “Don’t bother.” Stick with namespacing your ID’s and class
names; for example, use in place of simply .
What are the Related other HTML Tags to ?
The other related HTML Tags to the <iframe> HTML Tag are listed below.
- <noframes> HTML Tag: The <noframes> HTML Tag and the <iframe> HTML Tag are related because they are both frames HTML Tags. The <noframe> HTML Tag provides an additional content option for people who do not have frame support. However, this tag is not support by HTML5.
- <frameset> HTML Tag: The <frameset> HTML Tag and the <iframe> HTML Tag are related because they are both frames HTML Tags. The <frameset> HTML Tag specifies a collection of frames to be used. However, this tag is not support by HTML5.
- <frame> HTML Tag: The <frame> HTML Tag and the <iframe> HTML tag are related because they are both frames html Tags. The <frame> HTML Tag specifies a window or a frame within a frameset. However, this tag is not support by HTML5.
Значение и применение
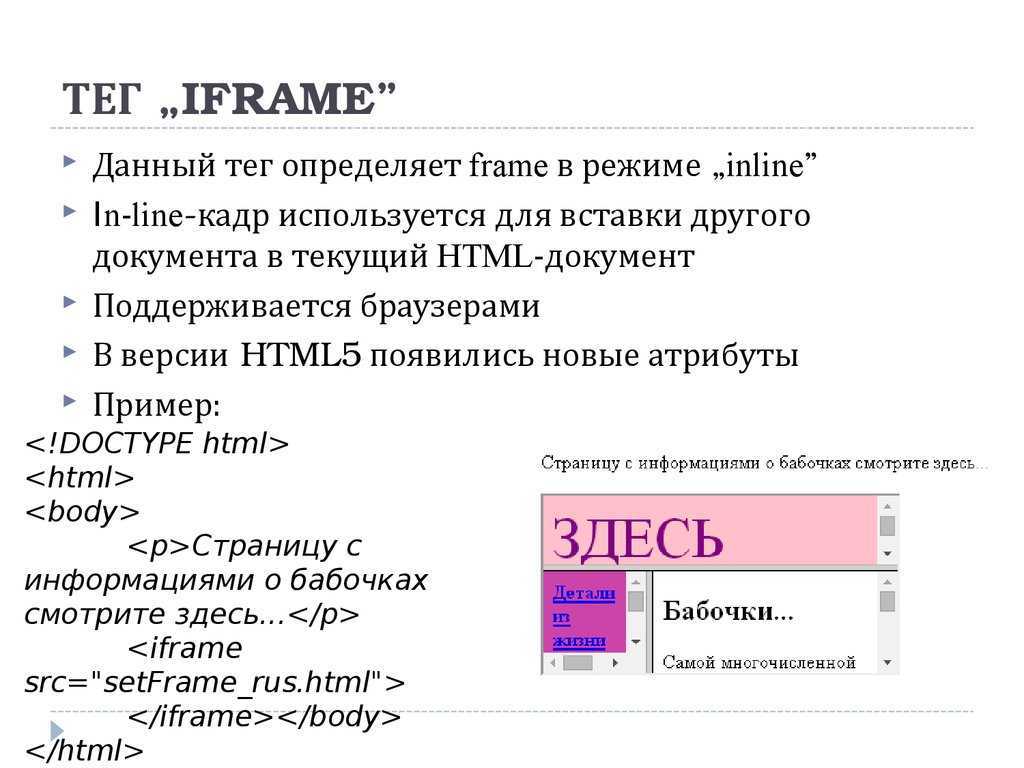
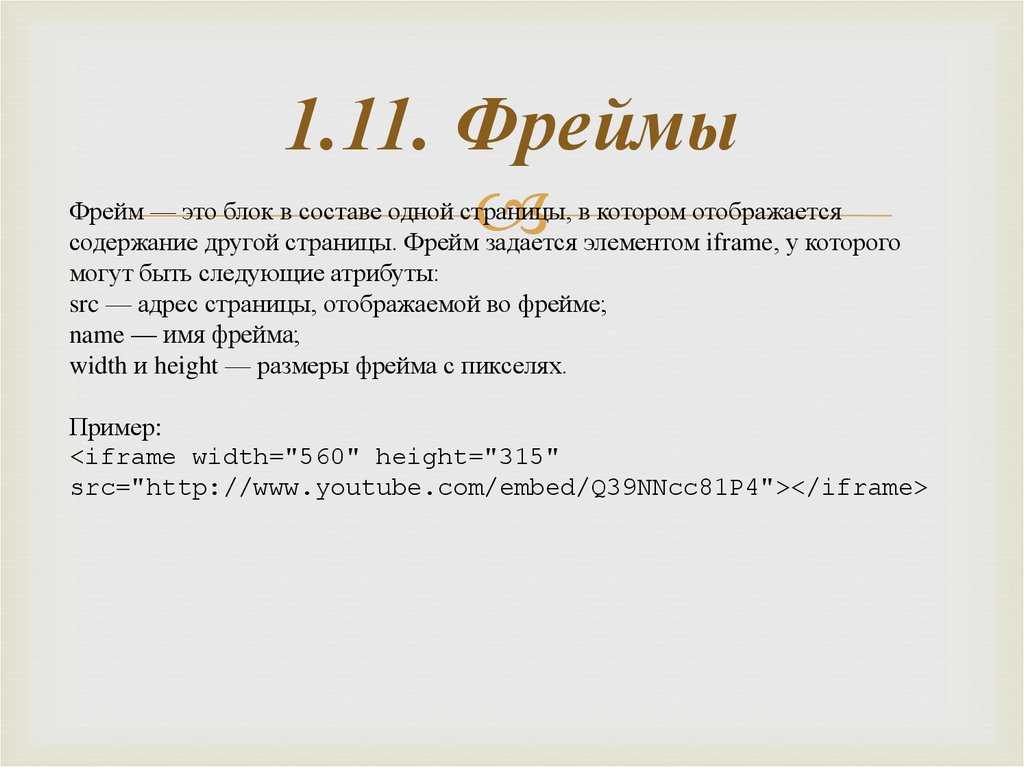
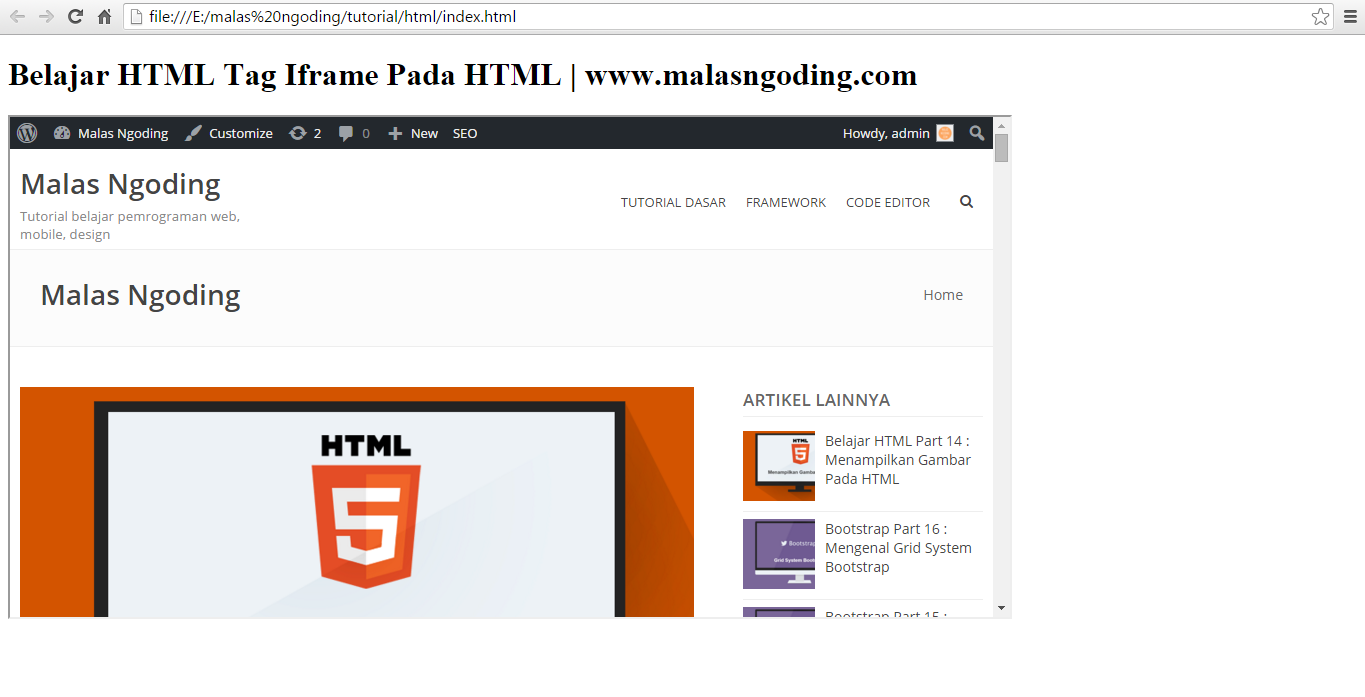
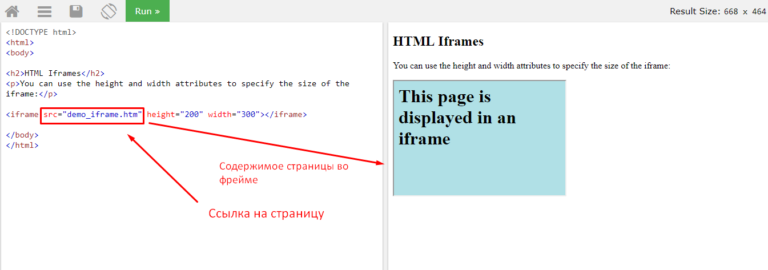
Тег <iframe> (HTML Inline Frame Element) определяет встроенную в веб-страницу область, которая может отображать содержимое отдельно взятого документа (например, *.pdf), медиа-контента или другого веб-сайта в заданном пространстве. Содержимое внутри области существует независимо от окружающей страницы.
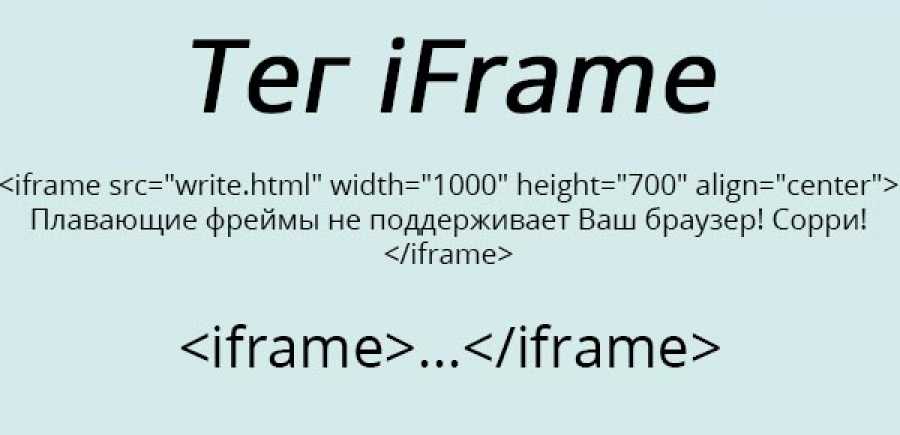
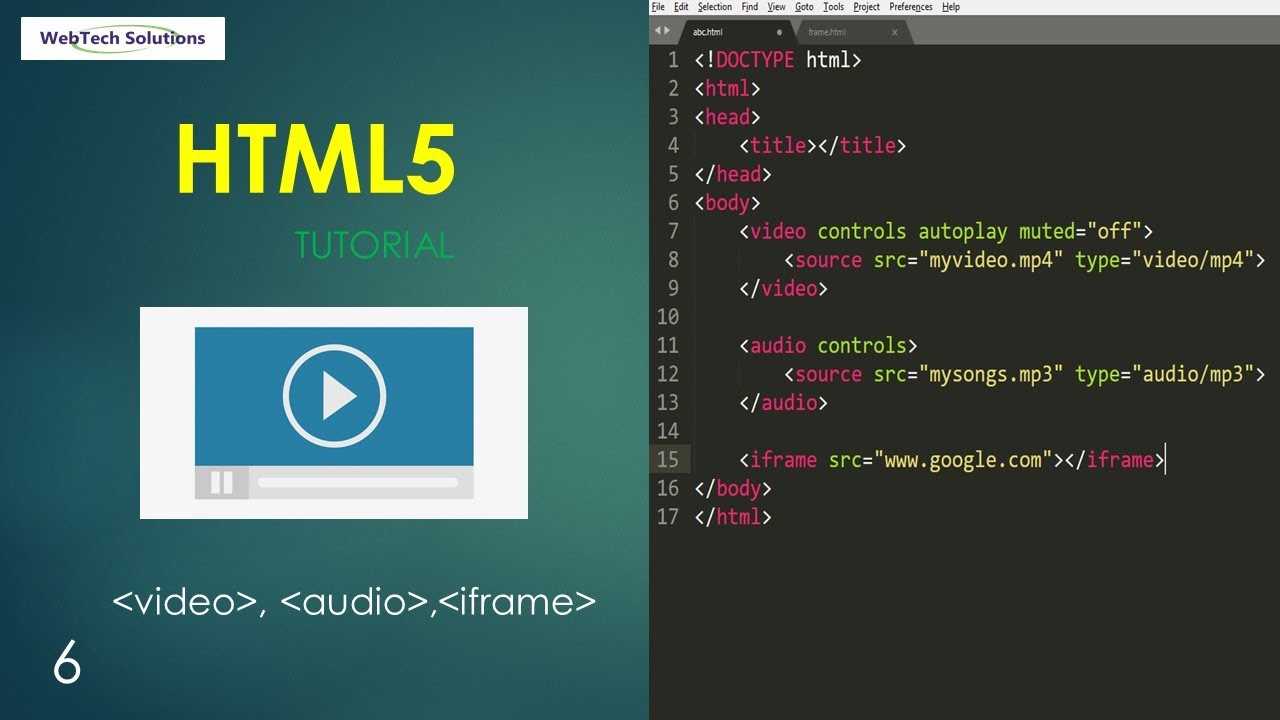
Синтаксис для добавления фрейма:
<iframe src = "URL"> </iframe>, где src атрибут, который определяет местоположение документа или веб-сайта.
Обращаю Ваше внимание, на то что некоторые сайты, например такие как поисковые системы, блокируют возможность размещения страницы сайта во фреймах, либо осуществляют переход по таймеру на свою «реальную» страницу
Песочница sandbox
Атрибут позволяет построить «песочницу» вокруг ифрейма, запретив ему выполнять ряд действий.
Наличие атрибута :
- Заставляет браузер считать ифрейм загруженным с другого источника, так что он и внешнее окно больше не могут обращаться к переменным друг друга.
- Отключает формы и скрипты в ифрейме.
- Запрещает менять из ифрейма.
Пример ниже загружает в документ с JavaScript и формой. Ни то ни другое не сработает:
Если у атрибута нет значения, то браузер применяет максимум ограничений.
Атрибут может содержать через пробел список ограничений, которые не нужны:
- allow-same-origin
- Браузер будет считать документ в ифрейме пришедшим с другого домена и накладывать соответствующие ограничения на работу с ним. Если ифрейм и так с другого домена, то ничего не меняется.
- allow-top-navigation
- Разрешает ифрейму менять .
- allow-forms
- Разрешает отправлять формы из .
- allow-scripts
- Разрешает выполнение скриптов из ифрейма. Но скриптам, всё же, будет запрещено открывать попапы.
Template
Here’s a template for the tag with all available attributes for the tag (based on HTML5). These are grouped into attribute types, each type separated by a space. In many cases, you will probably only need one or two (if any) attributes. Simply remove the attributes you don’t need.
For more information on attributes for this tag, see HTML5 Tag and HTML4 Tag.
<iframe
src=»»
srcdoc=»»
name=»»
sandbox=»»
width=»»
height=»»
accesskey=»»
class=»»
contenteditable=»»
contextmenu=»»
dir=»»
draggable=»»
dropzone=»»
hidden=»»
id=»»
itemid=»»
itemprop=»»
itemref=»»
itemscope=»»
itemtype=»»
lang=»»
spellcheck=»»
style=»»
tabindex=»»
title=»»
translate=»»
onabort=»»
onautocomplete=»»
onautocompleteerror=»»
onblur=»»
oncancel=»»
oncanplay=»»
oncanplaythrough=»»
onchange=»»
onclick=»»
onclose=»»
oncontextmenu=»»
oncuechange=»»
ondblclick=»»
ondrag=»»
ondragend=»»
ondragenter=»»
ondragexit=»»
ondragleave=»»
ondragover=»»
ondragstart=»»
ondrop=»»
ondurationchange=»»
onemptied=»»
onended=»»
onerror=»»
onfocus=»»
oninput=»»
oninvalid=»»
onkeydown=»»
onkeypress=»»
onkeyup=»»
onload=»»
onloadeddata=»»
onloadedmetadata=»»
onloadstart=»»
onmousedown=»»
onmouseenter=»»
onmouseleave=»»
onmousemove=»»
onmouseout=»»
onmouseover=»»
onmouseup=»»
onmousewheel=»»
onpause=»»
onplay=»»
onplaying=»»
onprogress=»»
onratechange=»»
onreset=»»
onresize=»»
onscroll=»»
onseeked=»»
onseeking=»»
onselect=»»
onshow=»»
onsort=»»
onstalled=»»
onsubmit=»»
onsuspend=»»
ontimeupdate=»»
ontoggle=»»
onvolumechange=»»
onwaiting=»»
>
</iframe>
iframe события и общение
Загрузка и ошибки
Поскольку iframe является документом, вы можете использовать большинство глобальных обработчиков событий. Когда вы запускаете iframe, есть пара событий, которые могут, пригодятся для улучшения работы. Например, отображение счетчика или отдельное сообщение, чтобы помочь пользователю:
load event — cобытие загрузки. Оно запускается, когда iframe полностью загружен. Другими словами, все статические ресурсы были загружены, и все элементы в дереве DOM вызвали событие load.
Событие ошибки — error event которое вызывается при сбое загрузки.
Вы можете прослушивать их с помощью атрибутов onload и onerror соответственно:
Если хотите, то вы можете добавить слушателей в свой iframe программно.
Общение с фреймами
От родителя к фрейму
Отправьте сообщение от родительского элемента:
И послушайте это в iframe:
От iframe к родителю
Отправьте сообщение из iframe:
И прослушай это у родителя:
Примечание: имейте в виду, что вы можете оказаться в некоторых хитрых ситуациях, когда вам нужно что-то отладить, так как сообщения запускаются и забываются (fire-and-forget) (иначе говоря. — нет реальной обработки ошибок).
Answer by Davis Little
Note: By default, the iframe element has a border around it. To remove it, you can use the style attribute to set the border CSS property to none.,To this day, there are eight attributes we can use to customize the behavior or styling of an iframe.,You have to use the sandbox and allow the attributes we discussed earlier.,You can listen to them with the onload and onerror attribute respectively:
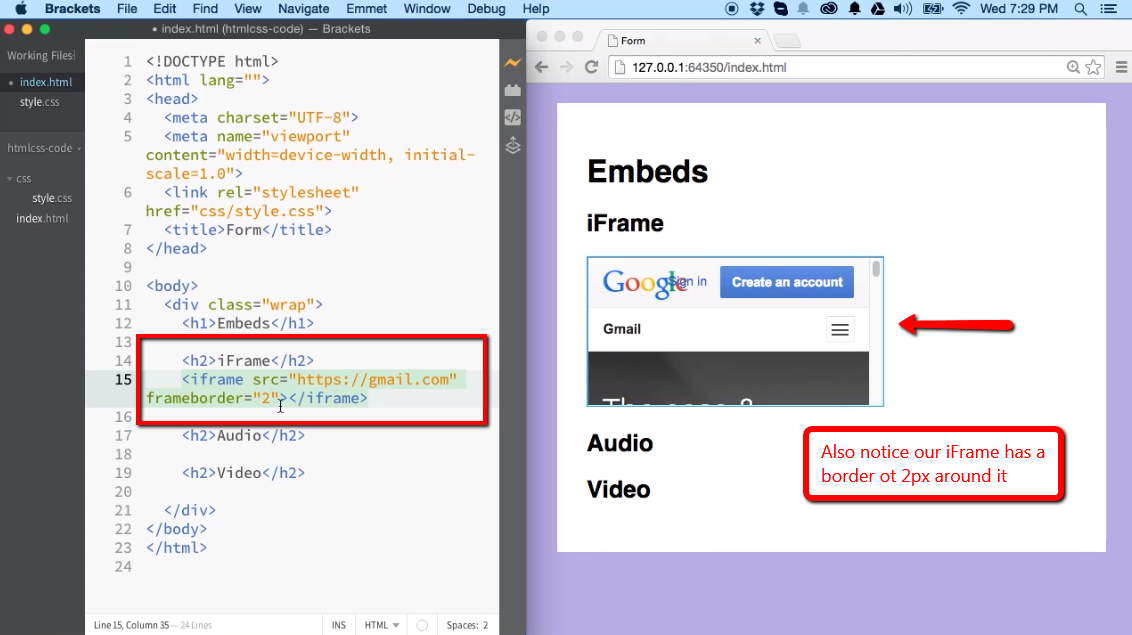
For instance, the code below will display a 500px square with the google homepage within:
But, to prevent the CSS of the current website from affecting the style of these templates, I figured out that using an iframe with the attribute was the cleanest solution.
To this day, there are eight attributes we can use to customize the behavior or styling of an iframe.
Note: By default, the iframe element has a border around it. To remove it, you can use the style attribute to set the border CSS property to none.
You can listen to them with the and attribute respectively:
Or if you can add the listeners to your iframe programmatically.
Send the message from the parent element:
And listen to it in the iframe:
Send the message from the iframe:
And listen to it in the parent:
For instance, if your iframe only needs to submit forms and to open new modal windows, here is how you will configure the sandbox attribute:
The empty sandbox attribute is mostly using for static content but will drastically reduce the capability required for other resources to work properly.
Thus, you should always think about placing a warning message as a fallback for those poor users.
It’s also not part of the W3C HTML5 specification at the time of this writing.
Keep in mind that all modern Chromium-based browsers support this at the time of this writing. You will be interested in the lazyload library for something that works everywhere.
Note: If you are using the bootstrap library in your project, there are the and that you can use straight out of the box to make your iframes responsive.
Easy peasy lemon squeezy! As you can access the window element of the iframe with , you have to do this:
Adding a title to the tag gives users more context for what is the iframe is about.
Another thing to keep in mind is that when your iframe includes non-readable content (like, for instance, a video game built with JavaScript), you will have to hide its contents from screen reader users using the aria-hidden attribute.
This will give more context to everyone about what should be displayed in the space.
Source: https://blog.logrocket.com/the-ultimate-guide-to-iframes/
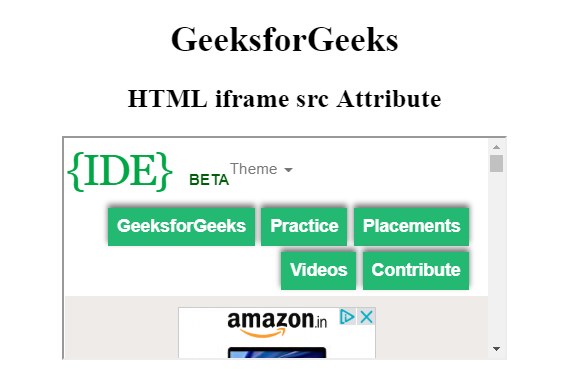
HTML | srcdoc Attribute
The HTML srcdoc attribute is utilized to define the HTML content that should be displayed within the inline frame. This attribute is typically employed alongside the sandbox and seamless attributes. In the case where a browser supports the srcdoc attribute, it will take precedence over the content specified in the src attribute (if it exists). Conversely, if a browser does not support the srcdoc attribute, it will display the file specified in the src attribute instead (if it exists).
Supported tag:
- iframe
Attribute Values
The HTML code is utilized to define the content of a webpage that will be displayed within an Iframe element.
Example:
html highlight=7
Output:
Below is a list of browsers that are supported by the HTML srcdoc Attribute.
- Versions 20.0 and higher of Google Chrome.
- Edge 79.0 and above
- Firefox 25.0 and above
- Unsupported by Internet Explorer.
- Opera 15.0 and above
- Safari 6.0 and above
HTML DOM IFrame srcdoc Property, IFrame srcdoc Property IFrame Object Example Change the HTML content that is shown in an iframe: document.getElementById(«myFrame»).srcdoc = «<p>Some new content inside the iframe!</p>»; Try it Yourself » Definition and Usage The srcdoc property sets or returns the value of the srcdoc attribute in an iframe …
Answer by Tessa Williamson
srcdoc is a much needed attribute, but specifying an entire HTML document inside an attribute is clumsy.,srcdoc is a much needed attribute, but specifying an entire HTML document inside an attribute is clumsy. On the other hand, I understand that just using the <iframe>’s contents was not feasible due to all the old markup using <iframe> contents as a fallback for non-iframe supporting UAs.,I’m sorry if I’m missing something, what’s the usecase here and why is it a much needed attribute?,Being able to use srcdoc as a flag alleviates this compat problem, and enables us to use the <iframe> contents as the srcdoc.
Ok, I think I get your point here now, use the content in between iframes like this:
Source: https://discourse.wicg.io/t/use-iframe-contents-if-srcdoc-is-present-but-empty/1548

Adding additional features#
Multiple code listings
Highlighting everything as isn’t ideal.
We would like to highlight , , and respectively.
To achieve that we need to split the code into fragments based on their language.
We will use Hugo’s nested templates to wrap our code snippets with additional metadata such as .
The invocation will now look like:
Notice the attribute inside the , this will hint the Hugo engine how to highlight the embedded snippet.
Let’s define the shortcode under :
There are a few things going on here.
Firstly, based on the parameter we include the appropriate boilerplate to embed the fragment into the document. The boilerplate can be either a or .
Secondly, we use Hugo’s to pass the snippet and the language used to the parent () shortcode for the purpose of rendering code listings later.
The information that’s passed will be a map resembling the following structure:
The parent () will be able to access this object and create code listings.
We now need to adjust the parent template to pick the correct language hint when highlighting the code:
We iterate over the map we’ve built using the nested shortcode templates and display multiple code listings with appropriate highlighting.
Let’s invoke the shortcode:
html
css
Fancy!
Applying default styles to the content
While elements such as , aren’t necessary in HTML5,
it’s sometimes desirable to have them inside the .
We can already achieve that by including the boilerplate in the fragments of language
but that would obscure the listings.
We will modify the code preview to apply the boilerplate to every instance and also add some reset styles on top of that.
Let’s modify the again:
As including the whole boilerplate inside the attribute wouldn’t be handy, we define an inline partial template and reference it in the attribute.
The partial template contains the regular , and with some additional styles attached. You can customize it to your liking.
Here’s the last invocation:
html
css
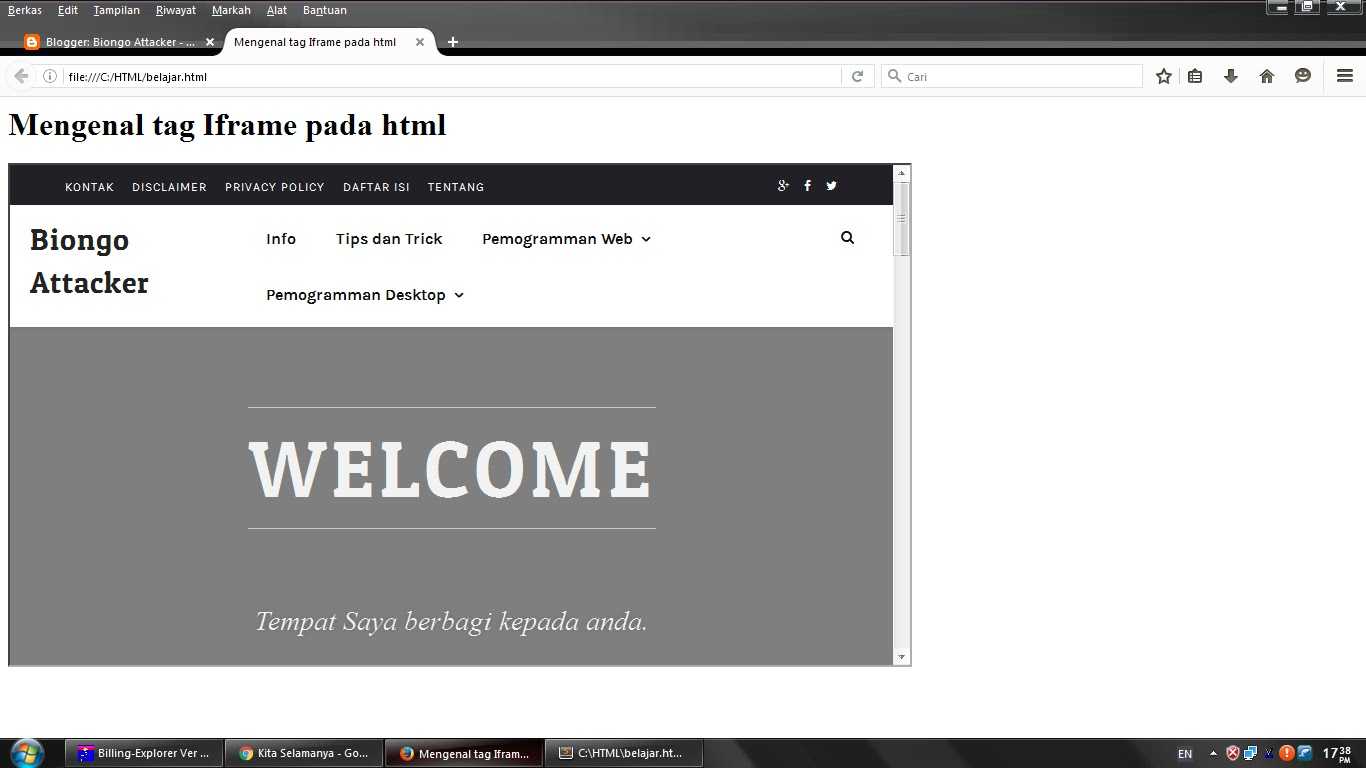
How To Create an Iframe in HTML: The Basic Syntax
Creating the HTML iframe element requires the use of the <iframe> tag. This element has both the opening and closing tag, and you add any content between these two tags. However, for the iframe element to properly work, you need to add the source attribute. This is going to show the link between the two HTML documents, and it is required for the syntax to work.
Let us take a look at the following basic syntax:
| <!DOCTYPE html><html><head><title>Title of the document</title></head><body><iframe src=”URL to the specific web page”> This is where you add the content for it </iframe></body></html> |
As you can see, this is the simplest way of creating a current HTML iframe syntax. Quite often, this basic code requires the addition of other HTML attributes that are going to change the visual output. These are called the iframe.style attributes and they help you style specific elements.
– Including Basic Attributes
Adding these attributes is completely based on your requirements and recommendations. The code is going to work fine even if you do not add them, however, they are highly recommended for a good visual output.
The following example is going to include two basic attributes:
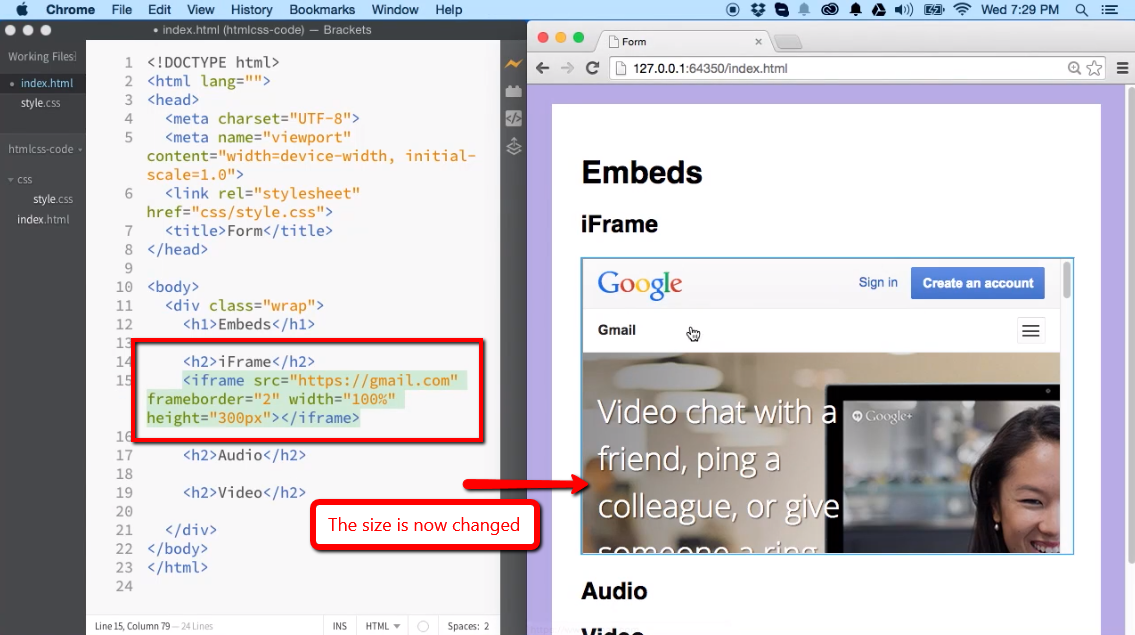
| <!DOCTYPE html><html><head><title>Title of the document</title></head><body><iframe src=”https://www.AnyWebPage.com” width=”1800px” height=”300px”> A content </iframe></body></html> |
You are always supposed to include the iframe inside the <body> element. Besides the source attribute, the two basic attributes we have added in this example are the height and width properties. By setting the value after these attributes, you can change the dimensions. The value can also be set in percentages, it does not have to be set in pixels.
It is worth noting that any attribute you add must be included inside the opening HTML iframe tag. The closing tag is only used to show where the content ends. However, these are not the only attributes you can include in the opening tag.
Attempt #3: Serverless Boomerang (redux)
Our first boomerang solved the browser support problem, but still has the «escaping» issue to deal with.
Fortunately, due to the way that we pass in the code, this can actually be solved. Rather than inserting the CSS and JS into the page on the server, we can do it on the client! This works because the URL GET parameters are still accessible to the client’s computer.
The source here is a bit longer, but it does work:
Enter fullscreen modeExit fullscreen mode
Now, if a script or style includes scary HTML characters, the browser will handle them for us when inserting said script/style into the document.
This solution is… fine. It works, technically. But we still have the soft URL length limit to consider. Plus, we’re now dealing with something server-side that feels like it should happen on the client.
There must be a better way.
Embedding pages from external sources
First, we’ll learn how to embed pages from external sources, which is probably the more common use case of iframes. Nowadays, you rarely see a web app that doesn’t have any content loaded from an external source.
For example, consider how many YouTube videos you find on webpages, Instagram posts you see outside of the app, Facebook comments sections on blogs, and even ads on webpages. Each of these elements is embedded into the website, which can range in complexity from a single line of code to an entire code section.
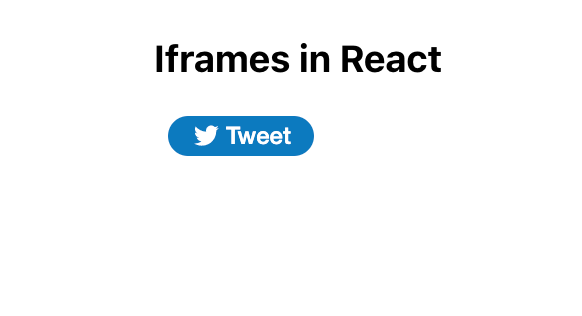
We can use the following line of code to add a Twitter Tweet button to a React app:
<iframe src="https://platform.twitter.com/widgets/tweet_button.html"></iframe>
We’ll use the code snippet above in the following code to generate a Tweet button like the one seen in the following screenshot. When a user clicks the Tweet button, the selected content will open in a new Tweet on their Twitter homepage:
function App() {
  return (
    <div className="App">
      <h3>Iframes in React</h3>
      <iframe src="https://platform.twitter.com/widgets/tweet_button.html"></iframe>
    </div>
  );
}

export default App;
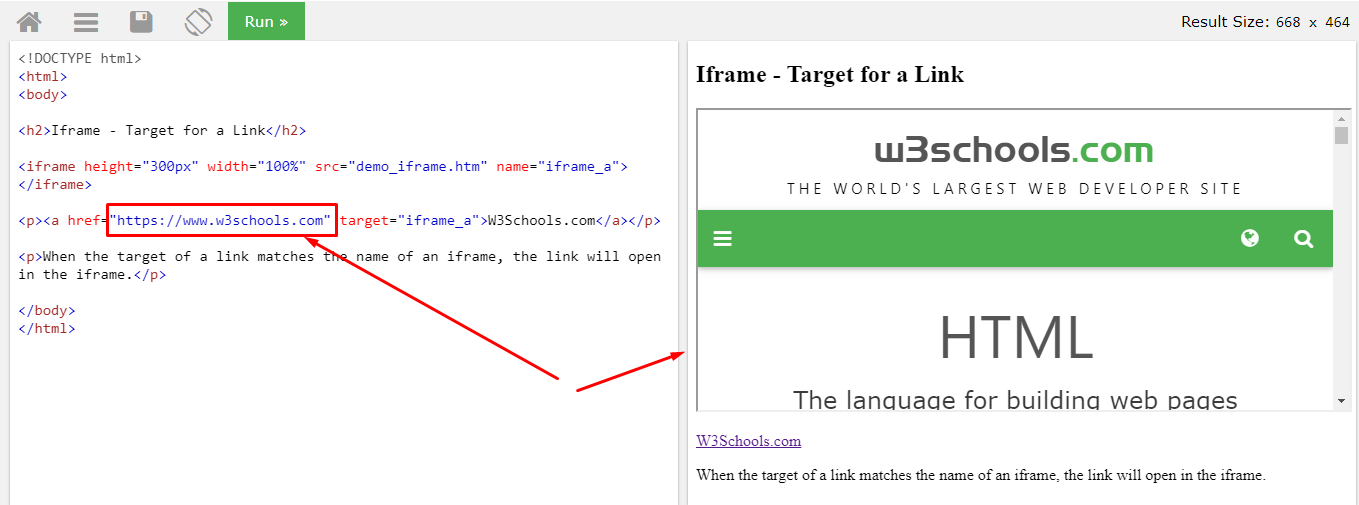
# Using Anchors with IFrames
Normally a change of webpage within an Iframe is initiated from with the Iframe, for example, clicking a link inside the Ifame. However, it is possible to change an IFrame’s content from outside the IFrame. You can use an anchor tag whose attribute is set to the desired URL and whose attribute is set to the iframe’s attribute.
Parameters
| Attribute | Details |
|---|---|
| Sets the element’s name, to be used with an tag to change the iframe’s . | |
| Sets the element’s width in pixels. | |
| Sets the element’s height in pixels. | |
| Specifies the page that will be displayed in the frame. | |
| Specifies the content that will be displayed in the frame, assuming the browser supports it. The content must be valid HTML. | |
| When set, the contents of the iframe is treated as being from a unique origin and features including scripts, plugins, forms and popups will be disabled. Restrictions can be selectively relaxed by adding a space separated list of values. See the table in Remarks for possible values. | |
| Whether to allow the iframe’s contents to use |
Remarks
An iframe is used to embed another document in the current HTML document.
You CAN use iframes for displaying:
- other HTML pages on the same domain;
- other HTML pages on another domain (see below — Same-origin policy);
- PDF documents (though IE might have some problems, This SO question(opens new window) might help);
You SHOULD use an iframe as a last resort, as it has problems with bookmarking and navigation, and there are always better options other than an iframe. This SO question(opens new window) should help you understand more about the ups and downs of iframes.


Same-origin policy
Some sites cannot be displayed using an iframe, because they enforce a policy called Same-origin policy(opens new window). This means that the site that the iframe lies on must be on the same domain as the one to be displayed.
This policy also applies to manipulating content that lives inside of an iFrame. If the iFrame is accessing content from a different domain, you will not be able to access or manipulate the content inside of an iFrame.
The iframe element on
attribute
The attribute, when set, adds extra restrictions to the iframe. A space separated list of tokens can be used to relax these restrictions.
| Value | Details |
|---|---|
| Allows forms to be submitted. | |
| Enables the JavaScript pointer API. | |
| Popups can be created using or | |
| The iframe document uses its real origin instead of being given a unique one. If used with the iframe document can remove all sandboxing if it’s from the same origin as the parent document. | |
| Enables scripts. The iframe document and parent document may be able to communicate with each other using the API. If used with the iframe document can remove all sandboxing if it’s from the same origin as the parent document. | |
| Allows the iframe’s content to change the location of the top level document. |
Answer by Estella Todd
Hello, I updated to ionic-angular2.0.0.beta9 and there are some issue with loading the styles within the scrdoc attribute of iframe: The style doesn’t load. However it was working in ionic-angular2.0.0.beta6 Here my Implementation:,This will only show the html but doesn’t add the styles. What could be the issue for this? Are there any alternatives way to achieve?. In the real time the HTML data will fetched from the api and it needs to be embedded on the iframe.,I tried with the inline style as well but did not work in ionic-angular2.0.0.beta9, But Worked in ionic-angular2.0.0.beta6. On the chrome browser console I get this messages:,@chandanch Is there a typo in your code? You’re setting the srcdoc to the tableData variable but you’re showing us a htmlData variable.
Source: https://github.com/driftyco/ionic/issues/6946
Content-Security Policy
What is it
- The spec: http://dvcs.w3.org/hg/content-security-policy/raw-file/tip/csp-specification.dev.html
- Support: Chrome 16+, FireFox 11+ (incomplete) (tested with theCSP Readiness suiteby Erlend)
I saw strange and wonderful things on my trip the future. Jet packs. Astronaut
food. Dogs and cats living together. Content-Security Policy easily stands out
as the most important.
At a high level, Content-Security Policy is a method for specifying from where
remote content may be included in a document. It is specified before the
document is first rendered–either by a new HTTP header:
…or a tag in the document head:
Upon receiving this information, compliant browsers will ignore all resources
not explicitly white-listed.
The white-list is largely specified on a per-domain basis, but CSP supports
keywords as well: (same origin as website), (disallow all
sources), (inline script and/or style tags, (runtime code evaluation via , , , and).
Back-end devs will definitely want to read up on the spec concerning
implementation details.
Why is it relevant?
In general, CSP will give publishers a method to prevent a broad range of
Cross-Site Scripting (XSS) attacks. (The developers at Twitter have written
about their early impressions implementing this technology here.)
This is of particular interest to third-party application developers because
we largely traffic in cross-site scripting patterns.
If your application displays user-generated content (a comment system, for
example), and users may inline images (or any resource for that matter), you
will need to host the images yourself. This is because publishers may disallow
resources from arbitrary locations on their pages.
Bookmarklets will also be affected. The spec is very clear that bookmarklets
themselves should not be subject to a document’s CSP. This is a good thing,
because we all love bookmarklets, and constraining them in this way would
likely kill them. It’s not all fun-and-games, though. Many bookmarklets rely on
injecting img and script tags into the document. For example,the Cornify bookmarklet injects two scripts and an
image from the domain:
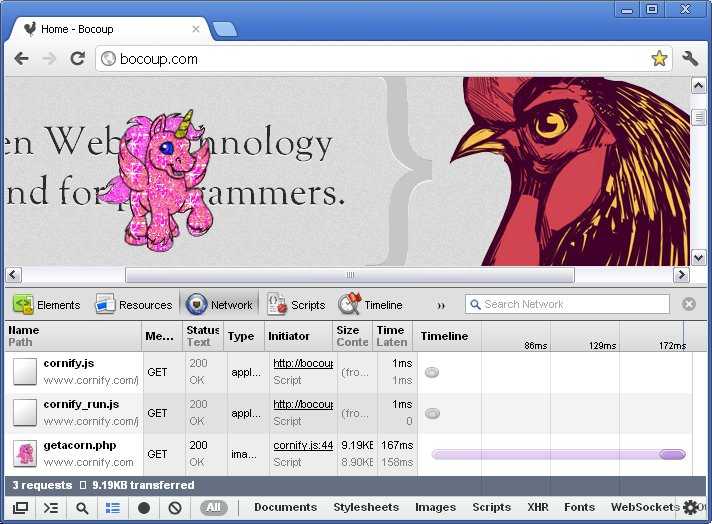
This behavior will no longer be generally achievable on all websites as more
and more pages disallow willy-nilly image and script loading.
Most of these restrictions translate to more work for the 3PJS developer. There
is one security benefit that we get for free, though: our applications will no
longer be tools for DDoS attacks.
Consider the following line of code:
If an attacker managed to sneak this into your app, then every user across all
publisher sites would make that request with every page load. When more
publishers enforce a Content-Security policy, most of these requests will not
be issued in the first place.
Admittedly, I have yet to hear of this attack actually being carried out. But
it’s nice to know that 3PJS developers can claim some benefit (however
inconsequential) from CSP.
Recommendation
As publishers begin implementing this security feature, they are going to
expect a rigorous list of domains required by your application. You’ll need to
inspect your application and note exactly from where it loads resources. There
are two ways to do this: bottom-up and top-down.
First off, you’ll want to audit your code base and create a list of the domains
that external resources are loaded from.
Next, if you do not already run a “dummy” publisher site for in-house
development, get to work! (The utility of such a staging environment merits a
dedicated article, this is just one use.) Activate CSP on that site, and use
its to help identify possible oversights in your initial investigation.
During this auditing process, keep an eye out for inline resources (JavaScript,
CSS, etc.) and “eval-like” patterns (described by the spec). You will be hard-pressed to convince some publishers to whitelist and just to get your application running. In
this way, you can view following best practices as having direct business
value. (It’s true that in some cases, inline scripts are the most efficient way
to get things done. For what it’s worth, I personally believe that tradeoffs
between speed and security are rarely relevant in front-end development. This
is a sign that CSP is making the web a stronger platform overall.)
After your audit is complete, you should update the documentation you
distribute to publishers. While it’s generally in your interest to write these
rules as strictly as possible, you can easily paint yourself into a corner. Try
to recognize the areas you may need to grow (for example, future subdomains),
as there will always be friction in getting publishers to change their
policies.