

Scroll horizontally always
Use to allow horizontal scrolling and always show scrollbars unless always-visible scrollbars are disabled by the operating system.
QrLmmW69vMQDtCOg48jidqvvWD2FzDt7I7bBoDc98SRP5OwvOScVYbRzFdfp540eF5v1pjogYkyI8NXqu4wY8chgsXIV0LU7XQKWJ98wLaBSHWiBhvkEU1T3sd6KEFo53CLjVjIz8UvZajb8sbsu62xTsF9cRtFdwEvusq6zJHvedymDCUkY6qXHsuL6fOmHo4KKMurZuJZrK3plRPUaI8XVciz8dVq5CEUXjMrTcB76H1w90CnkRER3nYjs3suTa3223xs8aL97m0peQfjlvKbF8HcmQG5mHEitCn1QZnbMZUK3zE9AIjwcVXP7R9V4fw2A93cZD7wj333X6aaiHZdkkTPtst0u05KSob5c0ZuKQi4D3V395NfFKKr8cR27jmpB7dqK2GiWXeOQUFcjmFVwlHWSlH8ZdUoVJpXf1xL6CRUxwZP4EhBbqQZaJm26ijWII6LRxJ5eVU9Y7KKvQsUeX5BawtgeMWRmjeCwQadTLTQG8gLpi2DvGpMtPWCdqHgEglVSB1ZlDrjEEsXYrNx1IOY0053K3pWNaR1ezyz8kahRfNs3byaHcIQu9tWTrcMpBWhZ45DzLjVV1N8Zt96uLnNWK5DvbKW8GgMuwY7fHkZFz85MN4d2gL0j85HmXGx9oPTFRkPWsmMOHUvm5IhB7QqGSAwT1uL7HgBrNX9a1BAWrp9zV1IWAd1q65sKOOCxTZrXJDpxBxYE4rJAGU6pcri9mUf4g49ZiIAwfu9njtZyYimmImCa6TFhk2jQcSmFDHacExxqC2BfYATHFrKSy94dbw6uWT52nM7MSM9JDu4cs9cbfnaf6amt4hTUotCTONg604b8JKPI1sfd4CG36fBNcnErhpllfRlXkY1xFwmwZT7IJV8okPGNQdTKpdPJOBGw3LHMKojPJl1nPiQB5C9bdePFMNLejSXY5DDvO70ehOCJpBtKZY2quoFJJjGfXe8T4DuGYGmM6JYd5DNinWZuUWXGvfIlJRHgf8BQNQvtmEzqGXIeQZitiq9F
CSS overflow hidden
Overflow hidden means the overflowing content will be hidden and will not be displayed on the page.
Once a web browser comes across the CSS overflow hidden property, it hides the extra content beyond the element’s box.
Let’s look at an example of overflow hidden.
HTML:
Enter fullscreen modeExit fullscreen mode
CSS:
Enter fullscreen modeExit fullscreen mode
Output:
As you can see in the example above, the p element with the class name “box” has an overflow property set to hidden. Because of this value, overflowing content is not visible on the page.
Emulators Online from LambdaTest allows you to seamlessly test your mobile applications, websites,and web apps on mobile browsers and mobile devices.
Основные приемы
1. Использование свойства overflow
Для скроллинга контента на странице можно использовать свойство overflow. Оно позволяет задать, как браузер должен обрабатывать содержимое, которое не вмещается в рамки блока.
Для этого необходимо задать значение overflow: auto или scroll для элемента, который должен прокручиваться. Также можно указать значения overflow-x и overflow-y для установки прокрутки только по горизонтали или вертикали.
2. Использование свойства height
Другой способ задания скроллинга – установка фиксированной высоты блока, содержащего контент, и использование свойства overflow для прокрутки содержимого, не помещающегося в блок.
Для этого необходимо задать значение height для блока и значение overflow: auto или scroll для его содержимого. Также можно использовать относительные значения высоты блока, например, 50% или 100vh.
3. Использование разметки таблицы
Для создания таблицы со скроллингом можно использовать разметку таблицы и задать значение overflow: auto для элемента tbody, который содержит строковый контент таблицы.
Для фиксирования заголовков и столбцов таблицы можно использовать элементы thead и tbody для заголовков и содержимого соответственно, а также использовать свойства position и z-index для их позиционирования.
Работа с мобильной версией
Адаптивный дизайн
Для того чтобы обеспечить удобный просмотр контента на мобильных устройствах, очень важно создать адаптивный дизайн страницы. Для этого можно использовать медиа-запросы в CSS
Медиа-запросы позволяют задавать различные стили для различных устройств и размеров экрана. Например, можно скрыть некоторые элементы на маленьких экранах или изменить размер текста.
Управление скроллом
На мобильных устройствах обычно используется вертикальный скролл. Для того чтобы сделать скролл на странице более удобным, можно использовать CSS-свойства overflow и overflow-y.
- overflow: hidden; — скрывает все, что выходит за рамки контейнера;
- overflow-y: scroll; — добавляет вертикальный скролл даже если контент помещается в контейнер.
Также можно использовать JavaScript для более продвинутой работы со скроллом на мобильных устройствах. Например, можно добавить гладкую анимацию при скроллинге или добавить кнопку «наверх» для быстрого перемещения на верх страницы.
Visible
Use to prevent content within an element from being clipped. Note that any content that overflows the bounds of the element will then be visible.
Lorem ipsum dolor sit amet, consectetur adipiscing elit. Mauris eleifend rutrum auctor. Phasellus convallis sagittis augue ut ornare. Vestibulum et gravida lectus, sed ultrices sapien. Nullam aliquet elit dui, vitae hendrerit lectus volutpat eget. In porttitor tincidunt egestas. Pellentesque laoreet ligula at est vulputate facilisis. Etiam tristique justo ut odio placerat ornare. Cras bibendum, orci at ornare tincidunt, lacus nunc gravida enim, sit amet euismod nunc lectus in lectus. Ut dictum nulla et arcu aliquet ornare. Aliquam et dapibus lectus. Aenean mattis elit mi, sed ultricies augue consectetur id. Sed id magna malesuada, luctus urna a, bibendum tortor. Cras cursus cursus ex. Nulla fringilla elit vitae imperdiet scelerisque. Donec ac sem eu diam convallis mollis a sed leo. Proin congue augue turpis, eget rutrum dolor ultricies non. Nulla blandit venenatis dapibus. Sed tincidunt mollis elit, quis suscipit nibh eleifend quis. Donec ex lorem, auctor eu rutrum in, blandit id dolor. Nulla molestie arcu turpis. In id felis vulputate, tempor massa eget, malesuada mauris. Quisque fringilla consequat metus, luctus scelerisque leo fringilla vel.
Overflow-clip-margin
There is one more CSS property that works with and that’s . This property lets you control how far from the elements edge the clipping begins. By default it begins right at the edge, but you can expand beyond it:
See the Pen Overflow: Clip with overflow-clip-margin example by Kilian Valkhof (@Kilian) on CodePen.
This gives you even more control over where content is rendered separately from the layout it is contained in.
Can I use currently says it only works in Chromium but this is wrong. It works fine In Firefox and in fact it works better in Firefox, because it lets you set a clip margin on a single axis. In Chromium this only works when both axes are set to clip. (Thanks to @KonstantinRouda for letting me know). This means the above example currently only works in Firefox.
To read more, check out the MDN documentation on overflow and overflow-clip-margin.
Description
Overflow options include clipping, showing scrollbars, or displaying the content flowing out of its container into the surrounding area.
Specifying a value other than (the default) creates a new block formatting context. This is necessary for technical reasons — if a float intersected with the scrolling element it would forcibly rewrap the content after each scroll step, leading to a slow scrolling experience.
In order for to have an effect, the block-level container must have either a set height ( or ) or set to .
Setting one axis to (the default) while setting the other to a different value results in behaving as .
The JavaScript property may be used to scroll an HTML element even when is set to .
Examples
Setting different overflow values for text
p {
  width: 12em;
  height: 6em;
  border: dotted;
  overflow: visible; /* content is not clipped */
}
(default)
Sed ut perspiciatis unde omnis iste natus error sit voluptatem accusantium doloremque laudantium.
p { overflow: hidden; /* no scrollbars are provided */ }
Sed ut perspiciatis unde omnis iste natus error sit voluptatem accusantium doloremque laudantium.
p { overflow: scroll; /* always show scrollbars */ }
Sed ut perspiciatis unde omnis iste natus error sit voluptatem accusantium doloremque laudantium.
p { overflow: auto; /* append scrollbars if necessary */ }
Sed ut perspiciatis unde omnis iste natus error sit voluptatem accusantium doloremque laudantium.
X and Y property of CSS overflow
Till this point, we used the overflow shorthand property to set overflow. Instead, we can also use overflow-x and overflow-y to control the overflow horizontally or vertically.
Overflow-x is used to control the horizontal overflow of an element. In simple terms, it specifies what to do with the right or left edges of the content.
Overflow-y is used to control the vertical overflow of an element. In simple terms, it specifies what to do with the top or bottom edges of the content.
Below is an example of overflow-x and overflow-y properties.
HTML:
Enter fullscreen modeExit fullscreen mode
CSS:
Enter fullscreen modeExit fullscreen mode
Output:
In the example above, we set overflow-x to scroll, because of which, we can scroll right and left. Next, we also set overflow-y to hidden, because of which we can not scroll up and down.
We used a property named “white-space with the value “no-wrap”. This is used to specify how whitespace inside elements is handled. White-space set to no-wrap means the element’s content will not be wrapped to a new line.
CSS overflow wrap
With the use of the overflow-wrap property in CSS, we can tell the browser to break lines of long words in case the content overflows from the element’s box. This helps prevent layout issues caused by overflow from an unusually long string of text.
This property has three values which are:
-
normal: this is the default value where the browser will break lines according to its line-breaking rules. Long strings will not break even if they overflow the element’s box.
-
break-word: with this value, words or strings of characters too long to fit inside their container will split at random points, causing a line break.
-
inherit: this will inherit the value of the overflow-wrap attribute, which was set on the targeted element’s immediate parent.
Below is an example of overflow-wrap.
HTML:
Enter fullscreen modeExit fullscreen mode
CSS:
Enter fullscreen modeExit fullscreen mode
Output:
In the above example, we can see that the box has the overflow-property set to break-word, which breaks the long string of characters and wraps them to the next line, ensuring that our content does not overflow from the container. However, if we do not specify the property, the long words will not break, and it will overflow the container.
A quick refresher on overflow
The overflow property lets you control how content that overflows a block element should be displayed. It had four different values:
- visible: The default value: any content that overflows is visibly rendered just where it would be if the block element was larger.
- hidden: The content is clipped to the element and overflowing content is hidden.
- scroll: The element is made into a scrollable area with scrollbar, regardless of whether the content requires it.
- auto: Depending on if the content fits or not the element gets a scrollbar. Often times You want overflow: auto, not overflow: scroll.
So far, so good.
While sets the overflow value for both axis, you can set a different value for both the x and y axis with and or with and if you want to use logical properties.
is also a shorthand that also allows for two values: the first for the x direction and the second for the y direction. will hide any horizontal overflows while adding a scrollbar for the vertical direction.

Setting two different directional overflows would let you configure your element such that it (for example) only scrolls in the vertical direction while wrapping text and hiding overflows in the horizontal direction, a common requirement.
But it turns out, they have a hidden dependency: You can’t have one axis be hidden in any way (hidden, scroll and auto all limit the content from expanding beyond the element) while having the other one set to visible:
See the Pen Overflow: Clip example by Kilian Valkhof (@Kilian) on CodePen.
That limits the type of design you can implement without adding additional HTML to style.
Примеры
<!DOCTYPE html>
<html>
<head>
	<meta charset="utf-8">
	<title>Пример №1</title>

	<style>

		div{
		width: 360px;
		height: 80px;
		margin: 4em;
		padding: 5px;
		}

		.overflow_y_1{
		overflow-y: visible;
		}

		.overflow_y_2{
		overflow-y: hidden;
		}

		.overflow_y_3{
		overflow-y: scroll;
		}

		.overflow_y_4{
		overflow-y: auto;
		}

	</style>

</head>
<body>

		<div class="overflow_y_1" style="background-color: violet;">
			overflow-y: visible overflow-y: visible overflow-y: visible
			overflow-y: visible overflow-y: visible overflow-y: visible
			overflow-y: visible overflow-y: visible overflow-y: visible
			overflow-y: visible overflow-y: visible overflow-y: visible
			overflow-y: visible overflow-y: visible overflow-y: visible
			overflow-y: visible overflow-y: visible overflow-y: visible
		</div>


		<div class="overflow_y_2" style="background-color: yellow;">
			overflow-y: hidden overflow-y: hidden overflow-y: hidden
			overflow-y: hidden overflow-y: hidden overflow-y: hidden
			overflow-y: hidden overflow-y: hidden overflow-y: hidden
			overflow-y: hidden overflow-y: hidden overflow-y: hidden
			overflow-y: hidden overflow-y: hidden overflow-y: hidden
			overflow-y: hidden overflow-y: hidden overflow-y: hidden
		</div>

		<div class="overflow_y_3" style="background-color: green;">
			overflow-y: scroll overflow-y: scroll overflow-y: scroll
			overflow-y: scroll overflow-y: scroll overflow-y: scroll
			overflow-y: scroll overflow-y: scroll overflow-y: scroll
			overflow-y: scroll overflow-y: scroll overflow-y: scroll
			overflow-y: scroll overflow-y: scroll overflow-y: scroll
			overflow-y: scroll overflow-y: scroll overflow-y: scroll
		</div>

		<div class="overflow_y_4" style="background-color: violet;">
			overflow-y: auto overflow-y: auto overflow-y: auto
			overflow-y: auto overflow-y: auto overflow-y: auto
			overflow-y: auto overflow-y: auto overflow-y: auto
			overflow-y: auto overflow-y: auto overflow-y: auto
			overflow-y: auto overflow-y: auto overflow-y: auto
			overflow-y: auto overflow-y: auto overflow-y: auto
		</div>

</body>
</html>
Пример №1
Вернуться назад
Specify the height property
Using the height property is not mandatory to enable vertical scrolling for a div element. The height property controls the explicit height of an element, and if you don’t specify it, the div will automatically expand to fit its content.
However, if you want to limit the height of the div and make it scrollable when the content exceeds that height, you can combine the overflow-y property with a specific height value. Here’s an example:
HTML:
CSS:
In the above code, the height property is set to 200px, but you can adjust it according to your needs. If the content inside the div exceeds the specified height, a vertical scrollbar will appear, allowing the user to scroll through the overflow content.
If you omit the height property, the div will expand vertically to accommodate its content, and the scrollbar will only appear when the content exceeds the available space in the parent container.
Как настроить скролл на странице с помощью CSS
1. Применение свойства overflow
Одним из способов настройки скролла на странице с помощью CSS является использование свойства overflow. При задании значения «auto» этого свойства элемент получает вертикальный скролл, если его содержимое выходит за пределы высоты элемента.
Пример:
Другой способ настройки скролла на странице — это использование свойств scrollTop и scrollHeight JavaScript. С помощью scrollTop можно установить или получить значение расстояния от верхней части элемента до его видимой верхней части. А с помощью scrollHeight можно получить значение высоты элемента с учетом его внутреннего содержимого.
Пример:
3. Использование псевдоэлементов ::before и ::after
Третий способ настройки скролла на странице с помощью CSS — это использование псевдоэлементов ::before и ::after. С их помощью можно создать блок, который будет появляться перед первым элементом списка или после последнего. Эти элементы могут иметь фиксированную высоту, что позволит использовать overflow: auto и получить вертикальный скролл.
Пример:
Селекторы псевдокласса полосы прокрутки
Чтобы создать более индивидуальный дизайн, вы можете выбрать определённые элементы полосы прокрутки и применить к ним стили, добавив псевдокласс к каждому псевдоэлементу. Ниже приведены некоторые из наиболее распространённых псевдоклассов:
- : Используется для придания горизонтальной полосе прокрутки стиля, отличного от вертикальной полосы прокрутки. Например, вы можете задать другую ширину или цвет для горизонтальной полосы прокрутки.
- : Используется для стилизации в CSS вертикальной полосы прокрутки, отличной от горизонтальной полосы прокрутки.
- : Применяется к кнопкам со стрелками в начале полосы прокрутки. Используется для стилизации кнопки уменьшения или стрелки вверх для вертикальной полосы прокрутки и стрелки влево для горизонтальной полосы прокрутки.
- : Применяется к кнопке со стрелкой в конце полосы прокрутки. Используется для стилизации кнопки увеличения или стрелки вниз для вертикальной полосы прокрутки и стрелки вправо для горизонтальной полосы прокрутки.
- : Применяется к первым кнопкам и первому фрагменту дорожки полосы прокрутки, которые находятся в верхней или левой части вертикальной или горизонтальной полосы прокрутки соответственно
- : Применяется к последнему фрагменту дорожки полосы прокрутки, которые находятся внизу или справа вертикальной, или горизонтальной полосы прокрутки, соответственно.
Ниже приведён пример, в котором используются все вышеперечисленные псевдоклассы, кроме , чтобы придать вертикальной полосе прокрутки другой вид:
В примере ниже используется псевдокласс для вставки тени на дорожку горизонтальной полосы прокрутки:
Хотя спецификации Webkit для стилизации полосы прокрутки работают нормально на момент написания статьи, W3C официально отказался от этой спецификации, и ожидается, что она будет постепенно выводиться из употребления.
Добавление полос прокрутки для блоков небольшого размера свойством overflow CSS
Давайте рассмотрим ситуацию, когда у вас есть блок с ограниченной высотой, но в нем нужно поместить контент произвольного размера, и возможно, что данный контент будет намного больше размера блока.
Товаров так много, что они не помещаются на видимую часть страницы, и у посетителя нет возможность нажать на кнопку «Оформить заказ». Это очень не красиво и не удобно.
Выходом из данной ситуации является ограничение максимальной высоты для блока с товарами, и добавление вертикальной полосы прокрутки для него. Для этого мы задаем следующие стили для этого блока:
PHP
#pop-up-products-list {
overflow-y: auto; /*Автоматическое добавление полосы прокрутки* /
max-height: 300px; /*Максимальная высота блока*/
}
|
1 |
#pop-up-products-list { overflow-yauto;/*Автоматическое добавление полосы прокрутки* / max-height: 300px; /*Максимальная высота блока*/ } |
Свойство overflow-y CSS — это то же самое свойство overflow, но предназначенное для управления контентом только по вертикали. Есть так же специальное свойство для управления контентом по горизонтали — overflow-x. Они имеют такой же набор значений, как и базовое свойство.
В данном случае мы добавили для overflow-y значение auto, которое добавляет полосы прокрутки по вертикали только при необходимости.
Вот что у нас получится:
Когда в корзине мало товаров, то нет никакой полосы прокрутки, и блок подстраивается по высоте, под количество товаров.
При большом количестве товаров, появляется полоса прокрутки, но при этом блок не превышает максимальной высоты.
overflow
Желаю вам успехов! До встречи в следующих статьях!
С уважением Юлия Гусарь
Значения
-
visible – в случае переполнения блочного элемента содержимым по вертикали, оно будет
отображаться даже за его пределами (т.е. обрезаться не будет). -
hidden – содержимое, которое не поместиться в размеры блочного элемента по вертикали,
отображаться на странице не будет (т.е. будет обрезано). -
scroll – в элемент будет добавлена вертикальная полоса прокрутки. При этом содержимое,
которое не поместиться в размеры блочного элемента по вертикали, отображаться на странице не будет (т.е. будет обрезано), но его можно будет
просмотреть при помощи вертикальной полосы прокрутки. -
auto – вертикальная полоса прокрутки будет добавляться только в случае переполения
блочного элемента его содержимым по вертикали.
Syntax
/* Keyword values */
overflow: visible;
overflow: hidden;
overflow: clip;
overflow: scroll;
overflow: auto;
overflow: hidden visible;

/* Global values */
overflow: inherit;
overflow: initial;
overflow: unset;
The property is specified as one or two keywords chosen from the list of values below. If two keywords are specified, the first applies to and the second to . Otherwise, both and are set to the same value.


Values
- Content is not clipped and may be rendered outside the padding box.
- Content is clipped if necessary to fit the padding box. No scrollbars are provided, and no support for allowing the user to scroll (such as by dragging or using a scroll wheel) is allowed. The content can be scrolled programmatically (for example, by setting the value of a property such as ), so the element is still a scroll container.
- Like for , the content is clipped to the element’s padding box. The difference between and is that the keyword also forbids all scrolling, including programmatic scrolling. The box is not a scroll container, and does not start a new formatting context. If you wish to start a new formatting context, you can use to do so.
- Content is clipped if necessary to fit the padding box. Browsers always display scrollbars whether or not any content is actually clipped, preventing scrollbars from appearing or disappearing as content changes. Printers may still print overflowing content.
- Depends on the user agent. If content fits inside the padding box, it looks the same as , but still establishes a new block formatting context. Desktop browsers provide scrollbars if content overflows.
- Behaves the same as , but with the scrollbars drawn on top of content instead of taking up space. Only supported in WebKit-based (e.g., Safari) and Blink-based (e.g., Chrome or Opera) browsers.
Mozilla extensions
- Use instead.
- Use and , or instead.
- Use and , or instead.
- Intended mainly for internal use and by themes. Disables scrolling of XML root elements, , and with the keyboard’s arrow keys and the mouse wheel.
As of Firefox 63, this feature is behind a feature preference setting. In about:config, set to
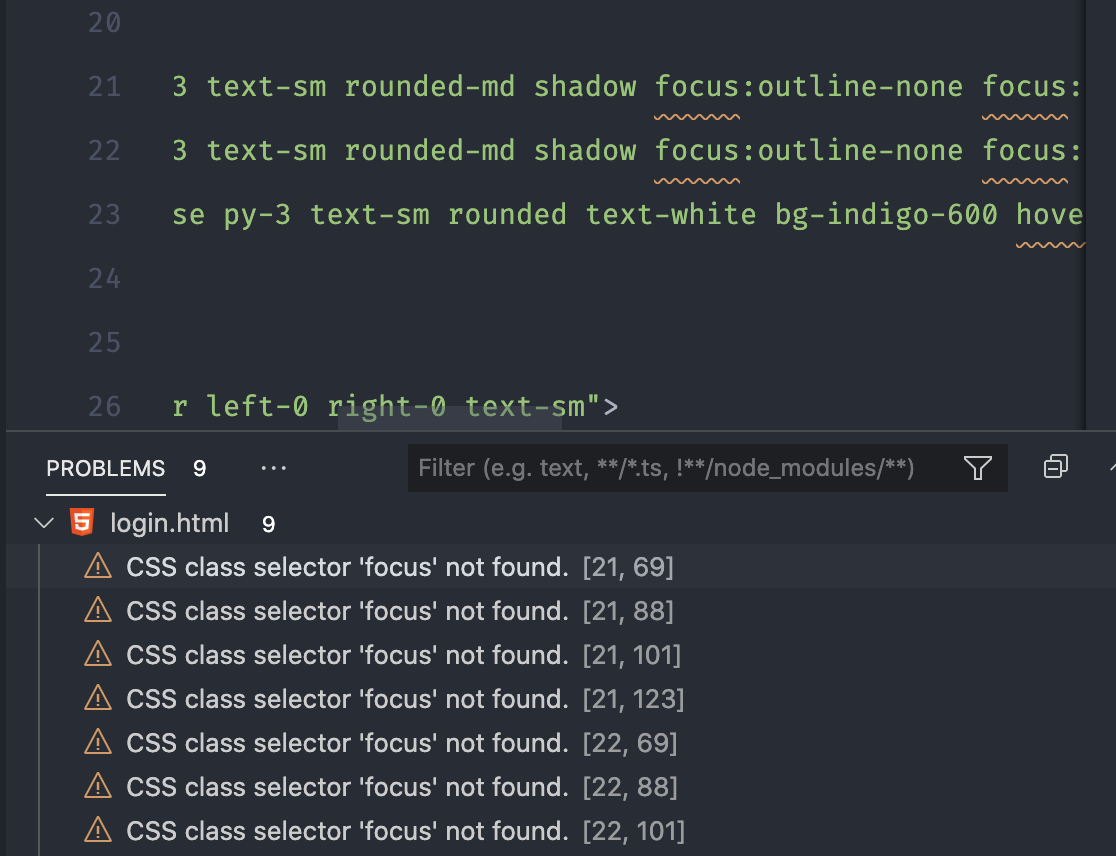
Reasons why its not working
-
Incorrect CSS Selector: Ensure that you are targeting the correct element with the overflow-y property. Double-check the class or ID name to ensure it matches the desired div element.
-
Content Height — If the content within the div element is not tall enough to exceed its height, the scrollbar will not appear. Make sure the content is larger than the div container to trigger the overflow behavior.
-
Conflicting CSS — Check for any conflicting CSS rules that may be overriding or interfering with the overflow-y property. Inspect the CSS cascade and ensure there are no conflicting styles applied to the element or its parent elements.
-
Parent Container Constraints — If the parent container has a fixed height or overflow property set to hidden, it may prevent the child div from scrolling. Verify that the parent container allows for overflow and is not restricting the scrolling behavior.
-
Box Sizing — The box-sizing property affects the calculation of an element’s height and may impact the effectiveness of overflow-y. Ensure that the box-sizing property is set appropriately, such as box-sizing: content-box or box-sizing: border-box, based on your layout requirements.
-
CSS Specificity — If there are conflicting CSS rules targeting the same element, the one with higher specificity will take precedence. Check if there are more specific rules overriding the overflow-y property.
-
JavaScript Modifications: If there is JavaScript code modifying the overflow-y property or the DOM structure dynamically, ensure that it is not interfering with the desired scrolling behavior.
Nested Divs
If you have nested div elements and you want to enable scrolling for the inner div while keeping the outer div fixed, you can achieve this by applying CSS properties to both elements. Here’s an example:
HTML:
CSS:
In the above code, the outer-div has a specified height and overflow-y set to hidden to hide any overflow content and prevent scrolling of the outer div. The inner-div has a height set to 100%, which allows it to occupy the full height of the outer div. The overflow-y property is set to auto to enable vertical scrolling for the inner div when its content exceeds its height.
With this setup, the outer div will remain fixed, and any overflow content within the inner div will be scrollable. Adjust the height and other properties according to your specific requirements.
Значения свойства
| Значение | Описание |
|---|---|
| visible | Переполнение не обрезается, содержимое выходит за пределы размеров элемента. Это значение по умолчанию. |
| hidden | Переполнение обрезается (контент, который выходит за размеры будет невидимым). |
| scroll | Переполнение обрезается, но добавляется полоса прокрутки, позволяющая увидеть содержимое, которое выходит из заданных размеров. |
| auto | Если переполнение обрезается, то полоса прокрутки будет добавлена автоматически, чтобы увидеть содержимое, которое выходит из заданных размеров. |
| initial | Устанавливает свойство в значение по умолчанию. |
| inherit | Указывает, что значение наследуется от родительского элемента. |
CSS3 Учебник
CSS3 Закругленные углыCSS3 Изображен. границаCSS3 Слои фона изображ.CSS3 ЦветаCSS Ключевые сл. цветаCSS3 Градиент
Линейные градиенты
Радиальные градиенты
Конические градиенты
CSS3 Тени
Теневые эффекты
Тени бокса
CSS3 Эффект текстаCSS3 Веб шрифтыCSS3 2D ТрансформацияCSS3 3D ТрансформацияCSS3 ПереходCSS3 АнимацияCSS3 Всплыв. подсказкиCSS3 Стиль изображенияCSS3 Отраж. изображенияCSS3 Объект-подгонкаCSS3 Объект-позицияCSS3 МаскировкаCSS3 КнопкиCSS3 ПагинацияCSS3 Несколько столбцовCSS3 ИнтерфейсCSS3 Переменные
Переменная var()
Переопределение
Переменные с JS
Медиа-запросы
CSS3 Размеры боксовCSS3 Медиа запросыCSS3 Медиа примерыCSS3 Флексбокс
CSS Гибкий бокс
CSS Flexbox контейнер
CSS Flexbox элементы
CSS Flexbox отзывчивый