

Javascript – blink the text
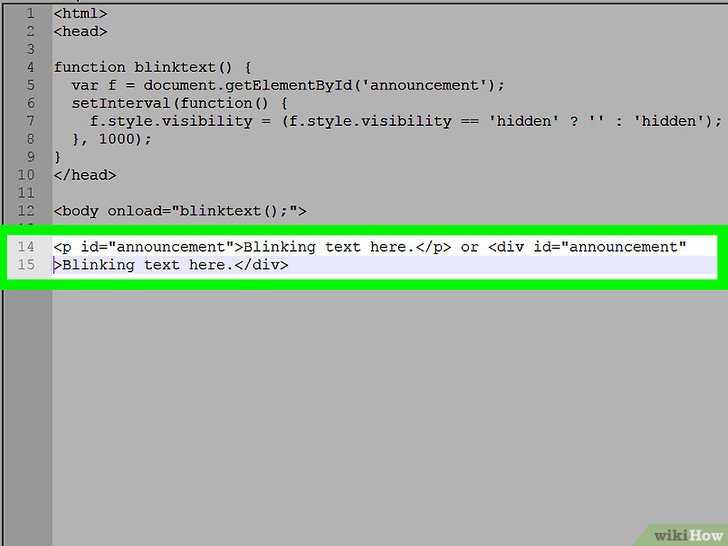
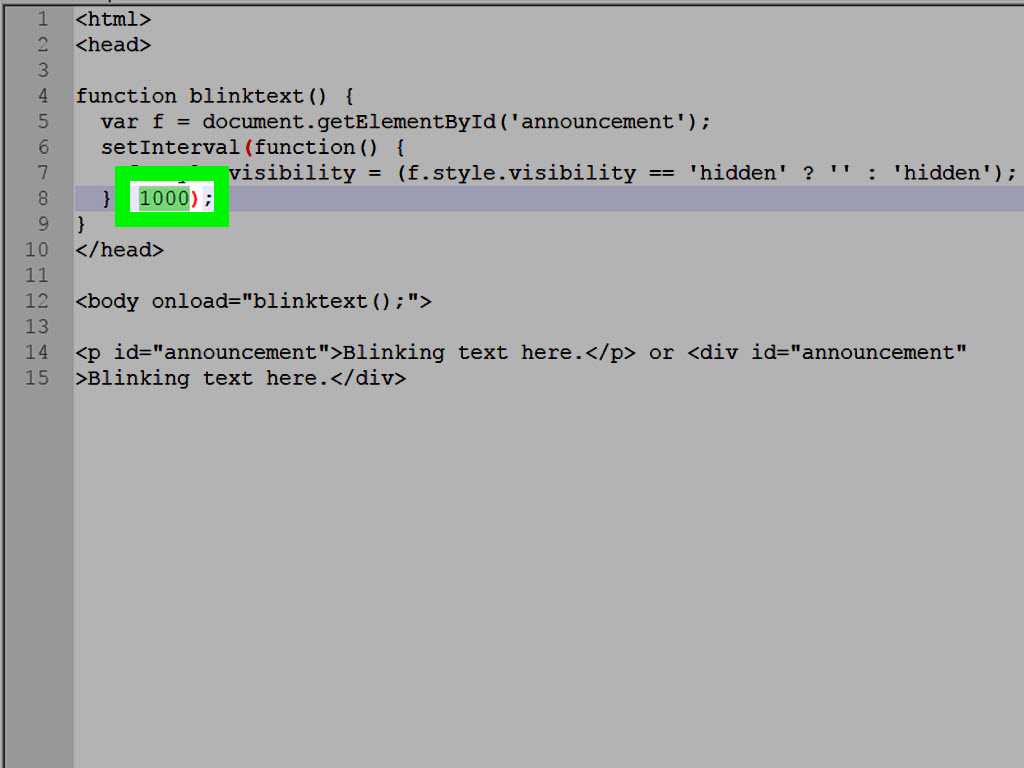
Now let’s see one example for blinking the text in javascript also. you may try some more approaches also. I have used the set function to create flashing text.
Run in Codedamn
Calling a function repeatedly after a specified time interval is the main task performed by the setInterval function. In the above code, the set function calls the function to check if the text is visible then make it invisible for a specified period and vice-versa.
That’s all there is to it. With just a few lines of code, you can add flashing/blinking text to your website. Just keep in mind that the tag is not recommended for use in modern websites, so it is best to use the JavaScript method for creating a blinking effect.
How To Blink Text in HTML: Two Distinct Approaches
So, are you ready to enhance the text on your landing page? Let’s start with two approaches:
– Using STYLE=”text-decoration:blink”
You must apply it to a text section that you feel needs some animation effects, and do not forget to add <SPAN> alongside. The same element allows users to go ahead with text decoration without unnecessary script formatting.
Now, let’s take a look at a coding example using this text-blinking technique:
| Here the text is normal, <SPAN STYLE=”text-decoration:blink”>here the text blinks if the browser supports this,</SPAN> and here the text returns to normal. |
When successfully entered on the document, you will get the following output:
| Here the text is normal, here the text blinks if the browser supports this, and here the text returns to normal. |
As promised, we have another approach, enclosed in the following section.
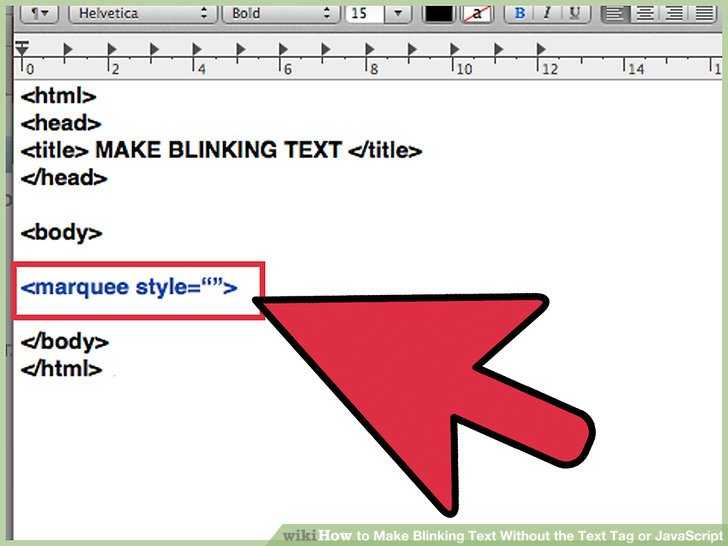
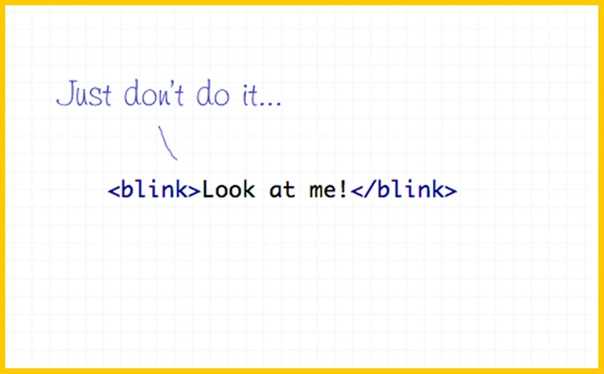
– The <Blink> Tag
The most popular approach is through the <blink> tag. Much like the other HTML elements, it has a start and an end tag. The used syntax looks somewhat like this:
| Here the text is normal, <blink>here the text blinks if the browser supports this,</blink> and here the text returns to normal. |
The output you are most likely to come across if you enter the code correctly is (the blink tags here are used to indicate where the text will “blink”):
| Here the text is normal, here the text blinks if the browser supports this, and here the text returns to normal. |
Let’s check out more examples in the next section.
Реализация
Мигать значение CSS текст-украшение собственности позволяет авторам предположить , что текст должен мигать без использования проприетарных тегов, но спецификации CSS 2.1 гласит , что « в соответствии пользовательские агенты могут просто не мигать текст», чтобы соответствовать User Agent Accessibility Рекомендации .
<span style="text-decoration: blink;">Text to blink here</span>
Элемент мигания также может быть реализован с использованием анимации CSS .
blink, .blink { animation blink 1s step-end infinite; }

@keyframes blink {
  67% { opacity  }
}
Подобные эффекты также могут быть достигнуты с помощью JavaScript .
<script type="text/javascript">
  (function() {
    var blinks = document.getElementsByTagName('blink');
    var visibility = 'hidden';
    window.setInterval(function() {
      for (var i = blinks.length - 1; i >= ; i--) {
        blinksistyle.visibility = visibility;
      }
      visibility = (visibility === 'visible') ? 'hidden'  'visible';
    }, 250);
  })();
</script>
<blink>Text to blink here</blink>
Или, в качестве альтернативы, функция мигания может быть реализована с помощью jQuery .
<script type="text/javascript">
    setInterval(function(){
      $('blink').each(function() {
        $(this).toggle();
      });
    }, 250);
</script>
<blink>Text to blink here</blink>
Complete HTML and CSS code for your reference
<html>
<head>
<style type=»text/css»>
.blinking {
animation: blinkingText 1s infinite;
font-family: futura;
font-style: italic;
width: 100%;
margin: 0 auto;
text-align: center;
color: white;
font-size: 45px;
background-color: #fc030b;
}
@keyframes blinkingText {
from {
opacity: 1;
color : yellow;
}
to {
opacity: 0;
color : white;
}
0% {
opacity: 0;
}
50% {
opacity: .5;
}
100% {
opacity: 1;
}
}
</style>
<body>
<span class=»blinking»>Limited offers</span>
</body>
</html>
|
1 |
<html> <head> <style type=»text/css»> .blinking { animationblinkingText1sinfinite; font-familyfutura; font-styleitalic; width100%; marginauto; text-aligncenter; colorwhite; font-size45px; background-color#fc030b; } @keyframes blinkingText { from { opacity1; coloryellow; } to { opacity; colorwhite; } 0% { opacity; } 50% { opacity.5; } 100% { opacity1; } } </style> <body> <span class=»blinking»>Limited offers<span> <body> <html> |
Recommended Articles
How to show the Text letter by letter using CSS?
How to Create Blinking Text using CSS ?
The flashing text effect, also referred to as the blinking text effect, can be readily achieved by utilizing HTML and CSS, specifically through the @keyframes rule and the opacity property.
In this part, we will generate a simple div element that contains some text.
The CSS code involves using CSS to design the text with the desired effect. This is achieved by implementing the @keyframes rule and setting the opacity property as demonstrated below.
|
The following codes need to be rephrased: , , , , , , , , , , , , , , , , , , , , , , , , , , , , , , , , , , , , , , , , , , , , , , , , , , , , , , , , , , , , , , , , , , , , , , , , , , , , , , , , , , , , , , , , , , , , , , , , , , , and . |
The final code is the result of combining the aforementioned two code sections.
| The following code snippets need to be rephrased to avoid repetition while maintaining their meaning: «msdt_code1», «msdt_code2», «msdt_code3», «msdt_code4», «msdt_code5», «msdt_code6», «msdt_code7», «msdt_code8», «msdt_code9», «msdt_code10», «msdt_code11», «msdt_code12», «msdt_code13», «msdt_code14», «msdt_code15», «msdt_code16», «msdt_code17», «msdt_code18», «msdt_code19», «msdt_code20», «msdt_code21», «msdt_code22», «msdt_code23», «msdt_code24», «msdt_code25», «msdt_code26», «msdt_code27», «msdt_code28», «msdt_code29», «msdt_code30», «msdt_code31», «msdt_code32», «msdt_code33», «msdt_code34», «msdt_code35», «msdt_code36», «msdt_code37», «msdt_code38», «msdt_code39», «msdt_code40», «msdt_code41», «msdt_code42», «msdt_code43», «msdt_code44», «msdt_code45», «msdt_code46», «msdt_code47», «msdt_code48», «msdt_code49», «msdt_code50», «msdt_code51», «msdt_code52», «msdt_code53», «msdt_code54», «msdt_code55», «msdt_code56», «msdt_code57», «msdt_code58», «msdt_code59», «msdt_code60», «msdt_code61», «msdt_code62», «msdt_code63», «msdt_code64», «msdt_code65», «msdt_code66», «msdt_code67», «msdt_code68», «msdt_code69», «msdt_code70», «msdt_code71», «msdt_code72», «msdt_code73», «msdt_code74», «msdt_code75», «msdt_code76», «msdt_code77», «msdt_code78», «msdt_code79», «msdt_code80», «msdt_code81», «msdt_code82», «msdt_code83», «msdt_code84», «msdt_code85», «msdt_code86», «msdt_code87», «msdt_code88», «msdt_code89», «msdt_code90», «msdt_code91», «msdt_code92», «msdt_code93», «msdt_code94», «msdt_code95», «msdt_code96», «msdt_code97», «msdt_code98», «msdt_code99», and «msdt_code100», «msdt_code101». |
The resulting output includes an image labeled as «msdt_img1».
How To Create HTML and CSS Blink Animation Tutorial, How To Create a Blink Animation in HTML and CSS Tutorial. Live News/Blog Blink Animation.
Duration: 3:07
Tags:
recreating the blink tag with css animations
recreate the alien title sequence
how do you use the blink tag


How to Create CSS Blinking Text (Quick Tutorial)
This Video is going to show you How to Create CSS Blinking Text (Quick Tutorial)Subscribe to
Duration: 2:35
CSS Blinking Text Animation
Blinking text animation with html and css. #cssanimationDownload Source code from here
Duration: 6:02
Simple CSS3 Blinking Text Animation
Simple CSS3 Blinking Text Animation | CSS for BeginnersFollow this Channel on:Facebook
Duration: 6:44
What is the best way to make text blink in HTML?
I am often asked this question, and so in this article, I will give you an answer that I have used successfully for many years. But first I want to explain what is HTML in the first place.
There are several ways in which one could say that HTML has evolved over the years but the basic idea is that one can create their own content on one’s web page and include that information on a website. The HTML language enables this to be possible by creating the link structure of the page so that a website can be designed using the structure that is being desired.
What you want to make HTML do is to be able to add a blinking animation to the text on the webpage, and as a result of doing so, it will automatically change its color from the current background color. When you first download the Flash Player, it will not have the ability to display these flashing text effects, but with time and patience, you should be able to set up the Flash player to allow the use of these flashing effects.
Once you have downloaded the Flash Player, you will need to make sure that you have it installed correctly, because if you have problems then you will not be able to make use of your website. Once you have the Flash player installed, you should now open up the Windows Task Manager and then click the Startup tab.
Click on the tab to enable the Startup tab for your Windows Task Manager, and then click OK. Now you need to restart the computer, and once it is done, you need to click the Task Manager button to enable this for your application. Once again, you should restart the computer, and this time, when the application reboots, you need to click OK to allow this to run.
After doing this you should then be able to see the effect that your text is having on the screen, and as a result, it will change its color to one that is different from its original background. So next time you ask yourself “how do I make text blink in HTML?”
You can see this in action by visiting websites such as Yahoo Answers, and you will notice that different people will be able to view the answers to their questions using different backgrounds. This is because they will be adding different code that is added to the website that allows them to do this. You may also want to visit some blogs that are run by different companies, and these companies are also adding different codes to the pages that they use to make it possible for different websites to use different colors of text on their web pages.
Examples Using Blink Tag in HTML: Use Cases
Theoretical knowledge is not enough when learning the markup language. This is why we believe in breaking down the complexities of an HTML topic through examples. You can definitely use them to practice and gain a better insight into the HTML blink tag itself.
Moreover, here are two of them to improve your learning curve:
– Coding Example 1
This is our first example where we have made use of the HTML blink tag:
| <!DOCTYPE html><html><head><title>Blinking text using HTML</title></head><body><h1>GeeksforGeeks</h1><blink>Blink tag not workingin HTML</blink></body></html> |
On sucessfully entering the text, you shall get the following output:
| GeeksforGeeks Blink tag not working in HTML |
– Coding Example 2
Here is another example of utilizing the blink tag:
| <!DOCTYPE html><html><head><title>Title of the document</title><style>blink {color: #1c87c9;font-size: 20px;font-weight: bold;font-family: sans-serif;}</style></head><body><h1>The <blink> Element </h1><blink>The <blink> element is deprecated. To attain blinking effect you should use CSS or JavaScript. See examples in the next section.</blink></body></html> |
Example 2 Explanation in Case of Browser Incompatibility
The results have not been easy to come around ever since the <blink> tag was deprecated. Plus, it may not be supported by your browser. In such a case, the outcome may appear like this:
| The <blink> Element |
The <blink> element is deprecated. To attain the blinking effect, you should use CSS or JavaScript. See examples in the next section.
If this happens, go ahead and read on, as we will be presenting alternative ways of making text blink in HTML further in our article.
How do I make an image blink?
Have you ever asked yourself how can I make an image blink? You might have asked yourself, but you will find that there are different techniques and tricks on how to make an image blink. see the following example. In the below example I have written the code on how you can blink your images.
This example will help you to blink the images.
First, flash is an important tool for your web page. There are many places to put your flash files, such as the top of the page, sidebar, or bottom of the page. The more flash pages that you have, the more traffic can be redirected to your site. If you can include a flash file in each one of your pages, then it can help to increase your website’s page rank. In addition, if you are using flash and a lot of other flash objects, then you can even increase the overall appearance of your site.
Second, you will want to keep your flash content simple and easy to read. Most people who visit your site are not going to sit down and read along, wordy articles. They are going to click on a link to your web page, which will lead them to your sales page. If they can’t understand what the page is about, then they are going to click away from your page and move onto another website that is easier to read. A simple, clear, and easy to read message will lead people to come back to your site.
Third, make sure that the colors of the text are not overwhelming to people’s attention. Many people will scroll down to your text and if they do not see any reason to continue reading, they are going to close out of your page. Make sure that you do not overpower the reader by including too many colors in your text.
Fourth, make sure that you are not using too many images. This is something that can easily turn off many people when they first open your page. Even if you think that the colors of your images are very attractive, people are not going to be attracted to your images if they do not match the rest of the page. If your image is not in harmony with your text, then the text will look very boring.
The Internet has changed the way that people do business and it is not likely to change back again. If you want to use the Internet, you are going to have to keep up with the times and adapt to the latest techniques and strategies.
TABLE OF CONTENTS
BLINKING BACKGROUND & TEXT
All right, let us now get into some examples of creating blinking animations in HTML and CSS.
EXAMPLE 1) BLINKING BACKGROUND
1-background-blink.html
To create a blinking background:
- Start by defining a set of . Since we are creating a blinking background, we will alternate between two colors.
- This should be self-explanatory, attach the keyframes to the container using
- The name of the set of keyframes.
- How fast the animation should be. Keep this short (fast enough), or it will turn into a “background transition”.
- The number of iterations/repetitions.
EXAMPLE 2) BLINKING TEXT
2-text-blink.html
Lorem ipsum dolor sit amet, consectetur adipiscing elit.
Yep, CSS animation also works on text. The only difference here is that we are animating the text instead of the . The rest of the mechanics remain the same.
EXAMPLE 3) BLINKING NOTIFICATION
3-warning.html
Lorem ipsum dolor sit amet, consectetur adipiscing elit.
Put the blinking background and text together, just what good will it do? This “blinking billboard” sure attracts a lot of attention – Maybe a good fit for stuff like displaying critical system messages, or even time-limited offers.
EXAMPLE 4) BLINK ON CLICK
4-click-blink.html
Lorem ipsum dolor sit amet, consectetur adipiscing elit. Ut eget varius turpis.
If you want to “show blink on demand”:
- (A) Create the as usual.
- (C) But set the on a CSS class instead.
- (D) Use Javascript to toggle the “blink” CSS class on your selected element.
DOWNLOAD & NOTES
Here is the download link to the example code, so you don’t have to copy-paste everything.
SORRY FOR THE ADS…
But someone has to pay the bills, and sponsors are paying for it. I insist on not turning Code Boxx into a «paid scripts» business, and I don’t «block people with Adblock». Every little bit of support helps.
Buy Me A Coffee Code Boxx eBooks
EXAMPLE CODE DOWNLOAD
Click here for the source code on GitHub gist, just click on “download zip” or do a git clone. I have released it under the MIT license, so feel free to build on top of it or use it in your own project.
EXTRA BITS & LINKS
That’s all for the scripts, and here are a few small extras that you may find useful.
EXTRA) ADDING MORE KEYFRAMES
EXTRA) BLINK ON MOUSE HOVER
INFOGRAPHIC CHEAT SHEET
Blinking Text & Background With CSS (Click to enlarge)
Thank you for reading, and we have come to the end of this short tutorial. I hope that it has given you a few ideas on how to create a blinking effect in CSS, and if you have anything to add to this guide, please feel free to comment below. Good luck and happy coding!
Make a Text Blink Using Internal or Embedded CSS
Internal CSS is contained within the HTML tag. In the tag, we can include any CSS property.
Look at the code below to learn how we used internal CSS to create the blinking text.
Run Above Code
This is one of the most straightforward approaches to making a text blink. We just did a little styling, and the work is done.
Some of the CSS terms are maybe new to you but donвЂt worry, let us see in detail what each of the terms means.
the Property
We used CSSвЂs property on the class to apply animations. The property is a shorthand for:
| Specify a name for animation. | |
| It defines how long an animation should take to complete one cycle. | |
| Specify the speed curve from the start to the end of an animation. | |
| Specify a wait for the start of an animation. | |
| Specify the number of times an animation should be played. | |
| Specify the direction of animation, i.e., forward, backward, or alternate back and forth. | |
| Indicate how CSS animations apply styles to their targets before and after execution. | |
| Specify whether the animation is running or paused. |
Now, let us understand what we wrote in our code. The in the above code holds the following properties:
- The is an animation name.
- The is the , meaning that each cycle will be completed after 1 second.
- The is the , meaning that the animation will play at the same speed from beginning to end.
- The is the which means the animation will be played unlimited times.
To summarize the entire information, we concluded that the animation would run through each cycle in one second at the same speed, an endless number of times.
Keyframes
In CSS, the define the animation rule. Changeable CSS styles are used to create animations.
Multiple CSS property changes may occur during an animation. We must determine when a change in style occurs in percentages or contains the phrases and , which are equivalent to 0% and 100%; 0% denotes the start, and 100% denotes its completion.
For the best browser support, always specify the 0% and the 100% selectors. We will see it later in the article.
The CSS syntax of the keyframes is:
LetвЂs have a look at what we did in our code.
We put keyframes on our animation and specify that at 50%, its opacity should be zero. An elementвЂs transparency is set through the property.
The value for the property must be strictly between 0 to 1.
CSS Vendor Prefixes
A unique prefix added to a CSS property is called a vendor prefix. There are several CSS properties that older browser versions do not support, so you must use a browser prefix to help those tags.


There is a prefix for each rendering engine that will only apply the attribute to that specific browser.
- Internet Explorer, Microsoft Edge:
- Chrome, Safari, iOS, Android:
- Firefox:
- Opera:
LetвЂs rewrite the code described above to work with as many browsers as possible.
Run Above Code
Make sure it’s accessible
1. Turn off our animation for users who prefer reduced motion
Users may specify their preference for reduced motion in their device’s settings, for example because it triggers motion sickness.
If your animation is not crucial to the UI, disable it. If it’s crucial (ie. conveys something meaningful), define an animation with the minimum movement possible.
2. Add appropriate ARIA role/attribute if necessary
If you create an extra element for animation that has no meaningful content, add so screen readers could skip it.
If the animated element functions as an image, for instance a pulsating font icon or element with background image, add and attributes, for example:
Recreating a Similar Visual Effect Using JavaScript & CSS
In the current world, web developers use either CSS or JavaScript for a blink tag remake. So, below you will see some of the examples that you can also use to recreate the HTML blink tag.
– How To Use JavaScript & HTML Blink
This is a wonderful way to prevent the pages from breaking from an unsupportive browser. Let’s find out how this scripting or programming language in combination with HTML works through examples.
Example 1
Please observe the coding snippet below:
| <!DOCTYPE html><html><head><title>Blinking with JavaScript</title><style>#blink {font-size: 20px;font-weight: bold;font-family: sans-serif;}</style></head><body><p id=”blink”>Hello Geeks let’s Blink</p><script type=”text/javascript”>var blink =document.getElementById(‘blink’);setInterval(function () {blink.style.opacity =(blink.style.opacity == 0 ? 1 : 0);}, 1000);</script></body></html> |
Output for First Example
On typing out the above code block, you shall arrive at the following output:
| Hello Geeks let’s Blink |
This entire phrase should have the blink effect in place if you enter the syntax correctly.
Example 2
If you want another code sample to practice with, we have another example for you:
| <!DOCTYPE html><html><head><title> HTML Blink Feature through JavaScript for Practising </title><style>#blink {font-size: 10px;font-weight: bold;color: #2d38be;transition: 0.2s;}</style></head><body><p id=”blink”> This is a solid case of blinking text for JS users. </p><script type=”text/javascript”>var blink = document.getElementById(‘blink’);setInterval(function() {blink.style.opacity = (blink.style.opacity == 0 ? 1 : 0);}, 1500);</script></body></html> |
Output for Second Example
The outcome will be:
| This is a solid case of blinking text for JS users |
When you run the code, you will see the sentence appearing in blue in the preview section. It will flicker quickly as expected. Since we had mentioned the font size, color, and transition earlier, the output will show a similar effect.
Example 3
Here is the final example to level up your confidence in using the blinking effect remake:
| <!DOCTYPE html><html><head><title>Title of the document</title><style>#blink {font-size: 30px;font-weight: bold;font-family: sans-serif;color: #1c87c9;transition: 0.4s;}</style></head><body><p id=”blink”>Blinking Effect with JavaScript</p><script type=”text/javascript”>var blink = document.getElementById(‘blink’);setInterval(function(){ blink.style.opacity = (blink.style.opacity == 0 ? 1 : 0);}, 1000);</script></body></html> |
Output for Third Example
Upon entering the source code, you shall get the following output:
| Blinking Effect with JavaScript |
Much like the other outcomes, you will notice it flashing against the white screen.
Re-creating the Blink Effect
In HTML, the way you used the blink
tag was by wrapping whatever text you wanted to blink inside it:
<blink>hello</blink>
While the exact behavior of the blink
tag is undefined, most browsers followed the initial Netscape
implementation where your text would be visible for .75 seconds
and disappear for .25 seconds. In our version using CSS
animations, we’ll stay consistent with the initial design.
Here is what the CSS animation version of the
blink tag looks like (launch in separate
window):
Its implementation looks as follows:
.blink {
	animation-duration: 1s;
	animation-iteration-count: infinite;
	animation-name: blink;
}

@keyframes blink {
	0% {
		opacity: 1;
	}
	75% {
		opacity: 1;
	}
	76% {
		opacity: 0;
	}
	100% {
		opacity: 0;
	}
}
To have this effect kick in, simply assign a class value of
blink to the text element you want to blinkify:
<p class="blink">hello</p>
This will ensure our .blink
style rule gets applied to that element. If you care about older
browsers, be sure to add a reference to the
-prefix-free library to ensure so that the vendor prefixes are taken
care of for you.
How do I make text blink in HTML?
How to make text blink in HTML is a question that many people seem to ask these days. The short answer is not too difficult, and you can easily find a solution to this problem. This is especially true for websites that use flashing banners or flash videos on them.
If the website’s code has the ‘flash’ option, then the code can easily be tweaked to make the blinking effect much more realistic. You could get hold of a special Flash plug-in, which could help you make the blinking effect in HTML possible.
You also need to take into account the website design in order to make it possible to have the blinking effect. The design should be easy on the eyes so that they don’t need to strain while trying to read. The website design also needs to be able to fit on top of the current web design scheme so that the background of the website is not an eyesore.
You can find the Flash plug-ins for most web browsers on the Internet by searching using keywords like ‘how do I make text blink in HTML’. There are also different kinds of sites available which could help you to learn more about this problem. You could try using the Yahoo! Answers site as it could be a very useful place where you could get answers to your question.
Before you even go ahead with the website design, it is best to test the HTML code before putting it live on the website. There are a lot of websites that would provide you with free tools that would allow you to do this, and you could try out the effect yourself without actually using any money.
So if you are wondering how to make text blink in HTML, then you need to consider what kind of website you would want to create. Remember, a good-looking website will not only attract customers but it also needs to be user-friendly so that users will find it easier to read it.
There are some websites that have made it possible for people to create websites in their own language and with the help of how do I make text blink in HTML, they can easily have text blink effects in different languages as well. Some websites may even allow users to have their own text to blink effect for a small fee.
Once you understand how do I make text blink in HTML, you can make websites in any language or in a different language. This is especially applicable for those who are bilingual as it would help them to learn new languages easily.
To learn how to make text blink in HTML, there are some websites available that would offer tutorials. You can take these tutorials as guidelines and you can use them to create a website that is easy to read and understand. After creating a website that is easily understandable and user-friendly, you could then turn it into a profitable business as it would help you make more sales.

![[ best 2023 ] blink html flashing text in html and css](https://rwvt.ru/wp-content/uploads/1/e/c/1ec51dcf57aa12495293e15ac6893613.gif)

