

Conclusion
The various functions we have in CSS for setting a background are quite powerful. The radial-gradient function is especially so. The amount of things we can do with radial gradients in this space goes beyond just circles. We can create circular borders/outlines, conical shapes, and more. If you have any interesting examples you would like to share, comment below with a link to your creation.
Just a final word before we wrap up. If you have a question and/or want to be part of a friendly, collaborative community of over 220k other developers like yourself, post on the forums for a quick response!
Color Stops
Color stops define what colors make up the gradient and optionally, where to put them.
We can add as many color stops as we want. By default, they’ll be spaced evenly along the gradient line.
Color stops also allow us to set the starting position of each color manually. We do so by adding a percentage (with being the start of the gradient and its end ) after the color.
Enter fullscreen modeExit fullscreen mode
We can also set an ending position for a color, if we want a color to take up more space.
Enter fullscreen modeExit fullscreen mode
Here are a few examples of manually positioned color stops
Enter fullscreen modeExit fullscreen mode
Замечания
Градиент — это комбинация двух и более заданных цветов, плавно переходящих друг в друга. В CSS градиенты используют вместо каких-либо изображений, как индикатор загрузки, для улучшения восприятия web-страницы при масштабировании и т.д. Mozilla Firefox поддерживает два вида градиентов: линейный и радиальный.
Mozilla Firefox корректно поддерживает градиенты только как значения для свойства background-image, а заодно и background. Вы можете задать значение для градиента вместо URL изображения.
Линейные градиенты отрисовываются вдоль оси, которая задается следующим образом:
- Если первый параметр функции градиента — это только <point>, то ось градиента начинается от заданной точки отсчета. Он закончится в точке, которая получается, если начальную точку отобразить на 180 градусов по оси, проходящей через центр элемента, для которого применяется градиент.
- Если первый параметр функции градиента — это только <angle>, то ось градиента начинается из угла элемента, причем так, чтобы она точно прошла через элемент. Ось градиента идет под заданным углом. Конечная точка градиента определяется следующим образом: в ней самый дальний из углов элемента, если считать от точки отсчета, будет перпендекулярен оси градиента.
- Если первый параметр функции градиента — это и <point>, и <angle>, то ось градиента выходит из точки отсчета под заданным углом. Конечная точка определяет так же, как и ранее.
- Если не заданы ни <point>, ни <angle>, а есть только значения <stop>, то ось градиента начинается от верхней граница элемента и опускается вертикально вниз к его нижней границе.
На рисунке ниже показаны два color-stops: красный и синий.
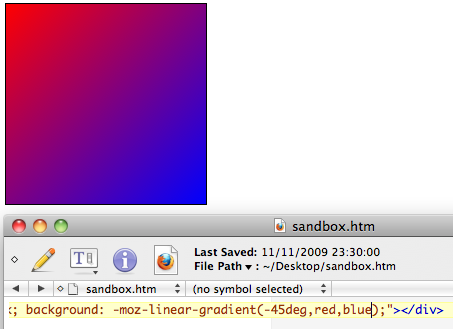
Области между цветами — это плавные размытые сочетания данных цветов. Каждый цвет в градиенте — это перпендекулярная линия к оси градиента. На рисунке линия начинается в верхнем левом углу элемента и заканчивается в нижнем правом. Ось градиента идет под углом в 45 градусов.
—moz-linear-gradient не поддерживает повторяющиеся градиенты. По умолчанию градиент растягивается, чтобы заполнить весь элемент, для которого он применяется. Посмотрите статью -moz-repeating-linear-gradient, чтобы узнать как сделать повторяющийся градиент.
CSS3 Учебник
CSS3 Закругленные углыCSS3 Изображен. границаCSS3 Слои фона изображ.CSS3 ЦветаCSS Ключевые сл. цветаCSS3 Градиент
Линейные градиенты
Радиальные градиенты
Конические градиенты
CSS3 Тени
Теневые эффекты
Тени бокса
CSS3 Эффект текстаCSS3 Веб шрифтыCSS3 2D ТрансформацияCSS3 3D ТрансформацияCSS3 ПереходCSS3 АнимацияCSS3 Всплыв. подсказкиCSS3 Стиль изображенияCSS3 Отраж. изображенияCSS3 Объект-подгонкаCSS3 Объект-позицияCSS3 МаскировкаCSS3 КнопкиCSS3 ПагинацияCSS3 Несколько столбцовCSS3 ИнтерфейсCSS3 Переменные
Переменная var()
Переопределение
Переменные с JS
Медиа-запросы
CSS3 Размеры боксовCSS3 Медиа запросыCSS3 Медиа примерыCSS3 Флексбокс
CSS Гибкий бокс
CSS Flexbox контейнер
CSS Flexbox элементы
CSS Flexbox отзывчивый
Defining the Shape and Size
The next argument in the function defines the shape and size of the gradient.
The first part of the second argument can either be or . The difference is basically that an ellipse is not a perfect circle, but it could be. So, depending on the size and center position of the gradient, the value could make the gradient oval-shaped. But a value of means the gradient will always be a perfect circle.
The next part of the second argument (the size) can take one of six values. The values are:
- closest-side
- closest-corner
- farthest-side
- farthest-corner
- contain
- cover
At first glance, these values might be a little difficult to grasp, so let’s break each one down visually. Let’s use a basic black-to-white gradient so we can illustrate what each value does. Here’s the code:
.element {
  background-image: radial-gradient(50px 50px, circle closest-side, black, white);
}
All the other values will remain the same, but we’ll change the size value (currently shown as ) so you can see the effect each one has on the look of the gradient.
Take note also that I’ve set the center position at to help make the shape and size values more clear.
closest-side
This value causes the gradient’s edge to meet the side of the element that is closest to the gradient’s center. Here’s how it looks:
closest-corner
This value causes the gradient’s edge to meet the corner of the element that’s closest to the center position of the gradient. Here it is:
Notice that part of the gradient’s full shape is cut off. This is because it’s being pushed into the corner of the element so that its edge meets the element’s corner.
farthest-side
This one does the opposite of the first value, causing the gradient’s edge to meet the side of the element that is farthest from the gradient’s center:
Notice that the size of the gradient in this example is different from the other two values because the gradient is forced to stretch to touch the farthest edge of the element.
farthest-corner
This value causes the gradient to stretch to the corner of the element that’s farthest away from the gradient’s center position:
Now the gradient covers much more of the element.
contain
This value causes the element to enlarge the gradient until it’s fully contained without any of the gradient being cut off by the element’s boundaries:
Look familiar? Well, it should, because this value is equivalent to , discussed above.
cover
Finally, this value causes the gradient to enlarge until it covers the entire area of the element:
Again, this should look familiar because this value is equivalent to .
I’m really not sure why the specification has different keywords defining identical results, but let’s not forget that the CSS3 spec is still in flux, so this could change.
Linear gradient syntax recap
As a recap, the syntax of linear gradients is fairly simple:
Inside the brackets you first include a setting for the gradient to go in ( means “start at the top left of the element, and travel diagonally towards the bottom right”), then you include a series of colour stops for the gradient to flow smoothly in between (you can specify these in percentages or fixed measurement units). The above line creates a gradient that looks like the following image:
 Figure 1: A simple linear gradient example
Note that the newest versions of Opera, Firefox and IE all support the current syntax of linear gradients, without prefixes, while WebKit-based browsers still require the old syntax. For compatibility with older browser versions and -Webkit- versions, you should consider including vendor prefixes versions of the property, all including the older syntax. This is basically the same, except:


- The direction keywords are the opposite way round and don’t include the word . So is equivalent to , is equivalent to , and so on.
- When signifying angles for directions, you need to do some recalculation, as used to mean horizontal towards the right (equivalent to ), and now it means vertical and upwards (equivalent to ).
A full code example would be:
CSS Tutorial
CSS HOMECSS IntroductionCSS SyntaxCSS SelectorsCSS How ToCSS CommentsCSS Colors
Colors
RGB
HEX
HSL
CSS Backgrounds
Background Color
Background Image
Background Repeat
Background Attachment
Background Shorthand
CSS Borders
Borders
Border Width
Border Color
Border Sides
Border Shorthand
Rounded Borders
CSS Margins
Margins
Margin Collapse
CSS PaddingCSS Height/WidthCSS Box ModelCSS Outline
Outline
Outline Width
Outline Color
Outline Shorthand
Outline Offset
CSS Text
Text Color
Text Alignment
Text Decoration
Text Transformation
Text Spacing
Text Shadow
CSS Fonts
Font Family
Font Web Safe
Font Fallbacks
Font Style
Font Size
Font Google
Font Pairings
Font Shorthand
CSS IconsCSS LinksCSS ListsCSS Tables
Table Borders
Table Size
Table Alignment
Table Style
Table Responsive
CSS DisplayCSS Max-widthCSS PositionCSS Z-indexCSS OverflowCSS Float
Float
Clear
Float Examples
CSS Inline-blockCSS AlignCSS CombinatorsCSS Pseudo-classCSS Pseudo-elementCSS OpacityCSS Navigation Bar
Navbar
Vertical Navbar
Horizontal Navbar
CSS DropdownsCSS Image GalleryCSS Image SpritesCSS Attr SelectorsCSS FormsCSS CountersCSS Website LayoutCSS UnitsCSS SpecificityCSS !importantCSS Math Functions
Prior Syntax (-webkit-gradient)
The and properties are supported in iOS 5.0 and later, and in Safari 5.1 and later on the desktop. In prior versions of Safari, both linear and radial gradients were implemented using the property. If you need to support earlier versions of iOS or Safari, use the property to create gradients. The syntax is as follows:
Specify linear gradients using the keyword , followed by a starting point, an ending point, a starting color with the keyword , any color stops, and an ending color with the keyword .
-
Linear gradient, vertical from top:
-
Linear gradient, horizontal from left:
-
Linear gradient, diagonal from upper left:
-
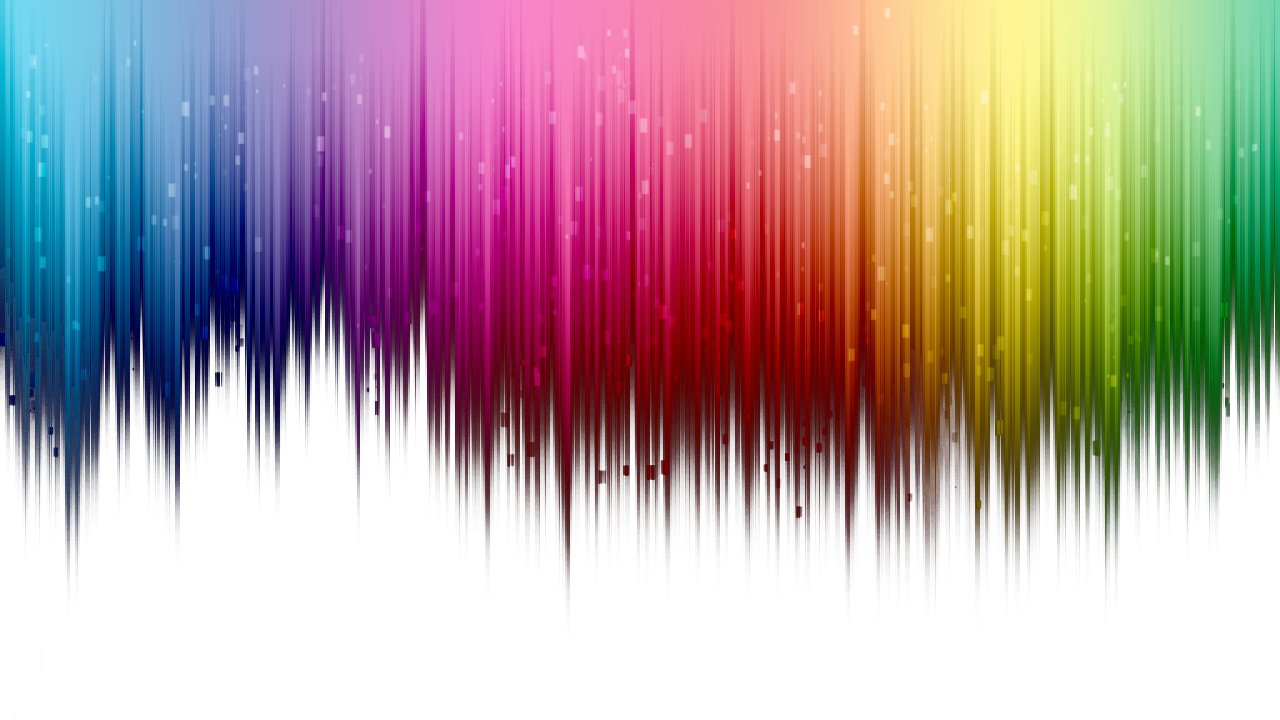
Linear gradient, rainbow:
Specify radial gradients using the keyword , followed by a starting point, a starting radius, an ending point, an ending radius, a starting color, any color stops, and an ending color.
-
Radial gradient, centered:
-
Radial gradient, offset:
-
Radial gradient, rainbow:
The beginning radius specifies the size of the disk at the center of the gradient. The ending radius specifies the size of the disk at the end of the gradient. The gradient is circular if the beginning and ending center points are the same, elliptical otherwise. The gradient is clipped by the shape of the containing element if the ending radius specifies a larger disk than the element can contain.
Adding more colours to the gradient
As with the linear gradients
it’s possible to insert more colours and ‘color-stop’ points. A
color-stop specifies a colour for the gradient to ‘hit’ at a
given point between 0, the inner circle of the gradient (equivalent to
from()), and 1, the outer circle (equivalent to
to()).
Here we have a gradient that transitions from orange to white to light
blue. All that is changing between each example is the point at which
the first transition is completed and the second one begins:
And of course we can insert more colours:
The examples in this section appear identical between WebKit and
Mozilla browsers, but you can see that the Mozilla specification isn’t
really designed for this kind of effect — more for filling entire
spaces.
One other trick which you can try out yourself. If you define two
color-stops at the same point then that will become a hard
edge/transition rather than a gradient.
Syntax
radial-gradient(circle at center, red , blue, green 100%)
Радиальный градиент задается путем указания центра градиента (где будет эллипс 0%), а также размера и формы конечной формы (эллипса 100%).
Values
-
Положение градиента интерпретируется так же, как или . Если не указано, по умолчанию используется .
-
Форма окончания градиента. Значение может быть (это означает, что форма градиента представляет собой круг с постоянным радиусом) или (что означает, что форма представляет собой выровненный по оси эллипс). Если не указано, по умолчанию используется .
-
Определяет размер конечной формы градиента. Если опущено, по умолчанию используется самый дальний угол. Это может быть указано явно или по ключевому слову. В целях определения ключевых слов считайте, что края градиентной рамки бесконечно продолжаются в обоих направлениях, а не являются конечными отрезками линии.
И круговые, и эллиптические градиенты принимают следующие ключевые слова для своего :
Keyword Description Окончательная форма градиента встречает сторону коробки,ближайшую к центру (для окружностей)или встречает как вертикальную,так и горизонтальную сторону,ближайшую к центру (для эллипсов). Форма окончания градиента имеет такой размер,что он точно соответствует ближайшему к центру углу коробки. Аналогичен , за исключением того, что конечная форма имеет размер, соответствующий той стороне коробки, которая находится дальше всего от ее центра (или вертикальной и горизонтальной сторон). При значении по умолчанию конечная форма градиента имеет такой размер,чтобы она точно соответствовала самому дальнему углу коробки от ее центра. Если указан как , размер может быть явно задан как , что обеспечивает явный радиус круга. Отрицательные значения недопустимы.
Если указан как или опущен, размер может быть задан как с двумя значениями, чтобы обеспечить явный размер эллипса. Первое значение представляет горизонтальный радиус, второе — вертикальный радиус. Значения в процентах относятся к соответствующему размеру окна градиента. Отрицательные значения недопустимы.
-
Значение точки цвета , за которым следуют одна или две необязательные позиции остановки (либо либо вдоль оси градиента). Процент или длина представляет центр градиента; значение представляет собой пересечение конечной формы с виртуальным лучом градиента. Промежуточные значения в процентах линейно расположены на луче градиента. Включение двух стоп-позиций эквивалентно объявлению двух цветных стопов одного цвета в этих двух позициях.
-
Th color-hint-это интерполяционная подсказка,определяющая,как градиент продвигается между соседними цветовыми остановками.Длина определяет,в какой точке между двумя цветовыми остановками цвет градиента должен достичь средней точки цветового перехода.Если этот параметр опущен,средней точкой цветового перехода будет средняя точка между двумя цветовыми остановками.
Syntax
/* A gradient at the center of its container,
   starting red, changing to blue, and finishing green */
radial-gradient(circle at center, red 0, blue, green 100%)
Values
- The position of the gradient, interpreted in the same way as or . If unspecified, it defaults to .
- The gradient’s shape. The value can be (meaning that the gradient’s shape is a circle with constant radius) or (meaning that the shape is an axis-aligned ellipse). If unspecified, it defaults to .
- A keyword describing how big the ending shape must be. The possible values are:
Keyword Description The gradient’s ending shape meets the side of the box closest to its center (for circles) or meets both the vertical and horizontal sides closest to the center (for ellipses). The gradient’s ending shape is sized so that it exactly meets the closest corner of the box from its center. Similar to , except the ending shape is sized to meet the side of the box farthest from its center (or vertical and horizontal sides). The default value, the gradient’s ending shape is sized so that it exactly meets the farthest corner of the box from its center. Note: Early implementations of this function included other keywords ( and ) as synonyms of the standard and , respectively. Use the standard keywords only, as some implementations have already dropped those older variants.
- A color-stop’s value, followed by an one or two optional stop positions (either a or a along the gradient’s axis). A percentage of , or a length of , represents the center of the gradient; the value represents the intersection of the ending shape with the virtual gradient ray. Percentage values in between are linearly positioned on the gradient ray. Including two stop positions is equivalent to declaring two color stops with the same color at the two positions.
- Th color-hint is an interpolation hint defining how the gradient progresses between adjacent color stops. The length defines at which point between two color stops the gradient color should reach the midpoint of the color transition. If omitted, the midpoint of the color transition is the midpoint between two color stops.
Changing the Radial Gradient Center
By default a radial gradient starts at the center of the gradient; however, it’s possible to change the point of origin with the introduction of a few keywords.
Changing the Radial Gradient Start Position Example
The line of code above will produce the following output:
As you can see from the output above the gradient now starts from the top right corner instead of the center. This change is possible because of the inclusion of the keyword top right in the code above. The following list of keywords can also be used to change the point of origin of the radial gradient:
- Top left
- Bottom right
- Bottom left
Changing the radius of the inner circle
In the examples below we are changing the radius of the inner circle
from 0 to 50 pixels in 10-pixel increments. You will see the solid
portion of the gradient getting larger.
In WebKit, when the two circles are identical, there is no gradient
and the default background colour (#f90) fills the container. Also in
WebKit, When the radius of the inner circle is larger than the outer
circle the gradient is inverted going from grey to blue instead of
vice-versa. Neither of these effects are seen in Mozilla so for the
last two examples we see just a solid background (#eef).
In WebKit, the gradient behaves like a background image and appears
in front of the default background. In Mozilla it behaves more like a
background colour, with a gradient applied.
Примеры
<!DOCTYPE html>
<html>
<head>
	<meta charset="utf-8">
	<title>Пример №1</title>

	<style>

		p{
		width: 500px;
		height: 300px;
		padding: 10px;
		margin: 4em;
		border: solid 3px black;
		}

		.background_1{
		background: radial-gradient(150px 100px at 50% 50%,
		#ffffff 2px, #000000 30px, #dddddd 70px);
		}

		.background_2{
		background: radial-gradient(150px 100px at 50% 50%,
		#ffffff, #000000 100px, #dddddd 200px);
		}

		.background_3{
		background: radial-gradient(550px 200px at 30% 50px,
		#ffffff 20%, #000000 70%, #dddddd);
		}

		.background_4{
		background: radial-gradient(300px 250px at 40% 100px,
		#ffffff, #000000, #dddddd);
		}

	</style>

</head>
<body>

	<p class="background_1">
		150px 100px at 50% 50%, #ffffff 2px, #000000 30px, #dddddd 70px
	</p>

	<p class="background_2">
		150px 100px at 50% 50%, #ffffff, #000000 100px, #dddddd 200px
	</p>

	<p class="background_3">
		550px 200px at 30% 50px, #ffffff 20%, #000000 70%, #dddddd
	</p>

	<p class="background_4">
		300px 250px at 40% 100px, #ffffff, #000000, #dddddd
	</p>

</body>
</html>
Пример №1
<!DOCTYPE html>
<html>
<head>
	<meta charset="utf-8">
	<title>Пример №2</title>

	<style>

		p{
		width: 500px;
		height: 150px;
		padding: 10px;
		margin: 1.5em;
		border: solid 3px black;
		}

		.background_1{
		background: radial-gradient(circle closest-side at
		30% 40%, #ffffff, #000000);
		}

		.background_2{
		background: radial-gradient(ellipse closest-side at
		30% 40%, #ffffff, #000000);
		}

		.background_3{
		background: radial-gradient(circle closest-corner at
		30% 40%, #ffffff, #000000);
		}

		.background_4{
		background: radial-gradient(ellipse closest-corner at
		30% 40%, #ffffff, #000000);
		}

		.background_5{
		background: radial-gradient(circle farthest-corner at
		30% 40%, #ffffff, #000000);
		}

		.background_6{
		background: radial-gradient(ellipse farthest-corner at
		30% 40%, #ffffff, #000000);
		}

	</style>

</head>
<body>

	<p class="background_1"></p>
	<p class="background_2"></p>
	<p class="background_3"></p>
	<p class="background_4"></p>
	<p class="background_5"></p>
	<p class="background_6"></p>

</body>
</html>
Пример №2
Вернуться назад
Description
As with any gradient, a radial gradient has ; i.e., it has no natural or preferred size, nor a preferred ratio. Its concrete size will match the size of the element it applies to.


To create a radial gradient that repeats so as to fill its container, use the function instead.
Because s belong to the data type, they can only be used where s can be used. For this reason, won’t work on and other properties that use the data type.
Composition of a radial gradient
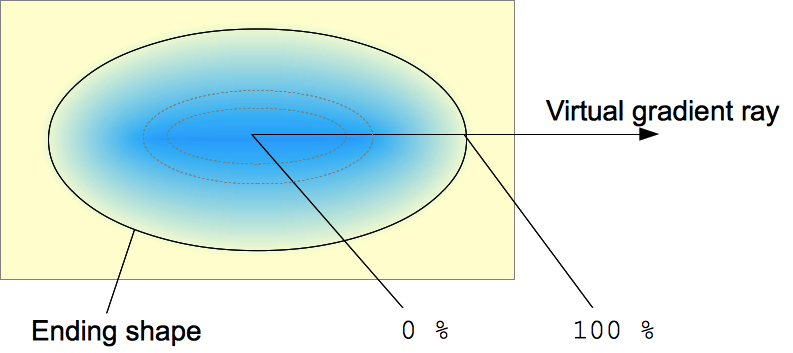 A radial gradient is defined by a center point, an ending shape, and two or more color-stop points.
To create a smooth gradient, the function draws a series of concentric shapes radiating out from the center to the ending shape (and potentially beyond). The ending shape may be either a circle or an ellipse.
Color-stop points are positioned on a virtual gradient ray that extends horizontally from the center towards the right. Percentage-based color-stop positions are relative to the intersection between the ending shape and this gradient ray, which represents . Each shape is a single color determined by the color on the gradient ray it intersects.
The Old Syntax
Because older versions of WebKit-based browsers supported a different syntax, it can be challenging to create a gradient that looks the same across all supporting browsers. Fortunately, for the most part, the browsers using the old syntax are not in very high use.
Nonetheless, here’s the old syntax, with a quick breakdown of the code:
.element {
  background-image: -webkit-gradient(radial, center center, 0, center center, 141, from(black), to(white), color-stop(25%, blue), color-stop(40%, green), color-stop(60%, red), color-stop(80%, purple)); /* old WebKit Syntax */
}
Instead of the fairly specific function, the old syntax uses the more general . The first argument in the function defines the type of gradient (in this case radial).
The next group of arguments () define the center position and radius of the inner circle of the gradient. Then the next group () defines the center position and radius of the outer circle of the gradient. The radius value is set in pixels, but no unit is specified.
Then the next group of arguments define the start and end colors, and the color stops that are in between the start and end colors. So the colors marked as “to” and “from” define the start and end colors and the subsequent values are the color stops.
Again, since this is the old syntax, I won’t spend any more time on this. If you need to know more about this syntax, you can check out on the Safari Developer Library.
I think the most important thing to note here is that you should put the new syntax after the old, to ensure that newer browsers (which still support the old syntax) use the most up-to-date implementation.
Summary
If you aren’t using css gradients yet, now is as good a time as any to start. This post is as much to remind me as it is to remind you. Once again check out the simple demo I created and even better experiment on your own.
Browser support is more than adequate and we aren’t dealing with design critical elements in gradients. And if you absolutely must have a gradient you can always set a fallback image so there really is no excuse.
Gradients are pretty easy to work with. The biggest hassles at the moment are probably the vendor prefixes and slight differences in how browsers honor the standard, but we should all be used to these kind of issues by now.
Browsers are moving toward adopting the latest spec and only webkit browsers still require a vendor prefix in their latest version so hopefully this hassle won’t exist for too much longer.
Do you use css gradients? If so how have they worked for you? If not, what’s keeping you from using them?
« Prev PostNext Post »
Download a free sample from my book, Design Fundamentals.
Управление размером радиального градиента
Заключительная особенность функции radial-gradient() заключается в том, что вы можете явно задать размер формы градиента. Другими словами вместо значений circle или ellipse указать свое значение.
Если указать одно значение, то оно будет расценено браузером как радиус для круглого градиента. Если указать два значения, то первое значение будет расценено браузером как горизонтальный радиус, а второе значение вертикальный радиус для эллиптического элемента.
Обращаю Ваше внимание, что запрещается использование процентных значений, если вы указываете только одно значение (радиус для круглого элемента), при использовании двух значений (для эллиптического градиента) допускается указывать эти значения в процентах. Давайте рассмотрим, как управлять размером радиального градиента в CSS
Давайте рассмотрим, как управлять размером радиального градиента в CSS.
<!DOCTYPE html>
<html>
<head>
	<title>Пример указания размера для радиальных градиентов</title>
<style>
div {
height: 200px; /* устанавливаем высоту элемента */
width: 200px; /* устанавливаем ширину элемента */
display: inline-block; /* устанавливаем, что элементы <div> становятся блочно-строчными (чтобы выстроились в линейку) */
line-height: 125px; /* устанавливаем высоту строки */
text-align: center; /* выравниваем текст по центру */
margin-bottom: .3em; /* устанавливаем внешний отступ снизу 0.3em */
color: white; /* устанавливаем цвет текста */
}
.test {
background-image: radial-gradient(50px, red, orange, yellow, green, skyblue, blue, violet); /* значение 50px задает радиус для круглого градиента, состоящего из 7 цветов */
}
.test2 {
background-image: radial-gradient(15% 45%, red, orange, yellow, green, skyblue, blue, violet, white); /* два значения в процентах, первое - горизонтальный радиус, а второе - вертикальный радиус для эллиптического восьмицветного градиента */
}
.test3 {
background-image: radial-gradient(100px 1em, orange, yellow, green, skyblue, blue, violet); /* два значения в единицах измерения длины, первое в px - горизонтальный радиус, а второе в em - вертикальный радиус для эллиптического семицветного градиента */
}
</style>
</head>
	<body>
		<div class = "test"></div>
		<div class = "test2"></div>
		<div class = "test3"></div>
	</body>
</html>
В этом примере мы создали три блока:
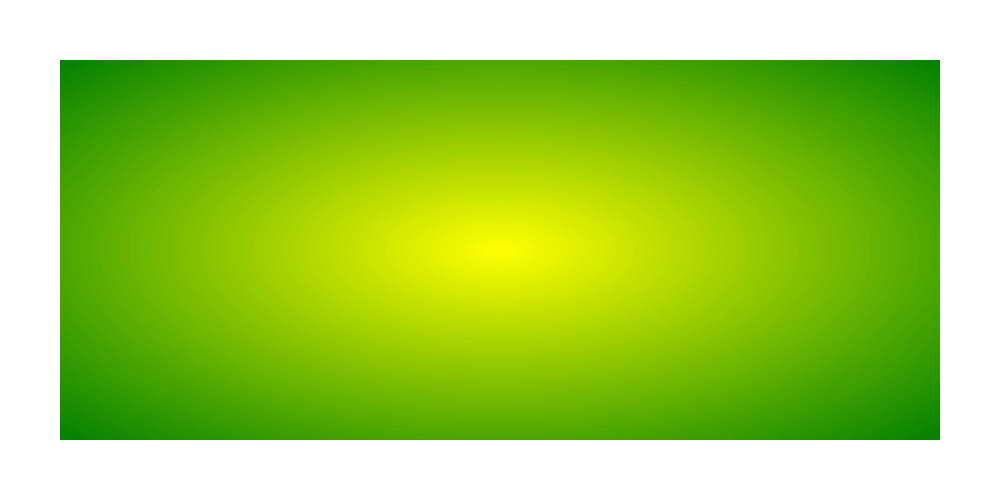
Первый блок – мы указали одно значение 50px, которое было расценено браузером как радиус для круглого градиента. Указали для градиента 7 цветов
Обратите внимание, что крайний цвет заполняет оставшуюся область
Второй блок – мы указали два значения в процентах: первое значение — горизонтальный радиус, а второе значение — вертикальный радиус для эллиптического градиента. Указали для градиента 8 цветов
Обратите внимание, что крайний цвет мы указали белый, который и заполнил оставшуюся область (один из вариантов, чтобы оставить только форму градиента)
Третий блок – мы указали два значения в единицах измерения длины (px и em): первое значение — горизонтальный радиус, а второе значение — вертикальный радиус для эллиптического элемента. Указали для градиента 7 цветов.
Результат нашего примера:
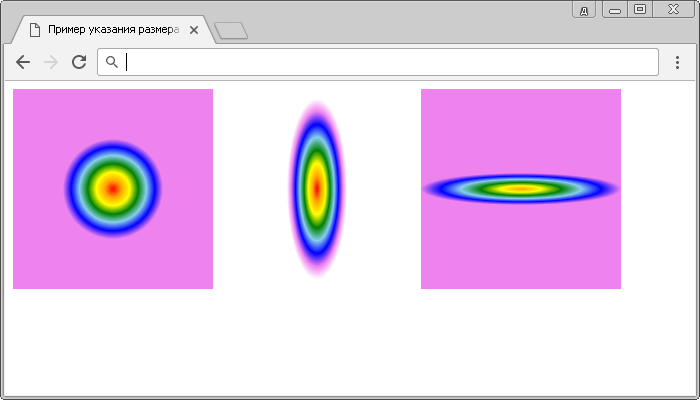
Рис. 141 Пример указания размера для радиальных градиентов.
Radial Gradients
A CSS radial gradient—although far less often seen—is just as beautiful and fun as a linear gradient and can be implemented just as easily. With that said, the code may seem more difficult to figure out at first. It is for this reason that, for some designers, it may be easier to start out with a linear gradient.
Result
Of course, the code isn’t actually all that complicated at all. In fact, most of the code is exactly the same as that of the linear gradient—with just a few tweaks for extra radial customization. For example, unlike with linear gradients, you can actually adjust the size of radial gradients in place of where the direction would normally go. Playing with the different values that determine these sizes can give you a lot of different results.
Values
- <position>
- A that is resolved and works the same way the value of does. If this value is not specified, it defaults to .
- <ending-shape>
- Can be either or ; determines whether the gradient’s ending shape is a circle or an ellipse, respectively. If is omitted, the ending shape defaults to a circle if the is a single , and to an ellipse otherwise.
- <size>
-
Determines the size of the gradient’s ending shape. If omitted it defaults to . It can be given explicitly or by keyword. For the purpose of the keyword definitions, consider the gradient box edges as extending infinitely in both directions, rather than being finite line segments.
If the ending-shape is an ellipse, its axes are aligned with the horizontal and vertical axes of the element.
Both and gradients accept the following keywords as their :
- : The ending shape is sized so that that it exactly meets the side of the gradient box closest to the gradient’s center. If the shape is an ellipse, it exactly meets the closest side in each dimension.
- : Same as , except the ending shape is sized based on the farthest side(s).
- : The ending shape is sized so that that it passes through the corner of the gradient box closest to the gradient’s center. If the shape is an ellipse, the ending shape is given the same aspect-ratio it would have if were specified.
- : Same as , except the ending shape is sized based on the farthest corner. If the shape is an ellipse, the ending shape is given the same aspect ratio it would have if were specified.
If is specified as or is omitted, the may be given explicitly as:
: Gives the radius of the circle explicitly. Negative values are invalid.
Note that percentages are not allowed here; they can only be used to specify the size of an elliptical gradient, not a circular one. This restriction exists because there is are multiple reasonable answers as to which dimension the percentage should be relative to. A future level of CSS may provide the ability to size circles with percentages, perhaps with more explicit controls over which dimension is used.
If is specified as or is omitted, may instead be given explicitly as:
{2}: Gives the size of the ellipse explicitly. The first value represents the horizontal radius, the second the vertical radius. Percentage values are relative to the corresponding dimension of the gradient box. Negative values are invalid.
- <color-stop>
-
A value followed by an optional color stop position. The color stop position can be set in percentage values or fixed values such as or , among others. Color stops are positioned along the gradient ray, and are used to specify the points along that line that colors start at.
A color-stop can be placed at a negative location; though the negative region of the gradient ray is never directly consulted for rendering, color stops placed there can affect the color of non-negative locations on the gradient ray through interpolation or repetition (see repeating gradients). For example, produces an elliptical gradient that starts with a reddish-orange color in the center (specifically, ) and transitions to yellow. Locations greater than 100% simply specify a location with a correspondingly greater distance from the center of the gradient.


Notes
Some combinations of position, size, and shape will produce a circle or ellipse with a radius of 0. This will occur, for example, if the center is on a gradient box edge and or is specified or if the size and shape are given explicitly and either of the radii is zero. In these degenerate cases, the user agent must render the gradient as follows:
Linear Gradients
You create a linear gradient by specifying a gradient line and then several color stops along that line.
linear-gradient(
,]?
+
The first argument above ,]? specifies a gradient line. The values can take an angle or keywords. When an angle is used 0deg points up, 90deg points to the right, and so on. With keywords you use “to” and then give a location, such as to top, to right, to top right.
The default is 0deg or to top.
The second argument + takes 2 or more colors and optionally a length for each.
.gradient {
background-image: linear-gradient(left, red, maroon)
background-image: linear-gradient(to left, red, maroon)
}
The two lines above while similar, actually have different gradient lines. The first “left” says the line starts at the left. The second “to left” says the line ends at the left. Webkit browsers don’t seem to honor the “to” keyword at the moment, though it works fine with other browsers.
We should still use vendor prefixes. The latest versions of all but webkit browsers no longer need them, but go a few versions back and they do. We should also provide a default fallback color and a fallback gradient image. Complete code for setting a linear gradient looks like the following
.gradient {
background-color: maroon;
background-image: url(images/fallback-gradient.png);
background-image: -webkit-linear-gradient(left, red, maroon);
background-image: -moz-linear-gradient(left, red, maroon);
background-image: -ms-linear-gradient(left, red, maroon);
background-image: -o-linear-gradient(left, red, maroon);
background-image: linear-gradient(left, red, maroon);
}
Note: Webkit previously used a different syntax (-webkit-gradient), which I didn’t include above. You might want to include it in the stack just above the current webkit line, depending on how many versions back you need to support.
background-image: -webkit-gradient(linear, left, right from(red), to(maroon));
You aren’t limited to only using two colors. You could set a linear gradient with more than two color stops like the following:
background-image: linear-gradient(left, orange, red 33%, maroon 67%, purple);
However, I’ve noticed that additional color stops beyond two often don’t transition as nicely. There’s usually a point (the color stop) where you see a solid band of a color.
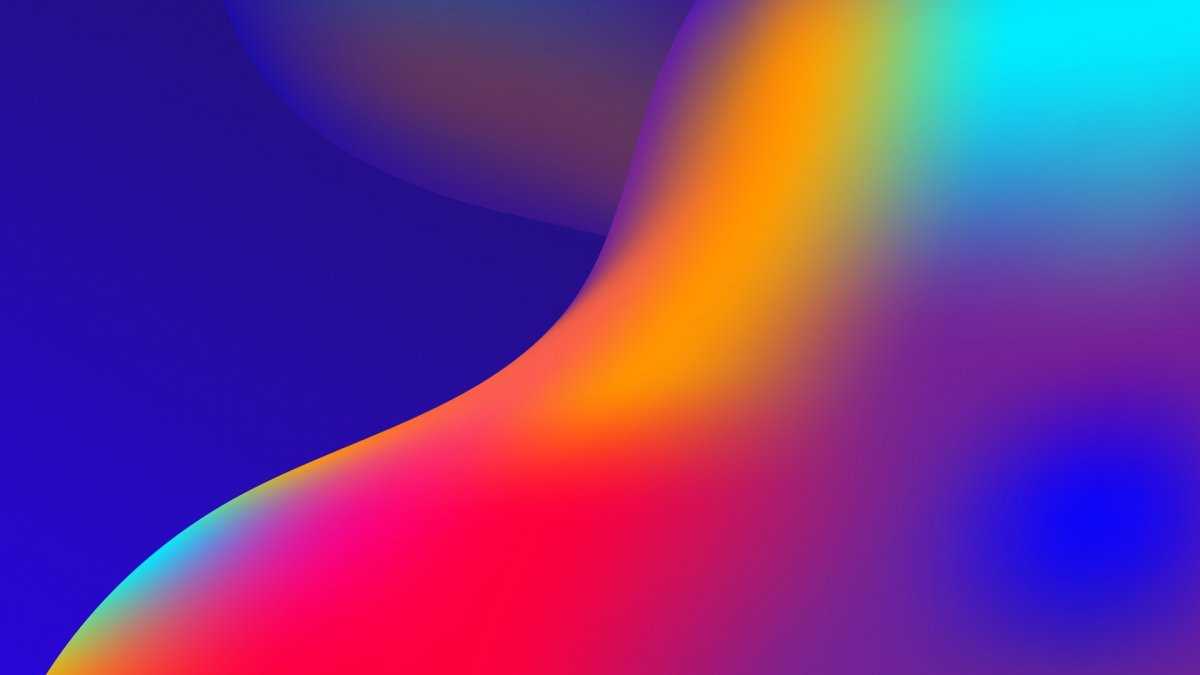
 radial-gradient(circle, yellow, orange 125px, red);
Changing the position of the inner circle
Again, this no longer seems to be possible in Mozilla, so the
following will only apply to WebKit browsers.
While the inner circle fits inside the outer circle there is no
problem. The gradient is simply squashed on one side and stretched on
the other. It’s when the edges touch or cross over that you start to
see strange effects.
In these cases an ‘arrow’ is formed using the points of
intersection of the two circles and the furthest point of the inner
circle. Outside of that arrow the default background is visible.
When the inner circle is larger than the outer, the effect is
reversed, just as in the previous examples:
These effects are described mathematically in the WebKit documentation.