

Using Text in SVG
To draw text in SVG, use the element.
The element has the following attributes:
| Attribute | Description |
|---|---|
| Specifies the x coordinate of the text | |
| Specifies the y coordinate of the text | |
| Specifies the x coordinate of the text relative to the current position | |
| Specifies the y coordinate of the text relative to the current position | |
| Specifies the rotation of the text | |
| Specifies the length of the text | |
| Specifies how to adjust the text length | |
| Specifies the font family of the text | |
| Specifies the font size of the text | |
| Specifies the font style of the text | |
| Specifies the font weight of the text | |
| Specifies the text decoration of the text | |
| Specifies the text anchor of the text |
Here is an example of an SVG text:
Run the code
Output:
Hello
SVG provides a set of elements to draw text. These elements are:
- : draws text
- : draws text in a specified position
- : draws text along a path
: draws alternate glyphs
: defines alternate glyphs
: specifies an alternate glyph
: references a glyph
: draws text along a path
: draws text along a path
How to Use an SVG File (In and Out of WordPress)
SVGs aren’t all that hard to use. Adding an SVG file to your website is as easy as taking its code and pasting it within an HTML document wherever you want the image to go.
If you and your site’s visitors use browsers that support SVG files (and most do these days), they’ll be able to see the element. Animating SVGs is, of course, trickier since it requires the use of CSS.
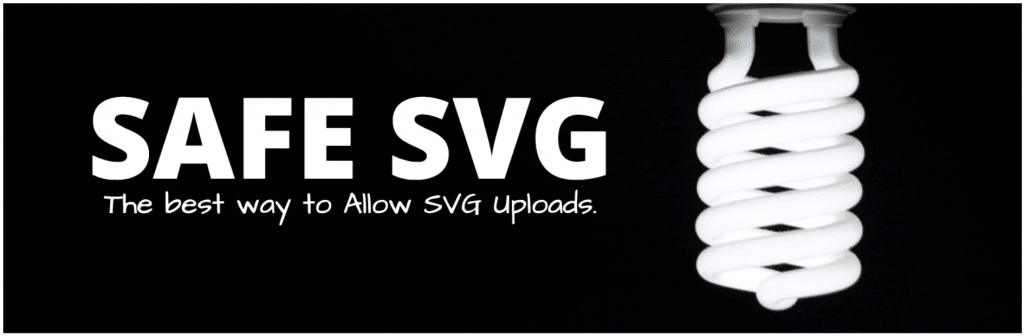
The process changes if you’re using WordPress, though. The Content Management System (CMS) doesn’t support SVGs out of the box. If you want to enable SVG support so you can upload files directly into your website, you’ll want to use a plugin such as Safe SVG:
It’s also possible to enable SVG support in WordPress manually, but the process is much more involved. In this case, using a plugin is the safer option.
Why Use an SVG File?
Many websites use formats such as PNG and JPEG almost interchangeably. SVGs aren’t quite as versatile, though. If you try to re-create a complex photograph using vectors, you’ll usually end up with massive and unusable SVG files.
The SVG format is a fantastic option for a whole set of other scenarios, though:
- Logo design. Since you’ll probably re-use logos across websites and social media, using SVG resolves any potential scalability issues.
- Diagrams. SVGs are a perfect match for diagrams and any other kind of illustration that relies on plain lines.
- Animated elements. You can use CSS to animate SVGs, which makes them a useful component in website design, particularly for microinteractions.
- Charts and graphs. You can use SVGs to create scalable graphs and charts that support animations.
Since SVGs use the XML format, this also makes them both searchable and indexable. Screen readers can interpret SVG files as long as you use the correct accessibility tags.
Finally, SVG files tend to be much smaller than high-resolution equivalents in other formats. On paper, this means you may be able to cut down some of your page sizes and decrease loading times. However, unless you plan to convert most of your images to SVGs, the performance increase will probably be minimal.
Why use SVG?
SVG allows to put graphics inside a web page, or a desktop document that
can interacts with textual data. A SVG page may be built from a database,
it may be searched by a search engine. You can turn XML numeric data into
graphics by an XSL transformation.
Compared with Canvas, SVG is better suited as a format for graphics produced with a drawing program, to be integrated into a web page, while Canvas is better for graphics dynamically created in the page when it appears.
Compared to a bitmap picture, SVG has the advantage of resizing without loss in definition, and allows interaction with the user.
You can display a city or a
building and allow a user to visit it by selecting locations.
SVG is a standard defined by the World Web Consortium and may be freely used
at production or end-user level without license to pay.
Conclusion
Adapting your website to use SVG files is much easier than you might imagine. The real challenge lies in designing SVGs from scratch or choosing the right images to convert to the format. Fortunately, there are plenty of tools you can use to do both.
Some great options include Adobe Illustrator, InDesign, and GIMP. Using those tools, you can create and convert existing images into SVGs. If you’re using WordPress, you can upload those SVGs using the Safe SVG plugin, then have fun animating them.
Do you have any questions about how to use SVG files? Let’s talk about them in the comments section below!
Article image thumbnail by VectorsMarket / shutterstock.com
Components of SVG
A SVG document is made of:
- Vector graphic shapes.
- Images.
- Texts.
- Containers of other elements.
- Styling properties.
Elements
- Canvas: a surface where to draw.
- Viewport: a rectangular region in a canvas.
- Use: a template.
- Property: a parameter for how to render the document.
- Graphical shapes: rect, circle, ellipse, line, polyline, polygon.
- Image.
- Text
- Symbol: reusable object as flowchart, electronic symbols.
- Container, made of other elements:
- g: a container for grouping graphic elements, used as partial canvas.
- svg: a document.
- switch: a list of alternative elements with conditions for one selected.
- clipPath: masked elements.
- mask: use objects as mask.
- pattern: a texture.
- a: a link.
What is an SVG File?
SVGs are graphics built using vectors. For the uninitiated, a vector is an element with a specific magnitude and direction. In theory, you can generate almost any type of graphics you want using a collection of vectors. Take this image of a blue rectangle with a black border and shadow, for example:
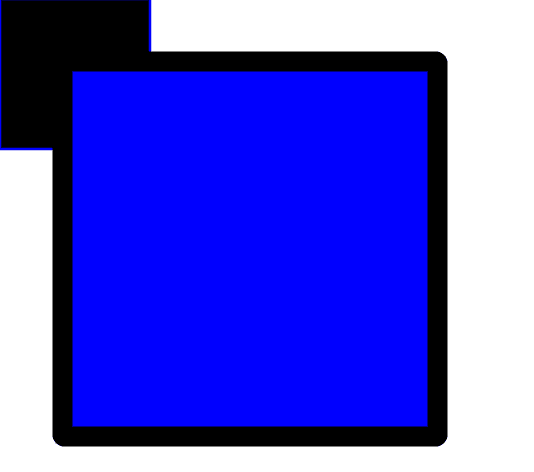
This is another kind of image file called a Portable Network Graphic (PNG), used for illustrations and drawings. If you wanted to replicate something similar using vector graphics, you’d need to generate it with XML code (the same found in use for sitemaps.) The following code could achieve the same result:
<?xml version="1.0" standalone="no"?>
<svg xmlns="http://www.w3.org/2000/svg" width="200" height="200" version="1.1"
baseProfile="full" > <rect x="0" y="0" width="60" height="60" style="stroke: blue;"/>
<rect id="myRect" x="25" y="25" rx="0.6" ry="0.6" width="150" height="150" fill="blue"
stroke="black" stroke-width="8"/>
</svg>
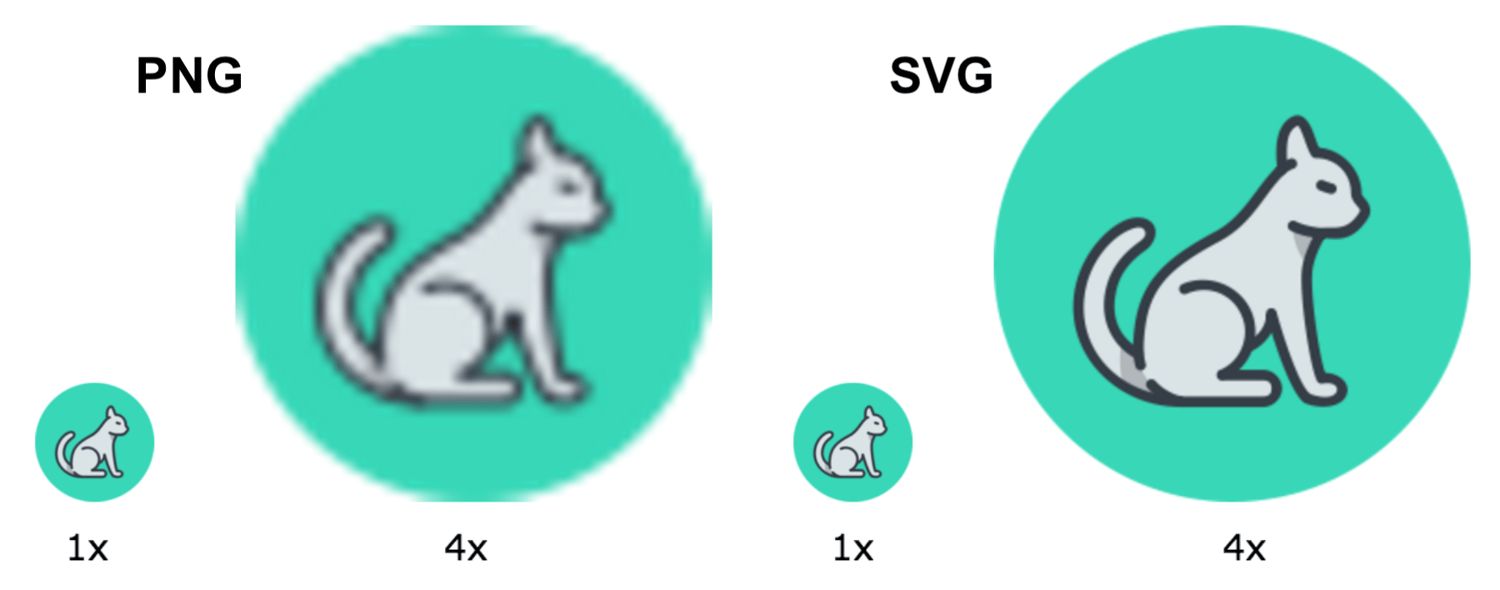
In theory, if you take this code and drop it into an HTML file, you’ll see a similar set of rectangles to the PNG – that is, as long as the browser you use supports SVG files. Although both images look the same, SVG files offer a whole host of benefits that other formats don’t. For example, SVGs are capable of retaining image quality as they scale up or down.
If you keep zooming in on the PNG rectangle, you’ll notice its quality begins to downgrade at some point. With more complex pixel-based graphics, the degradation becomes evident much faster. However, SVGs look good at practically any resolution.
What Is an SVG?
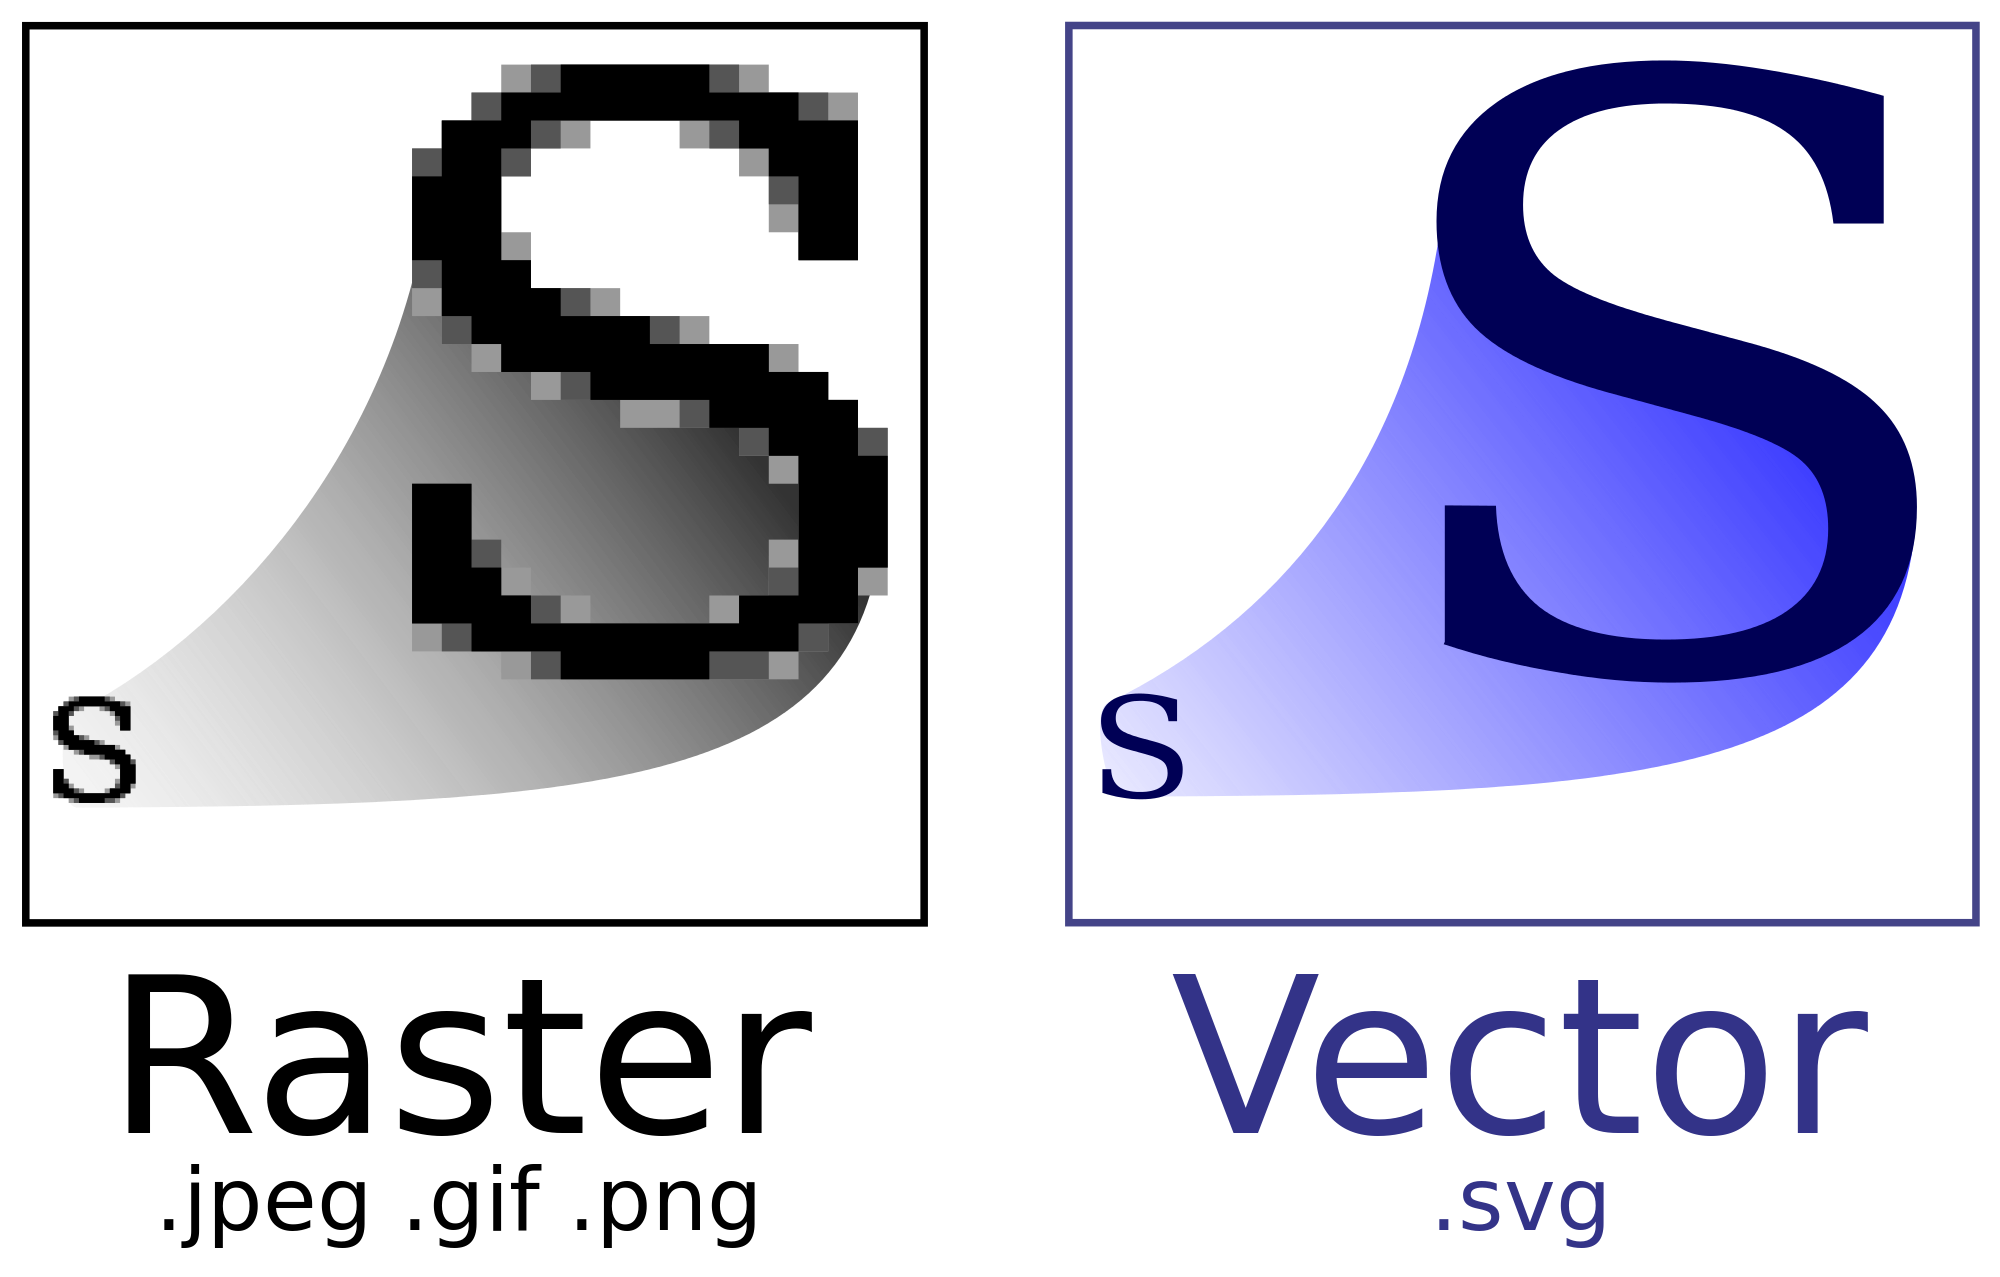
SVG stands for Scalable Vector Graphics; it’s a vector image format that allows you to draw shapes using a markup language (XML). The “scalable” part of the name is a key characteristic of SVGs—unlike raster image formats (e.g., PNG, JPEG), vector images don’t lose quality when you scale them beyond their original size. Whereas raster images store their data using fixed-size pixels, vector images like SVGs store their data as XML definitions for shapes, which can easily be scaled responsively to any size.
By analogy, this is the difference between drawing something on screen (raster images) and giving your browser instructions for how to draw something on screen, relative to a coordinate system (vector images). Vector images give your browser more flexibility since they can be rescaled to any size with a bit of simple math.
As a bonus, you can even fluidly animate SVGs to create really fun and engaging user experiences. Here are a few noteworthy developer blogs that do this:
- Joshua Comeau
- Cassie Evans
- George Francis
- Will Boyd
There are two ways to draw SVGs: by hand, where you define the markup explicitly using HTML, or through a vector image program like Inkscape:

These programs come with basic shapes, color pickers, drawing tools, and path manipulation, allowing you to create complex drawings with greater ease than if you were to do them by hand. You’ll typically see designers and logo artists using GUIs like Inkscape rather than coding SVGs by hand. Still, understanding how SVG markup works is a valuable learning experience. At the end of the day, these programs output files; if you inspect those files, you’ll find that their markup is just XML, and you can make sense of it if you understand how SVGs work.
How to program SVG documents?
To build a SVG document you need for a canvas.
provides a such Java canvas named «SVGCanvas2D» that convert your
drawing into SVG.
If you want visually build a SVG document, you need for a component that can
display SVG content and let the user interact with that content (insert object,
rotate, put text, etc…). JSVGCanvas is a Java component to do
that.
You need also to manipulate the SVG document from a scripting language with
a DOM API. DOM (Document Object Model) is an object oriented representation
of the document. Events may be assigned then to SVG elements.
All these modules are provided by
for Java programmers.
How to Create an SVG File (2 Ways)
There are two approaches you can take when it comes to SVG files. You can create them from scratch or take an existing image and convert it. Let’s start with the manual method.
1. Create an SVG File Manually
Creating an SVG file usually doesn’t involve you typing out vector information as we did earlier. That was just an example to show the concept. Instead, you create SVGs like any other graphics – by using a design program and saving the file out as an SVG. Many modern graphic design tools support SVGs out of the box. Some top options include:
- Adobe Illustrator, Photoshop, Animate, and InDesign
- Microsoft Visio
- Inkscape
- GIMP
The last two options in this list are open-source solution. This makes them a great option to experiment with creating SVGs without paying for premium software. In fact, they may be all you need.
If you don’t have any experience with graphic design, creating your own logos or other elements for your website will be a challenge. In this case, your best bet will be to take existing images and convert them into SVGs.


2. Convert Existing Images Into SVGs
There are a lot of free tools you can use to convert images from other formats into SVGs. Most of the software we mentioned in the last section enables you to open your images and save them as SVG files.
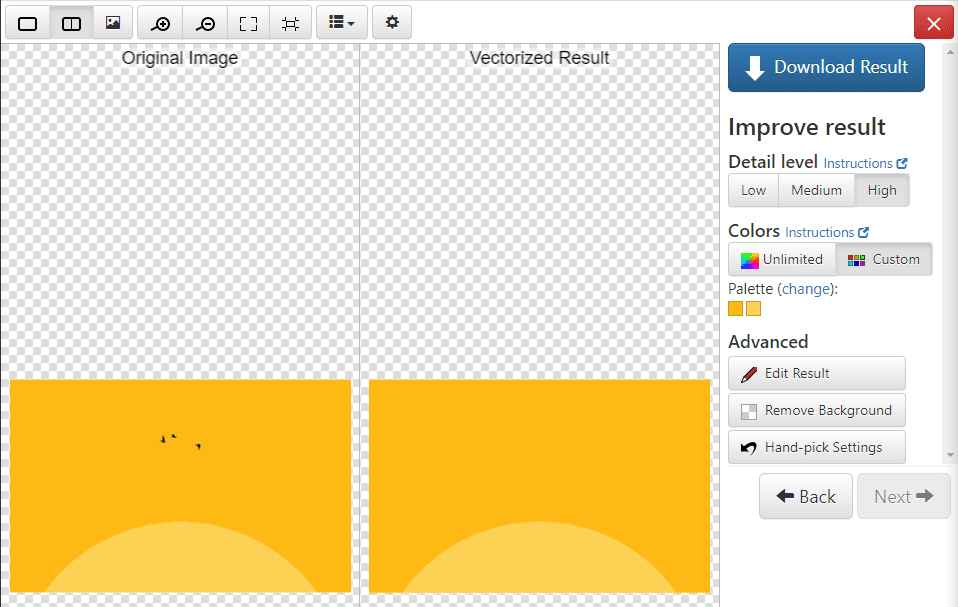
If you don’t want to download any software, you can also use online conversion tools – and there are plenty of services you can turn to. One example is Vector Magic, which you can use to convert all manner of filetypes into SVGs:
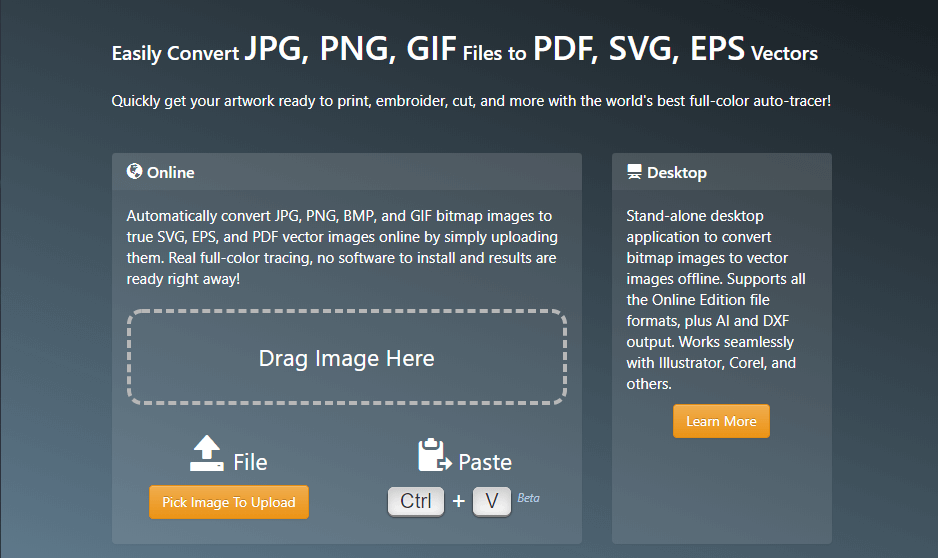
We like this particular tool because it shows you a preview of your SVG file before you download it. You can also use a built-in editor to make small changes and corrections before downloading the file:
Of course, this is just one option. Other PNG and JPG to SVG converter services include Convertio, and Img2Go. You’ll want to do some research to find the most suitable solution for your needs.
In our experience, most SVG converters offer results of similar quality. For the best possible results, the converter you use doesn’t matter as much as the images you select.
As a rule of thumb, it only makes sense to use the SVG format for ‘simple’ images – that is, images with defined borders and clean lines. The more complex the image, the more likely it is you’ll end up with a massive SVG file that’s a chore to edit manually or animate.
Как вставить SVG на страницу?
Добавлять файлы на страницу можно 4-мя способами:
- Как обычные изображение, через HTML. В страницу вставляется следующий код: То есть, вы вставляете обычное изображение, только в формате SVG. За поддержку браузерами можете не беспокоиться – и SVG поддерживается без проблем, и SVG 2.0 будет поддерживаться без проблем, когда выйдет.
- Стилями CSS. В этом случае SVG указывается как фоновое изображение: Дает немного больше гибкости, чем вставка в HTML картинки, но имеет схожую с первым вариантом проблему, о которой мы расскажем ниже.
-
Вставка объекта. В этом случае графическому файлу дается метка «object»:
Backup_picture.jpg нужна на тот случай, если по каким-то причинам браузер не хочет работать с SVG. - Вставка кода. Новый метод, который позволяет добавлять изображение сразу кодом: При желании вы можете сначала составить изображение в графическом редакторе, после чего скопировать сгенерированный код на страницу.
У первых двух способов есть один недостаток – JS-скрипты на странице не могут получить доступ к изображению, то есть менять их на лету или делать анимацию средствами JS не получится. Но есть и плюсы: 1) изображения кэшируются; 2) очень просто использовать. У третьего и четвертого способа нет вышеописанных минусов, но и плюсов виде кэширования/простоты тоже нет.
SVG vs. Canvas
As can be seen in the examples below:
- SVG is a descriptive language, composed of tags that make up a page, or incorporated into a web page.
- Canvas is just a tag that displays dynamic content, the result of a JavaScript program.
We generate content directly into Canvas in the page with JavaScript code. But we can automatically generate SVG content from data taken from a database to convert them into graphics.
Or a drawing may be made with Inkscape to produce a file that is embedded in an HTML page.
SVG tags can contain HTML tags. A link tag <a> for example. This is not the case for Canvas.
We can build a game with both SVG Canvas.
Что такое SVG?
Глобально есть 2 типа изображений: растровые и векторные. Растровая графика – это когда мы берем холст, размечаем его точками (пикселями), закрашиваем каждый пиксель в нужный цвет и получаем изображение. Растровой графикой пользуются тогда, когда нужно нарисовать что-то с большим количеством цветов, переходов и сегментов:

Форматы png и jpg – это как раз про растровую графику. Принцип построения векторных изображений отличается: изображение в основном состоит из геометрических фигур и линий, которые задаются кодом (директивами или функциями):
У такого подхода есть ряд явных преимуществ и недостатков. Из преимуществ:
- Очень маленький вес изображения. Даже самая простая jpg-иконка будет весить от 10 килобайт. Если код этой иконки состоит из 500 символов (что, на самом деле, для иконки очень много), вес изображения будет равен 0.5-1 килобайт.
- Масштабируемость. Поскольку изображение описано в коде (коде XML для SVG), браузерам очень легко это изображение масштабировать. Ширина основного блока равна 600 пикселей? Вставляем изображение в оригинальном размере. Ширина основного блока равна 1200 пикселей? Увеличиваем масштаб изображения вдвое и выводим. Поскольку изображение рисуем сам браузер, при удвоении ширины изображения не будет возникать никакой зернистости – у растровых картинок такой привилегии нет.
- Интерактивность. Поскольку SVG описывается с помощью разметки XML, вы с помощью JavaScript можете получить доступ к этому коду и каким-то образом динамически изменить его прямо во время выполнения страницы (когда пользователь с ней взаимодействует). В растровых изображениях это тоже возможно, но либо очень усеченно (канувшая в Лету флэш-анимация), либо с помощью специального формата – gif (и тут тоже не все так просто).
Из минусов:
- Практически невозможно создать детальное изображение. Посмотрите на 2 картинки выше. Поскольку SVG создается через редакторы кода, на воссоздание первого изображения у вас уйдут годы.
Каков вердикт? Пользоваться форматом векторных графических изображений стоит тогда, когда нужно создать небольшие легковесные изображения, то есть иконки/схематические рисунки/простую анимацию. SVG предоставляет широкий инструментарий для создания изображений, но разбираться в нем вам придется с нуля. Если есть возможность – добавлять на страницы сайта анимацию лучше именно в SVG.
Minifying SVG Paths
For this tutorial, I formatted the SVG paths nicely to make them easier for beginners to read and understand. But in the wild, you’re more likely to encounter compact path notations like this:
This may seem strange, but it’s still the same syntax that we learned. The trick here is that we can unambiguously remove a space before and after each SVG path command (the letters). As long as we don’t squish two consecutive numbers up against each other, we’ll still get the same path definition as before.
You may come across this syntax if you’ve exported a compressed SVG from a drawing tool like Inkscape or if you’ve manually run it through an SVG minifier.
Shapes in SVG
SVG provides a number of shapes that can be used to create graphics. These shapes are called SVG elements.
Some of the most commonly used SVG elements are:
- Line
- Rectangle
- Circle
- Ellipse
- Polygon
- Polyline
- Path
1. SVG line
To create a line in SVG use the <line> element.
It has 4 attributes: , , , and . These attributes specify the start and end points of the line. (x1, y1) is the start point and (x2, y2) is the end point.
Example
Run the code
Output:
Note: Here we have used the attribute to specify the color of the line. You can also use the attribute to define the width of the line.
2. SVG rectangle
To create a rectangle in SVG use the <rect> element.
It also has 4 attributes: , , , and . Here (x, y) is the starting point of the rectangle, and width and height are the width and height of the rectangle.
Example
Run the code
Output:
Here we have used the attribute to specify the color of the rectangle. You can also use the attribute to define the color of the border.
You can also specify the corner radius of the rectangle using the and attributes. These attributes specify the horizontal and vertical radius of the rounded corners of the rectangle.
Example
Run the code
Output:
3. SVG circle
You can create a circle in SVG using the element. The element has three attributes: , , and .


and specify the x and y coordinates of the center of the circle, and specifies the radius of the circle.
Run the code
Output:
4. SVG ellipse
Just like circle, you can also create an ellipse in SVG using the element.
An ellipse is defined by two radii (rx and ry) and a center (cx and cy).
Run the code
Output:
5. SVG polygon
A polygon is a closed shape consisting of a set of connected straight-line segments. The first and last points are connected.
In SVG, polygons can be created using the element. The element has a attribute that defines the vertices of the polygon.
Run the code
In the above example, the polygon has three vertices at the coordinates (10, 10), (20, 30), and (30, 20).
Output:
Here is an example of creating a hexagon using a polygon.
Run the code
The points used to create the hexagon are (25, 5), (75, 5), (100, 50), (75, 95), (25, 95), and (0, 50).
Output:
6. SVG polyline
Polyline is a series of connected straight-line segments. It is similar to polygons, but polylines are not closed shapes.
Use the element to create a polyline. Just like the element, the element has a attribute that defines the polyline’s vertices.
Run the code
In the above example, the polyline has three vertices at the coordinates (10, 10), (20, 30), and (30, 20).
Output:
Note: Make sure to set the attribute to to avoid filling the shape with the default color.
7. SVG path
A path is a series of connected straight-line segments, curves, and arcs. It is the most powerful SVG element to create complex shapes.
Use the element to create a path.
This element has an attribute called which stands for «path data». The attribute specifies a series of commands and coordinates that define the path.
Run the code
In the above example, the path has two vertices at the coordinates (10, 10) and (90, 90) and M is the move to command and L is the line to command.
Output:
The element supports a variety of commands for drawing lines, curves, and arcs. Some of the most commonly used commands are:
- : moveto (specifies the starting point of the path)
- : lineto (draws a line segment to the specified coordinates)
- : horizontal lineto (draws a horizontal line segment to the specified x coordinate)
- : vertical lineto (draws a vertical line segment to the specified y coordinate)
- : curveto (draws a cubic Bezier curve to the specified coordinates)
- : smooth curveto (draws a smooth cubic Bezier curve to the specified coordinates)
- : quadratic Bezier curveto (draws a quadratic Bezier curve to the specified coordinates)
- : smooth quadratic Bezier curveto (draws a smooth quadratic Bezier curve to the specified coordinates)
- : elliptical arc (draws an elliptical arc to the specified coordinates)
You can use these commands in combination to create complex shapes and lines.
Here is an example of an SVG path:
Run the code
Output:
SVG Basics
Developers start an SVG graphic with the tag and XML namespace like so:
The sample also includes a attribute. The attribute is optional but it is recommended for complaince with XML specifications.
This sample won’t display anything, it merely established a viewport. You can add and attributes to set a display size for the viewport this essentially establishes a canvas for you to work in.
With a viewport in place you can add basic graphics, text, and path elements.
In the opening tag we add a width attribute to set the width of the viewport to 100% of the container width, you can use percentages or pixel widths. The opening svg tag also has attribute which defines a window through which elements of your svg are visible, in this case, the viewbox spans from (0,0) to (600,300). In SVG space the X-axis starts with zero on the left and increases to the right; the Y-axis starts with zero at the top and increases towards the bottom.
The first new tag is the tag which defines a rectangle in the SVG viewport. In this case we define a square which is 10 units from the top and left and 100 units tall and wide. The attribute sets the fill color for the shape.
Next we define a circle or oval with the tag. The sample defines a circle centered at (240,60) with a radius of 50 units. The and attributes set a stroke color and a size for the stroke.
You can add text to the graphic with the tag. The sample text is anchored from the middle of the text to a point at (450, 70) and has a font size of 20 units. The nice thing about text in SVG is it will scale with the rest of your graphic, but it is still readable by the browser and web bots.
When you want to apply the same attributes or CSS styles to multiple SVG elements you can group them with the tag. Attributes assigned to the tag, like the attribute in the example, will be applied to all elements within the group. In this case three elements.


The element defines a vector path in the viewport. The path is defined by the attribute. In the first example the definition reads ‘move to the absolute coordinate (10, 170) and draw a line to the relative coordinates 590 in the X direction and 0 in the Y direction.
The following commands can be used to create your path:
M = move to L = line to H = horizontal line to V = vertical line to Z = close path C = (cubic bezier) curve to S = smooth curve to Q = quadratic bezier curve to T = smooth quadratic bezier curve to A = arc
The canvas element
Canvas graphics can be drawn onto a
A context is created through the getContext method on the
After creating the context object, the example draws a red rectangle 100 pixels wide and 50 pixels high, with its top-left corner at coordinates (10,10).
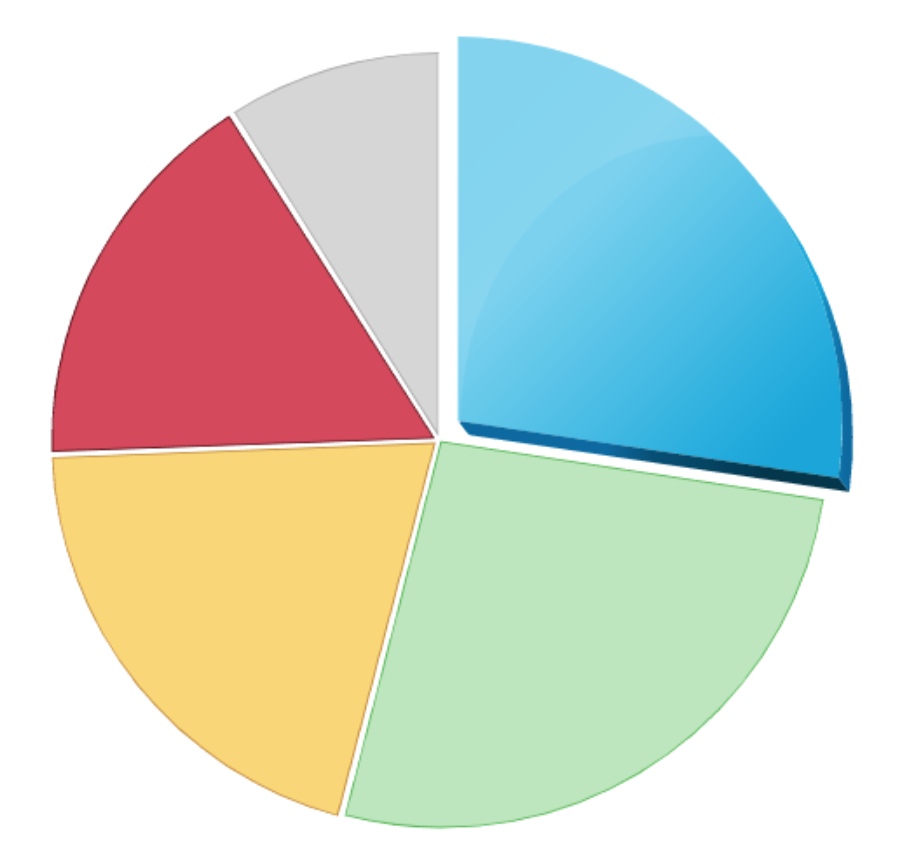
Drawing a pie chart
The results variable contains an array of objects that represent the survey responses.
To draw a pie chart, we draw a number of pie slices, each made up of an arc and a pair of lines to the center of that arc. We can compute the angle taken up by each arc by dividing a full circle (2 π ) by the total number of responses and then multiplying that number (the angle per response) by the number of people who picked a given choice.
This draws the following chart:
Browser Support
is available in all modern browsers. There are some issues with scaling in IE 9 through IE 11 however they can be overcome with the use of the , , , and CSS.
SVG 101: How to Code SVGs by Hand
I know you’re itching to get to the examples, but first things first!
All SVG shapes are defined within the SVG element itself, like this:
Of course, there’s more to it than just that. Let’s explore the basic anatomy of an SVG.
If you’ve ever inspected the contents of an file, like one created by Inkscape or some other vector image program, you may have seen this attribute on the element itself:
This is known as a . In simple terms, a namespace declaration helps a user agent like your browser to understand and parse an element’s syntax. Here, we’ve declared that our namespace is SVG. A namespace declaration is not required if you’re rendering inline SVG icons, like in HTML. But if you’re including SVG files (e.g., as an image), then the SVG does need to specify its namespace. I’ll omit the namespace in this tutorial since we don’t need one.
You’ve probably also seen these three attributes: , , and :
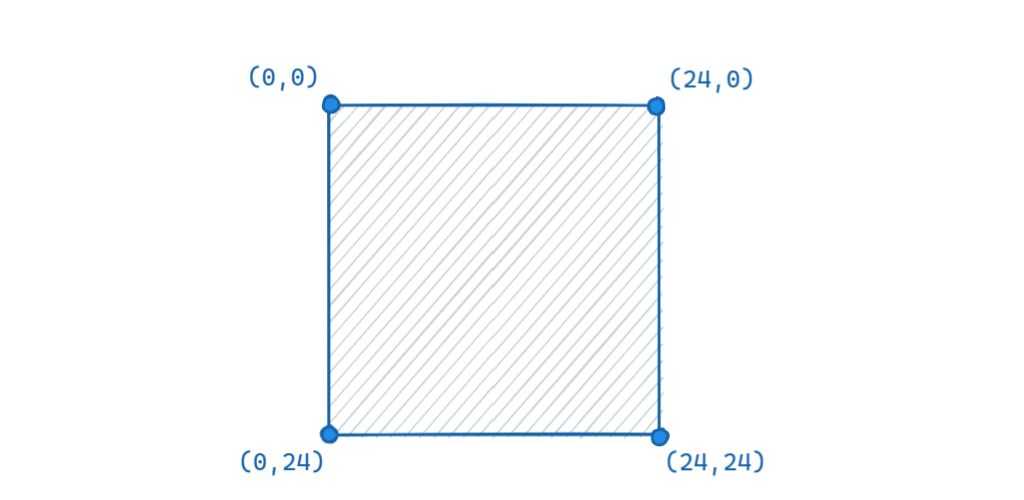
The attribute defines the dimensions of the viewport (“canvas”) for an SVG. The first two numbers allow you to pan the SVG viewport horizontally or vertically, giving it an appearance of some sort of inner offset relative to the origin, . In the code sample above, we have an offset of , meaning the top-left corner of the viewport is the origin.
Below are two SVG icons. The one on the left has a of . The one on the right has a of . As a result, the origin of the second viewport is offset by units horizontally and vertically. So instead of being , the origin is now . This means that the image shifts to the left relative to the . It’s as if we’ve panned our canvas towards the bottom-right corner.
The last two numbers control the size (horizontal and vertical, respectively) of this coordinate system, before any scaling is done. Larger numbers lead to a larger viewport and more space to work with, while smaller numbers lead to a smaller viewport and less space to work with. In the examples above, the viewport size is declared to be , so our coordinates range from (top-left corner) to (bottom-right corner):
Finally, the and attributes work just as you’d expect them to: They define the final (scaled) width and height of your SVG element, in pixels. Alternatively, you can change an SVG’s size with CSS using and .
All SVG shapes are drawn relative to the coordinate system, not to the final and of the SVG. This means that your canvas size may be , and any shapes you draw will be confined within this base pixel coordinate space, but you can later scale the vector image as needed.
For example, if our is but we’ve set the width and height to be , or some other number, then we’re still working within a base viewport size of , so there’s no visible point like . Everything will just get scaled up by a factor of to give us a bigger SVG drawing. This is really useful because it means we can draw all of our icons using a fixed viewport size, and if we later want to scale it up, we don’t have to adjust the shapes and their coordinates—the and will scale everything for us.
For this tutorial, I’ll use a of but dimensions of so that the icons are easier to see. You can use any values that you want, though, as long as you adjust your markup accordingly.
Before we move on, a clarifying note on pixels and SVGs: With the most basic SVG, one pixel unit maps to exactly one unit on your screen. But as noted on the MDN docs, . SVGs are scalable, after all, so in the SVG coordinate space may actually map to if the SVG has been scaled to a larger size with and . This is unlike the behavior of raster images, where one “pixel” is always a fixed-size unit of measurement. Key takeaway: Wherever I use as a unit, don’t take that to mean one literal output pixel on the user’s screen.