
2D Convolution ( Image Filtering )
As in one-dimensional signals, images also can be filtered with various low-pass filters (LPF), high-pass filters (HPF), etc. LPF helps in removing noise, blurring images, etc. HPF filters help in finding edges in images.
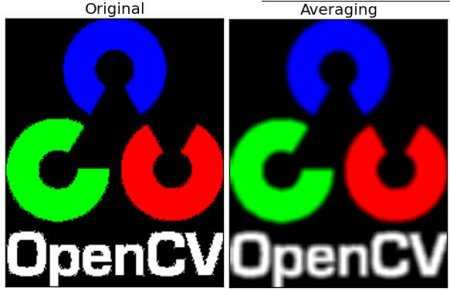
OpenCV provides a function to convolve a kernel with an image. As an example, we will try an averaging filter on an image. A 5×5 averaging filter kernel will look like the below:
The operation works like this: keep this kernel above a pixel, add all the 25 pixels below this kernel, take the average, and replace the central pixel with the new average value. This operation is continued for all the pixels in the image. Try this code and check the result:
import numpy as np
import cv2 as cv
from matplotlib import pyplot as plt
img = (‘opencv_logo.png’)
assert img is not None, «file could not be read, check with os.path.exists()»
kernel = np.ones((5,5),np.float32)/25
dst = (img,-1,kernel)
plt.subplot(121),plt.imshow(img),plt.title(‘Original’)
plt.xticks([]), plt.yticks([])
plt.subplot(122),plt.imshow(dst),plt.title(‘Averaging’)
plt.xticks([]), plt.yticks([])
plt.show()
Result:
image
brightness
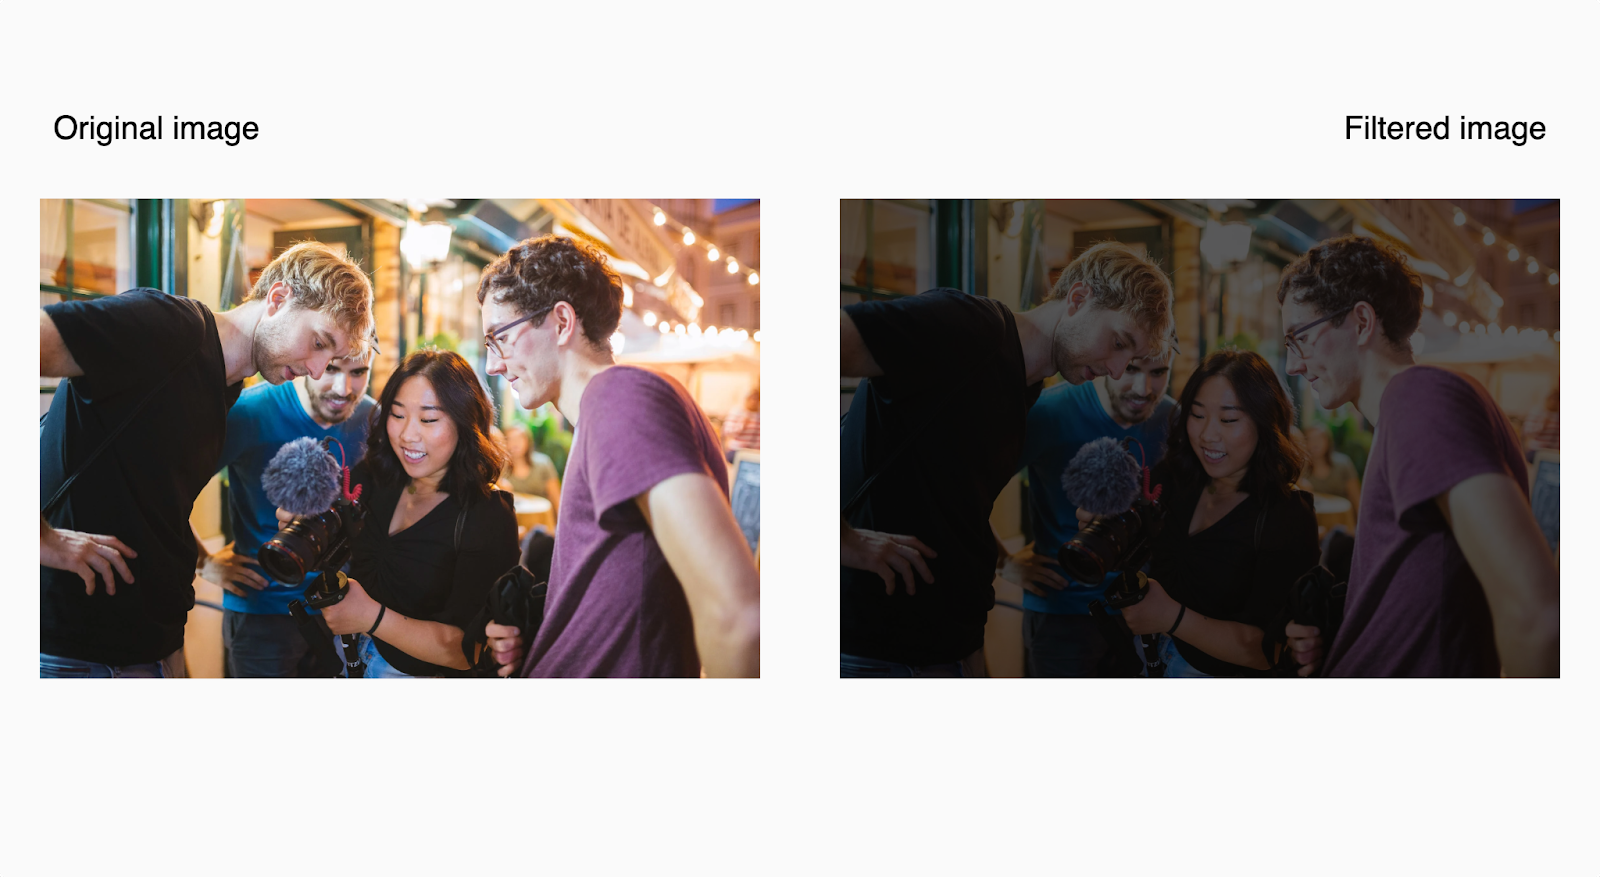
The brightness filter adjusts the brightness level of an image. The filter applies a linear multiplier to the input image, making it appear brighter or darker.
It accepts a decimal value between 0 and 1, or a percentage value. A value of 0 results in a completely black image. A value of 100% or 1 leaves the image as is with its original brightness level. Values greater or less than 100% or 1 determine how dark or bright the image will be.
Note that all filter functions that accept decimal values do not work with negative integers (-10, for example) but only accept positive numbers.
The brightness filter has a default percentage and numerical value of 100% and 1. Passing a percentage or numerical value lower than these numbers reduces the image brightness level, giving it the appearance of having a shadow cast over it. The lower the value the higher the intensity of the shadow cast over it is.
The code below applies the brightness filter with a percentage value of 35% to an image:
The result:
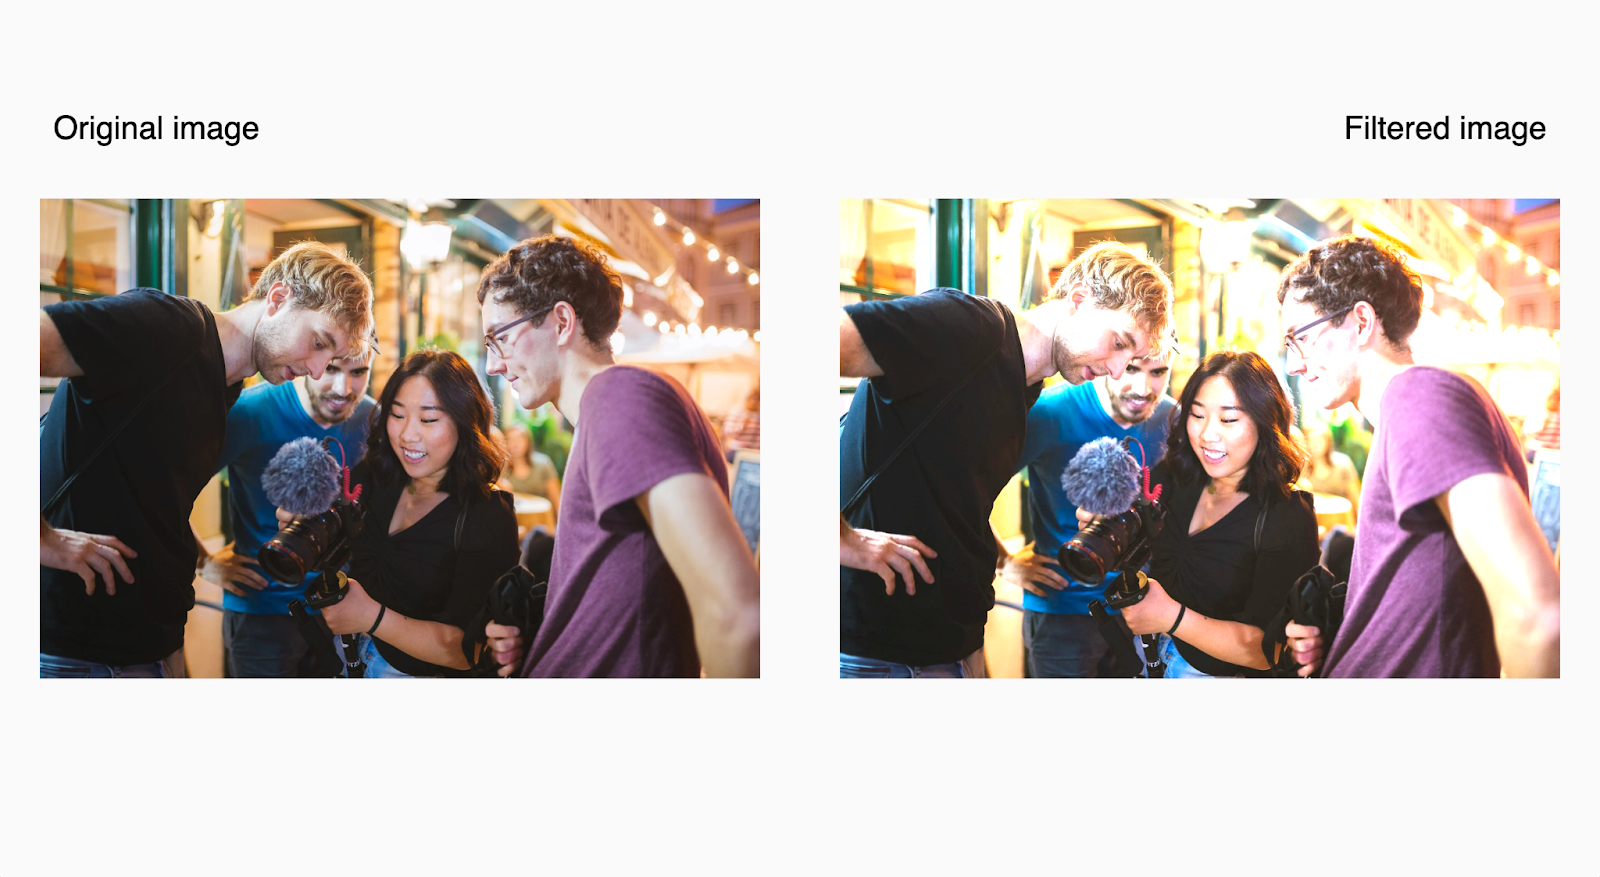
The opposite effect occurs when you pass a percentage or numerical value greater than 100% and 1 to the filter function. It increases the image’s brightness level to make it appear like a photo that has been over-exposed to too much light.
The code below applies the brightness filter with a value of 135% to an image.
The result:
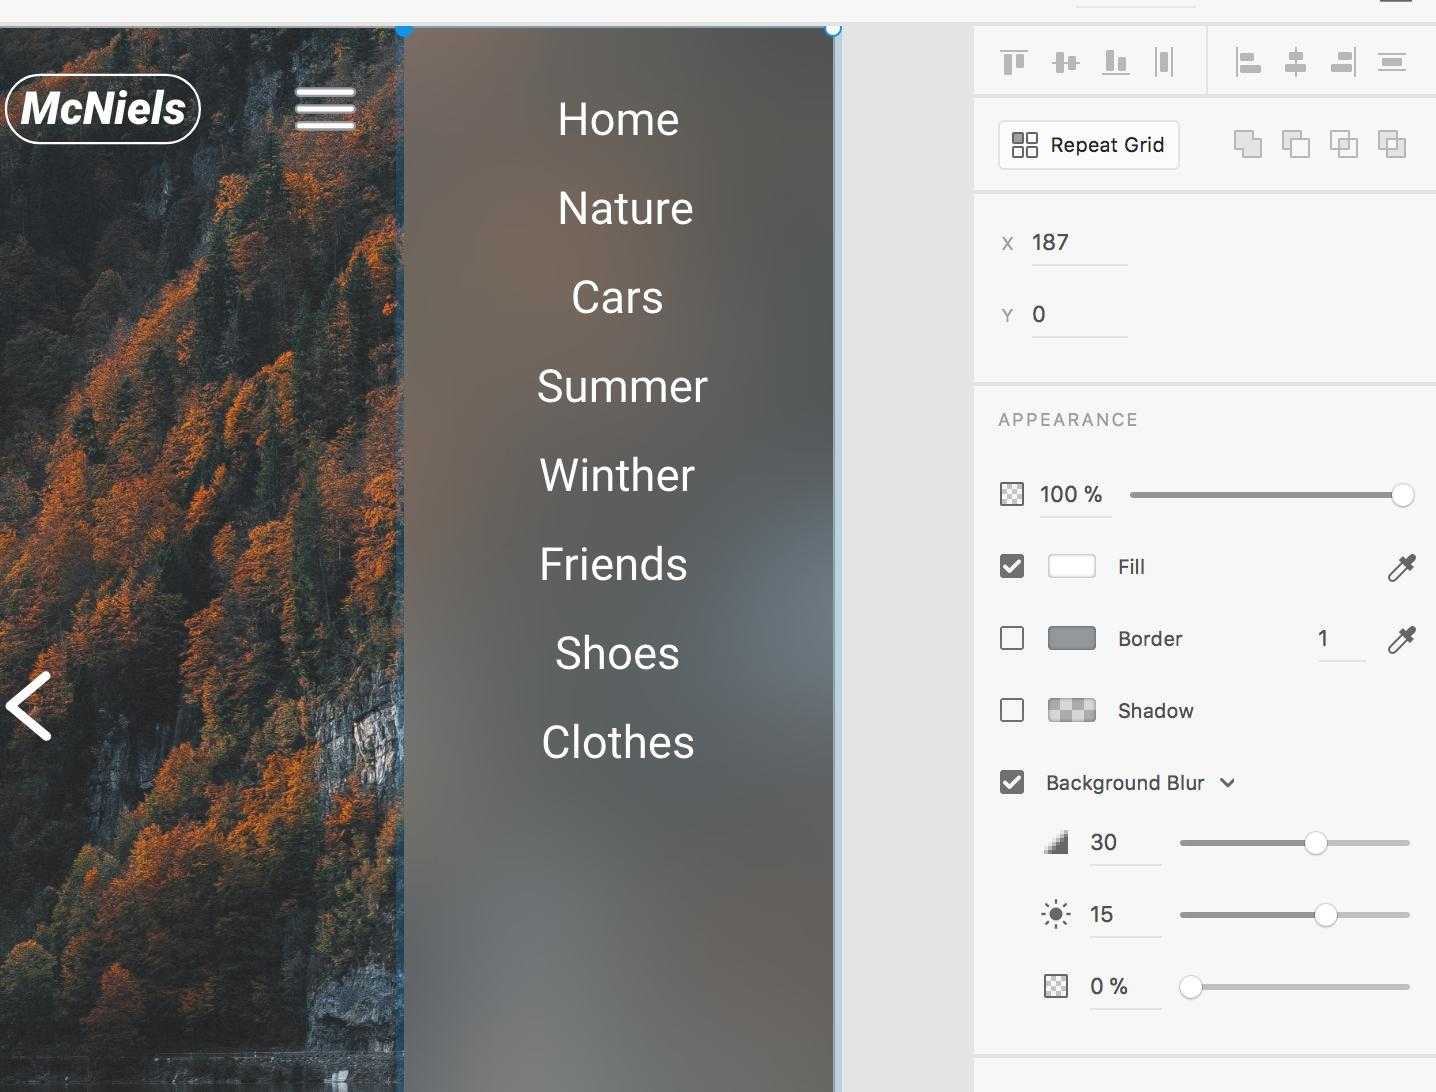
Сочетание эффектов
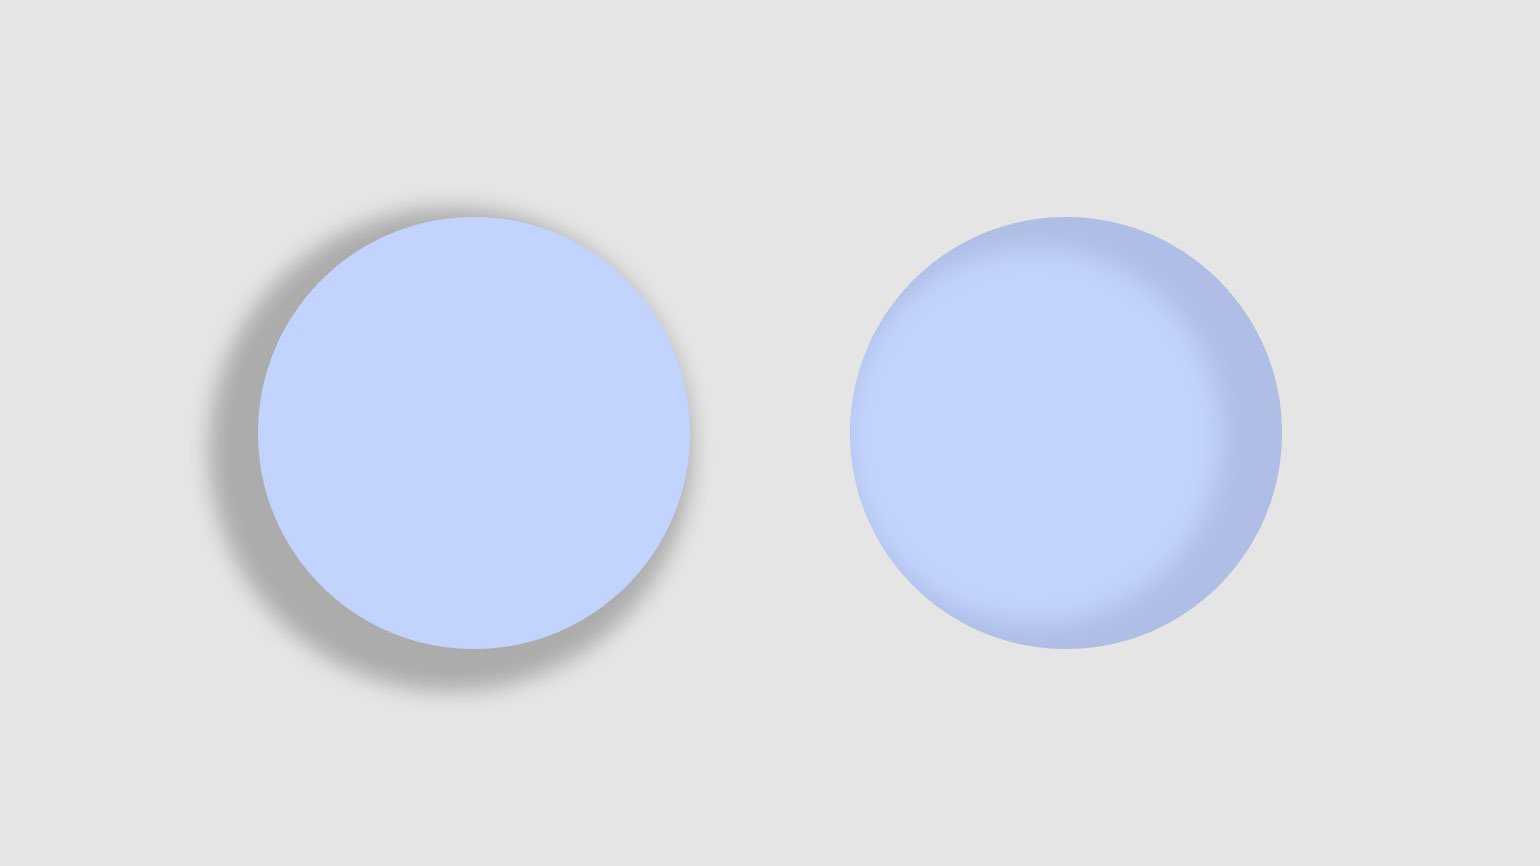
В разделе Effects можно добавить сколько угодно разных эффектов: например, несколько теней и несколько размытий. Благодаря этому можно добиться интересных результатов. Для примера рассмотрим, как сделать эффект матового стекла.
- Добавьте на макет фотографию и поверх неё наложите любую фигуру: круг, квадрат, треугольник.
- В настройках эффектов фигуры добавьте тень со следующими настройками: X и Y — 12, Blur — 25, Spread — 2, непрозрачность тени — 25%.
- В настройках эффектов фигуры добавьте Background blur с размытием 25.
- Снизьте непрозрачность заливки фигуры до 10%.
- По желанию можно добавить обводку с непрозрачностью 50%.
Если делать тень чёрной, а цвет фигуры белым, то эффект получится недостаточно реалистичным. Лучше использовать основной цвет фона, чтобы сымитировать падающий на ваше стекло свет.
Изображение: Skillbox Media
Подробнее о том, как можно сочетать разные эффекты в Figma, читайте в нашей инструкции по морфизмам в интерфейсах:
hue-rotate
Digital photography uses a concept known as the color wheel, an organization of colors around a circle, showing the relationships between the primary, secondary, and tertiary colors to produce colors on a computer screen.
 An illustration of the color wheel
Each color in the color wheel has a property called hue, the position of the color (in angle degrees) on the wheel.
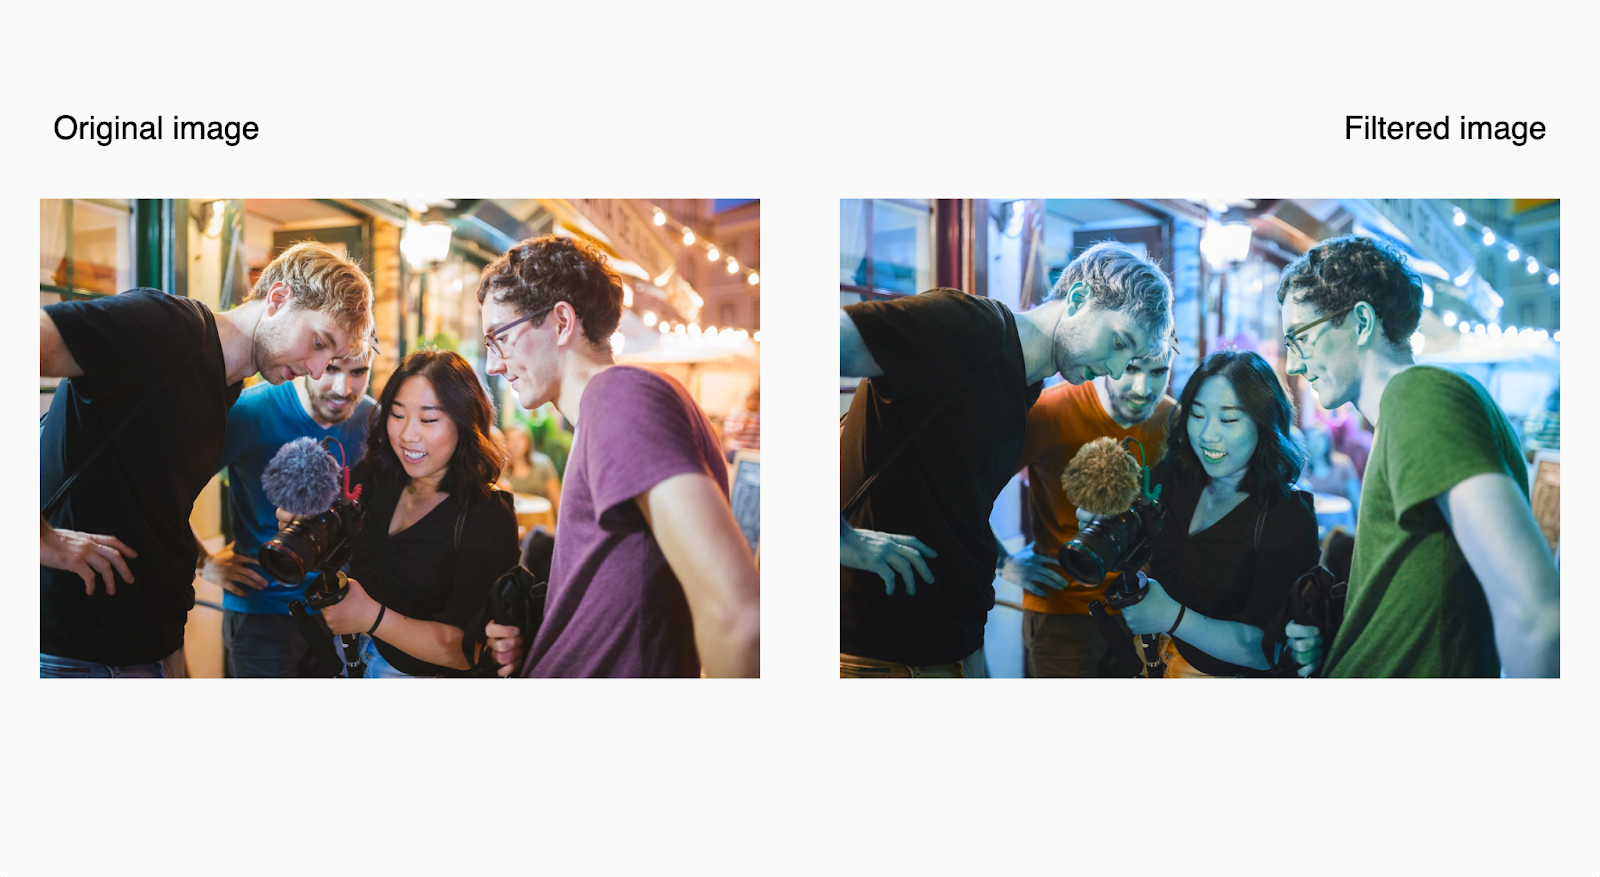
The hue-rotate filter accepts a CSS angle value (`deg`, `grad`, `rad`, or `turn`) and shifts the hue value of each color present on an element relative to the amount you specify, updating all colors relative to their hue’s starting point.
For example, red is at 0 degrees on the color wheel, and blue is at 240 degrees. If a portion of an image contains red, passing a value of `240deg` to the `hue-rotate` filter will shift the hues of all the colors on the image by 240 degrees, turning that part of the image from red to blue.
The code below adds a hue rotation of 180 degrees to an image:
The result:
Note, the unit identifier for the hue-rotate filter is optional for zero angles. For example, both and are valid, but is not.
Тени
Drop Shadow — внешняя тень, подходит для отделения объекта от фона. Inner Shadow — внутренняя, подходит для создания объёмных объектов:
Изображение: Skillbox Media
Чтобы добавить тень, в разделе Effects нажмите на плюсик. По умолчанию Figma добавит обычную тень, но если нажать на надпись Drop Shadow, в выпадающем меню его можно изменить на Inner Shadow.
Базовые настройки у теней одинаковые, но работают они немного по-разному:
- Blur — размытие краёв тени.
- Spread — размер тени.
- X и Y — смещение относительно центра объекта. X — влево и вправо, а Y — вверх и вниз.
- Также у тени можно настроить её цвет и непрозрачность.
Смещение и размер у внешней тени могут быть какими угодно, так как явных границ у неё нет. У внутренней тени те же параметры ограничены самим объектом.
Редактирование внешней тени. Изображение: Skillbox Media
Редактирование внутренней тени. Изображение: Skillbox Media
Также у тени можно изменить цвет и режим наложения. Работает это как в Photoshop — в зависимости от режима и цвета тень будет подстраиваться под фон:

Изображение: Skillbox Media
Обычно тени используют в интерфейсах, чтобы показать уровни взаимодействия кнопок или сделать их похожими на реальные аналоги. О том, как правильно сделать тени для вашего приложения, читайте в инструкции дизайнера Марии Булиной:
What a backdrop filter is
Adding a backdrop filter to any element lets you apply filter effects (e.g., blur, color shift, contrast, etc.) to transparent areas inside the element’s boundary. Anything behind the element that’s visible through the transparent areas is affected by the backdrop filter.
You can also apply multiple backdrop filters to a single element. You can layer and combine the backdrop filters together to create a variety of visual effects.
How backdrop filters differ from filters
Backdrop filters have the same effect as filters, with one notable difference — backdrop filters apply only to areas behind the element instead of to the element and its children. Filters, on the other hand, apply directly to the element and its children, and don’t affect anything behind the element.

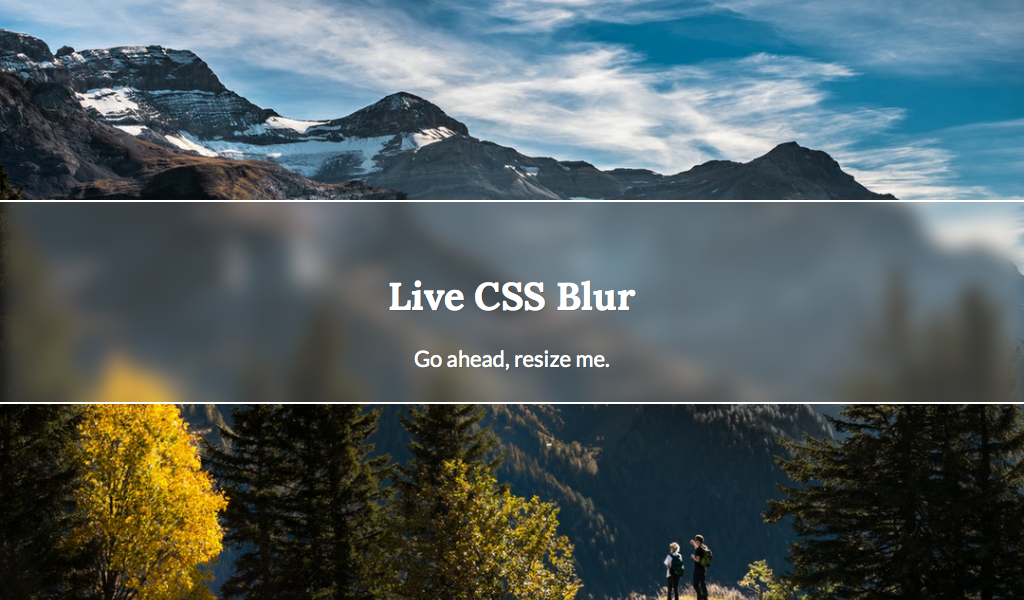
The difference between a blur backdrop filter (top) and a blur filter (bottom) is shown. The top navbar with the blur backdrop filter makes elements behind it appear blurred. The bottom navbar with the blur filter affects the element and its children (e.g., the entire navbar and text are blurred) and doesn’t blur elements behind it.
url
The url filter takes a string value pointing to an SVG filter element and applies its effects to an HTML element.
The SVG filter element `<filter></filter>` is used to add special visual effects to SVG graphics.
Syntax:
The `<filter>` tag takes a required id attribute to identify the filter. We can then use the url filter to apply the SVG filters to HTML elements using either the id selector of the filter or a link to it.
For example, the code below defines a blur filter using the `<feGaussianBlur>` filter tag:
Now, you can apply the SVG filter to an element by passing its id to the url filter:
Here’s the result.

Other Usage Notes
Here are a few more points to note when using CSS filters.
Using Multiple CSS Filters
Throughout this article, we have only looked at using a single CSS filter per section. However, you may combine two or more CSS filters to manipulate the rendering of an element.


Syntax:
We can pass two or more of the 11 CSS filters to the filter property, and CSS applies them to the element according to the order they appear.
For example:
The `opacity` filter comes first in the filter property in the code above before the `drop-shadow`. When rendering the image in the browser, CSS will apply an opacity of 50% to the image, making it partially transparent, before adding a drop-shadow.
Here’s the result:

Reversing the order of the filter properties changes the result:
Usage with the initial and inherit keywords
In addition to the 11 CSS filters, the filter property accepts two extra values.
- initial: The default value of the filter property — resolves to “none”.
- inherit: The computed value of the filter property from an element’s direct parent.
Try using CSS filters yourself!
Hopefully, you now have a thorough understanding of all 11 CSS filters, how they work, and how you can use them to apply different visual effects to the elements on your websites.
CSS filters give you more independence from photo editing software when creating production assets and visual effects for your websites—helping save on both time and money. They enable you to apply these visual effects directly in the browser.
- The Complete Guide to Regular Expressions (Regex)
- Rules of React’s useEffect
- Dev Discussions: Intro to the Jamstack with Salma Alam-Naylor of Netlify
Victor is a frontend developer and technical writer interested in the JAMStack. and has a knack for breaking down developer concepts to understandable bits for others.
FAQ on CSS blur effects
What is a CSS blur effect?
The CSS blur effect is a visual alteration applied to an element that makes it appear out of focus or blurry. It’s commonly achieved using the function within the property. This effect can be applied to text, images, or other elements to create a sense of depth, draw attention to specific content, or as a part of your design aesthetic.
How do I apply a blur effect to an image?
To apply a blur effect to an image, you’ll want to use the property along with the function in your CSS. For example:
This code will apply a 5-pixel blur to all images on your webpage.
Can I create a hover effect with a blur?
Absolutely! You can create a hover effect with a blur by using the pseudo-class in your CSS. Here’s an example:
In this example, the image will become blurry when the user hovers over it, with a smooth transition.
Can I apply a blur effect to text?
Yes, you can apply a blur effect to text using the property and the function, just like with images. Here’s an example:
This code will apply a 2-pixel blur to all paragraphs on your webpage.
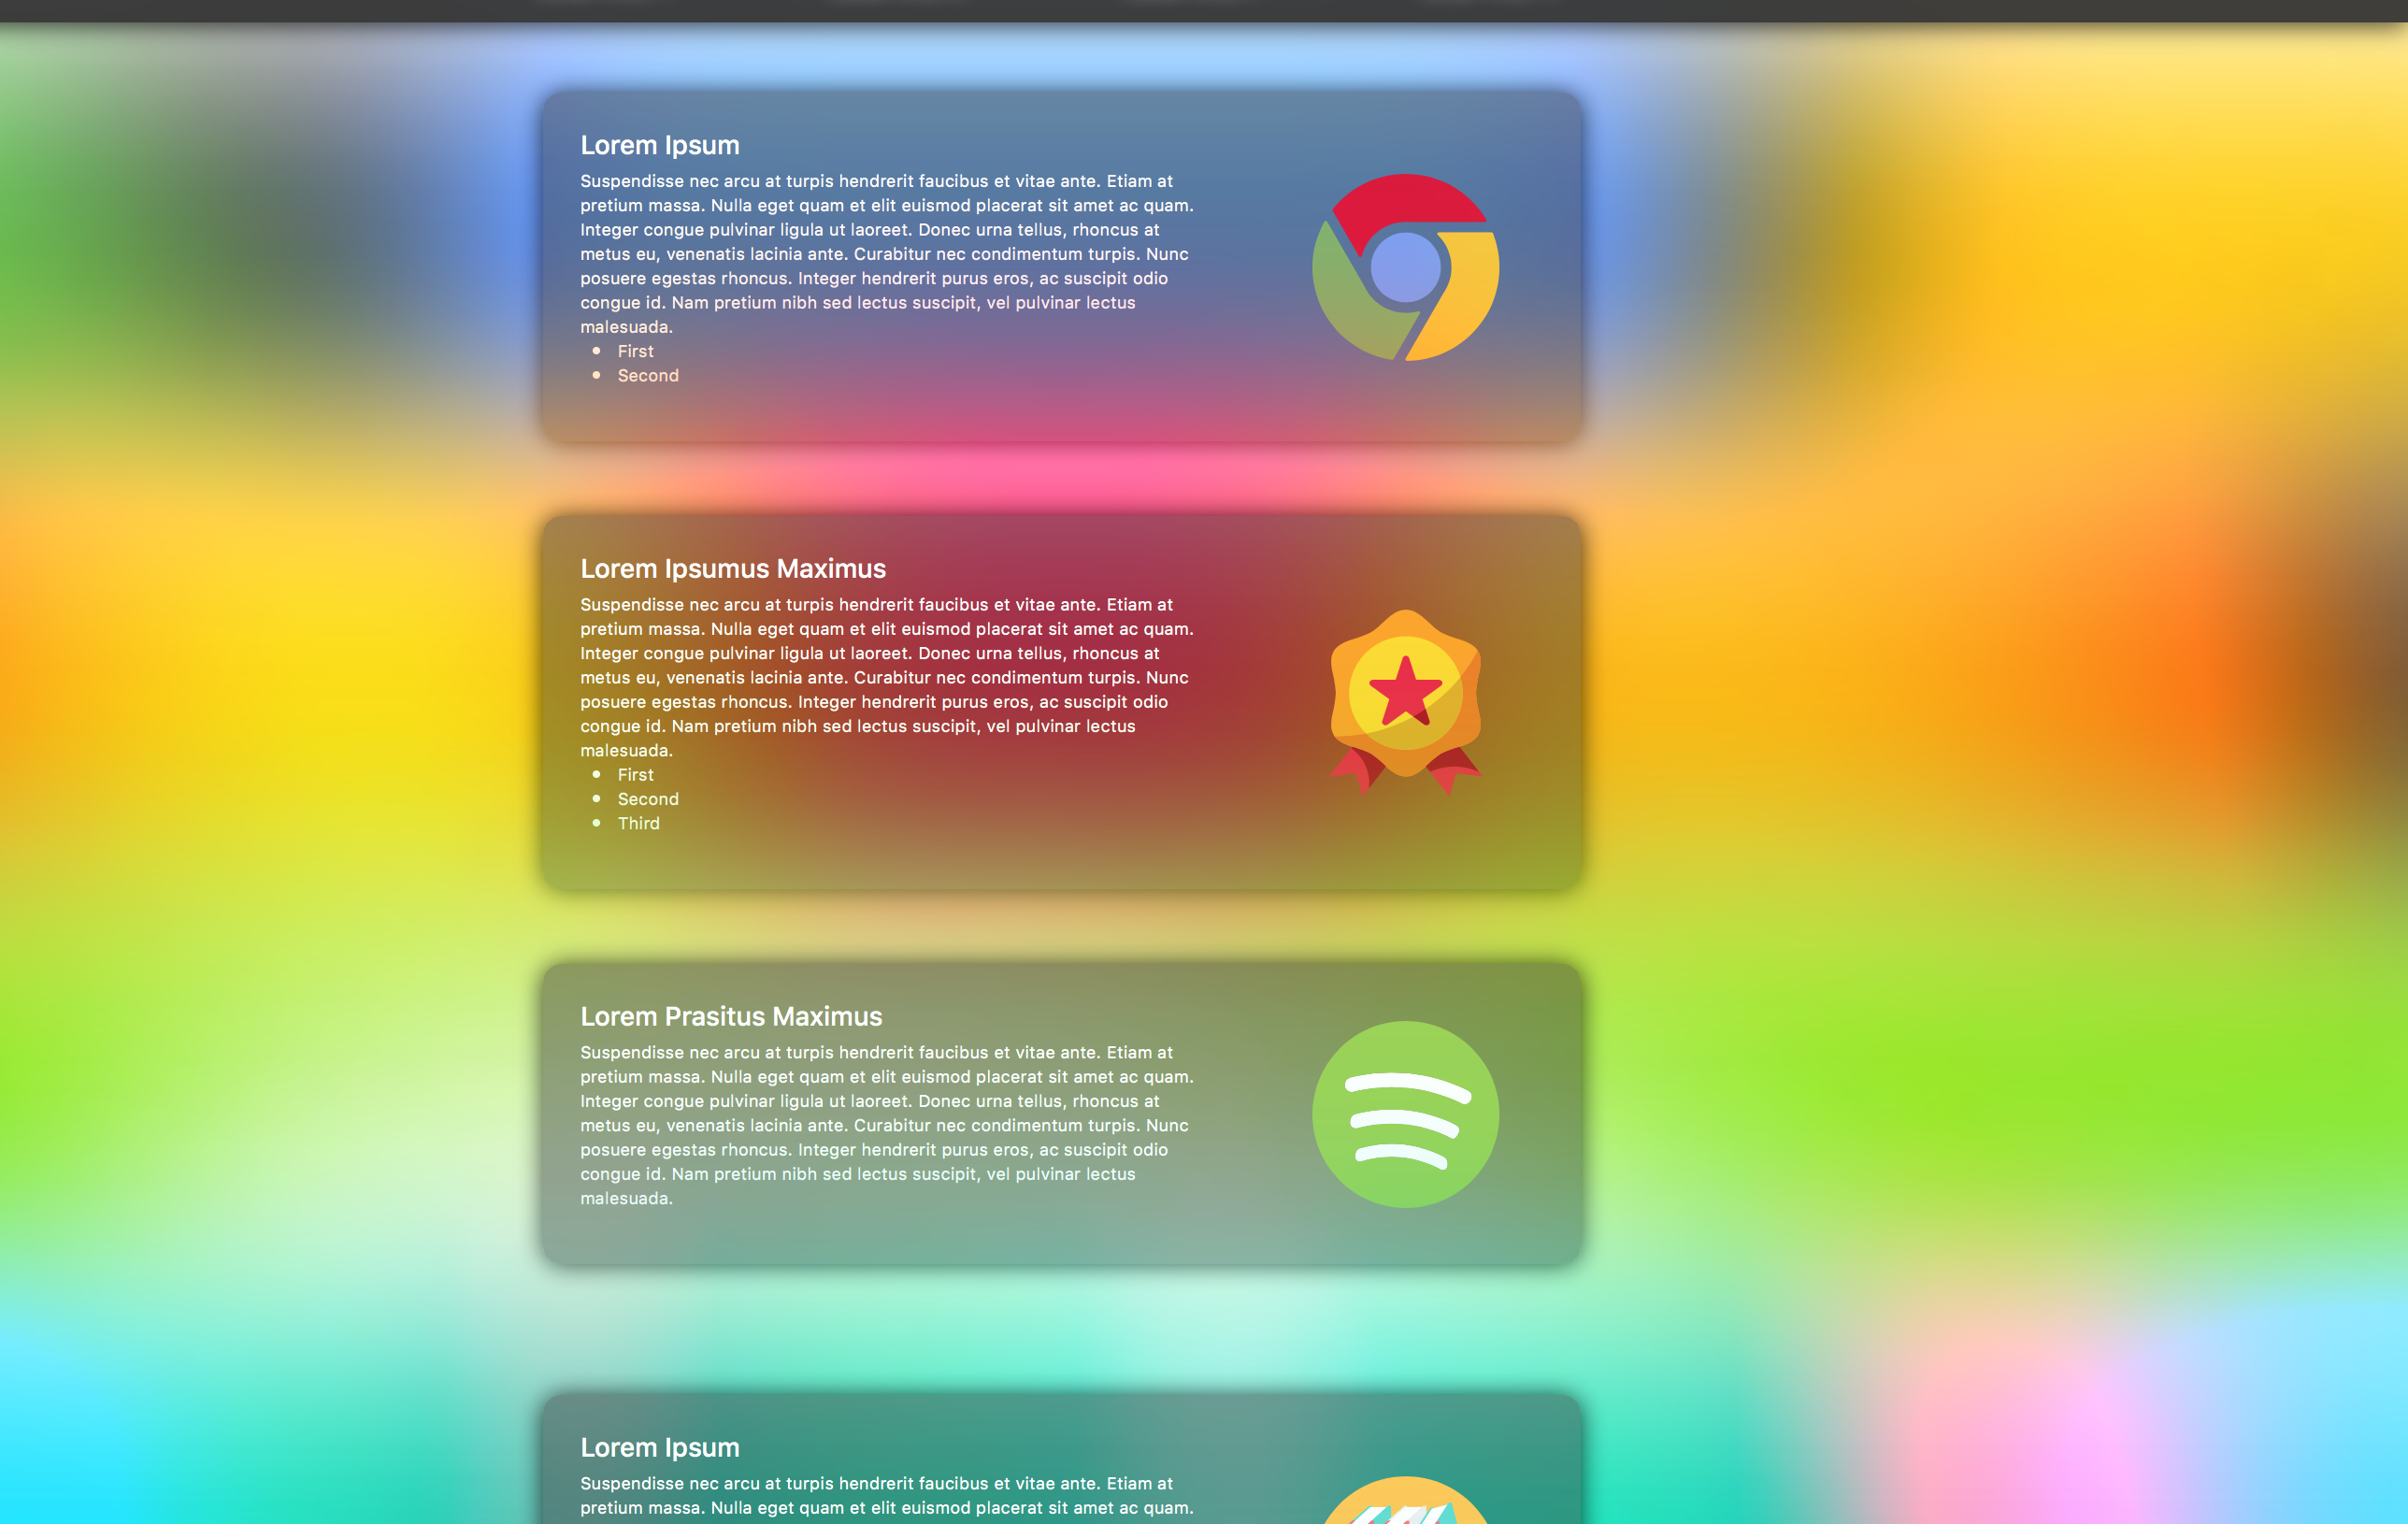
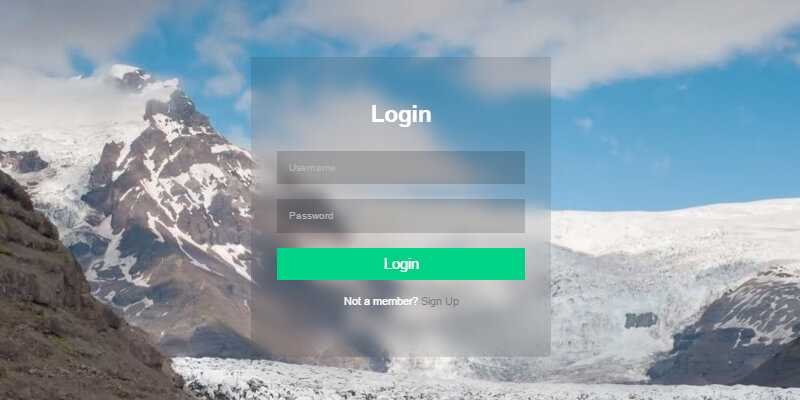
How do I create a frosted glass effect using CSS blur?
To create a frosted glass effect using CSS blur, you’ll need to create a semi-transparent background and apply a blur effect to the content beneath it. You can achieve this using a combination of , , and CSS positioning. Here’s an example:
Can I animate the blur effect?
Yes, you can animate the blur effect using CSS animations or transitions. For example, here’s how you can create a simple animation that gradually increases the blur:
How do I create a depth of field effect with CSS blur?
To create a depth of field effect with CSS blur, you can apply different levels of blur to elements positioned at various “depths” in your design. By giving the appearance that some elements are closer or further away, you can create a sense of depth. For example, you could have a foreground element with no blur, a midground element with a slight blur, and a background element with a stronger blur.
Are there performance considerations when using CSS blur?
Using CSS blur can impact the performance of your webpage, particularly on slower devices or browsers with limited support for hardware acceleration. Applying blur effects to large images or multiple elements can cause your page to load slowly or become unresponsive. To minimize performance issues, use blur effects sparingly and consider using alternative techniques, like pre-blurred images, for static content.
Can I use CSS blur with SVG elements?
Yes, you can apply CSS blur effects to SVG elements using the property, just like with HTML elements. However, you’ll need to ensure that the
property is applied within the SVG’s element or in an external CSS file, rather than inline on the SVG element itself. Here’s an example:
In this example, a 3-pixel blur is applied to the red circle within the SVG.
Are there browser compatibility issues with CSS blur?
While most modern browsers support the property and the function, there may be compatibility issues with older browsers, such as Internet Explorer. It’s essential to test your design across different browsers and consider using feature detection or fallback styles for browsers that don’t support CSS blur. You can use tools like Can I use (caniuse.com) to check browser support for specific CSS features, including the property.
Answer by Harmony Lloyd
CSS Filters are a powerful tool that authors can use to achieve varying visual effects (sort of like Photoshop filters for the browser). The CSS filter property provides access to effects like blur or color shifting on an element’s rendering before the element is displayed. Filters are commonly used to adjust the rendering of an image, a background, or a border.,This function is similar to the more established box-shadow property; the difference is that with filters, some browsers provide hardware acceleration for better performance.,The url() function takes the location of an XML file that specifies an SVG filter, and may include an anchor to a specific filter element. Here’s a tutorial that works as a nice intro to SVG filters with a fun demo.,Therefore is it correct to assume that vendor prefixes are still needed?
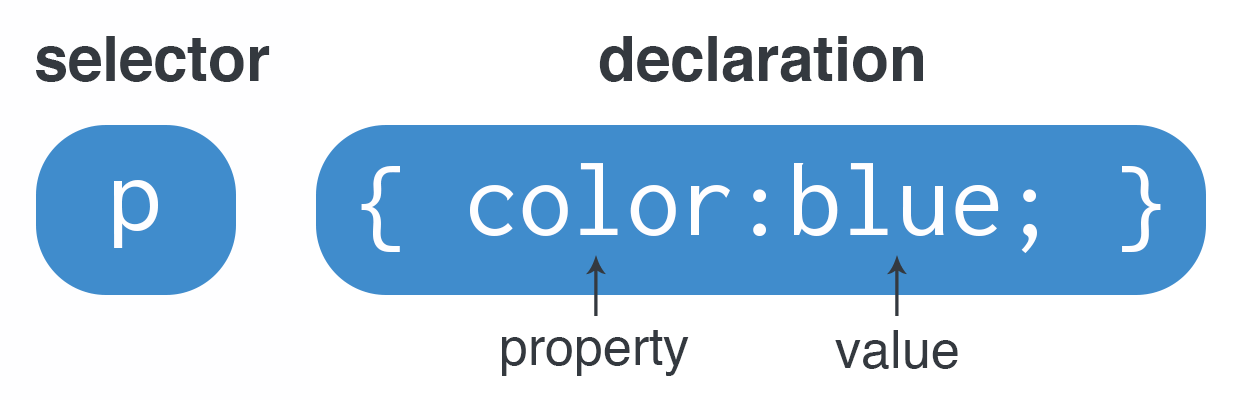
The syntax is:
Multiple functions can be used, space separated.
opacity
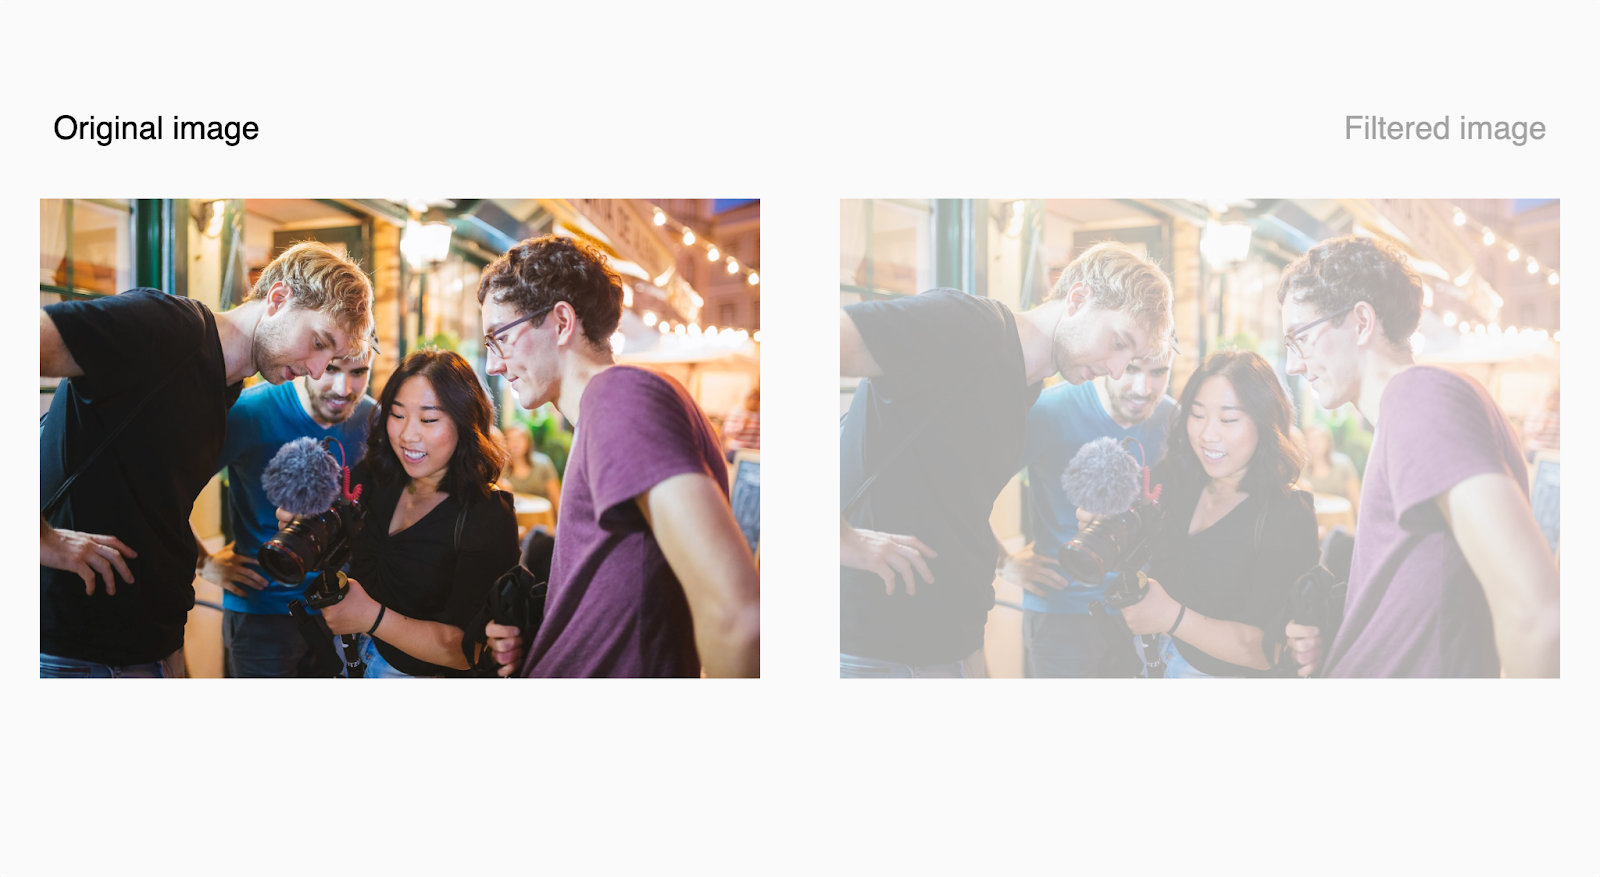
The opacity filter applies a transparency effect to an element’s colors. It accepts a percentage or decimal value to decide how much transparency to apply to an image. An opacity of 0% or 0 will result in a completely transparent element. 100% opacity will show no transparency. Setting the opacity between 0% and 100% will give the element or image partial transparency.
The code below adds an opacity of 35% to an image:
The result:
You might notice that the opacity filter works just like the CSS opacity property because both control how transparent an element should be. The difference and why you should prefer the opacity filter over the CSS opacity property is that CSS filters are hardware-accelerated.
When you use the opacity filter to add opacity to an element, the browser will offload the computing task onto the Graphics Processing Unit (GPU) — a specialized processor designed to accelerate graphics rendering within the system. This increases the browser’s efficiency and frees up the CPU to perform other tasks.
drop-shadow
The CSS drop-shadow filter applies an (often blurry) background shadow to an element, giving it a more three-dimensional look.
The drop-shadow filter accepts four parameters when applying a drop shadow to an element:
- : A CSS length value that specifies the horizontal distance between the element and the drop shadow. Positive values place the shadow to the element’s right, and negative values place the shadow to the left.
- : A CSS length value that specifies the vertical distance between the element and the drop shadow. Positive values place the shadow below the element, and negative values place the shadow above it.
- : The blur radius of the shadow is specified as a CSS length unit. The larger the value, the more blurred the shadow becomes. If left unspecified, it defaults to 0, producing a sharp and unblurred shadow. No negative values are permitted.
- : The color of the shadow, specified as a CSS color. If left unspecified, it defaults to the color black.
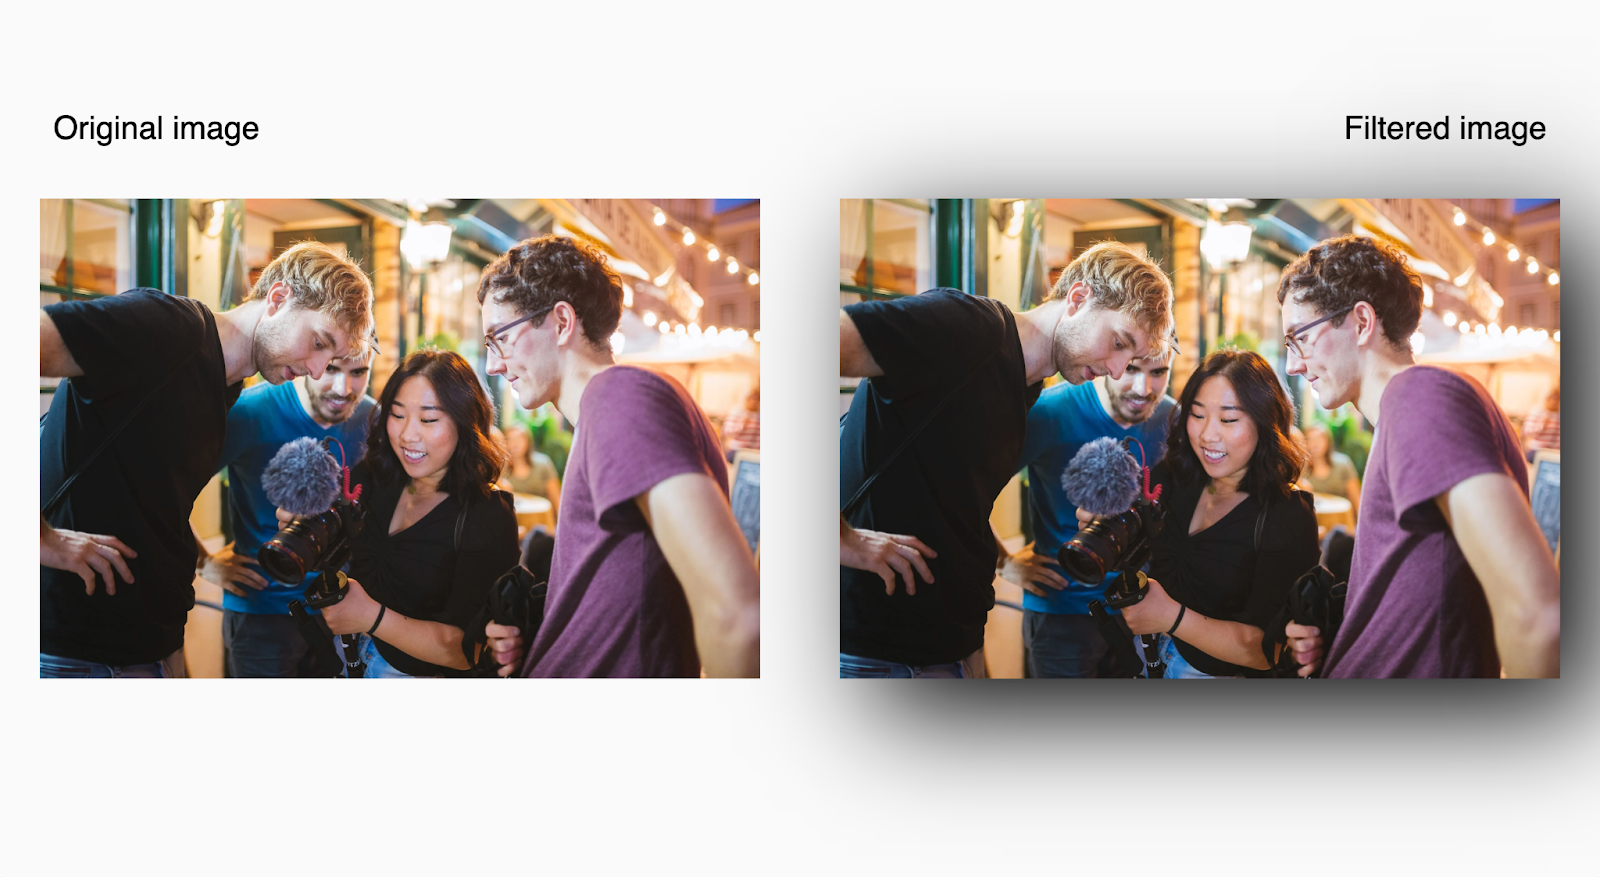
Here’s an example of setting a drop shadow to an element:
The code above adds a black shadow with a 50px blur to the image, setting it 30px to the right of the image and 30px below it.
Here’s the result:
The `drop-shadow` filter looks much like the CSS `box-shadow` property at first glance. However, there’s a difference between the two, and it’s worth comparing those differences to know when to prefer one over the other.
One difference between the `drop-shadow` filter and the `box-shadow` property is the `drop-shadow` filter does not accept the `inset` keyword, which, when set, rather than aligning the shadow behind the element, inserts the shadow within the element, giving it a framed appearance.
For example:
The result:
The result of using the `insert` keyword that’s only available to the `box-shadow` property to insert the shadow into the div.
Another difference between the `drop-shadow` filter and the `box-shadow` property is the `drop-shadow` filter does not accept the <spread-radius> parameter — a CSS length value that specifies how wide the shadow will span. Positive values cause the shadow to enlarge, and negative values cause the shadow to shrink. If not specified, it will default to a value of 0 (the shadow will be the same size as the element).
Example:
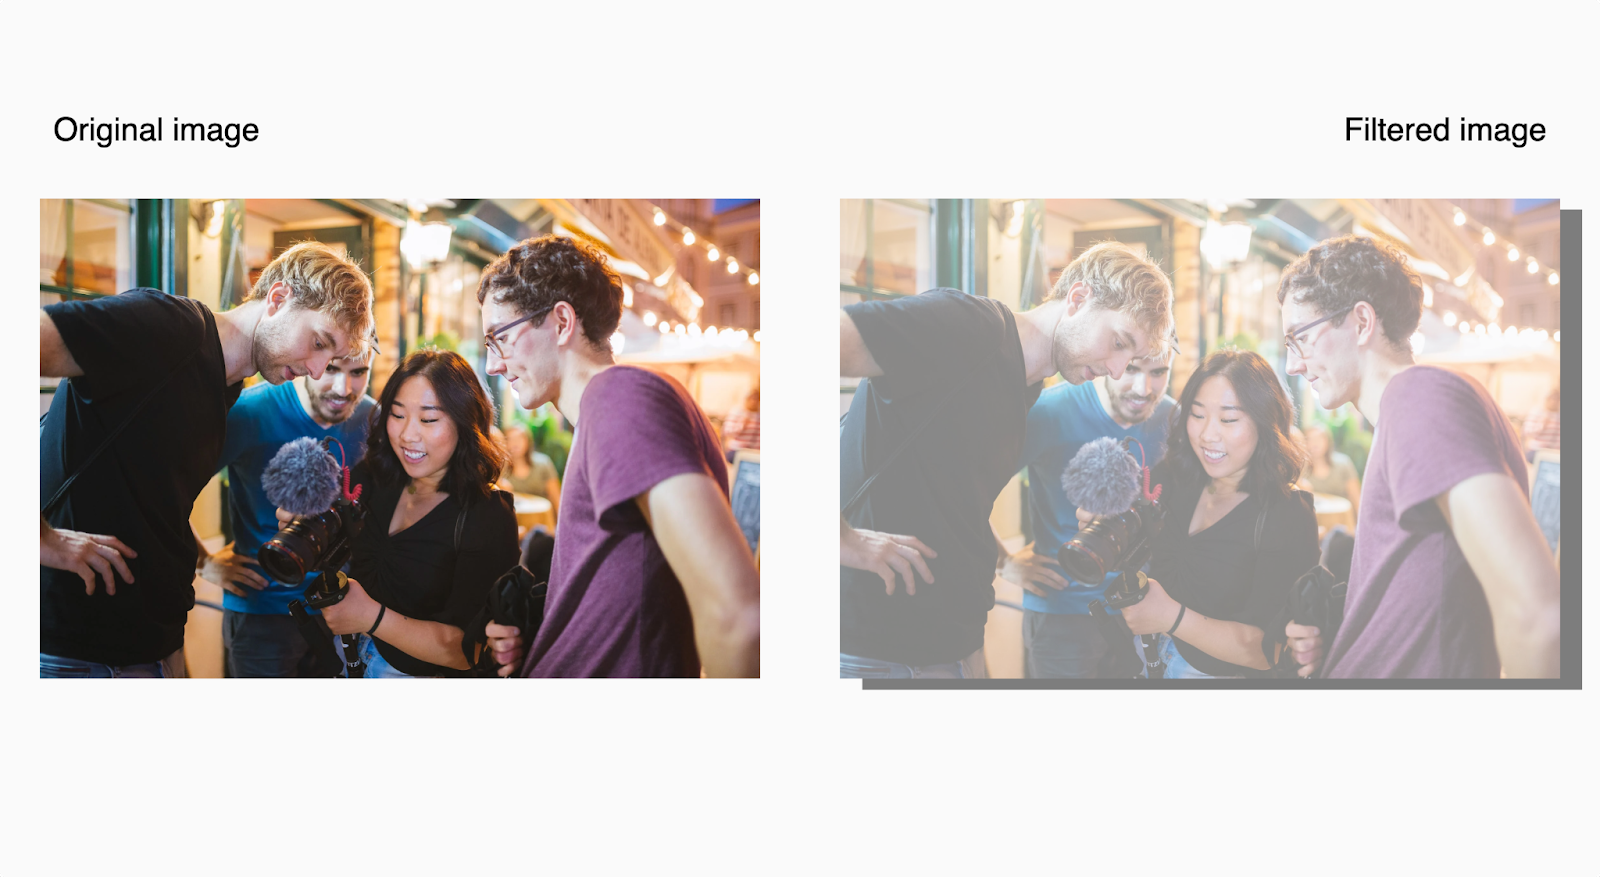
The code above adds a gray shadow with a 50px blur to an image, passing an additional length value of 70px that signifies the shadow will span 50px more than the image in width.
The result:

Lastly, to explain the significant difference between the `drop-shadow` filter and the `box-shadow` property, we’ll be using the CoderPad logo below.

The CoderPad logo
If the `box-shadow` property is used to add a shadow to the CoderPad logo above:
It results to the image below:

Notice that the shadow is applied to a rectangular box around the logo? This is because CSS uses a box model, where the edges of an element are bound in a rectangular box containing its padding, border, and margin properties. Even in cases where the element does not appear to have a rectangular shape, the box is still there, which is where the shadow will be applied.


CSS filters are not bound to the box model. That means that the drop-shadow filter will only consider the outline of the CoderPad logo, ignoring its box model so that only the contents of the logo receive the shadow.
For example:
The result:

Deciding which method to use between `drop-shadow` and `box-shadow` is totally up to you based on the effect you want to achieve.
Значения свойства
Значение
Описание
none
Указывает, что эффекты отсутствуют. Это значение по умолчанию.
blur(px)
Применяет эффект размытия изображения. Чем больше указано значение, тем больше будет размытие. Если значение не задано, то используется значение .
brightness( % | 0+ )
Значение регулирует яркость изображения.0% (0) — изображение полностью черное.100% (1) — значение по умолчанию (исходное изображение).Более 100%(1) — увеличивает яркость изображения.
contrast( % | 0+ )
Значение регулирует контрастность изображения.0% (0) — изображение полностью серое.100% (1) — значение по умолчанию (исходное изображение).Более 100%(1) — увеличивает контрастность изображения.
drop-shadow(h-shadow v-shadow blur-radius spread-radius color )
Значение определяет эффект тени изображения.h-shadow — Обязательное значение. Задаёт расположение горизонтальной тени. Допускается использование отрицательных значений, при этом тень будет слева от изображения.v-shadow — Обязательное значение. Задаёт расположение вертикальной тени. Допускается использование отрицательных значений, при этом тень будет над изображением.blur-radius — Необязательное значение. Задаёт радиус размытия в пикселях. Чем больше это значение, тем больше размытие, при этом тень становится больше и светлее. Если значение не задано, то значение будет равно 0 (резкие — отчетливые тени). Отрицательные значения не допускаются.spread-radius — Необязательное значение. Размер тени в пикселях (радиус растяжения тени). При положительных значениях тень будет расшииряться, а при отрицательных сжиматься. Если значение не задано, то значение будет равно 0 (тень соответствует размеру элемента). color — Необязательное значение. Определяет цвет тени (HEX, RGB, RGBA, HSL, HSLA, «Предопределённые цвета»). Значением по умолчанию является черный.
Данного эффекта можно достичь, используя контейнер со свойством, которое имеет более широкую поддержку браузерами — box-shadow(создание тени элемента).
Также свойством box-shadow можно создать мультитень, чего нельзя достичь фильтром в одном объявлении.
Основная разница заключается в том, что фильтры имеют аппаратное ускорение
Обращаю Ваше внимание, что четвертый параметр (spread-radius) может не поддерживаться некоторыми браузерами, а может и поддерживаться.
hue-rotate(deg)
Производит замену цветов изображения в зависимости от заданного угла. Значение задается в градусах (0deg — 360deg)
Угол поворота определяет количество градусов вокруг цветового круга (в зависимости от заданного угла цвет изображения меняется).0deg — значение по умолчанию (исходное изображение). Максимальное значение 360deg.
grayscale( % | 0-1 )
Значение определяет эффект градации серого цвета. Отрицательные значения недопустимы.0% (0) — значение по умолчанию (исходное изображение).100% (1) — изображение полностью серое (используется для создания черно-белых изображений).
invert( % | 0-1 )
Значение инвертирует цвета изображения. Отрицательные значения недопустимы.0% (0) — значение по умолчанию (исходное изображение).100% (1) — изображение полностью инвертировано.
opacity( % | 0-1 )
Задает уровень прозрачности изображения. Отрицательные значения недопустимы.0% (0) — изображение полностью прозрачно.100% (1) — значение по умолчанию (исходное изображение).
Данного эффекта можно достичь, используя свойство, которое имеет более широкую поддержку браузерами — opacity(определяет уровень прозрачности для элемента).
Разница заключается в том, что фильтры имеют аппаратное ускорение.
saturate( % | 0+ )
Задает уровень насыщенности изображения. Отрицательные значения недопустимы.0% (0) — не насыщенное изображение.100% (1) — значение по умолчанию (исходное изображение).Более 100%(1) — увеличивает насыщенность изображения.
sepia( % | 0-1 )
Конвертирует изображение в сепию (вид графической техники, использующий оттенки коричневого цвета). Отрицательные значения недопустимы.0% (0) — значение по умолчанию (исходное изображение).100% (1) — полностью конвертирует изображение в сепию.
url()
Задает путь к XML файлу, который содержит SVG фильтр, либо фильтры, которые могут впоследствии использоваться как якорь (необходимо указывать определенный id для каждого фильтра). Допускается размещать SVG в теле документа.
Синтаксис при размещении SVG фильтра из XML документа:filter: url(filters.xml#filter-id);
Синтаксис при размещении SVG фильтра в теле страницы:filter: url(#filter-id);
initial
Устанавливает свойство в значение по умолчанию.
inherit
Указывает, что значение наследуется от родительского элемента.
What is the mean blur and how does the Gaussian blur compare?
The mean blur takes the mean of the pixels instead of using a weighted average like the Gaussian blur. In other words, the mean blur will have a larger blur impact than the Gaussian blur and it will differentiate less between edges.
Illustrated in examples
Let’s take the case where we are no longer working with a pizza, but simply a square with a different coloured corner: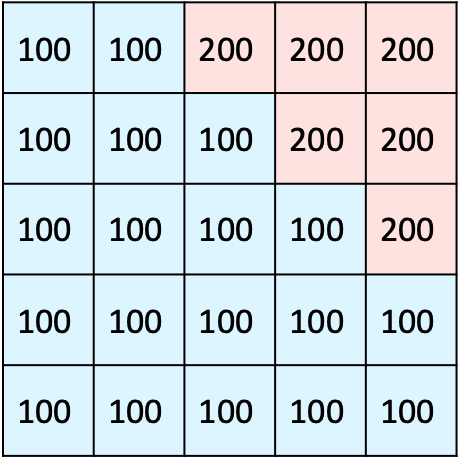
We start by placing the filter as such: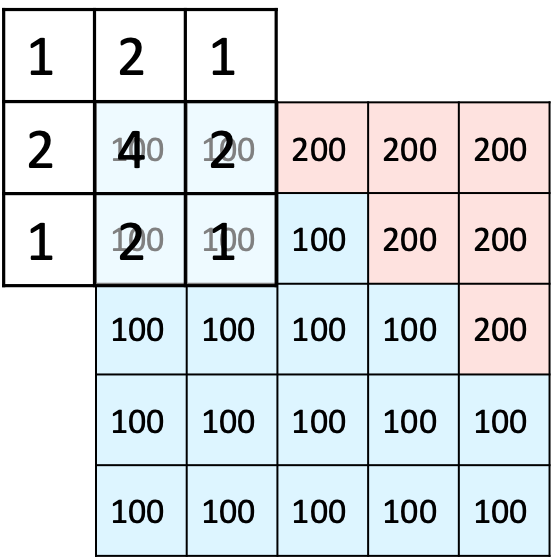
By multiplying the grid we get 900. Then, we divide this by the number of pixels, that is 4. So 900 / (4 + 2 + 2 + 1) = 100, this one stayes the same.
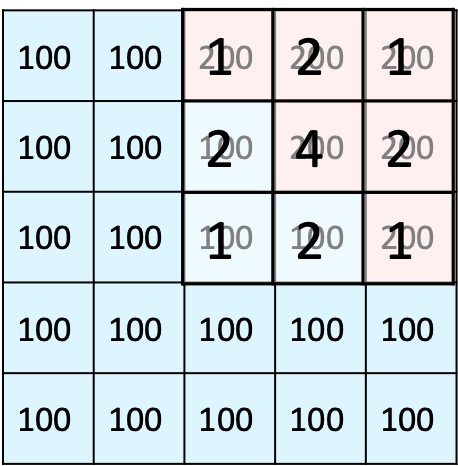
A more obvious change would be in this case, where 4 x 200 + 2 x (200 + 200 + 100 + 100) + 1 x (200 + 200 + 200 + 100) = 2700.
We divide this by 16 (the sum of 4, 2 x 4 and 1 x 4) to get 168.75. The colour will be in between blue and pink but more to the pink side. This will likely create a gradient effect and smooth harsh edges.
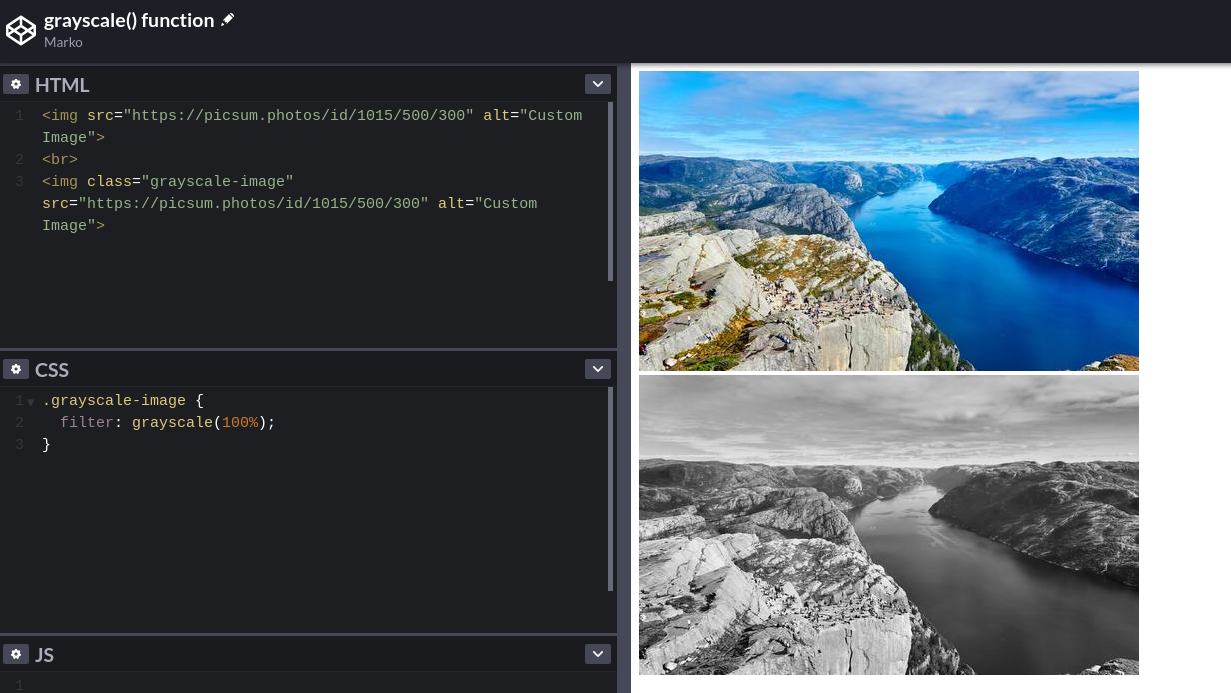
grayscale
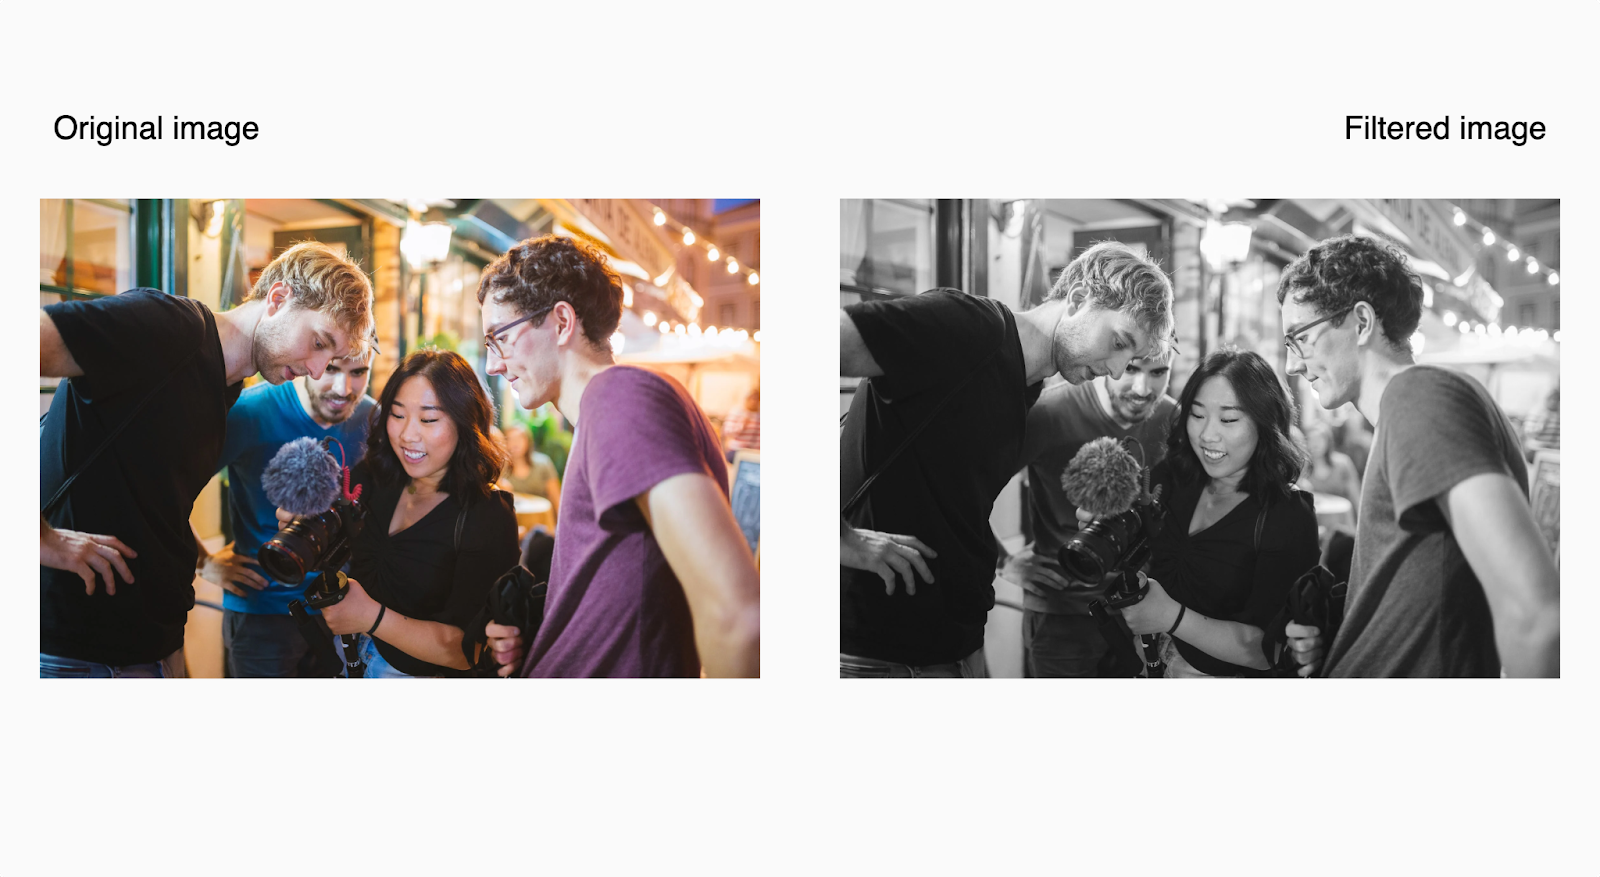
In digital photography, an image contains both color information and luminance (brightness) information. The grayscale filter removes all color information (a representation of the three light sources — red, green, and blue (RGB) used to produce colors on a computer screen) from an image. It leaves only the luminance information — a range of monochromic (gray) shades, with pure white as the lightest shade, pure black as the darkest shade, and every other shade in between being a shade of gray — known as the grayscale.
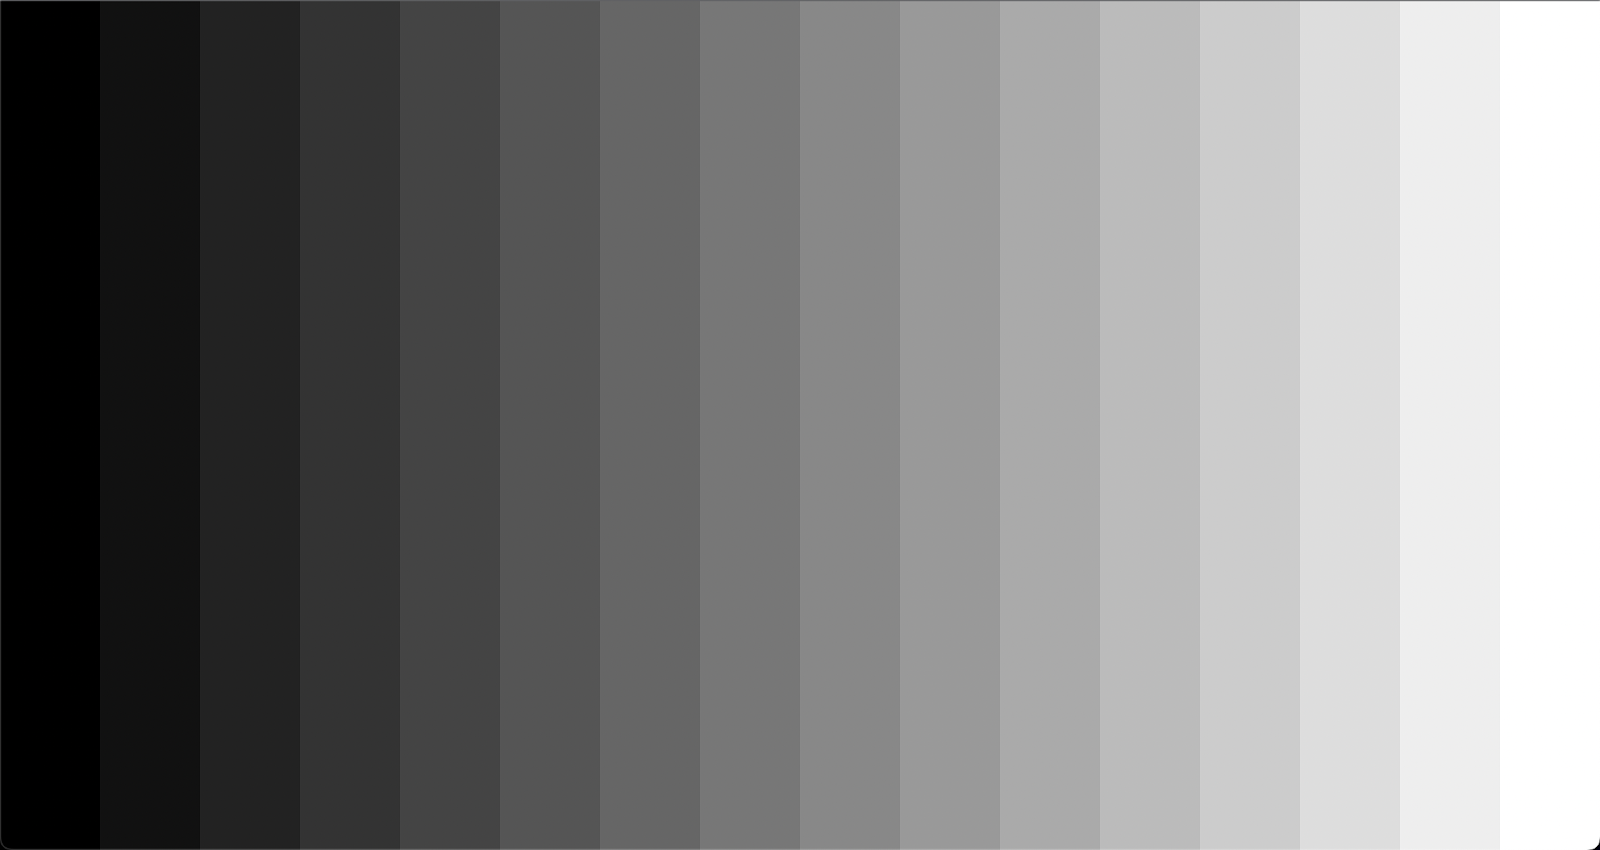 An illustration of the grayscale color range
The grayscale filter removes all color information from an image and sets its color to a tone in the grayscale.
It accepts a decimal value between 0 and 1, or a percentage value up to 100%. A value of 100% or 1 results in a completely gray image. The image would remain unchanged with a value of 0% or 0, and values between 0% and 100% give it a tone between its original color and complete gray, making the image have a desaturated look.
The code below uses the grayscale filter to make an image completely gray:
The result:
Typical applications where the grayscale filter could come into use would be applying it to images when dark mode is enabled to slightly reduce the overall vibrancy of colors, putting less eye strain on the user. You might also use it to make client logos gray when listing them on a website.
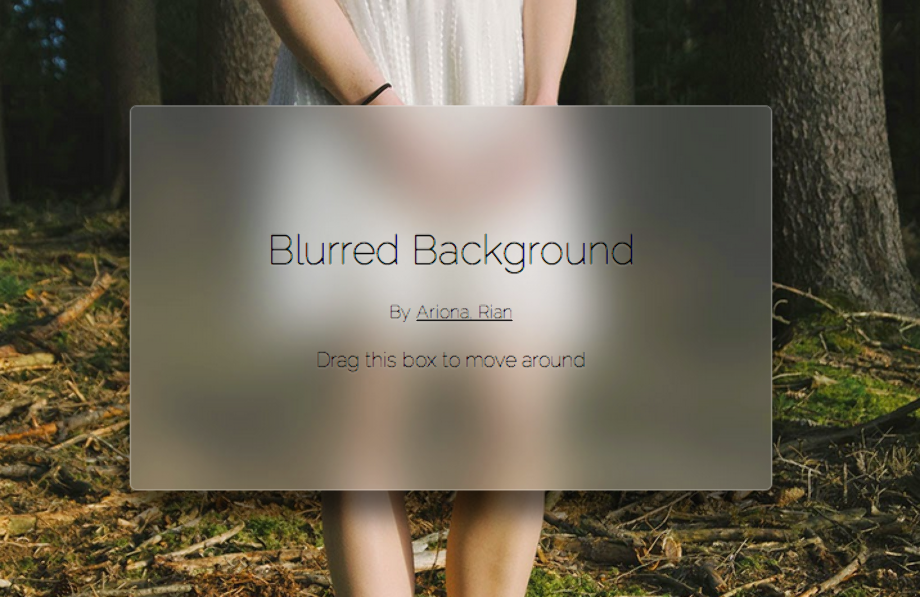
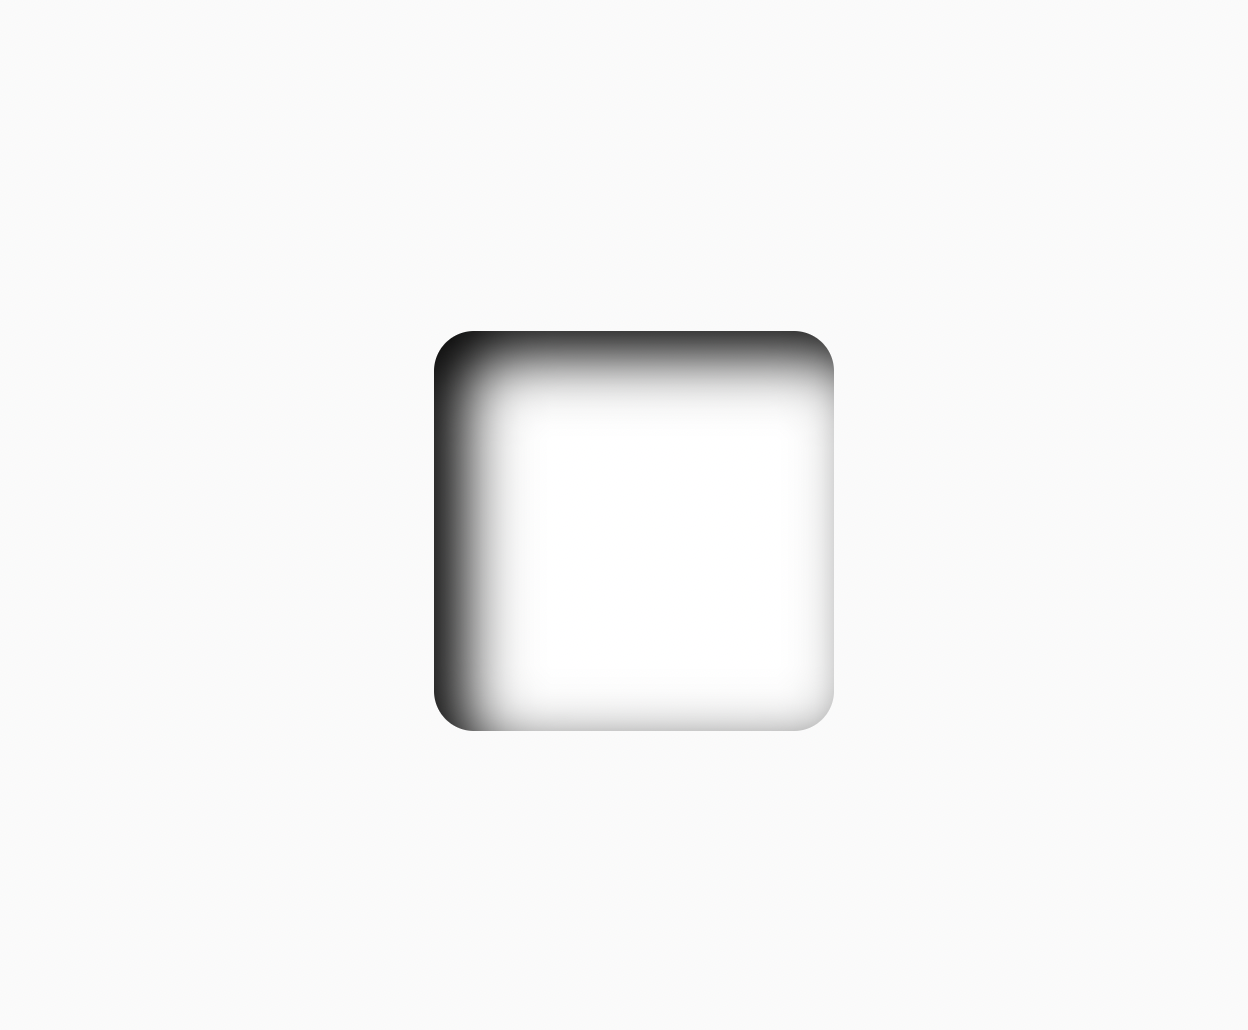
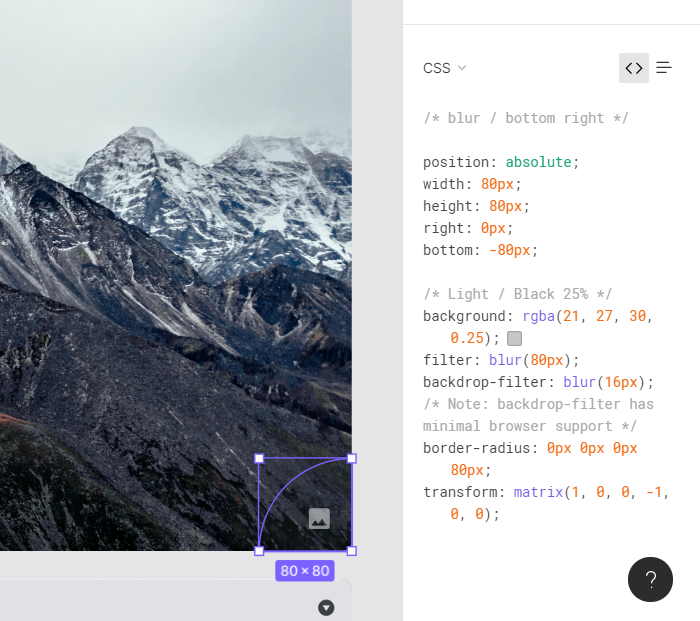
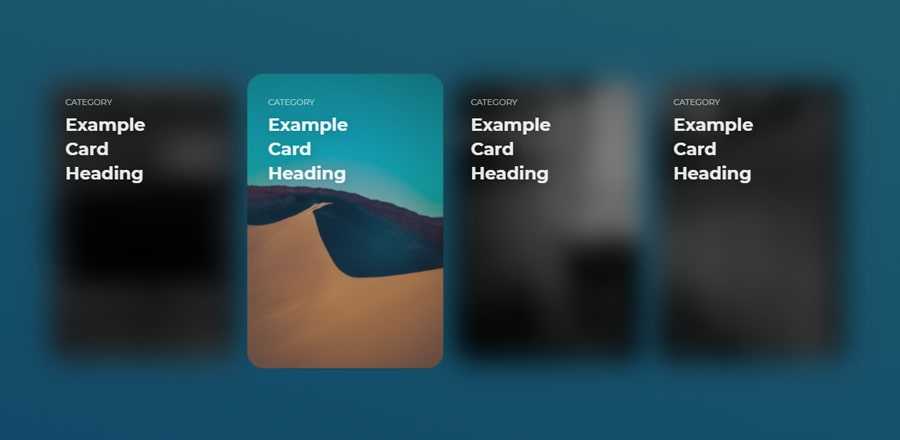
Backdrop Blur Without ‘Backdrop-Filter’
 Creating a Backdrop Without Using the Backdrop Filter
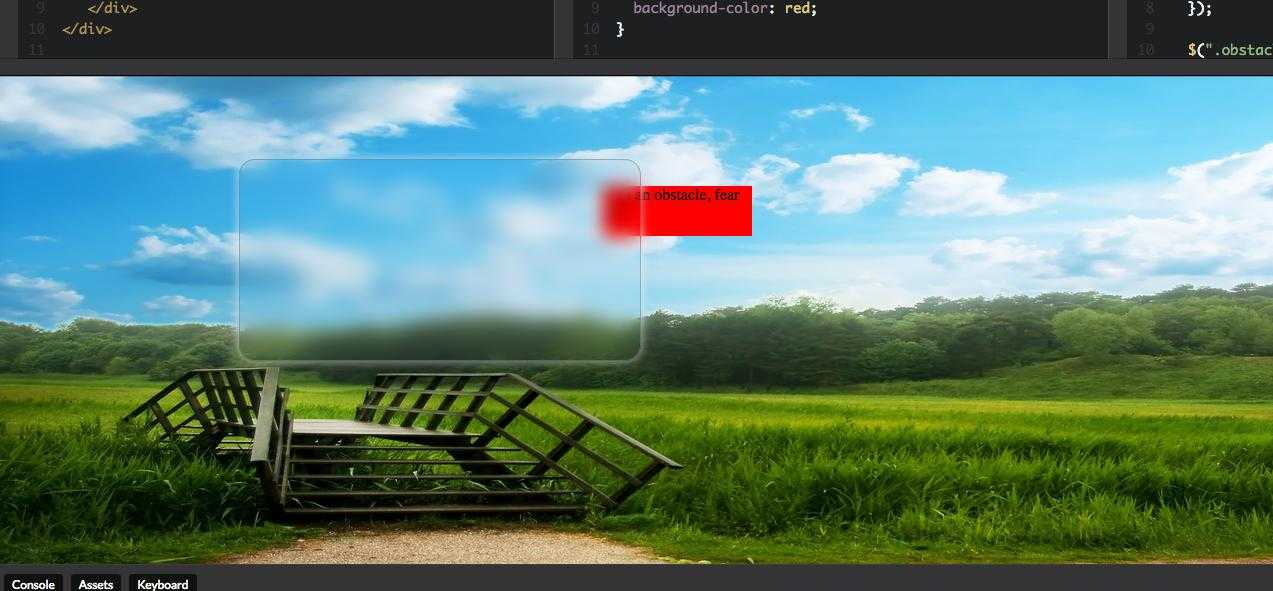
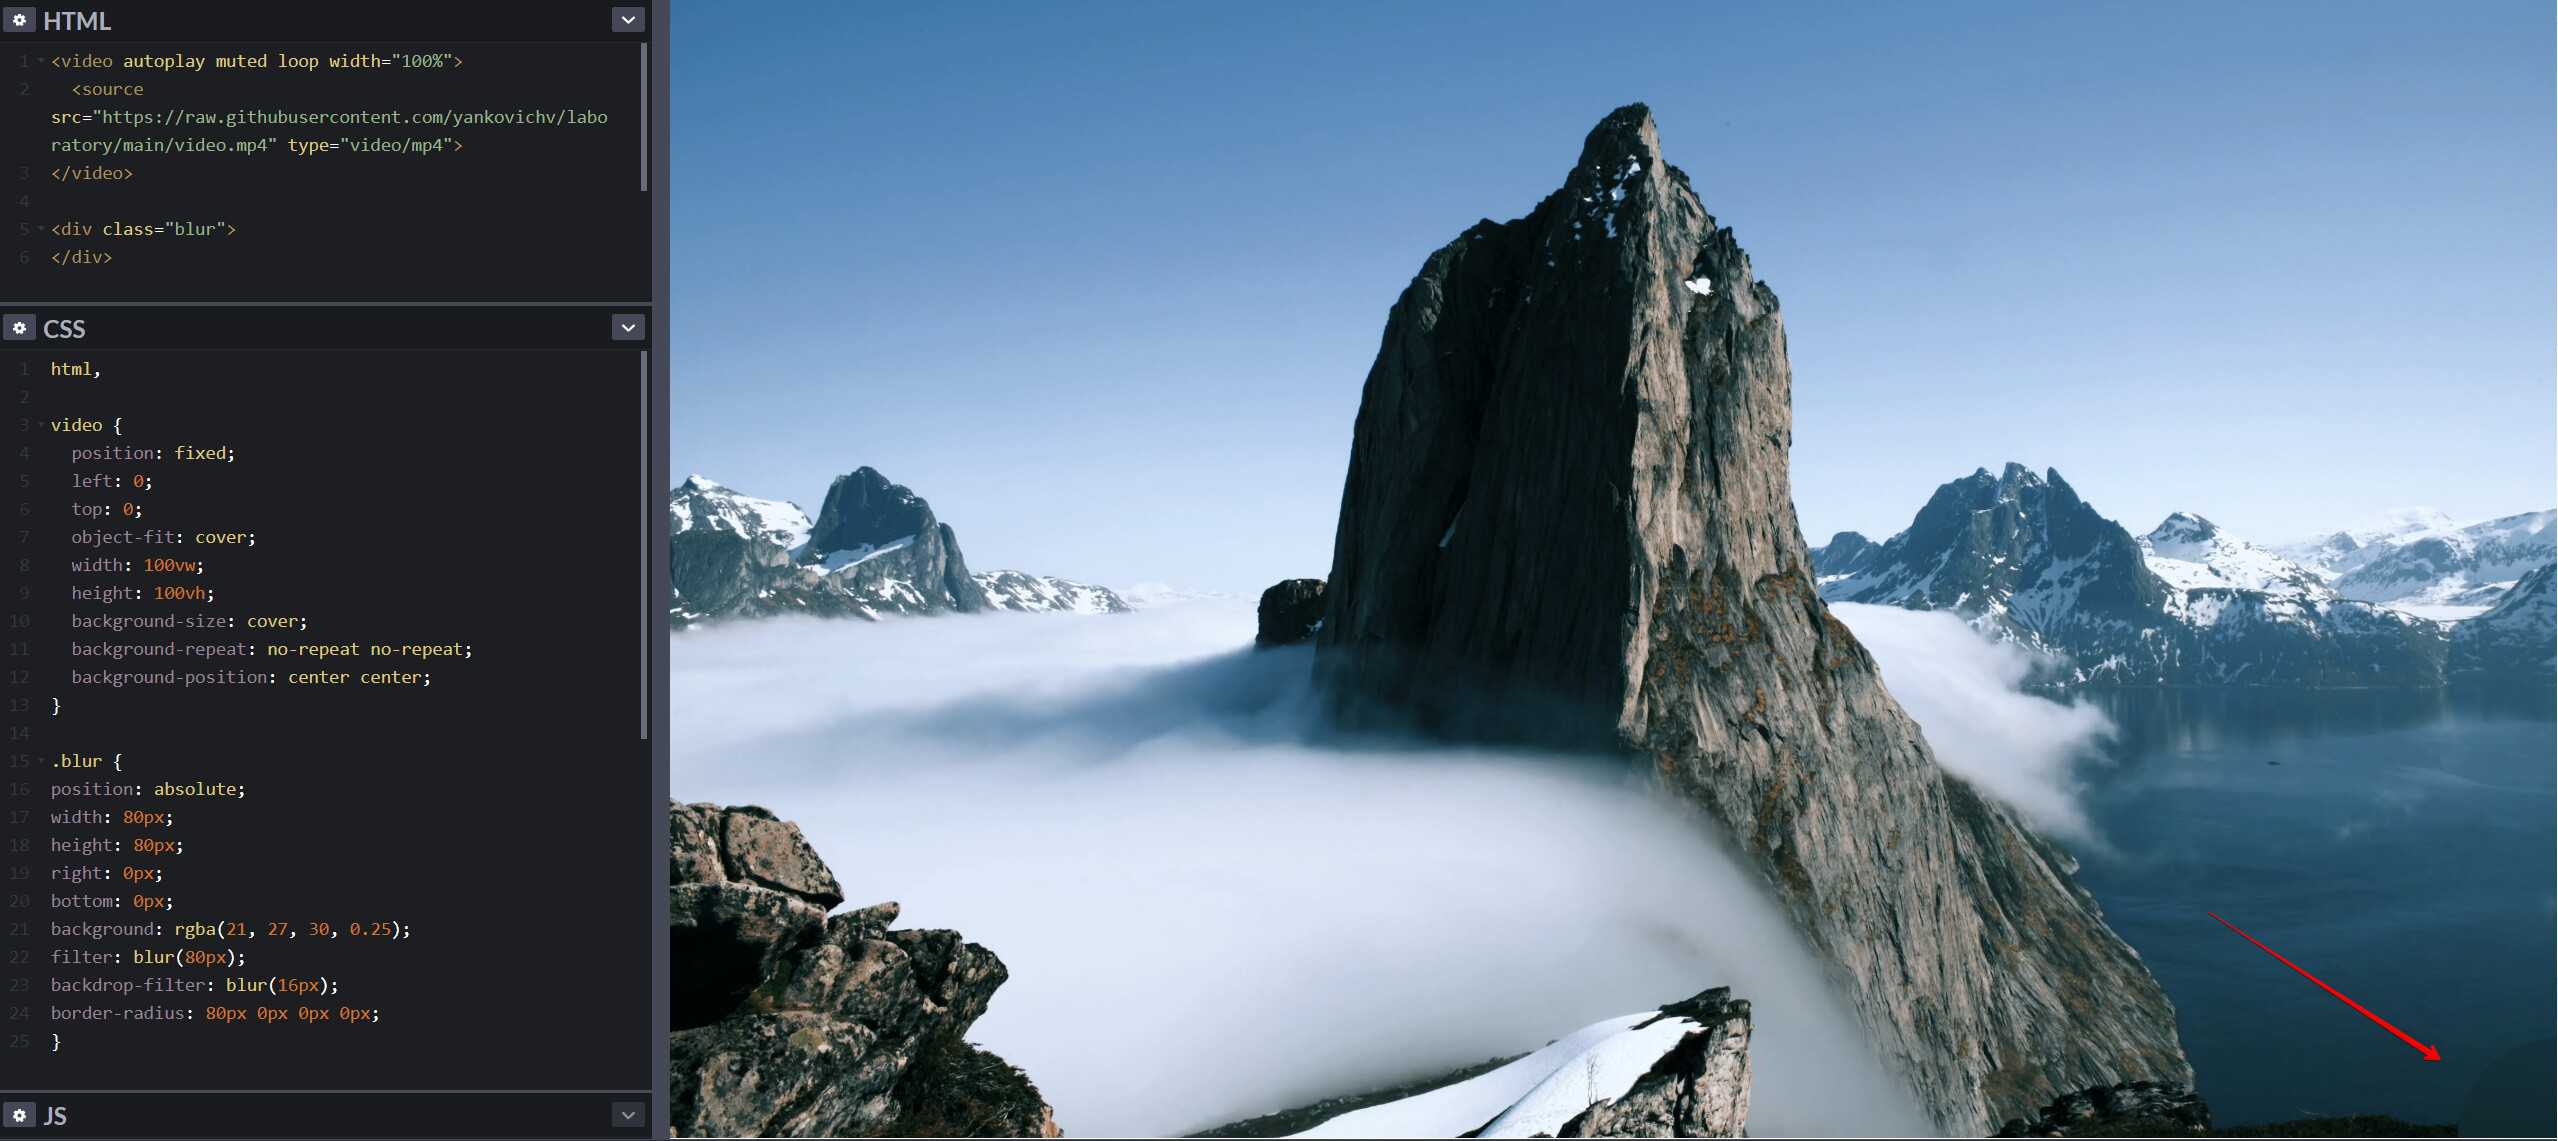
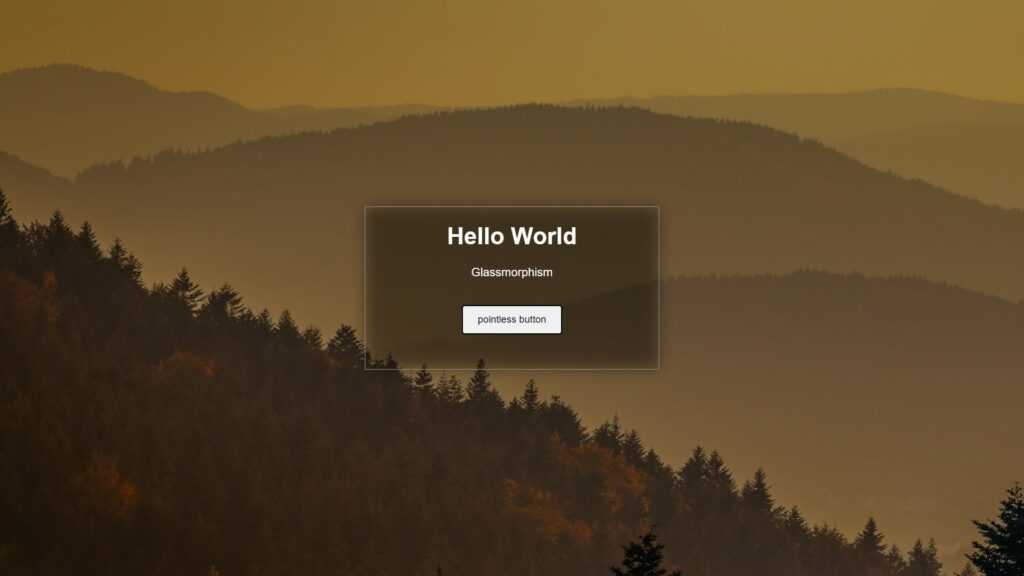
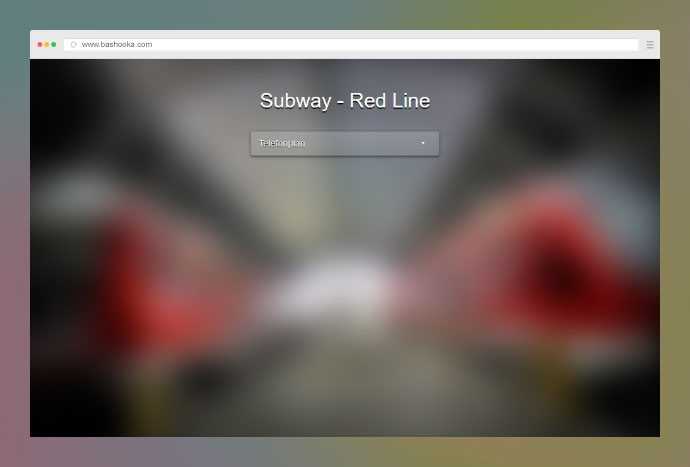
It’s possible when using backgrounds to create a backdrop blur without using a backdrop-filter property. This example explains how to create glass-styled background designs to add to your web design space.
This glass design falls under glassmorphism, a design trend that uses a blurring effect to produce glass for forms and web elements. You can check out more on glassmorphism here, where we published examples of user interfaces using this design technique.
Moving on to our example, we can create an alternate solution using pseudo-elements to apply a blurring effect. Using the pseudo-element allows us to insert an effect before its parent element. So if a parent element has no styles and is transparent, we would see an effect from the pseudo-element if positioned behind it. That means if there is text within a parent element, it would not be blurred, but a background would be.
Let’s give a CSS example.
The HTML only includes a div, image, heading, line break, and paragraph element.
Note: Remember that you can change background colors within pseudo-elements, such as, to create different backdrop blurring effects besides black or gray.
Note: This CSS feature is similar to a backdrop filter when applying blurring to an image or element. There is a difference between and backdrop-filter property, which is that backdrop applies to everything behind the element it’s applied to, unlike blur, which applies to everything inside an HTML element.
If you are interested in the backdrop-filter version of the blur, check out this article on medium that briefly explains what the property is and how to use it.
Answer by Julia Roberson
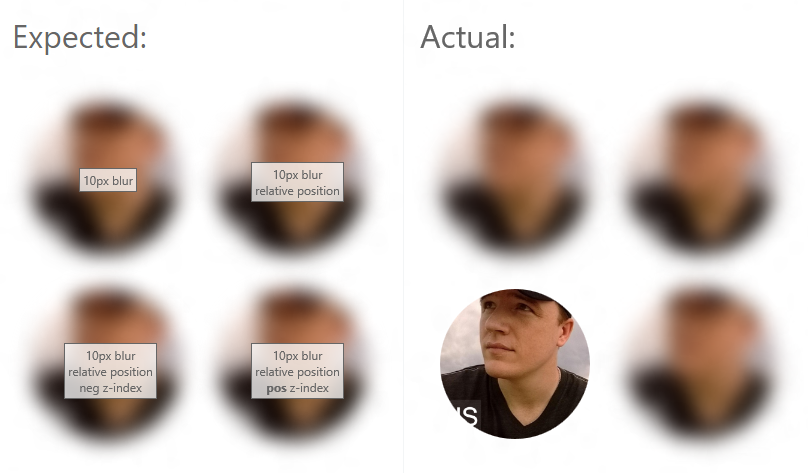
I did find a decent solution that didnt cause the whole thing to lag: only blur the image when it is in view; however, this is not cross platform compatible. IE ignores it and firefox just screws up when you use the blur filter.,Well yes, blur filters are extremely heavy for your browser. It’s something to keep in mind.,Instead of loading the separate images my plan was to use the same image in both places and use javascript to blur/darken them; however, when I use CSS blur the site’s scroll lags (like it’s on a huge delay 300-500ms delay).,Just blur the image on the server side, much lighter on the client that way
I’ve tried two ways to solve this the first is to load the image twice:
the CSS:
The second way was to remove the src tag and add a CSS background image
Source: https://www.reddit.com/r/webdev/comments/2rj0bl/using_css_filter_blur_causes_site_to_lag/
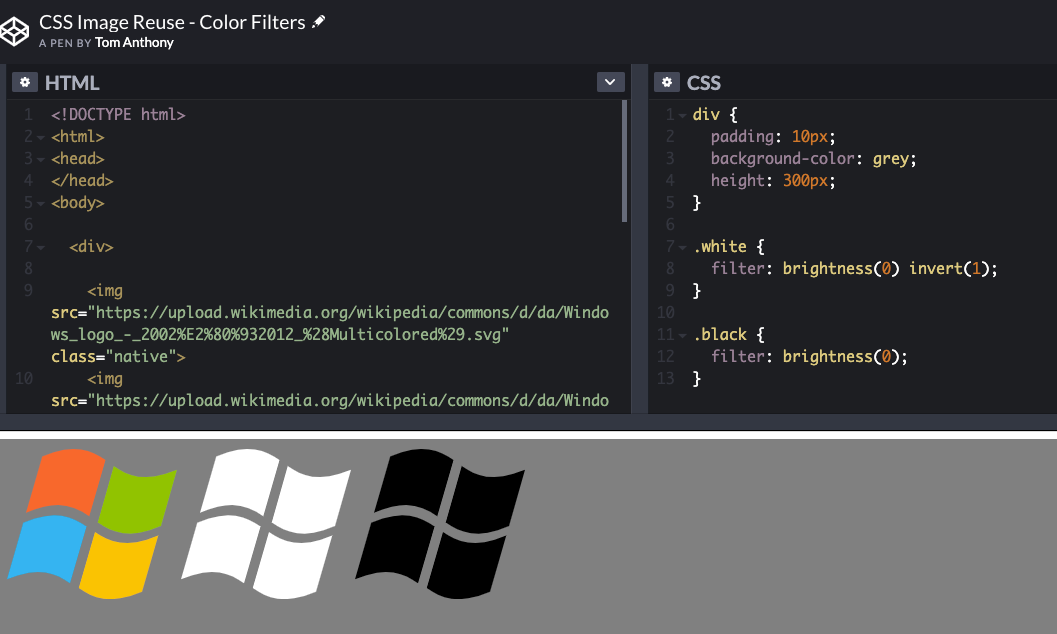
invert
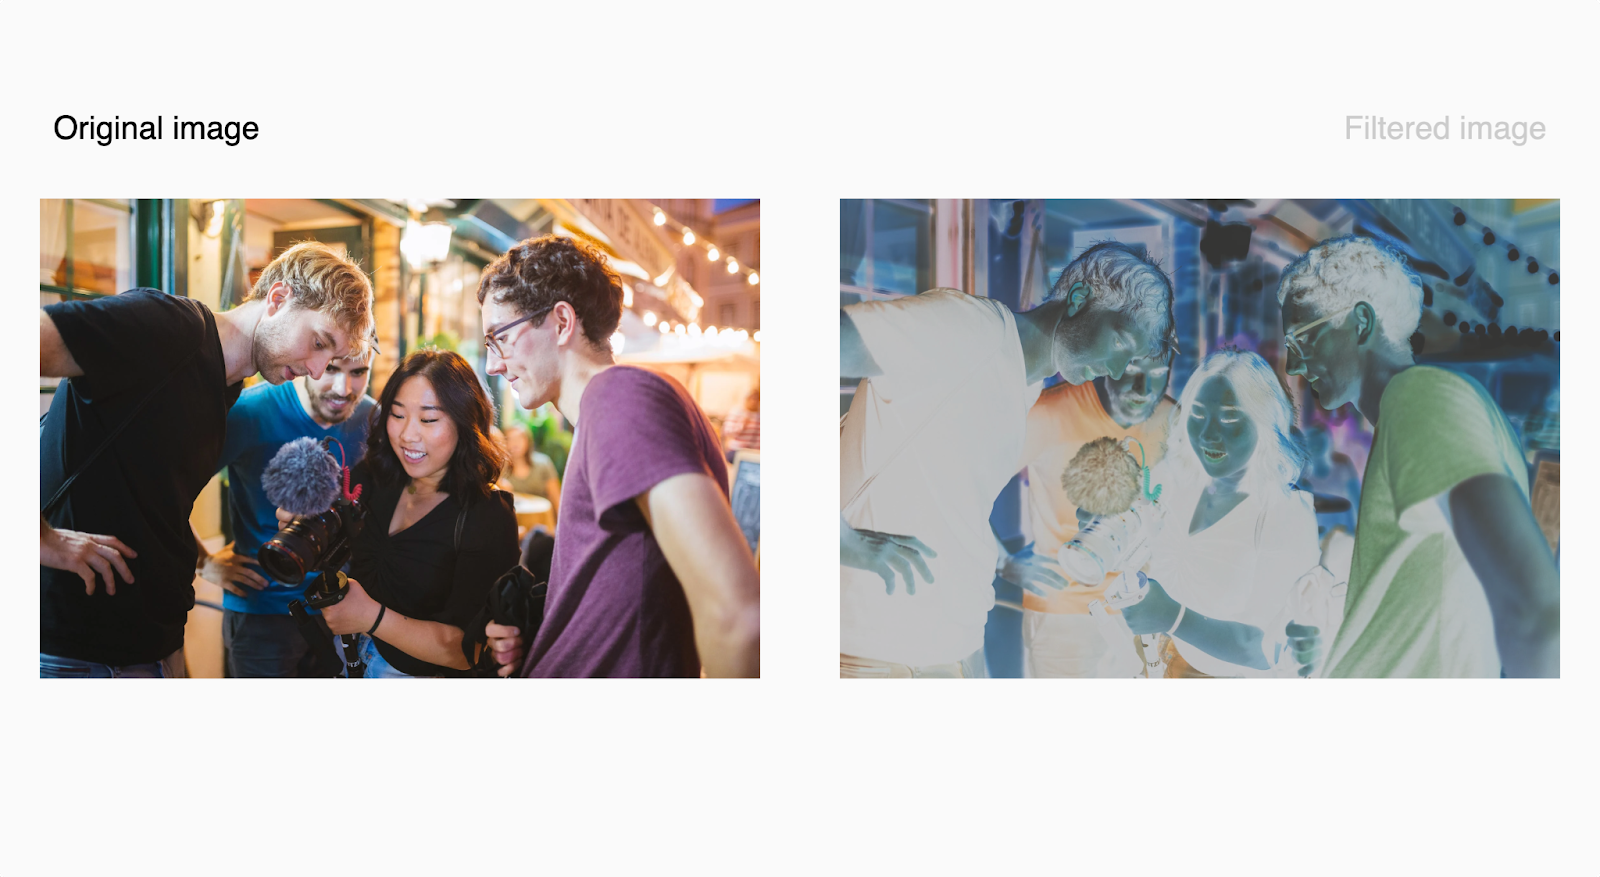
Remember the color wheel mentioned in the section above? When applied to an element or image, the CSS invert filter flips the hue of every color present by 180 degrees, converting each color to the color directly opposite it on the color wheel.
 An illustration of the color wheel
Bright areas become dark, red becomes cyan, magenta turns green, blue becomes yellow, and vice-versa, giving the image a color-negative effect.
The invert filter accepts a decimal value between 0 and 1, or a percentage value up to 100% that controls the extent of the color-negative effect. A value of 0.5 or 50% turns an image completely gray.
The code below inverts the colors on an image by 80%:
The result:
Final Thoughts on Cool CSS Blur Effect Options
There are lots of excellent CSS features and the backdrop filter is one of the best ones. If you use this in combination with CSS animation, you can give your background image a unique touch.
Every web designer should experiment with CSS blur effect options and explore the wide range of possibilities that this tool offers.
If you enjoyed reading this article about CSS blur effects, you should read these as well:
- CSS Modal Examples That You Can Download and Edit
- Awesome CSS Progress Bar Templates You Can Download
- The Best CSS Range Slider Templates You Can Download
Creative Ways to Use CSS Blur Effect in Your Web Design
Step three: created the blurred image
The blurred image is created as a new image, otherwise the calculations will be inaccurate as the numbers keep changing!
Here the skimage.filters.gaussian function takes 3 arguments,
- img: the image to be modified
- sigma: this defines the sigma used in the x and y directions
- truncate: as a real Gaussian is defined from negative to positive infinity, truncate determines the limits of the approx
Step 4: Check the Image
Launch ImageViewer to see what has happened to the image!
The high sigma values yield this pizza — we can still make out that it is a pizza, but barely. High sigma values are preferable if you are not very good at placing your toppings aesthetically and still want to upload the photo to social media. However, if you’ve burnt your pizza, the blur can’t save it because the black will still be there.
How is the Gaussian blur useful in daily life?
Its main purpose is removing noise from images. This means it is very versatile and can be the base for a photo editing filter for example or just to prepare images for further processing.
What is a Gaussian blur filter, specifically?
Gaussian Filter is one of the most commonly used blur filters in Machine Learning. It employs the technique «kernel convolution».
This filter works by taking a pixel and calculating a value (similar to the mean, but with more bias in the middle). The filter is constructed based on the normal distribution, which is shaped like a bell curve. The idea is that pixels closer to the center pixel have a larger weight and those further a way a smaller weight.
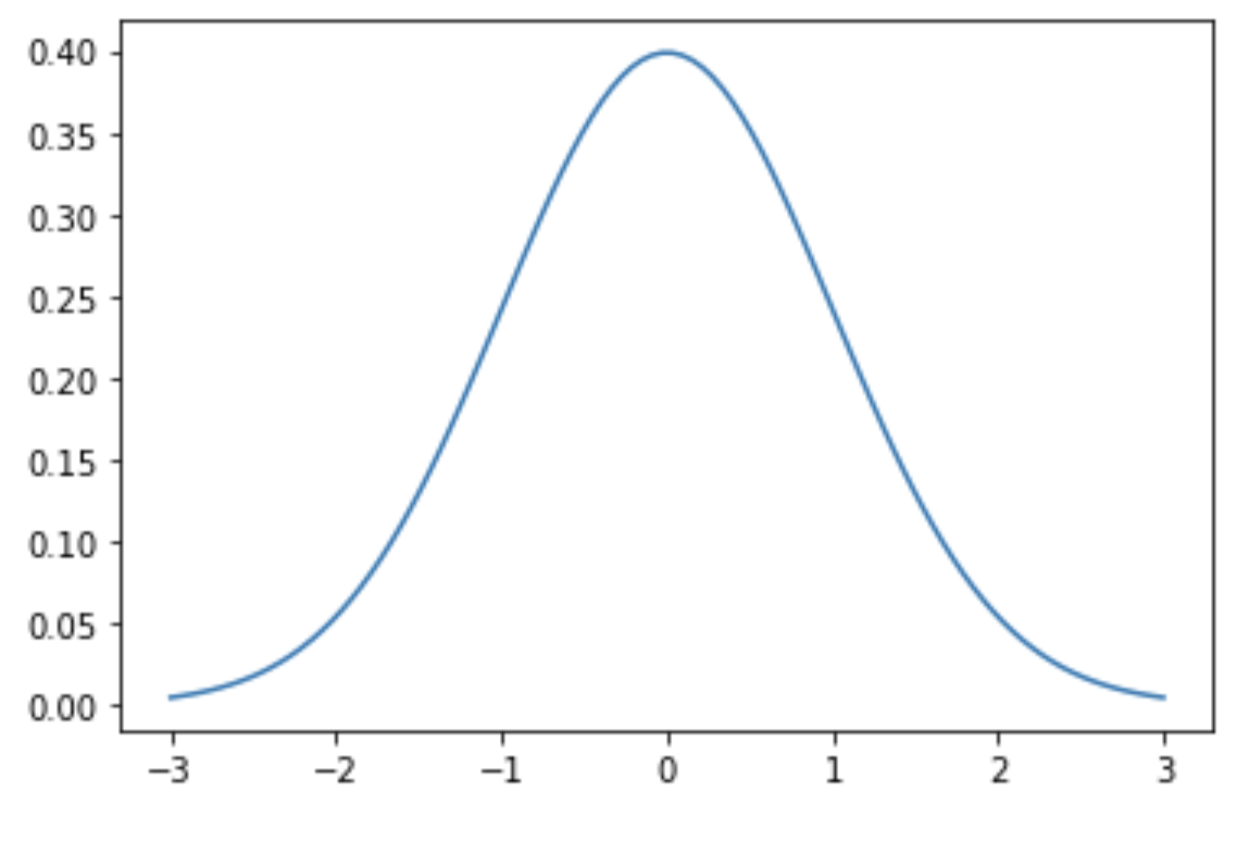
This is an example of a normal distribution with mean 0 and standard deviation (and variance, which is standard deviation squared) 1.
A sample Gaussian filter would be as such:
Note that the values closer to the middle (in this case represented by 4) are larger than those further away.
Note that the filter has to be an odd number size (e.g. 3×3, 5×5):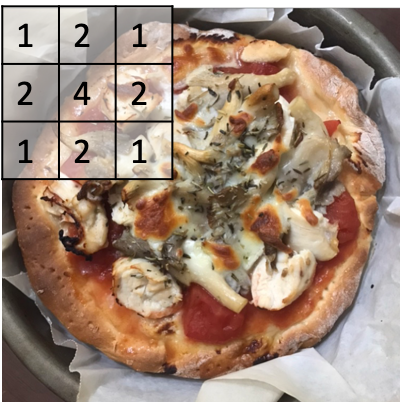
This is because the Gaussian filter calculates a value which replaces the number at the middle of the cell, in this case the ‘4’.

Демо
Изображения, фильтры, композиция
- image-orientation
- image-rendering
- image-resolution
- object-fit
- object-position
- linear-gradient()
- radial-gradient()
- repeating-linear-gradient()
- repeating-radial-gradient()
- conic-gradient()
- repeating-conic-gradient()
- url()
- element()
- image()
- cross-fade()
- backdrop-filter
- filter
- background-blend-mode
- isolation
- mix-blend-mode
- contain
- contain-intrinsic-block-size
- contain-intrinsic-height
- contain-intrinsic-inline-size
- contain-intrinsic-size
- contain-intrinsic-width
- container
- container-name
- container-type
- @container
- content-visibility
More Examples
Apply a blur effect to the image:
img {
filter: blur(5px);}
Apply a blurred background image:
img.background { filter: blur(35px);}
Adjust the brightness of the image:
img {
filter: brightness(200%);}
Adjust the contrast of the image:
img {
filter: contrast(200%);}
Apply a drop shadow effect to the image:
img { filter: drop-shadow(8px 8px 10px
gray);}
Convert the image to grayscale:
img {
filter: grayscale(50%);}
Apply a hue rotation on the image:
img {
filter: hue-rotate(90deg);}
Invert the samples in the image:
img {
filter: invert(100%);}
Set the opacity level for the image:
img {
filter: opacity(30%);}
Saturate the image:
img {
filter: saturate(800%);}
Convert the image to sepia:
img {
filter: sepia(100%);}
Using Multiple Filters
To use multiple filters, separate each filter with a space. Notice that the order is important (i.e. using grayscale()
after sepia() will result in a completely gray image):
img { filter: contrast(200%) brightness(150%);}
All Filters
A demonstration of all filter functions:
.blur { filter: blur(4px);}.brightness {
filter: brightness(0.30);}.contrast {
filter: contrast(180%);}.grayscale { filter: grayscale(100%);}.huerotate { filter: hue-rotate(180deg);}.invert { filter: invert(100%);}.opacity { filter: opacity(50%);}.saturate { filter: saturate(7);}.sepia {
filter: sepia(100%);}.shadow {
filter: drop-shadow(8px 8px 10px green);}