

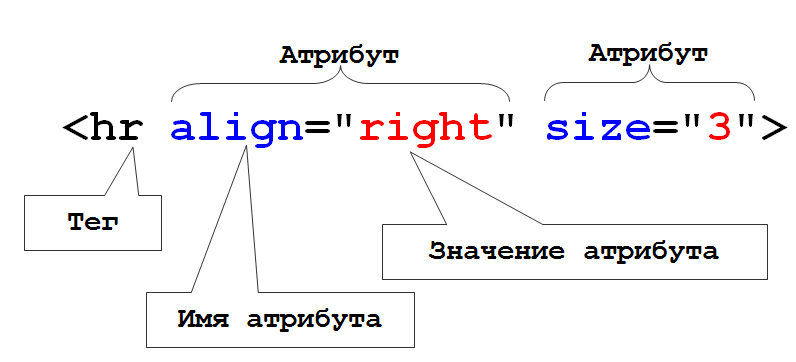
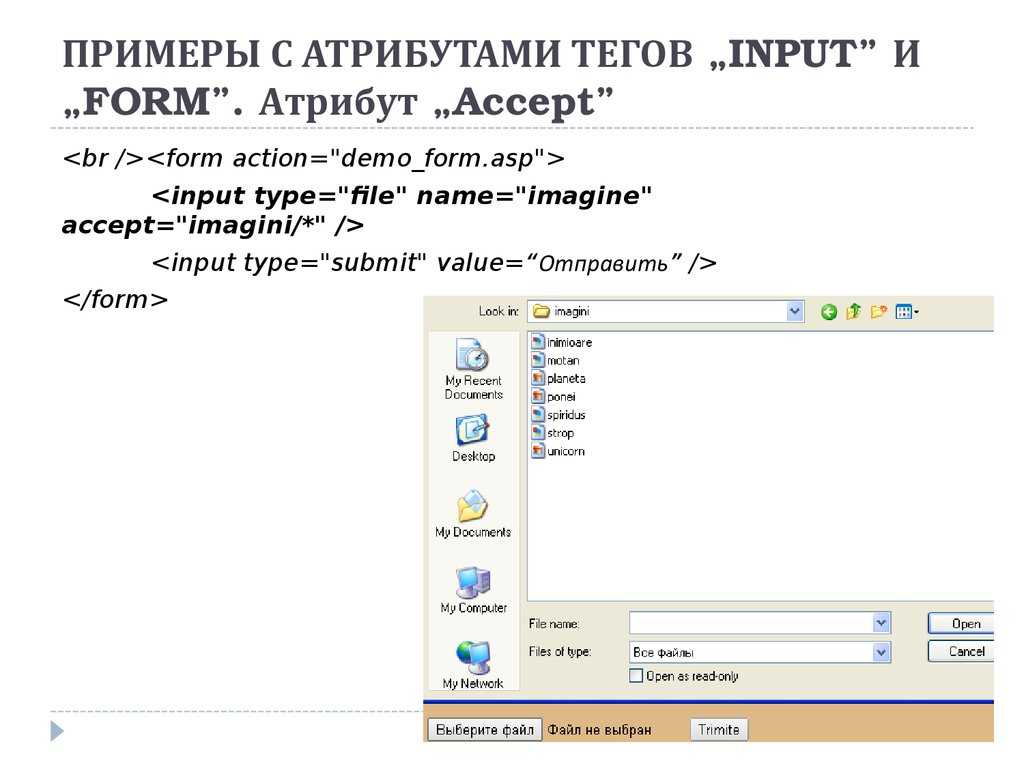
Загрузка файлов
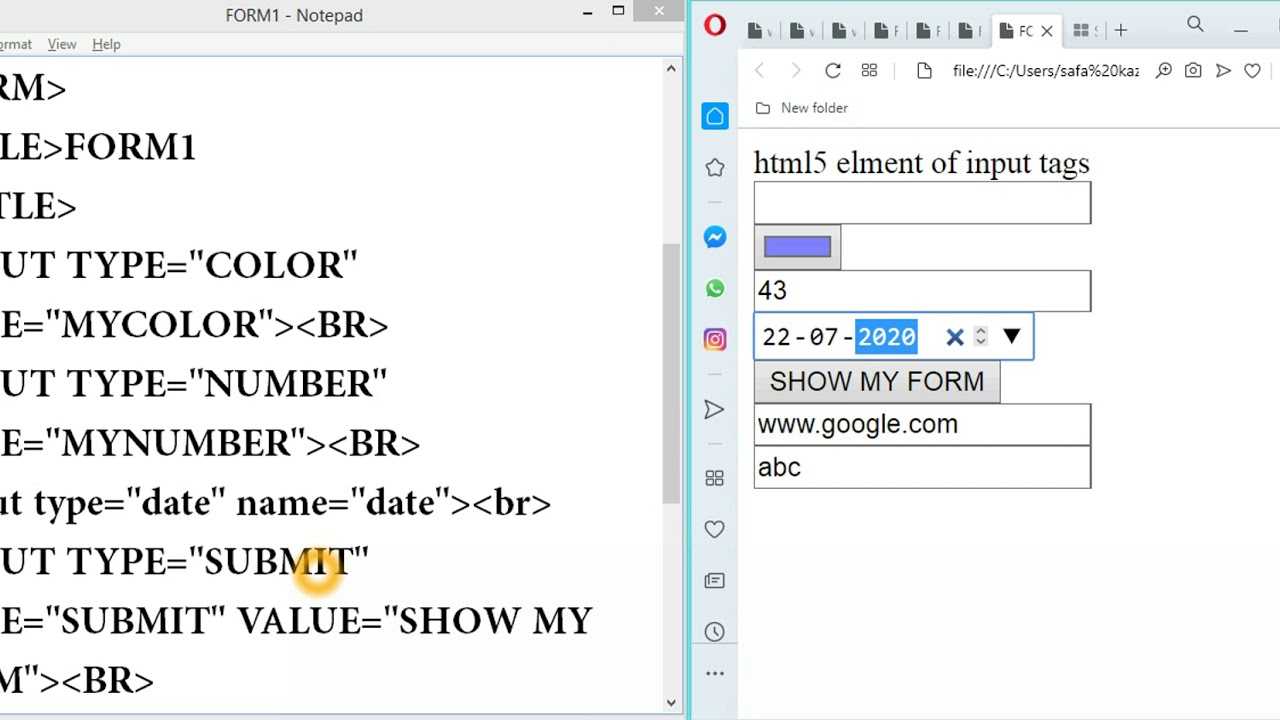
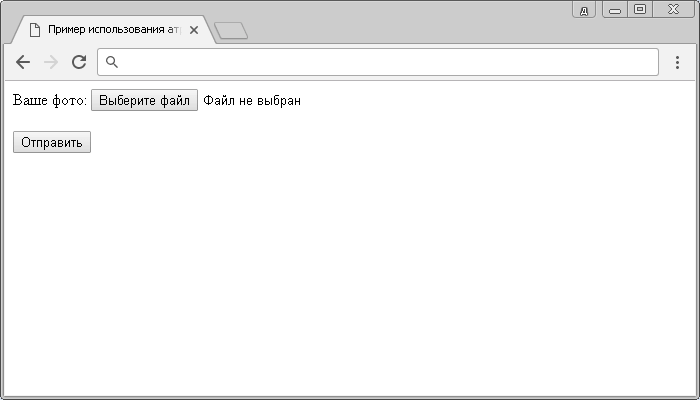
Для того чтобы можно было загружать на сервер один или несколько файлов, в форме применяется специальное поле. В браузерах Firefox, IE и Opera такой элемент отображается как текстовое поле, рядом с которым располагается кнопка с надписью «Обзор. » (рис. 1). В Safari и Chrome доступна только кнопка «Выберите файл» (рис. 2).
Рис. 1. Вид поля для загрузки файла в Firefox
Рис. 2. Загрузка файлов в Chrome
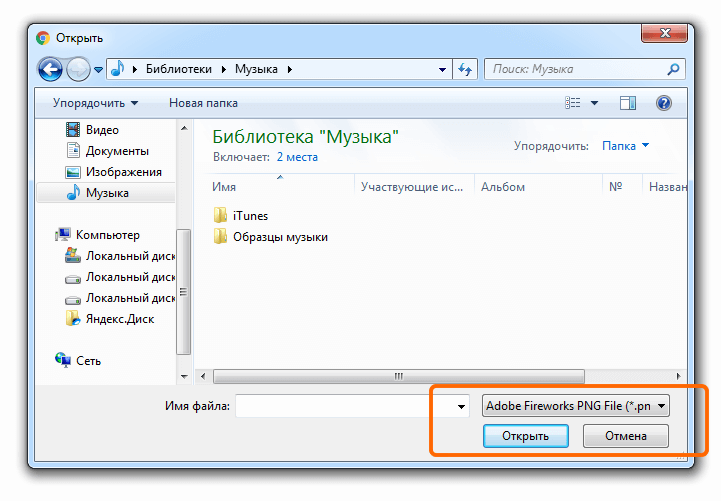
При нажатии на кнопку открывается окно для выбора файла, где можно указать, какой файл пользователь желает использовать.
Синтаксис поля для отправки файла следующий.
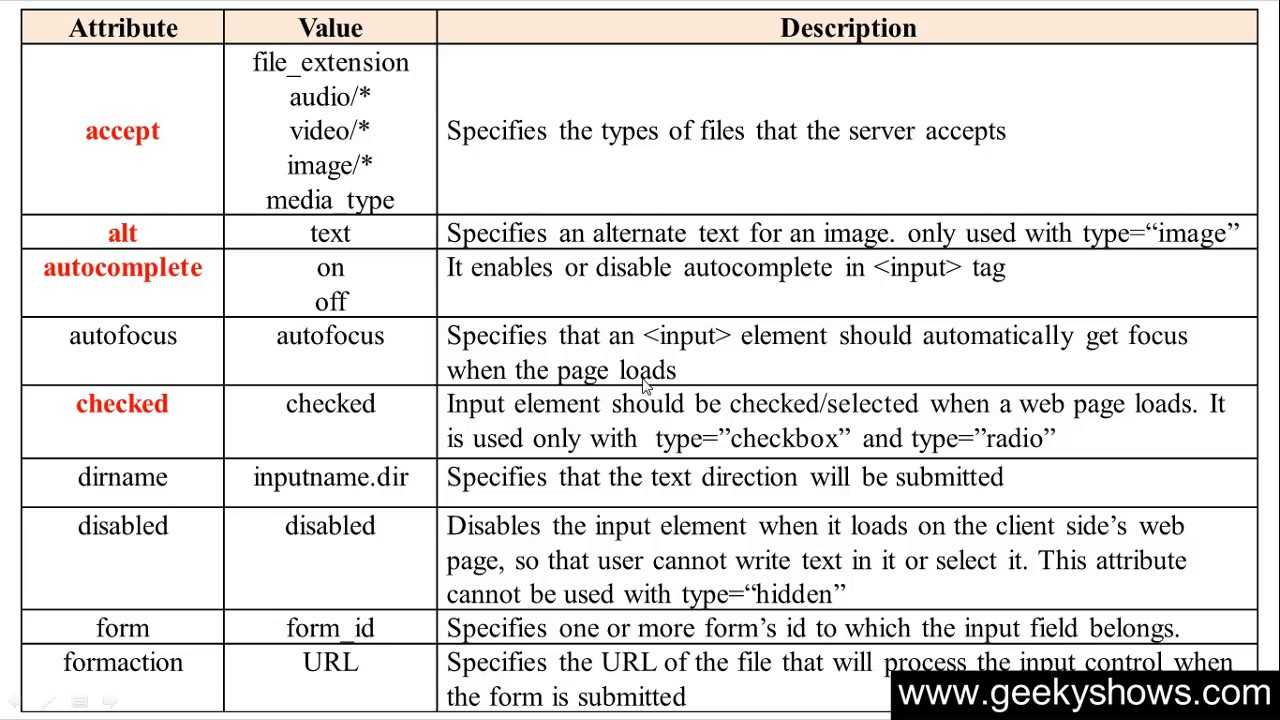
Атрибуты перечислены в табл. 1.
| Атрибут | Описание |
|---|---|
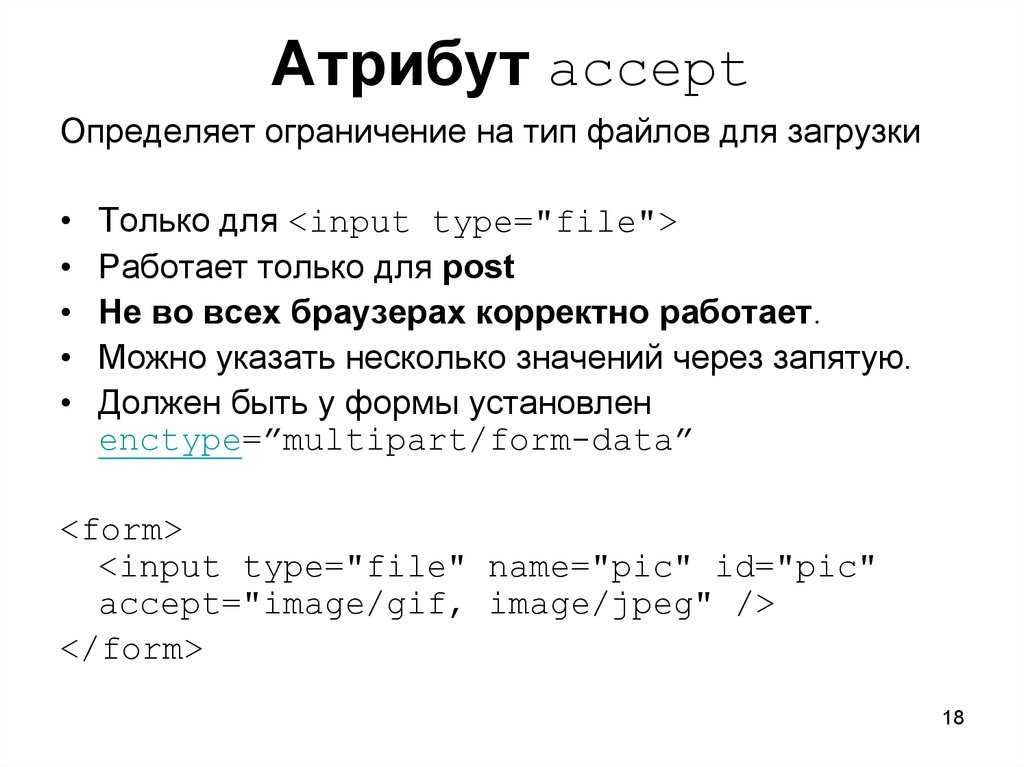
| accept | Устанавливает фильтр на типы файлов, которые вы можете отправить через поле загрузки файлов. |
| size | Ширина текстового поля, которое определяется числом символов моноширинного шрифта. |
| multiple | Позволяет выбирать и загружать сразу несколько файлов. |
| name | Имя поля, используется для его идентификации обработчиком формы. |
Прежде, чем использовать данное поле, в форме необходимо сделать следующее:
- задать метод отправки данных POST ( method=»post» );
- установить у атрибута enctype значение multipart/form-data .
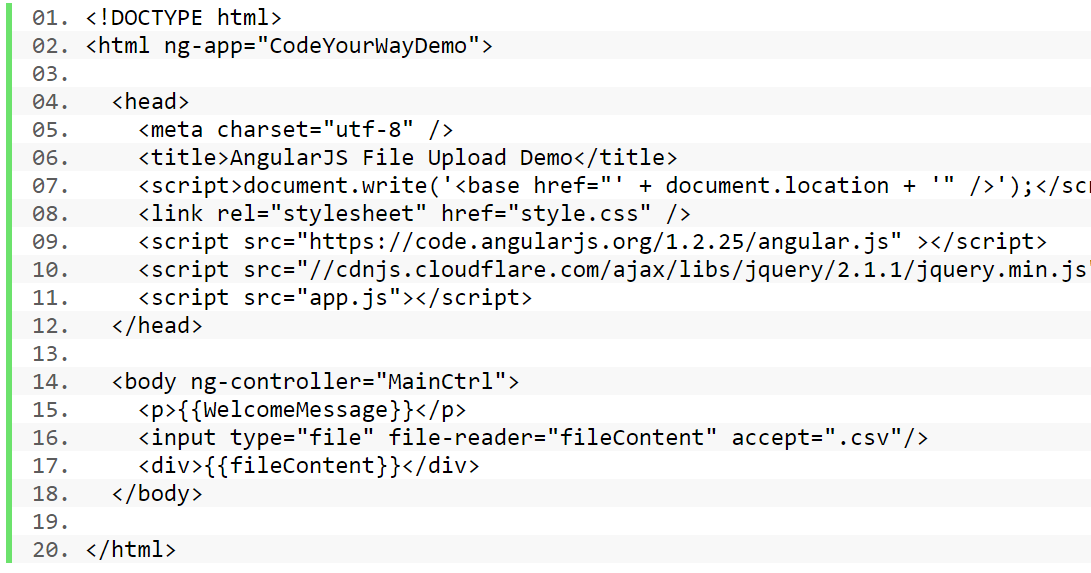
Форма для загрузки файла продемонстрирована в примере 1.
Пример 1. Создание поля для отправки файла
Хотя можно установить ширину поля через атрибут size , в действительности ширина никак не влияет на результат работы формы. В браузерах Safari и Chrome этот атрибут вообще никакого воздействия не оказывает.
Атрибут multiple более важен, он позволяет не ограничиваться одним файлом для выбора, а указать их сразу несколько для одновременной загрузки.
Если атрибут accept не указывать, тогда добавляются и загружаются файлы любого типа
Наличие accept позволяет ограничить выбор файла, что особенно важно, когда требуется загрузить только изображение или видео. В качестве значения выступает MIME-тип, несколько значений разделяются между собой запятой
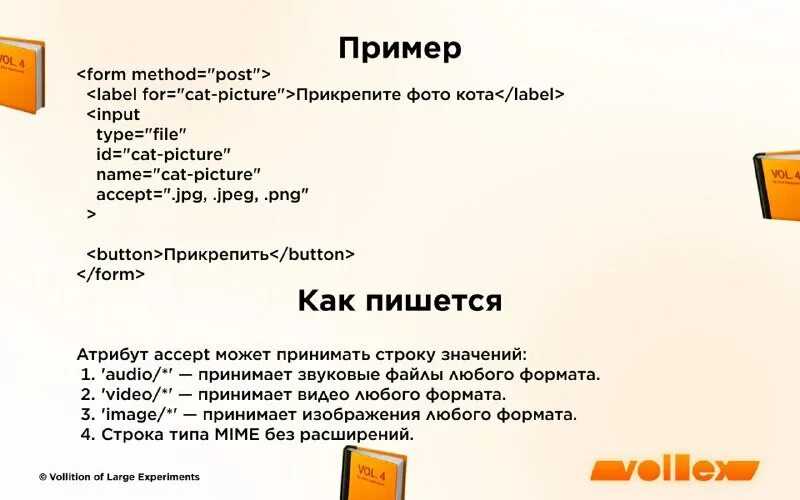
Также можно использовать следующие ключевые слова:
- audio/* — выбор музыкальных файлов любого типа;
- image/* — графические файлы;
- video/* — видеофайлы.
В табл. 2 показаны некоторые допустимые значения атрибута accept .
| Значение | Описание |
|---|---|
| image/jpeg | Только файлы в формате JPEG. |
| image/jpeg,image/png | Только файлы в формате JPEG и PNG. |
| image/* | Любые графические файлы. |
| image/*,video/* | Любые графические и видеофайлы. |
Использование дополнительных атрибутов показано в примере 2.
Пример 2. Загрузка фотографий
Не все браузеры поддерживают новые атрибуты. IE полностью игнорирует multiple и accept , Safari не поддерживает accept , а Firefox не работает с MIME-типом, только с ключевыми словами. Поэтому в примере выше специально для Firefox установлено значение image/*,image/jpeg . Также учтите странную ошибку в Опере, она не допускает пробелы после запятой внутри accept .
Результат примера показан на рис. 3
Обратите внимание, что из-за наличия multiple несколько изменился вид поля
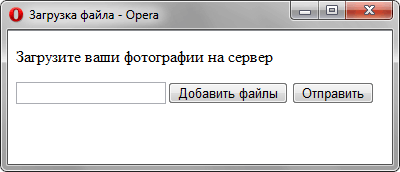
Рис. 3. Загрузка файлов в Opera
Unique file type specifiers
A unique file type specifier is a string that describes a type of file that may be selected by the user in an element of type . Each unique file type specifier may take one of the following forms:
- A valid case-insensitive filename extension, starting with a period («.») character. For example: , , or .
- A valid MIME type string, with no extensions.
- The string meaning «any audio file».
- The string meaning «any video file».
- The string meaning «any image file».
The attribute takes as its value a string containing one or more of these unique file type specifiers, separated by commas. For example, a file picker that needs content that can be presented as an image, including both standard image formats and PDF files, might look like this:
<input type="file" accept="image/*,.pdf">
Support
is supported since Android 2.0 and iOS 6.0. The attribute is supported since Android 3.0 but there’s no support for it in iOS (checked with iOS 10 too).
To test some of the other options I’ve put together a HTML Media Capture demo page with 20+ code variants for video, audio, pictures, multiple options, multiple selection and variants of the attribute. The code is available on GitHub.
| Safari & Chrome on iOS 9 & 10 | Chrome on Android 4.4 & 6 | |
|---|---|---|
| accept=»video/*» | yes | yes |
| accept=»audio/*» | no | yes |
| accept=»image/*» | yes | yes |
| multiple accept values | only image+video | no, breaks filtering |
| capture on the spot or select file | yes | yes |
| capture in accept attr (very old spec) | no | no |
| capture=»camcorder» (old spec) | no | yes |
| boolean capture (w3c candidate) | only in iOS 10.3+ | yes |
| multiple files | yes | yes |
| file type | mov | mp4 |
| video codec | h.264 | h.264 |
| audio codec | aac @ 44.1kHz | aac @ 48kHz |
Also check out the from the Programming the Mobile Web book by Maximiliano Firtman (2013).
Using file inputs
A basic example
form method="post" enctype="multipart/form-data"> div> label for="file">Choose file to uploadlabel> input type="file" id="file" name="file" multiple /> div> div> button>Submitbutton> div> form>
This produces the following output:
Note: You can find this example on GitHub too — see the source code, and also see it running live.
Regardless of the user’s device or operating system, the file input provides a button that opens up a file picker dialog that allows the user to choose a file.
Including the multiple attribute, as shown above, specifies that multiple files can be chosen at once. The user can choose multiple files from the file picker in any way that their chosen platform allows (e.g. by holding down Shift or Control , and then clicking). If you only want the user to choose a single file per , omit the multiple attribute.
Limiting accepted file types
Often you won’t want the user to be able to pick any arbitrary type of file; instead, you often want them to select files of a specific type or types. For example, if your file input lets users upload a profile picture, you probably want them to select web-compatible image formats, such as JPEG or PNG.
Acceptable file types can be specified with the accept attribute, which takes a comma-separated list of allowed file extensions or MIME types. Some examples:
- accept=»image/png» or accept=».png» — Accepts PNG files.
- accept=»image/png, image/jpeg» or accept=».png, .jpg, .jpeg» — Accept PNG or JPEG files.
- accept=»image/*» — Accept any file with an image/* MIME type. (Many mobile devices also let the user take a picture with the camera when this is used.)
- accept=».doc,.docx,.xml,application/msword,application/vnd.openxmlformats-officedocument.wordprocessingml.document» — accept anything that smells like an MS Word document.
Let’s look at a more complete example:
form method="post" enctype="multipart/form-data"> div> label for="profile_pic">Choose file to uploadlabel> input type="file" id="profile_pic" name="profile_pic" accept=".jpg, .jpeg, .png" /> div> div> button>Submitbutton> div> form>
Additional attributes
In addition to the common attributes shared by all elements, inputs of type also support the following attributes.
accept
The attribute value is a string that defines the file types the file input should accept. This string is a comma-separated list of . Because a given file type may be identified in more than one manner, it’s useful to provide a thorough set of type specifiers when you need files of a given format.
For instance, there are a number of ways Microsoft Word files can be identified, so a site that accepts Word files might use an like this:
<input type="file" id="docpicker"
  accept=".doc,.docx,application/msword,application/vnd.openxmlformats-officedocument.wordprocessingml.document">
capture
The attribute value is a string that specifies which camera to use for capture of image or video data, if the attribute indicates that the input should be of one of those types. A value of indicates that the user-facing camera and/or microphone should be used. A value of specifies that the outward-facing camera and/or microphone should be used. If this attribute is missing, the user agent is free to decide on its own what to do. If the requested facing mode isn’t available, the user agent may fall back to its preferred default mode.
Note: was previously a Boolean attribute which, if present, requested that the device’s media capture device(s) such as camera or microphone be used instead of requesting a file input.
Forcing use of camera & microphone
The syntax differences I’ve met were in relation to the attribute.
According to the W3C Candidate Recommendation, it’s a boolean attribute, that, if specified, indicates that the capture of media directly from the device’s camera and/or microphone is preferred. Since it’s a it should be used like this:
or
But the popular Capturing Audio & Video in HTML5 article used a different syntax:
And several Q&A on StackOverflow used the capture attribute with a string value like this:
Syntax changes in spec
It seems all versions were right at a certain point but the spec changed.
first appeared in the July 2010 spec as a parameter which could be added to the attribute but in the April 2011 spec it became an attribute in it’s own right with 4 string values (, , , ) and was finally changed to a boolean type in December 2012 and that’s how it remained since including in the W3C Candidate Recommendations.
Thus the correct syntax is
and
Как оценить безопасность приложения
Оценить безопасность веб-приложения можно с помощью специальных сервисов и программ: OWASP ZAP, Arachni, Burp Suite или других. Они помогают срежиссировать разные атаки и узнать об уязвимостях при разработке или в готовом веб-приложении.

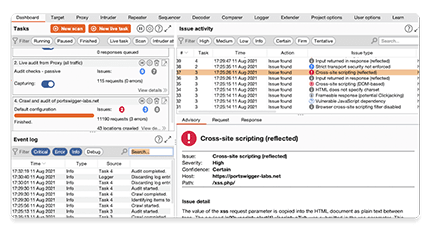
На скриншоте показаны результаты тестирования в Burp Suite — найдено несколько уязвимостей, и в правом нижнем углу описано, как тестировали определённую атаку.
Такие сканеры проверяют приложение на все основные атаки, в том числе XSS, SQL-инъекции, CSRF и загрузку вредоносных файлов. После тестирования вы получаете подробный отчёт об уязвимости веб-приложения — он пригодится при составлении карты задач для повышения безопасности.
How Web Forms Work
The Internet is a large global network that connects millions of computers all around the world.
Computers that are part of the network communicate with each other by sending and receiving information.
The way this is achieved is thanks to the web’s client/server request/response architecture.
The client, which is typically a web browser such as Google Chrome, sends a request to a web server.
A web server is a piece of computer hardware or software that stores files that make up websites and distributes them whenever it receives a request to do so.
The request could be to view a form that’s part of a webpage.
The server sends back the files that make up the web form as a response. The web browser then assembles the files together and the user views the form in the web browser.
This request/response cycle is structured by a protocol, called HTTP (which stands for HyperText Transfer Protocol).
So, when using a web form, a user enters the necessary data. Then after the client-side validation that checks if all required fields are filled out and whether the data is of the right format, the user clicks the submit button.
The data is then sent to the server in name-value pairs in an HTTP request. This method of organizing information in name-value pairs makes sure that the correct data corresponds to the correct form element.
Then a server-side language such as PHP, Ruby, or Python is used to process the information and store it in a database for later use or retrieval.
Non-standard attributes
In addition to the attributes listed above, the following non-standard attributes are available on some browsers. You should try to avoid using them when possible, since doing so will limit the ability of your code to function in browsers that don’t implement them.
The Boolean attribute, if present, indicates that only directories should be available to be selected by the user in the file picker interface. See for additional details and examples.
Though originally implemented only for WebKit-based browsers, is also usable in Microsoft Edge as well as Firefox 50 and later. However, even though it has relatively broad support, it is still not standard and should not be used unless you have no alternative.
Using file inputs
A basic example
<form method="post" enctype="multipart/form-data">
 <div>
   <label for="file">Choose file to upload</label>
   <input type="file" id="file" name="file" multiple>
 </div>
 <div>
   <button>Submit</button>
 </div>
</form>
This produces the following output:
Note: You can find this example on GitHub too — see the source code, and also see it running live.
Regardless of the user’s device or operating system, the file input provides a button that opens up a file picker dialog that allows the user to choose a file.
Including the attribute, as shown above, specifies that multiple files can be chosen at once. The user can choose multiple files from the file picker in any way that their chosen platform allows (e.g. by holding down Shift or Control, and then clicking). If you only want the user to choose a single file per , omit the attribute.
Limiting accepted file types
Often you won’t want the user to be able to pick any arbitrary type of file; instead, you often want them to select files of a specific type or types. For example, if your file input lets users upload a profile picture, you probably want them to select web-compatible image formats, such as JPEG or PNG.
Acceptable file types can be specified with the attribute, which takes a comma-separated list of allowed file extensions or MIME types. Some examples:
- or — Accepts PNG files.
- or — Accept PNG or JPEG files.
- — Accept any file with an MIME type. (Many mobile devices also let the user take a picture with the camera when this is used.)
- — accept anything that smells like an MS Word document.
Let’s look at a more complete example:
<form method="post" enctype="multipart/form-data">
  <div>
    <label for="profile_pic">Choose file to upload</label>
    <input type="file" id="profile_pic" name="profile_pic"
          accept=".jpg, .jpeg, .png">
  </div>
  <div>
    <button>Submit</button>
  </div>
</form>
Unique file type specifiers
A unique file type specifier is a string that describes a type of file that may be selected by the user in an element of type . Each unique file type specifier may take one of the following forms:
- A valid case-insensitive filename extension, starting with a period («.») character. For example: , , or .
- A valid MIME type string, with no extensions.
- The string meaning «any audio file».
- The string meaning «any video file».
- The string meaning «any image file».
The attribute takes as its value a string containing one or more of these unique file type specifiers, separated by commas. For example, a file picker that needs content that can be presented as an image, including both standard image formats and PDF files, might look like this:
<input type="file" accept="image/*,.pdf">
Using file inputs
A basic example
<form method="post" enctype="multipart/form-data">
 <div>
   <label for="file">Choose file to upload</label>
   <input type="file" id="file" name="file" multiple>
 </div>
 <div>
   <button>Submit</button>
 </div>
</form>
This produces the following output:
Note: You can find this example on GitHub too — see the source code, and also see it running live.
Regardless of the user’s device or operating system, the file input provides a button that opens up a file picker dialog that allows the user to choose a file.
Including the attribute, as shown above, specifies that multiple files can be chosen at once. The user can choose multiple files from the file picker in any way that their chosen platform allows (e.g. by holding down Shift or Control, and then clicking). If you only want the user to choose a single file per , omit the attribute.
Getting information on selected files
The selected files’ are returned by the element’s property, which is a object containing a list of objects. The behaves like an array, so you can check its property to get the number of selected files.
Each object contains the following information:
-
The file’s name.
-
A number specifying the date and time at which the file was last modified, in milliseconds since the UNIX epoch (January 1, 1970 at midnight).
-
A object representing the date and time at which the file was last modified. This is deprecated and should not be used. Use instead.
-
The size of the file in bytes.
-
The file’s MIME type.
-
A string specifying the file’s path relative to the base directory selected in a directory picker (that is, a picker in which the attribute is set). This is non-standard and should be used with caution.
Note: You can set as well as get the value of in all modern browsers; this was most recently added to Firefox, in version 57 (see bug 1384030).
Limiting accepted file types
Often you won’t want the user to be able to pick any arbitrary type of file; instead, you often want them to select files of a specific type or types. For example, if your file input lets users upload a profile picture, you probably want them to select web-compatible image formats, such as JPEG or PNG.
Acceptable file types can be specified with the attribute, which takes a comma-separated list of allowed file extensions or MIME types. Some examples:
- or — Accepts PNG files.
- or — Accept PNG or JPEG files.
- — Accept any file with an MIME type. (Many mobile devices also let the user take a picture with the camera when this is used.)
- — accept anything that smells like an MS Word document.
Let’s look at a more complete example:
<form method="post" enctype="multipart/form-data">
  <div>
    <label for="profile_pic">Choose file to upload</label>
    <input type="file" id="profile_pic" name="profile_pic"
          accept=".jpg, .jpeg, .png">
  </div>
  <div>
    <button>Submit</button>
  </div>
</form>
This produces a similar-looking output to the previous example:
Note: You can find this example on GitHub too — see the source code, and also see it running live.
It may look similar, but if you try selecting a file with this input, you’ll see that the file picker only lets you select the file types specified in the value (the exact interface differs across browsers and operating systems).
The attribute doesn’t validate the types of the selected files; it provides hints for browsers to guide users towards selecting the correct file types. It is still possible (in most cases) for users to toggle an option in the file chooser that makes it possible to override this and select any file they wish, and then choose incorrect file types.
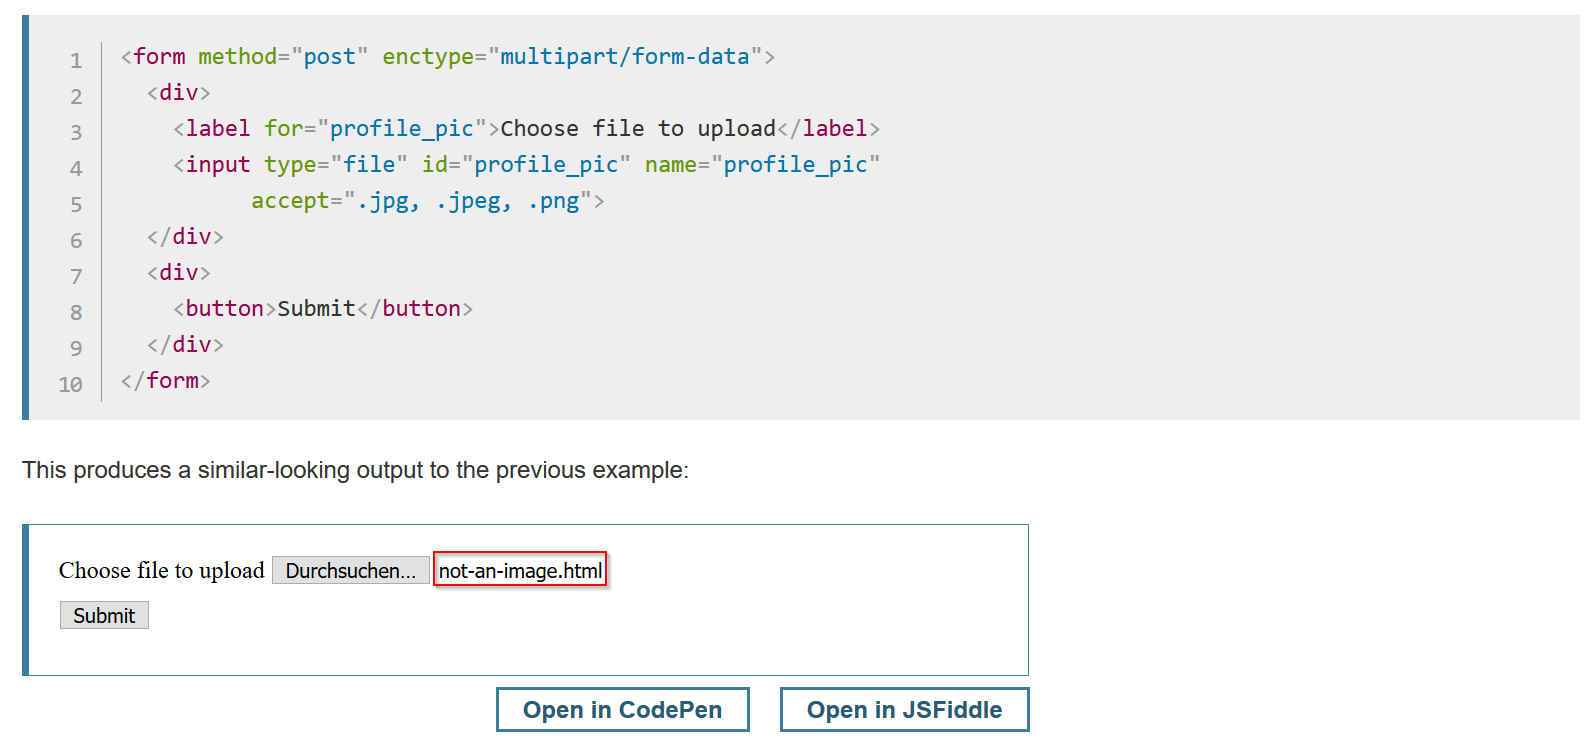


Because of this, you should make sure that the attribute is backed up by appropriate server-side validation.
Notes
- You cannot set the value of a file picker from a script — doing something like the following has no effect:
const input = document.querySelector("input"); input.value = "foo"; - When a file is chosen using an , the real path to the source file is not shown in the input’s attribute for obvious security reasons. Instead, the filename is shown, with appended to the beginning of it. There are some historical reasons for this quirk, but it is supported across all modern browsers, and in fact is .
Examples
При установке типа ввода файла открывающийся штатный подборщик файлов должен позволять выбирать только файлы соответствующего типа.Большинство операционных систем высветляют файлы,которые не соответствуют критериям и не подлежат выбору.
<p>
  <label for="soundFile">Select an audio file:</label>
  <input type="file" id="soundFile" accept="audio/*">
</p>
<p>
  <label for="videoFile">Select a video file:</label>
  <input type="file" id="videoFile" accept="video/*">
</p>
<p>
  <label for="imageFile">Select some images:</label>
  <input type="file" id="imageFile" accept="image/*" multiple>
</p>
Обратите внимание, что последний пример позволяет выбрать несколько изображений. Дополнительную информацию см
В атрибуте .
Examples
When set on a file input type, the native file picker that opens up should only enable selecting files of the correct file type. Most operating systems lighten the files that don’t match the criteria and aren’t selectable.
p> label for="soundFile">Select an audio file:label> input type="file" id="soundFile" accept="audio/*" /> p> p> label for="videoFile">Select a video file:label> input type="file" id="videoFile" accept="video/*" /> p> p> label for="imageFile">Select some images:label> input type="file" id="imageFile" accept="image/*" multiple /> p>
Note the last example allows you to select multiple images. See the multiple attribute for more information.
HTML Media Capture spec revisions
For ease of reference I’ve linked all HTML Media Capture spec revisions below
2 May 2017 (Editor’s Draft)https://w3c.github.io/html-media-capture/
9 September 2014 (W3C Candidate Recommendation)https://www.w3.org/TR/html-media-capture/
19 June 2014 (Working Draft)https://www.w3.org/TR/2014/WD-html-media-capture-20140619/
9 may 2013 (W3C Candidate Recommendation)https://www.w3.org/TR/2013/CR-html-media-capture-20130509/
26 March 2013 (Working Draft)https://www.w3.org/TR/2013/WD-html-media-capture-20130326/
13 December 2012 (Working Draft, of type )https://www.w3.org/TR/2012/WD-html-media-capture-20121213/
12 July 2012 (Working Draft)https://www.w3.org/TR/2012/WD-html-media-capture-20120712/
29 May 2012 (Working Draft)https://www.w3.org/TR/2012/WD-html-media-capture-20120529/
14 April 2011 (Working Draft, with 4 string values)https://www.w3.org/TR/2011/WD-html-media-capture-20110414/
28 Sept 2010 (Working Draft)https://www.w3.org/TR/2010/WD-html-media-capture-20100928/
20 July 2010 (Working Draft, capture appears as part of accept)https://www.w3.org/TR/2010/WD-html-media-capture-20100720/
10 April 2010 (Working Draft, no capture attribute)https://www.w3.org/TR/2010/WD-capture-api-20100401/
See also
- Использование файлов из веб-приложений
- File API
HTML
-
HTML-атрибут ссылка
Элементы в HTML имеют атрибуты;это дополнительные значения,которые настраивают или регулируют их поведение различными способами,чтобы соответствовать критериям,желаемым пользователями.
-
Атрибуты контента по сравнению с IDL
В HTML большинство атрибутов имеют две стороны:содержание и IDL (Interface Definition Language)Атрибут содержания является таким,каким вы его задаете из кода HTML)и
-
Атрибут HTML:автозаполнение
Атрибут HTML autocomplete позволяет веб-разработчикам указать,с каким разрешением пользовательский агент предоставляет автоматизированную помощь в заполнении значений полей формы,
-
Атрибут HTML:захват
Атрибут capture указывает,что,по желанию,новый файл должен быть захвачен,и какое устройство использует носитель типа,определенного accept Значения включают пользователя
Overview
Because a given file type may be identified in more than one manner, it’s useful to provide a thorough set of type specifiers when you need files of specific type, or use the wild card to denote a type of any format is acceptable.
For instance, there are a number of ways Microsoft Word files can be identified, so a site that accepts Word files might use an like this:
input type="file" id="docpicker" accept=".doc,.docx,application/msword,application/vnd.openxmlformats-officedocument.wordprocessingml.document" />
Whereas if you’re accepting a media file, you may want to be include any format of that media type:
input type="file" id="soundFile" accept="audio/*" /> input type="file" id="videoFile" accept="video/*" /> input type="file" id="imageFile" accept="image/*" />
The accept attribute doesn’t validate the types of the selected files; it provides hints for browsers to guide users towards selecting the correct file types. It is still possible (in most cases) for users to toggle an option in the file chooser that makes it possible to override this and select any file they wish, and then choose incorrect file types.
Because of this, you should make sure that expected requirement is validated server-side.
Какие бывают атаки
Чтобы понимать, куда направлены атаки, важно знать структуру передачи данных. Задачи по их отправке и получению разделены между клиентом и сервером
Клиент отправляет запрос, а сервер принимает его и возвращает ответ.
Клиент — это любое устройство для работы с сайтом, например, ноутбук или смартфон.
Сервер — специальная программа или мощный компьютер.
Атаки делятся на те, которые направлены на клиентскую часть, и те, которые направлены на серверную. Но это распределение условно, ведь есть атаки, которые направлены и на клиент, и на сервер. А некоторые атаки направлены на сервер, но реализуются на клиенте. Например, взлом базы данных, когда киберпреступник через поля ввода добирается до информации о базе данных.
MITM — группа атак с участием посредника, когда киберпреступник тайно вмешивается в обмен данными, чтобы получить или изменить информацию. К таким атакам относятся XSS-атаки и SQL-инъекции.
XSS-атаки — попытка захвата данных, когда киберпреступник внедряет собственный JavaScript-код в веб-приложение и затем использует в личных целях. Такую атаку используют, чтобы захватить учётные записи, украсть личные данные, выдать себя за пользователей или получить доступ к информации.
SQL-атака — атака на базу данных веб-приложения. При работе с базой разработчики используют SQL-запрос. Когда хакер добавляет к таким запросам вредоносный код, происходит SQL-атака, или SQL-инъекция.
CSRF-атака — подделка межсайтовых запросов. При атаке пользователя обманом заставляют делать в веб-приложении то, что он не хотел. Например, пользователя переводят на поддельный сайт, чтобы он перевёл деньги киберпреступнику или ввёл логин и пароль.
DoS и DDoS-атаки — попытка вывести веб-приложение из строя. Такие атаки происходят через настолько большой поток трафика, что веб-приложение не может его обработать и выходит из строя. DoS-атака организовывается с одного источника, а DDoS — с двух и более.
Атаки с загрузкой файлов — попытка получить информацию или нарушить работу веб-приложения, когда злоумышленник отправляет файл с вредоносным кодом через поле для загрузки.
Манипуляция URL — изменение URL в адресной строке браузера. Если веб-приложение не защищено, то киберпреступник добирается до приватной информации, например, личных данных или сведений о заказанных товарах. Ещё к этой атаке относится поиск страниц, скрытых от пользователей.
Examples
When set on a file input type, the native file picker that opens up should only enable selecting files of the correct file type. Most operating systems lighten the files that don’t match the criteria and aren’t selectable.
<p>
  <label for="soundFile">Select an audio file:</label>
  <input type="file" id="soundFile" accept="audio/*">
</p>
<p>
  <label for="videoFile">Select a video file:</label>
  <input type="file" id="videoFile" accept="video/*">
</p>
<p>
  <label for="imageFile">Select some images:</label>
  <input type="file" id="imageFile" accept="image/*" multiple>
</p>
Note the last example allows you to select multiple images. See the attribute for more information.
Unique file type specifiers
A unique file type specifier is a string that describes a type of file that may be selected by the user in an element of type file . Each unique file type specifier may take one of the following forms:
- A valid case-insensitive filename extension, starting with a period («.») character. For example: .jpg , .pdf , or .doc .
- A valid MIME type string, with no extensions.
- The string audio/* meaning «any audio file».
- The string video/* meaning «any video file».
- The string image/* meaning «any image file».
The accept attribute takes as its value a string containing one or more of these unique file type specifiers, separated by commas. For example, a file picker that needs content that can be presented as an image, including both standard image formats and PDF files, might look like this:
input type="file" accept="image/*,.pdf" />
Examples
In our first example we’ll set up a with a single file input, where you’ll be able to test the performance of the control with a real file upload. Note that the has the attribute correctly set up to «multipart/form-data», as needed for file uploads.


Note: please choose small files (under 300KB) or the upload time may become considerable. Files greater than 2MB won’t be uploaded.
It’s time to try uploading multiple files. This example will be exactly as the one before with the execption that the attribute will be present in the file input, and its atribute will have a couple of square brackets («[]») in the end. Both conditions are required to implement a successful multiple file upload.
Note: please, try not to upload a big number of files and keep their sizes small (under 300KB) or the upload time may become considerable. Files greater than 2MB won’t be uploaded.
Browser support for multiple file uploads is incomplete, specially among mobile devices. For full compatibility, authors may need to rely on scrips.
Now we’ll implement a single file upload with some restrictions about the file type, using the attribute in the file input. The attribute takes a comma separated list with any of the following: an Internet media type; file extensions (like «.jpg» or «.pdf»); the strings «audio/*», «video/*» and «image/*» representing sound, video and image files, respectively. It provides the browsers with a hint about what type of files the author expects to receive in this control. Supporting browsers will usually restrict the type of files that can be selected to the ones specified in this attribute.
Authors shouldn’t rely on the attribute as a strict method of restraining the user input. When browsers don’t support the mechanism or the files have their extensions altered this check may fail. Server-side checks should always be performed.
To improve compatibility, authors are encouraged to provide multiple references (with Internet media types and extensions) of a file type, whenever possible.
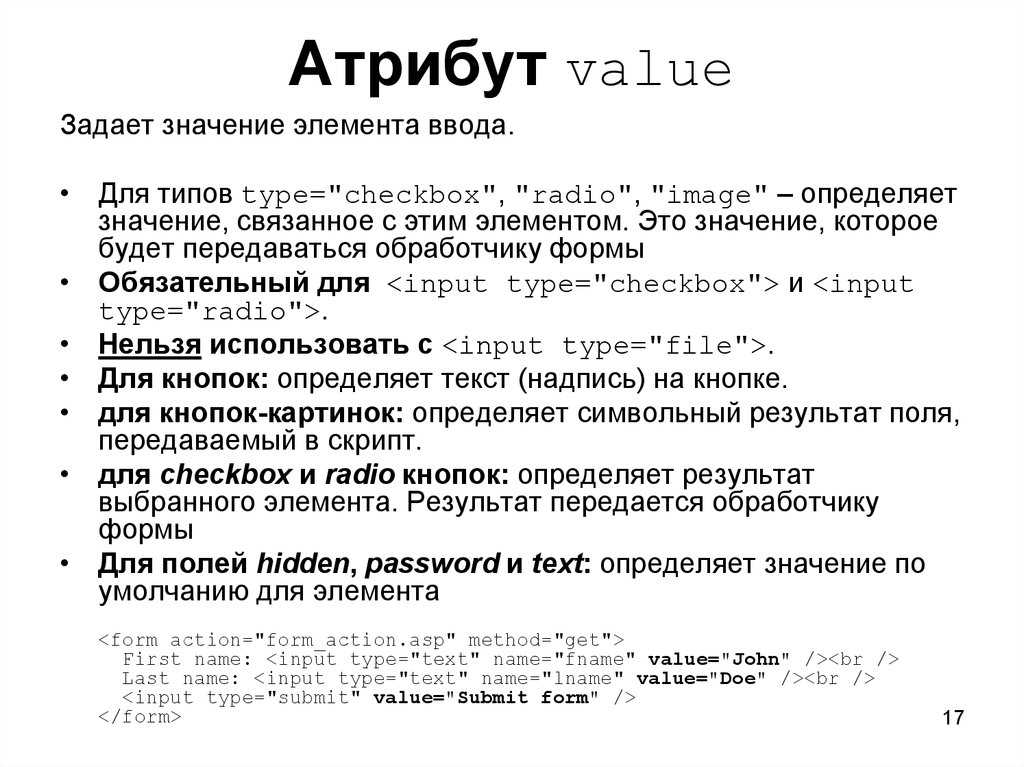
Form и input #
Тегом <form> мы объединяем поля для ввода данных.
На самом деле у тега есть определённые полезные и достаточно обязательные атрибуты. Эти атрибуты указывают куда отправлять форму и каким способом. Соответственно они называются action и method. Тогда это будет выглядеть вот так:
Предлагаю сразу вписать туда значения, что бы мы привыкали к заполнению нужных атрибутов. В action мы поставим заглушку #, решётка часто используется заглушки ссылки. А в метод передачи данных мы напишем post. Методы передачи, получения, изменения и удаления данных, такие как post, get и другие — темы для самостоятельного изучения, внизу статьи будет пара ссылок на Википедию.
Результат:
Если я говорю о формочках, то я представляю себе сразу форму логина на сайт. Давайте я её и реализую. Для этого у меня есть тег <input>
Вроде выглядит всё очевидно. Подпись для поля, тег для ввода и даже тип ввода “text” не должен вызывать удивления.
Делаем второе такое поле — пароль.
Если мы попытаемся заполнить поле текста, то мы будем видеть символы, которые вводим. Если же мы будем заполнять поле пароля, то вместо символов мы увидим звёздочки. Помимо text и password существует ещё несколько полей.